|
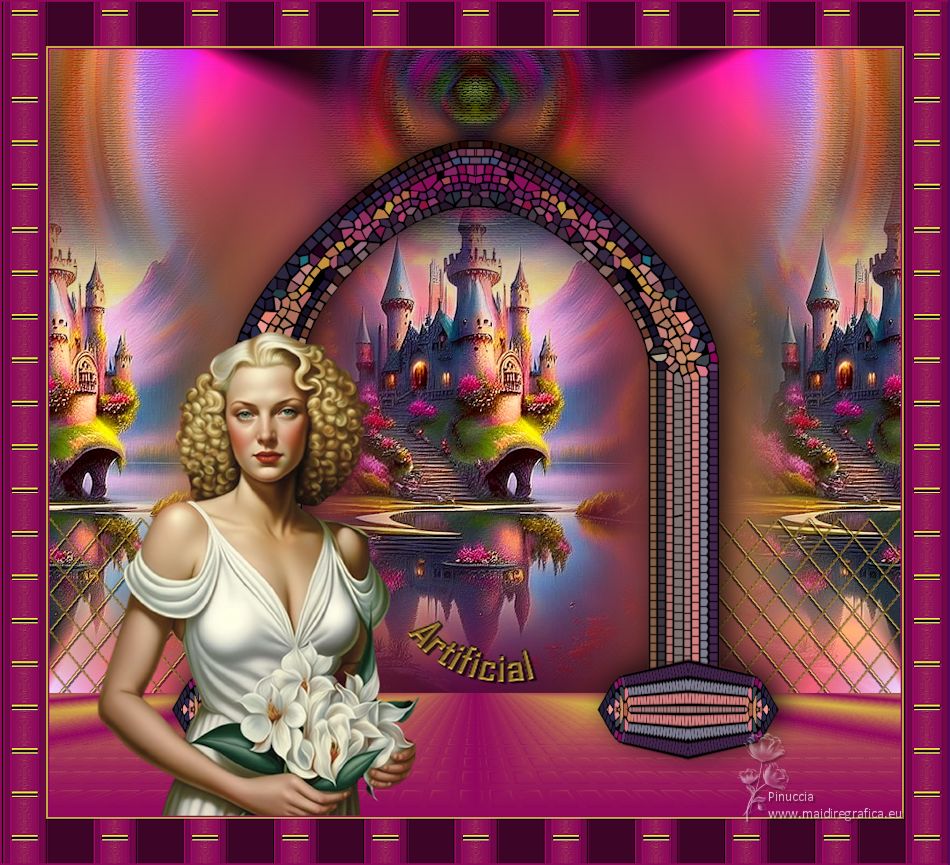
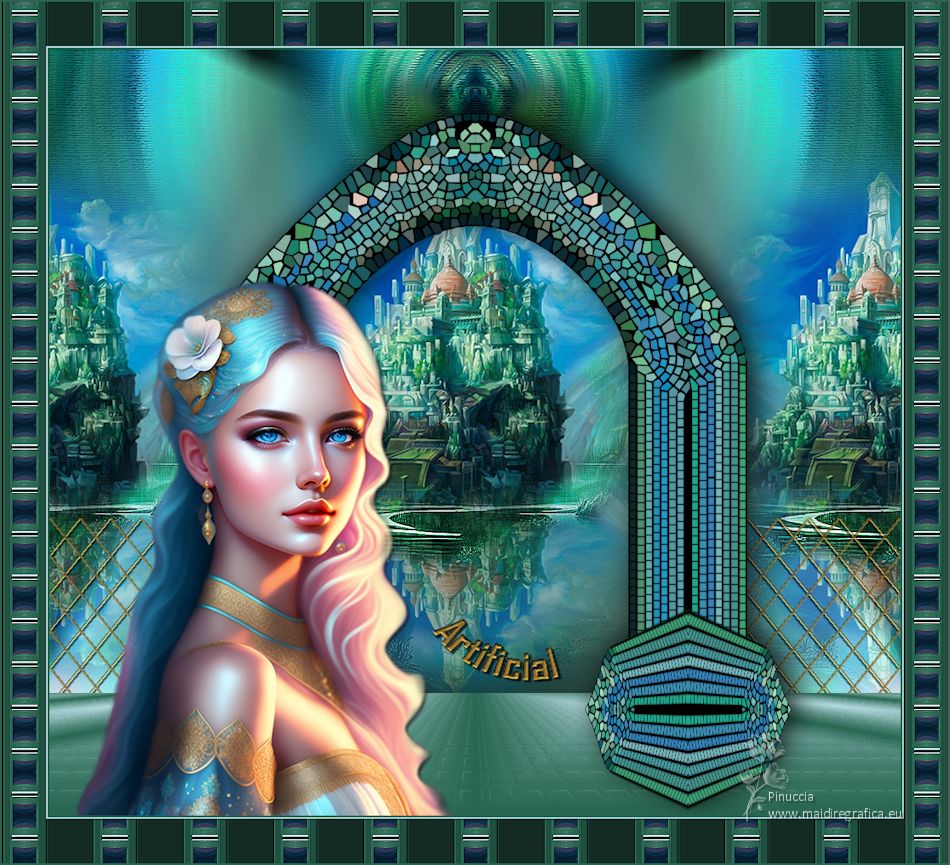
TOP ARTIFICIAL


Thanks Luz Cristina for your invitation to translate your tutorials into english

This tutorial, created with PSP9, was translated with Pspx9, but it can also be made using other versions of PSP.
Since version PSP X4, Image>Mirror was replaced with Image>Flip Horizontal,
and Image>Flip with Image>Flip Vertical, there are some variables.
In versions X5 and X6, the functions have been improved by making available the Objects menu.
In the latest version X7 command Image>Mirror and Image>Flip returned, but with new differences.
See my schedule here
 French Translation here French Translation here
 Your versions here Your versions here

For this tutorial, you will need:

Tubes by Luz Cristina.
(The links of the tubemakers here).
*It is forbidden to remove the watermark from the supplied tubes, distribute or modify them,
in order to respect the work of the authors

consult, if necessary, my filter section here
Filters Unlimited 2.0 here
Mura's Seamless - Tile Frame Diagonal here
Backgroundmaniac - Fantasy Grid here
FM Tile Tools - Saturation Emboss, Blend Emboss here
Simple - Zoom out and flip here
Mura's Meister - Pole Transform here
Mura's Meister - Perspective Tiling here
Artistiques - Pastels here
Alien Skin - Xenofex 2 here
Filters Mura's Seamless and Simple can be used alone or imported into Filters Unlimited.
(How do, you see here)
If a plugin supplied appears with this icon  it must necessarily be imported into Unlimited it must necessarily be imported into Unlimited

You can change Blend Modes according to your colors.
In the newest versions of PSP, you don't find the foreground/background gradient (Corel_06_029).
You can use the gradients of the older versions.
The Gradient of CorelX here

Copy the pattern Gold in the Patterns Folder.
1. Open a new transparent image 1000 x 900 pixels.
2. Set your foreground color to #d8bb46,
and your background color to #92075d.
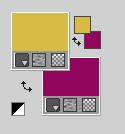
Set your foreground color to a Foreground/Background Gradient, style Rectangular.
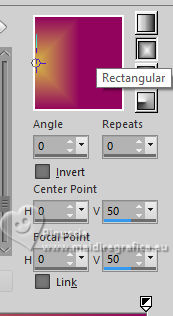
Flood Fill  the transparent image with your Gradient. the transparent image with your Gradient.
3. Effects>Reflection Effects>Rotating Mirror,

4. Layers>Duplicate - 2 times.
Stay on the layer of the second copy.
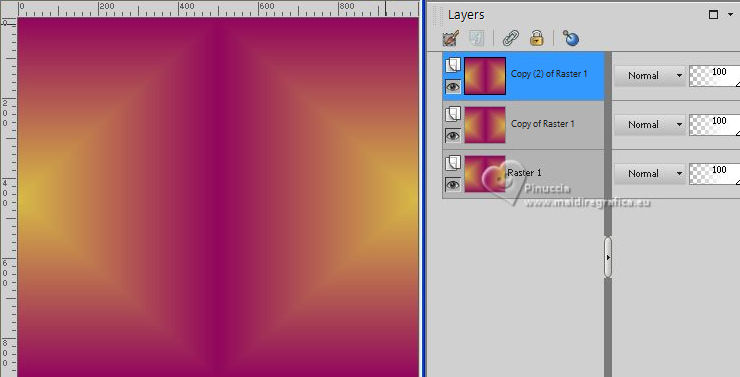
5. Selections>Select All.
Open the misted Misted-LuzCristina 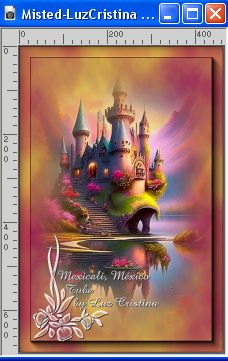
Edit>Copy.
Go back to your work and go to Edit>Paste into Selection.
Selections>Select None.
6. Effects>Image Effects>Seamless Tiling, default settings.

7. Effects>Geometric Effects>Perspective horizontal.
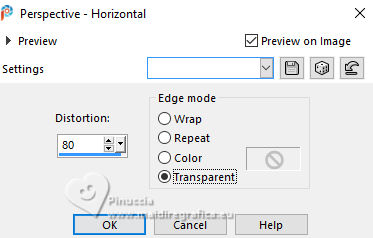
Image>Mirror>Mirror horizontal.
Repeat Effects>Geometric Effects>Perspective horizontal, same settings.
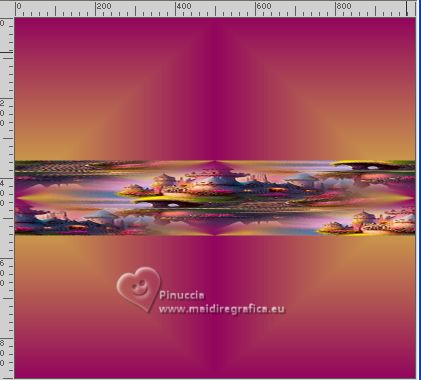
8. Effects>Distortion Effects>Pinch

9. Effects>Plugins>Mura's Meister - Pole Transform.
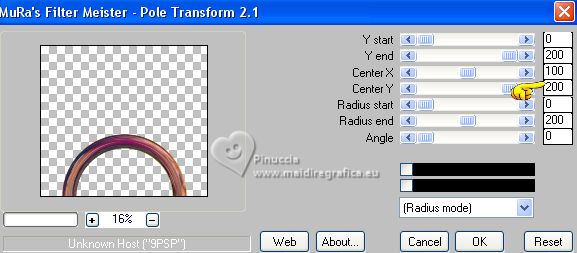
10. Effects>Image Effects>Offset.
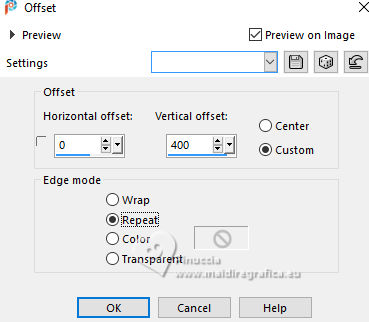
11. Effects>Distortion Effects>Pinch, same settings.

12. Effects>Plugins>Alien Skin - Xenofex 2 - Classic Mosic.
Grout color: #000000.
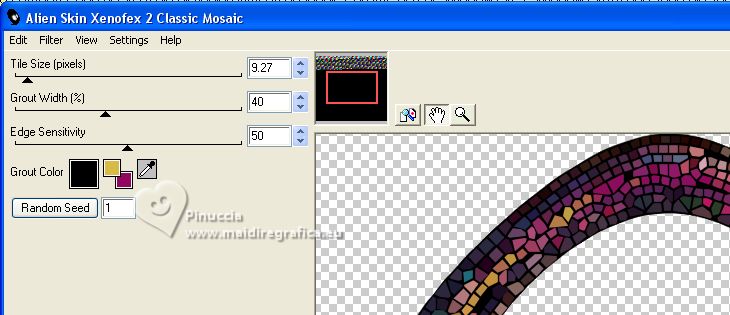
13. Effects>Reflection Effects>Rotating Mirror, same settings

14. Layers>Duplicate.
Repeat Effects>Plugins>Mura's Meister - Pole Transform.
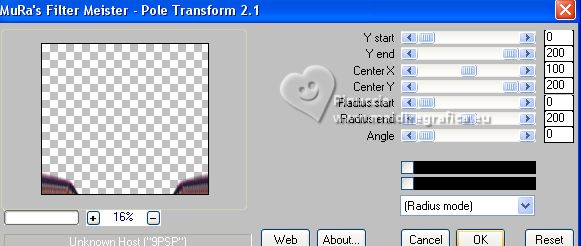
15. Effects>Plugins>Simple - Zoom out and flip
this effect works without window; result:
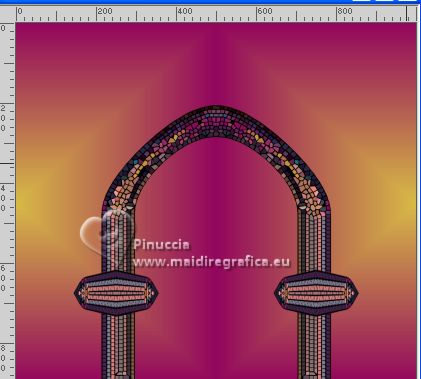
16. Activate the layer Copy (2) of Raster 1.
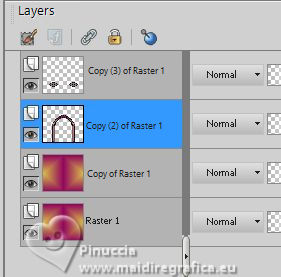
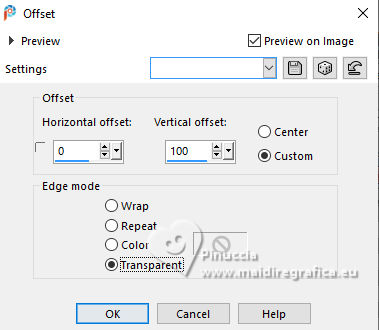
Effects>Image Effects>Offset.
17. Activate your top layer (Copy of copy (2) of Raster 1).
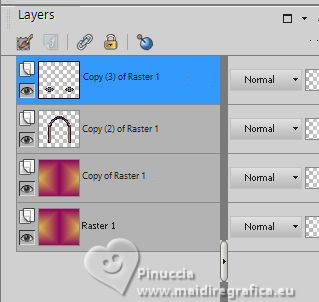
Effects>Image Effects>Offset.

You should have this
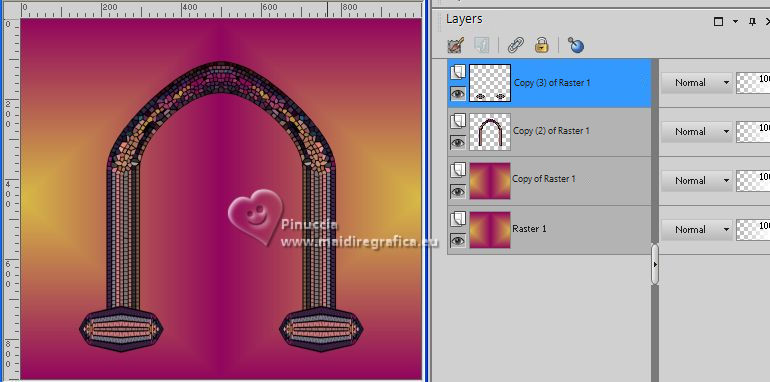
18. Layers>Merge>Merge Down.
Effects>3D Effects>Drop Shadow.
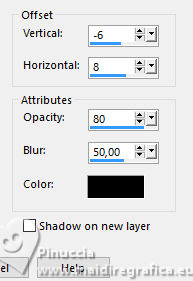
19. Activate the layer Copy of Raster 1.
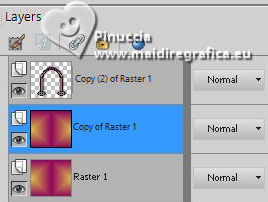
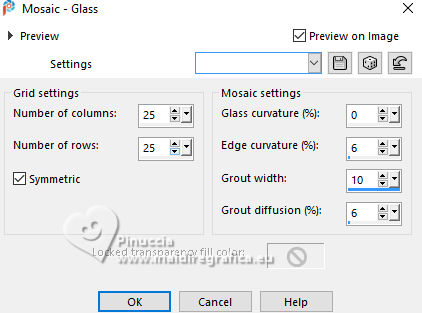
Effects>Texture Effects>Mosaic Glass.
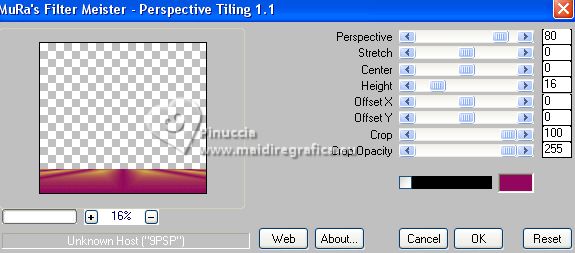
20. Effects>Plugins>Mura's Meister - Perspective Tiling.
21. Edit>Paste as new layer (the misted is still in memory).
Layers>Arrange>Move Down.
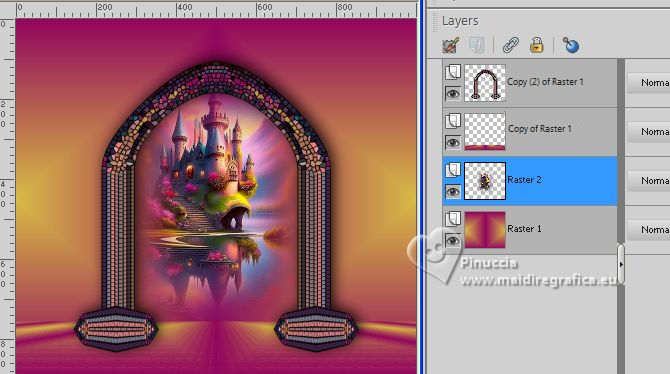
22. Effects>Image Effects>Seamless Tiling.

24. Layers>Duplicate.
Layers>Arrange>Move Down.
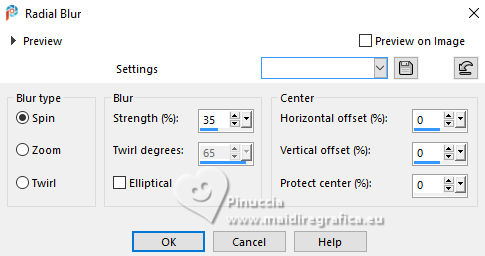
25. Adjust>Blur>Radial Blur.
26. Effects>Image Effects>Offset.

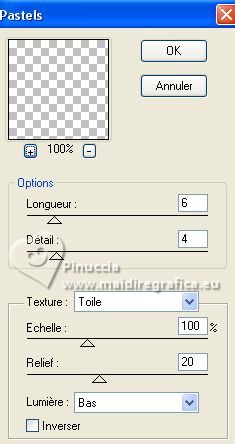
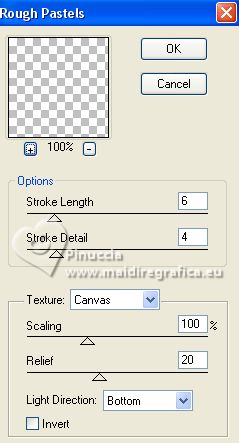
27. Effects>Plugins>Artistiques - Pastels
if you use the english version: Effects>Plugins>Artistics - Rough Pastel
28. Effects>Plugins>FM Tile Tools - Saturation Emboss, default settings.

29. Effects>Reflection Effects>Rotating Mirror, same settings

30. Activate the layer Raster 1.
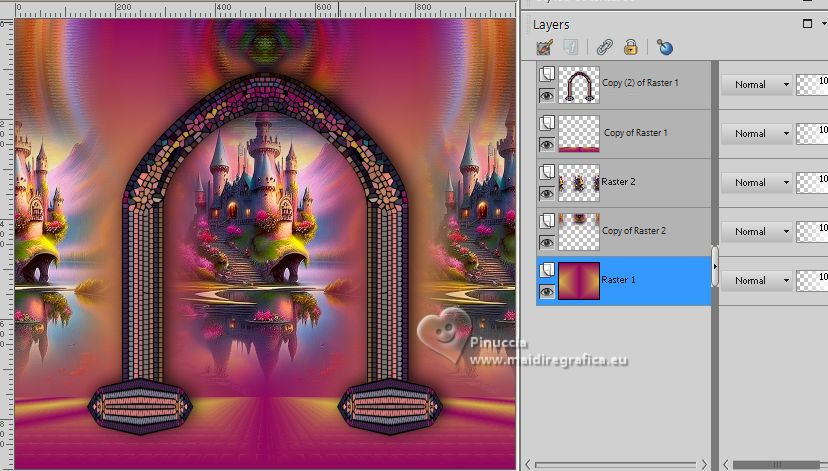
Effects>Illumination Effects>Lights
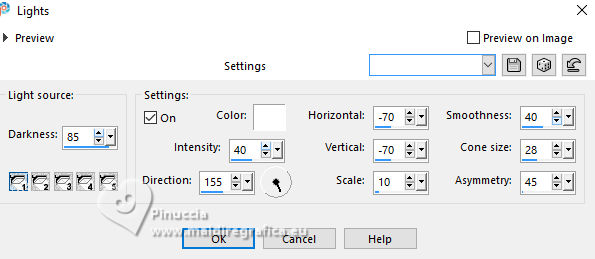
the tutorial shows only the light n.1.
Here below my settings of the other lights
color white or grey #c8c8c8
light 2
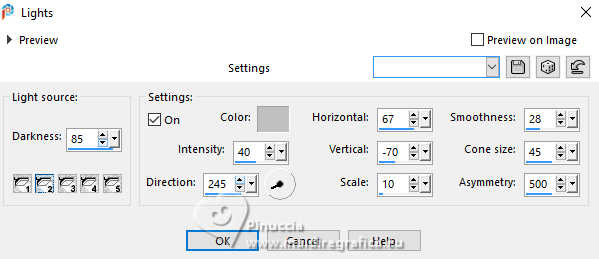
light 3
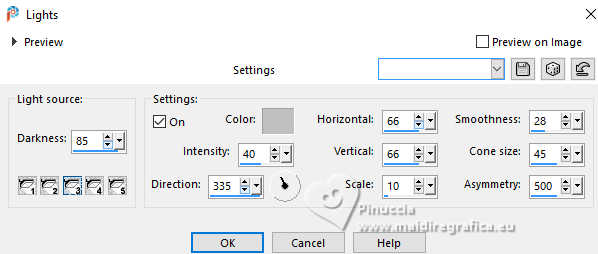
light 4
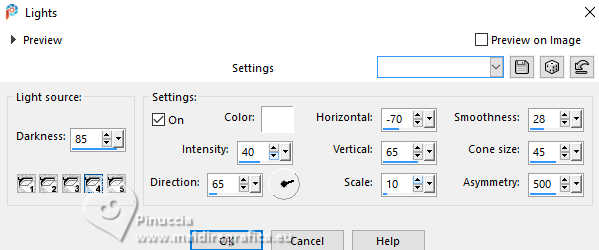
light 5
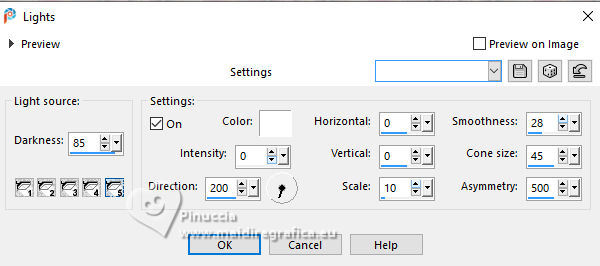
31. Effects>Reflection Effects>Rotating Mirror, same settings

32. Layers>New Raster Layer.
Activate your Selection Tool 
(no matter the type of selection, because with the custom selection your always get a rectangle)
clic on the Custom Selection 
and set the following settings.
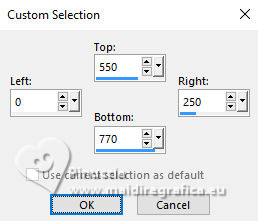
33. Effects>Plugins>Mura's Seamless - Tile Frame Diagonal.
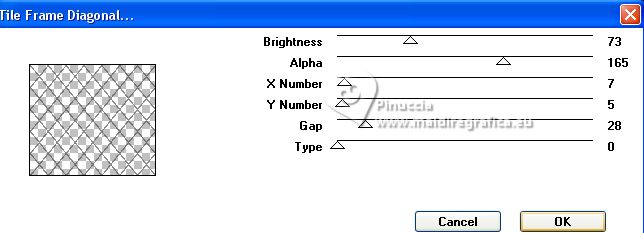
34. Effects>Texture Effects>Sculpture - pattern Gold
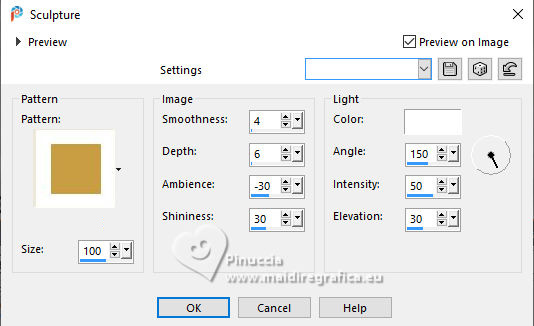
Selections>Select None.
35. Effects>Effects>Drop Shadow.
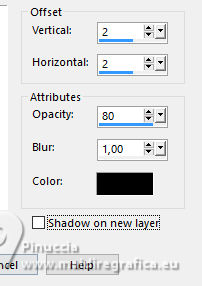
36. Adjust>Sharpness>Sharpen More.
37. Layers>Arrange>Move Up, 2 times.
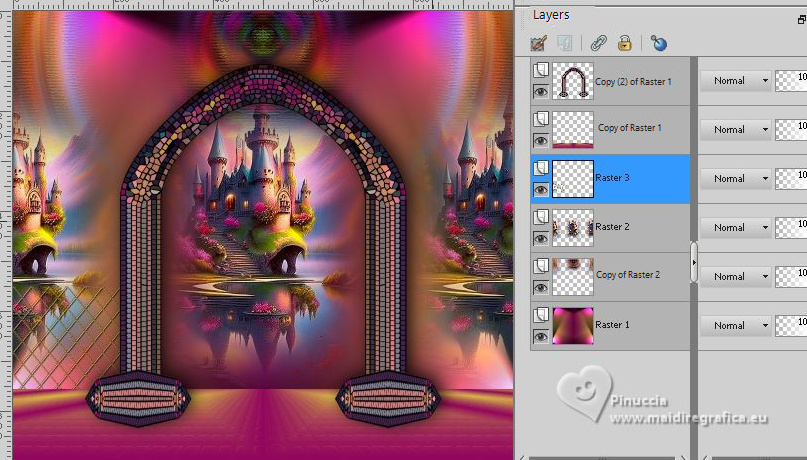
Layers>Duplicate.
Image>Mirror>Mirror Horizontal.
38. Activate your top layer.
Open the tube 8098-LuzCristina 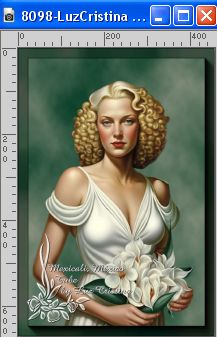
Edit>Copy.
Go back to your work and go to Edit>Paste as new layer.
Move  the tube to the left side. the tube to the left side.
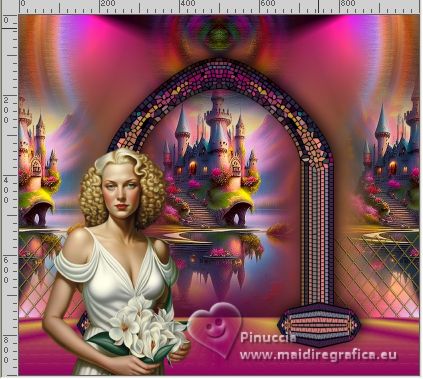
39. Effects>3D Effects>Drop Shadow, same settings.

40. Open the texte texto 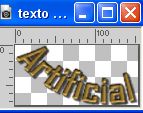
Edit>Copy.
Go back to your work and go to Edit>Paste as new layer.
Move  the text to your liking. the text to your liking.
The Text has already its Drop Shadow.
41. Image>Add Borders, 2 pixels, symmmetric, dark color.
Image>Add Borders, 2 pixels, symmetric, light color.
Image>Add borders, 52 pixels, symmetric, dark color.
42. Activate your Magic Wand Tool 
and click in the last border to select it.
43. Effects>3D Effects>Inner Bevel.
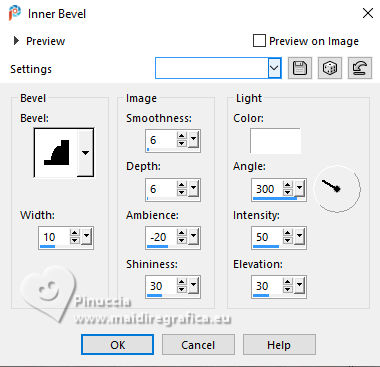
44. Effects>Plugins>Backgroundmaniac - Fantasy Grid.
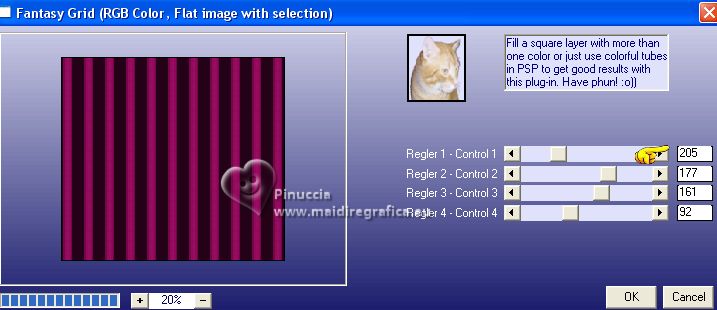
45. Effects>Plugins>FM Tile Tools - Blend Emboss, default settings.

46. Image>Add borders, 2 pixels, symmetric, dark color.
Selections>Select None.
47. Image>Resize, to 85%, resize all layers checked.
48. Sign your work and save as jpg.
For the tubes of this version thanks Colybrix

If you have problems or doubts, or you find a not worked link,
or only for tell me that you enjoyed this tutorial, write to me.
28 Febbraio 2025

|

