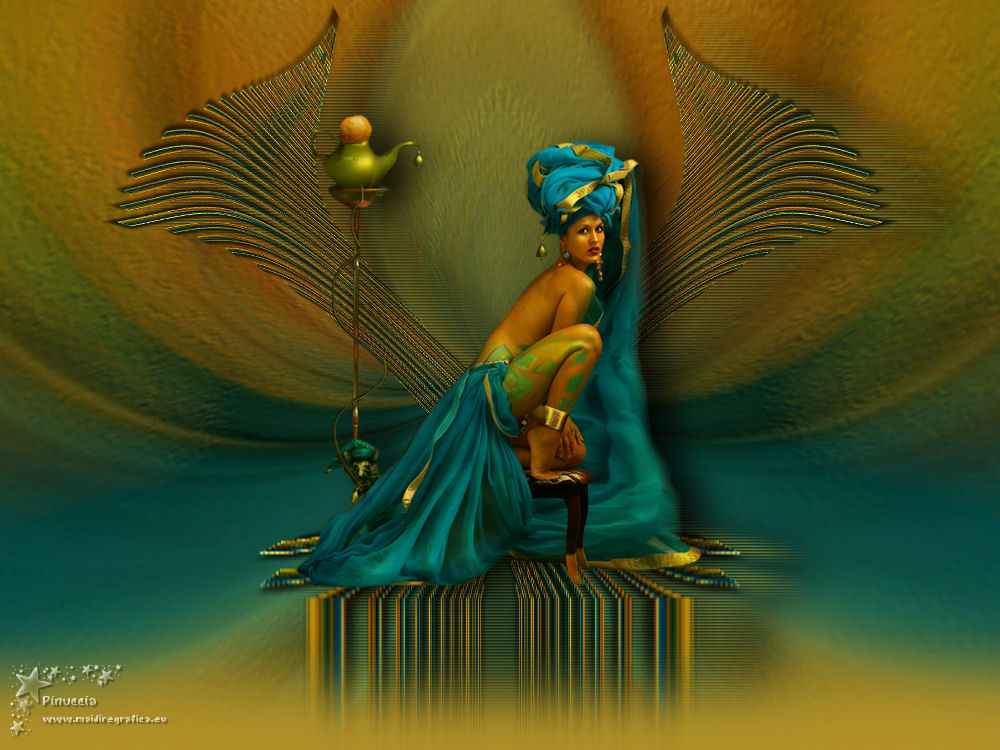
|
TOP BLUR


Thanks Luz Cristina for your invitation to translate your tutorials into english

This tutorial, created with PSP9, was translated with PspX9, but it can also be made using other versions of PSP.
Since version PSP X4, Image>Mirror was replaced with Image>Flip Horizontal,
and Image>Flip with Image>Flip Vertical, there are some variables.
In versions X5 and X6, the functions have been improved by making available the Objects menu.
In the latest version X7 command Image>Mirror and Image>Flip returned, but with new differences.
See my schedule here
 French Translation here French Translation here
 Your versions here Your versions here

For this tutorial, you will need:

For the tube thanks Ana Ridzi.
(The links of the tubemakers here).

consult, if necessary, my filter section here
Mura's Meister - Pole Transform here
Blur - Radial Blur - in the material

You can change Blend Modes according to your colors.
In the newest versions of PSP, you don't find the foreground/background gradient (Corel_06_029).
You can use the gradients of the older versions.
The Gradient of CorelX here

Copy the preset Emboss 3 in the Presets Folder.
Open the mask in PSP and minimize it with the rest of the material.
1. Open a new transparent image 1000 x 700 pixels.
2. Set your foreground color to #003933,
and your background color to #b19027.
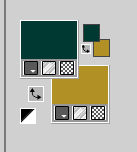
Set your foreground color to a Foreground/Background Gradient, style Linear.

Flood Fill  the transparent image with your Gradient. the transparent image with your Gradient.
3. Selections>Select All.
Open your woman's tube AR405 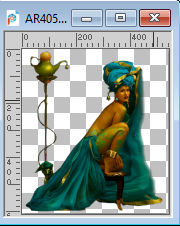
Edit>Copy.
Go back to your work and go to Edit>Paste into Selection.
Selections>Select None.
4. Effects>Image Effects>Seamless Tiling, default settings.

5. Effects>Plugins>Blur - Radial Blur.
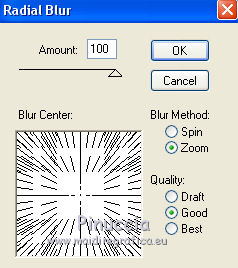
6. Effects>Reflection Effects>Rotating Mirror.

7. Effects>User Defined Filter - select the preset Emboss 3
or apply 2 times the filter FM Tile Tools - Blend Emboss.
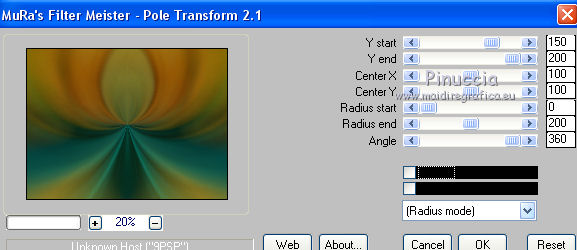
8. Effects>Plugins>Mura's Meister - Pole Transform.
9. Layers>Duplicate.
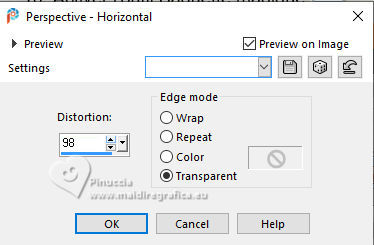
10. Effects>Geometric Effects>Perspective Horizontal.
11. Image>Mirror>Mirror Horizontal.
Repeat Effects>Geometric Effects>Perspective Horizontal, same settings.
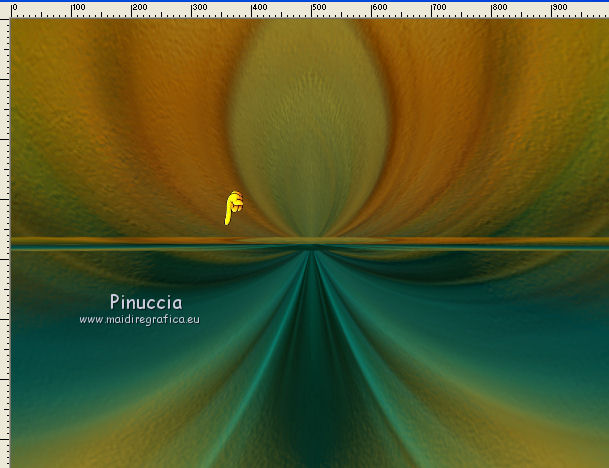
12. Image>Resize, to 80%, resize all layers not checked.
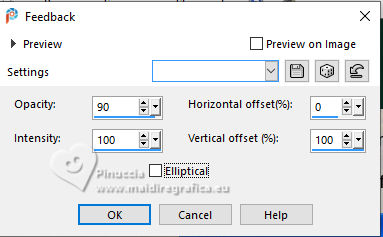
13. Effects>Reflection Effects>Feedback.
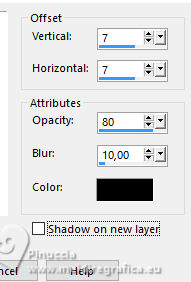
14. Effects>3D Effects>Drop Shadow.
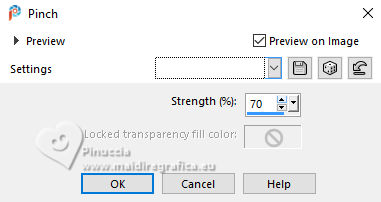
15. Effects>Distortion Effects>Pinch.
16. Layers>Duplicate.
Image>Mirror>Mirror Vertical (Image>Flip).
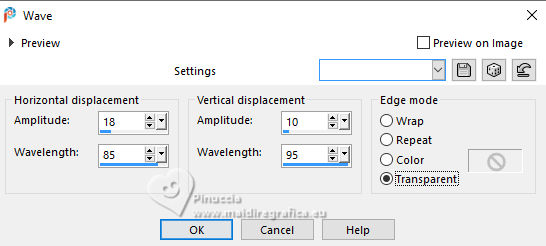
17. Effects>Distortion Effects>Wave.
18. Activate the layer Copy of Raster 1.
Edit>Repeat Wave
19. Activate again your top layer.
Layers>Merge>Merge Down.
Effects>Edge Effects>Enhance.
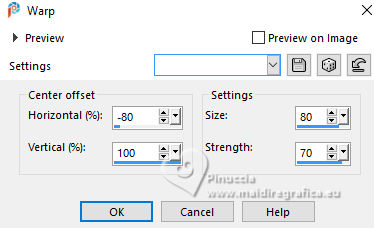
20. Effects>Distortion Effects>Warp.
21. Layers>Duplicate.
Image>Mirror>Mirror Horizontal.
Layers>Merge>Merge Down.
22. Effects>Distortion Effects>Pinch.

23. Image>Mirror>Mirror Vertical (Image>Flip).
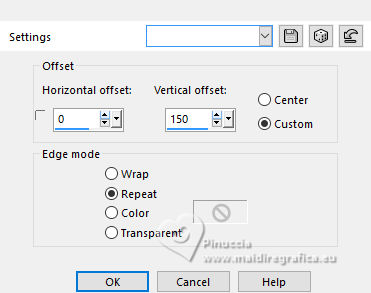
24. Effects>Image Effects>Offset.
25. Layers>New Mask layer>From image
Open the menu under the source window and you'll see all the files open.
Select the mask masck fade suave
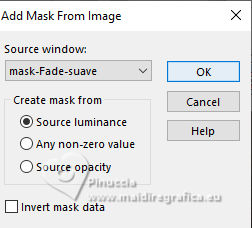
Layers>Duplicate, to apply the mask 2 times.
Layers>Merge>Merge Group.
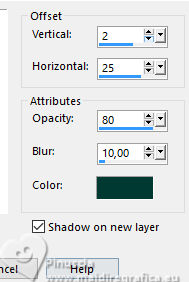
26. Effects>3D Effects>Drop Shadow, foreground color
shadow on new layer checked.
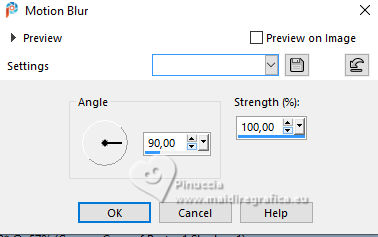
27. Adjust>Blur>Motion Blur.
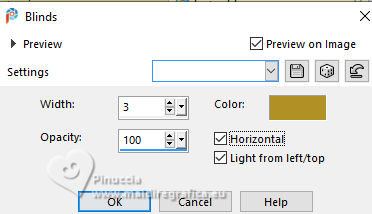
28. Effects>Texture Effects>Blinds, light color.
29. Effects>3D Effects>Drop Shadow, color black.
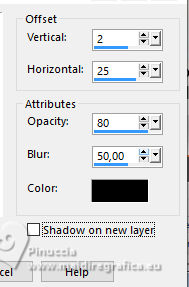
Optional, on the shadow's layer:
apply the mask fadesuave one time.
30. Activate your top layer.
Edit>Paste as new layer (the woman's tube is still in memory).
Image>Resize, to 80%, resize all layers not checked
Effects>3D Effects>Drop Shadow, at your choice.
31. Activate your bottom layer.
Apply 2 times the mask fadesuave.
Layers>Merge>Merge Group.
32. Layers>New Raster Layer.
Layers>Arrange>Send to Bottom.
Flood Fill  the layer with your light background color. the layer with your light background color.
33. Activate again your top layer.
Sign your work on a new layer.
Layers>Merge>Merge All and save as jpg.
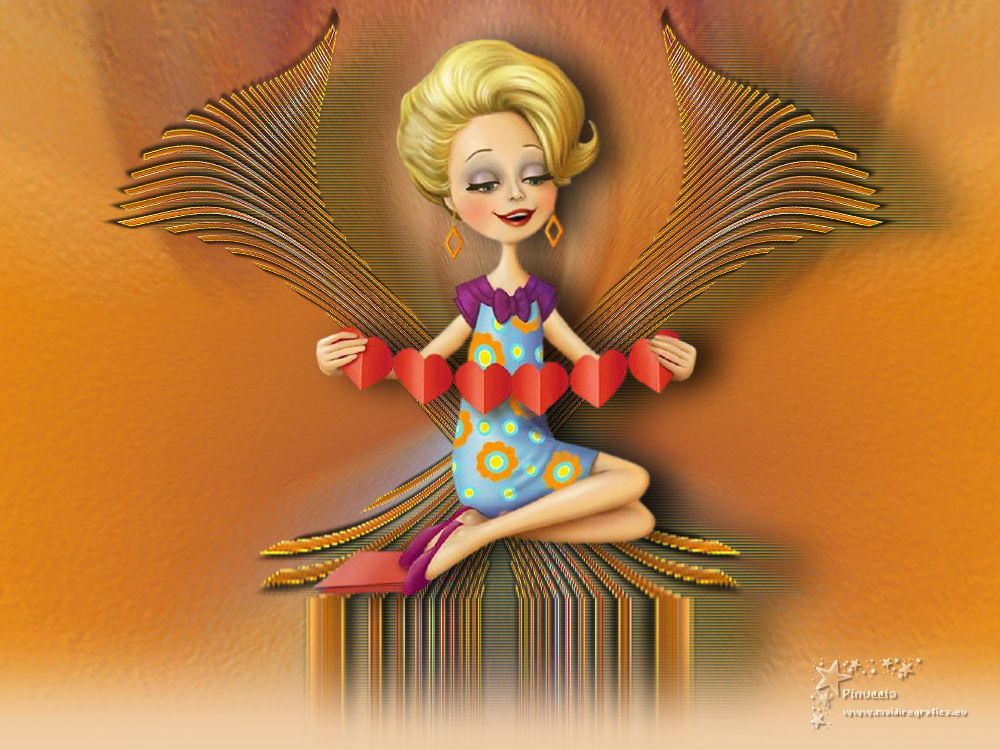
Versions with tubes by Luz Cristina
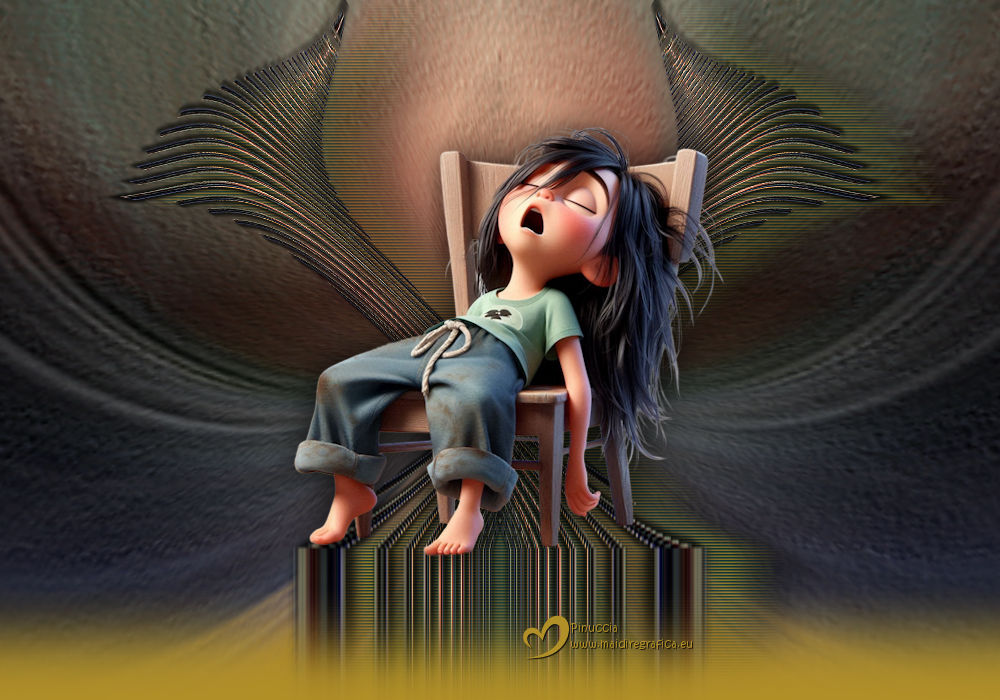
Choosing the right tube is a challenge.
I ran several tests to get the best results.
By choosing a tube with contrasting colors,
I found that the Pole Transform effect can flatten the colors:
For this, in the last example, I used the Pole Transform effect with the default settings.
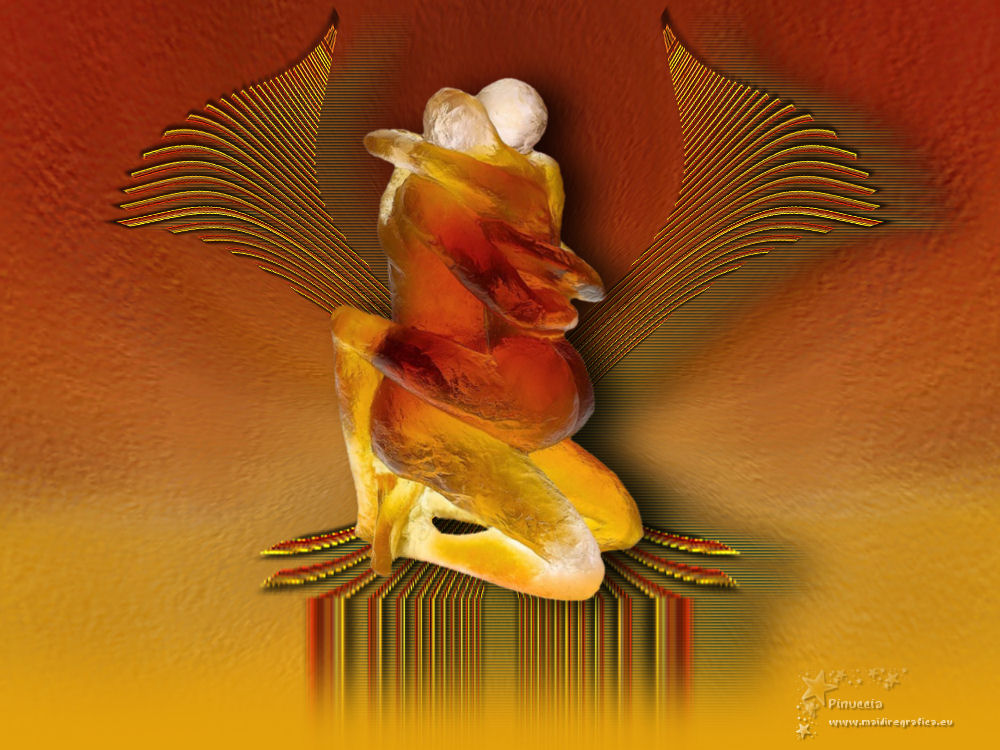
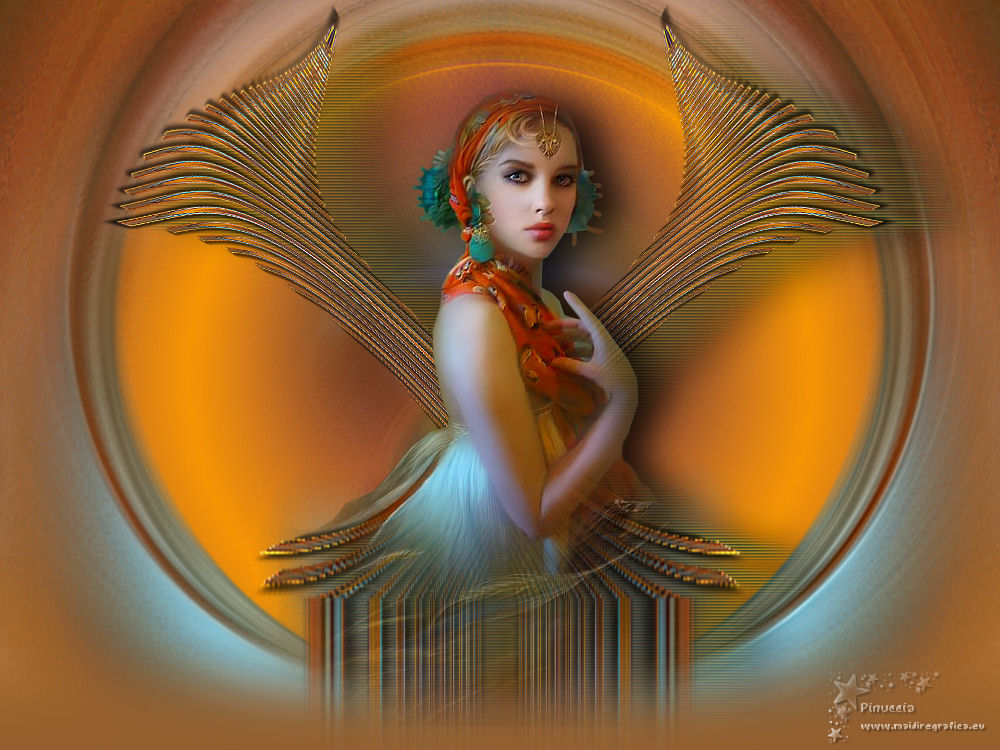
For the tube of this version thanks Renée

If you have problems or doubts, or you find a not worked link,
or only for tell me that you enjoyed this tutorial, write to me.
30 May 2025

|

