|
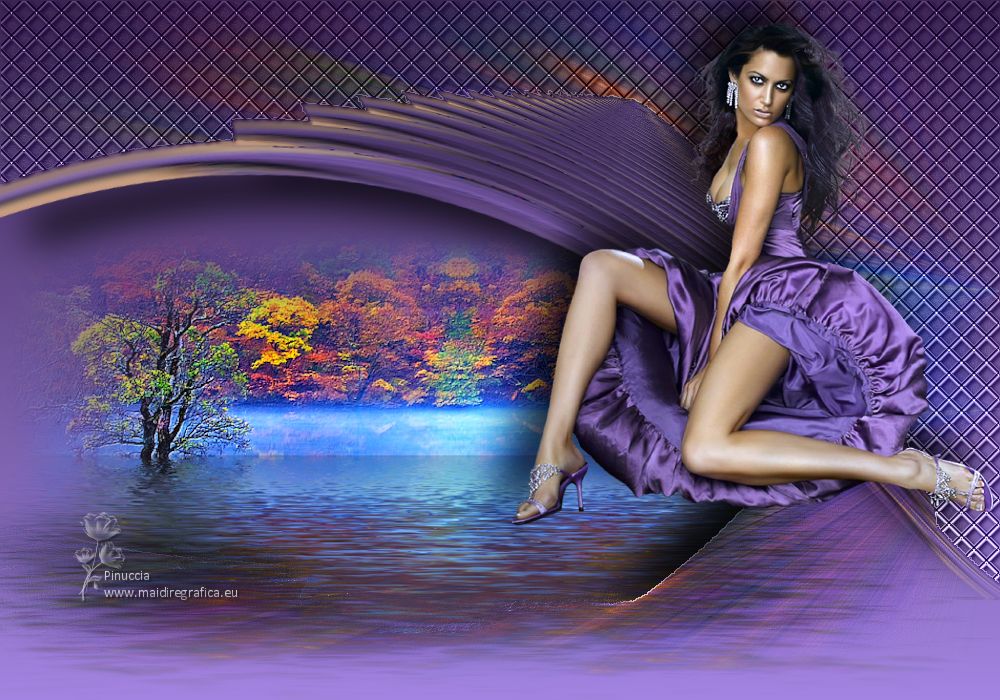
TOP CARMELITA


Thanks Luz Cristina for your invitation to translate your tutorials into english

This tutorial, created with PSP9, was translated with Psp2020, but it can also be made using other versions of PSP.
Since version PSP X4, Image>Mirror was replaced with Image>Flip Horizontal,
and Image>Flip with Image>Flip Vertical, there are some variables.
In versions X5 and X6, the functions have been improved by making available the Objects menu.
In the latest version X7 command Image>Mirror and Image>Flip returned, but with new differences.
See my schedule here
 French Translation here French Translation here
 Your versions here Your versions here

For this tutorial, you will need:

For the tubes thanks Nini and Anna.br
(The links of the tubemakers here).

consult, if necessary, my filter section here
Filters Unlimited 2.0 here
FM Tile Tools - Saturation Emboss here
Balder Olrik - Select Sharp here
Flaming Pear - Flood here
Filters Balder Olrik can be used alone or imported into Filters Unlimited.
(How do, you see here)
If a plugin supplied appears with this icon  it must necessarily be imported into Unlimited it must necessarily be imported into Unlimited

You can change Blend Modes according to your colors.
In the newest versions of PSP, you don't find the foreground/background gradient (Corel_06_029).
You can use the gradients of the older versions.
The Gradient of CorelX here
The textures of the old versions are also missing in the newer PSP versions.
Find the older textures here

Open the mask in PSP and minimize it with the rest of the material.
1. Open a new transparent image1000 x 600 pixels.
2. Set your foreground color to #a384e2,
and your background color to #3a2452.
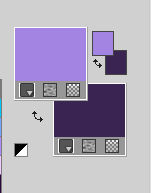
Set your Foreground color to a Foreground/Background Gradient, style Linear.
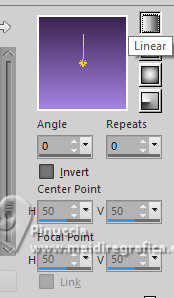
Flood Fill  the transparent image with your gradient. the transparent image with your gradient.
3. Selections>Select All.
Open your woman's tube et Edit>Copy.
Go back to your work and go to Edit>Paste into Selection.
Selections>Select None.
4. Effects>Image Effects>Seamless Tiling, default settings.

5. Adjust>Blur>Radial Blur.
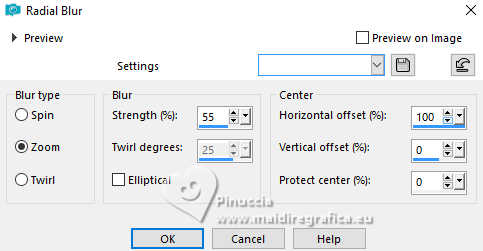
Effects>Edge Effects>Enhance More.
6. Effects>Geometric Effects>Perspective horizontal.
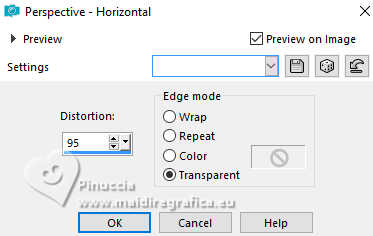
7. Image>Mirror>>Mirror Horizontal.
Effects>Geometric Effects>Perspective horizontal, same settings.
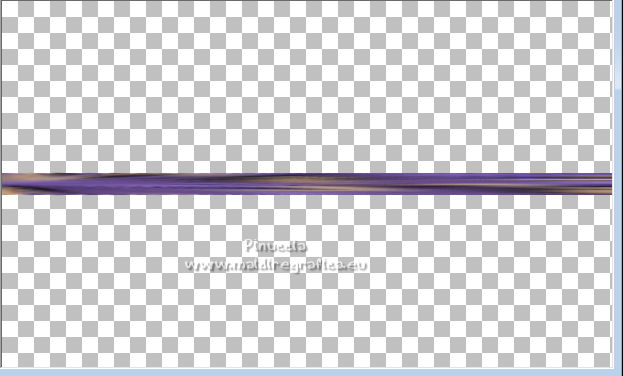
8. Effects>Reflection Effects>Feedback.
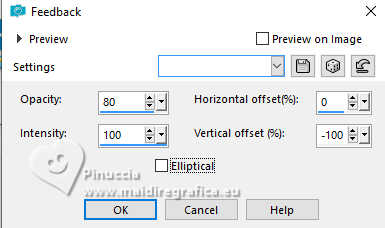
9. Effects>Image Effects>Offset.
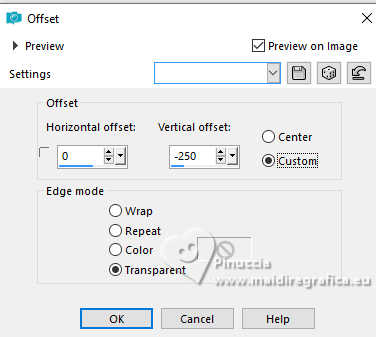
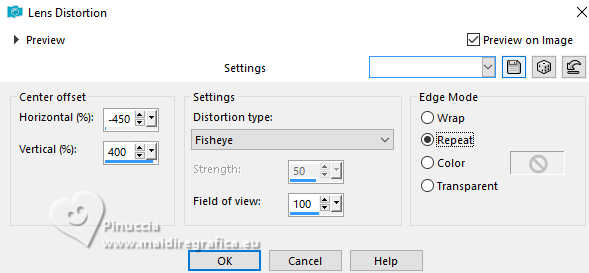
10. Effects>Distortion Effects>Lens Distorsion.
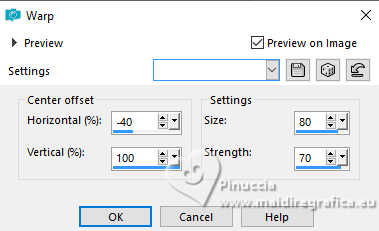
11. Effects>Distortion Effects>Warp.
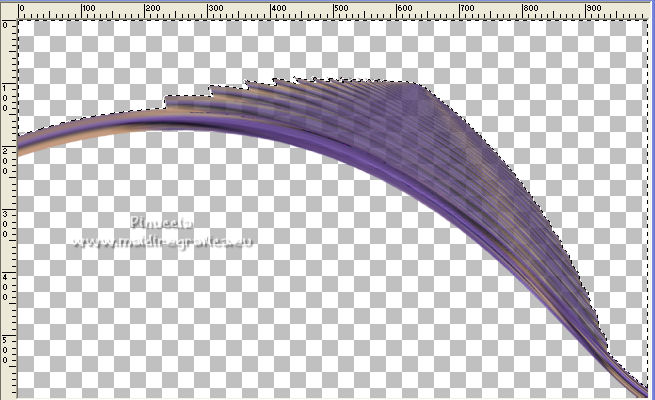
12. Activate your Magic Wand Tool 
and click in the top transparent part to select it.
13. Layers>New Raster Layer.
Open the landscape misted and go to Edit>Copy.
Go back to your work and go to Edit>Paste into Selection.
14. Layers>Duplicate - 2 times, to have 3 layers of the misted.
Layers>Merge>Merge Down - 2 times.
15. Adjust>Blur>Radial Blur, same settings.

Effects>Edge Effects>Enhance More.
16. Keep selected.
Layers>New Raster Layer.
Reduce the opacity of your Flood Fill Tool to 70%.
Flood Fill  the layer with your Gradient. the layer with your Gradient.
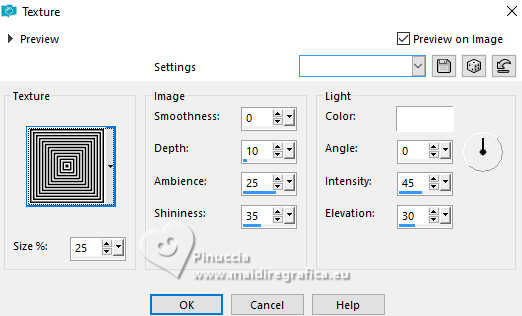
17. Effects>Texture Effects>Texture - select the texture Cadres
18. Effects>Plugins>Balder Olrik - Select Sharp.
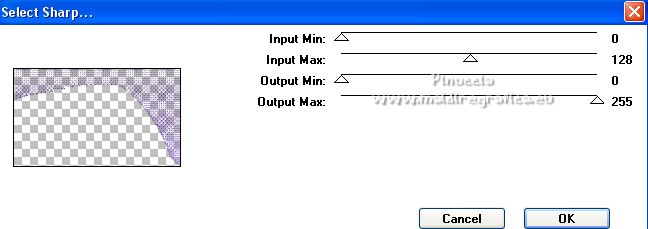
Selections>Select None.
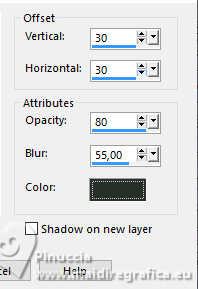
19. Effects>3D Effects>Drop Shadow.

Change the Blend Mode of this layer to Luminance (legacy).
20. Activate the bottom layer, Raster 1.
Effects>3D Effects>Drop Shadow.
21. Layers>New Mask layer>From image
Open the menu under the source window and you'll see all the files open.
Select the mask fadesuave.
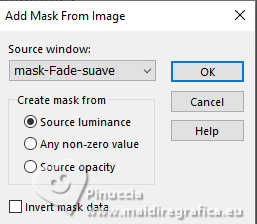
Layers>Merge>Merge Group.
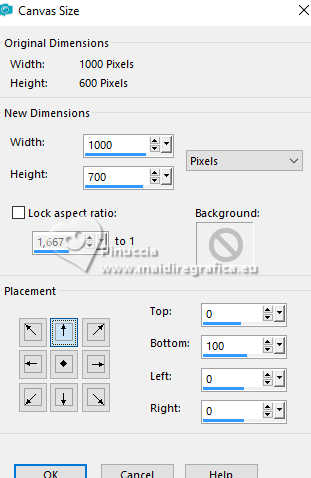
22. Image>Canvas Size - 1000 x 700 pixels.
Layers>New Raster Layer.
Layers>Arrange>Send to Bottom.
Set again the opacity of your Flood Fill to 100.
Flood Fill  the layer with your Gradient. the layer with your Gradient.
23. Edit>Paste as new layer (the landscape misted is still in memory).
Place  correctly the tube to the left side. correctly the tube to the left side.
Layers>Duplicate.
Image>Mirror>Mirror Horizontal.
Place  correctly the tube against the other. correctly the tube against the other.
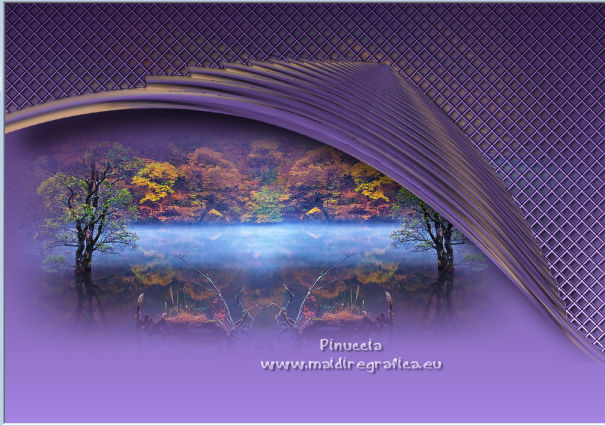
Layers>Merge>Merge Down.
24. Effects>Plugins>FM Tile Tools - Saturation Emboss, default settings.

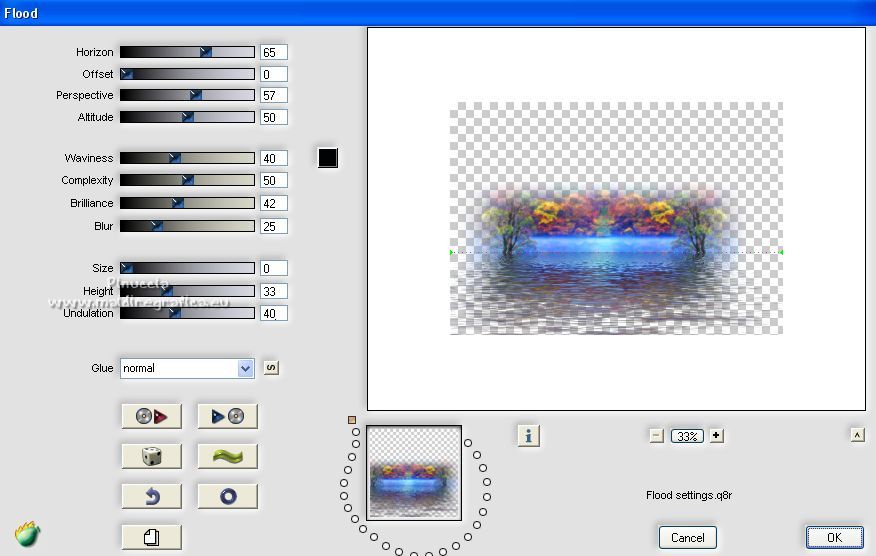
25. Effects>Plugins>Flaming Pear - Flood
26. Layers>New Mask layer>From image
Open the menu under the source window
and select again the mask mask fadesuave.

Layers>Duplicate, to apply the mask 2 times.
Layers>Merge>Merge Group.
27. Activate the layer Raster 2.
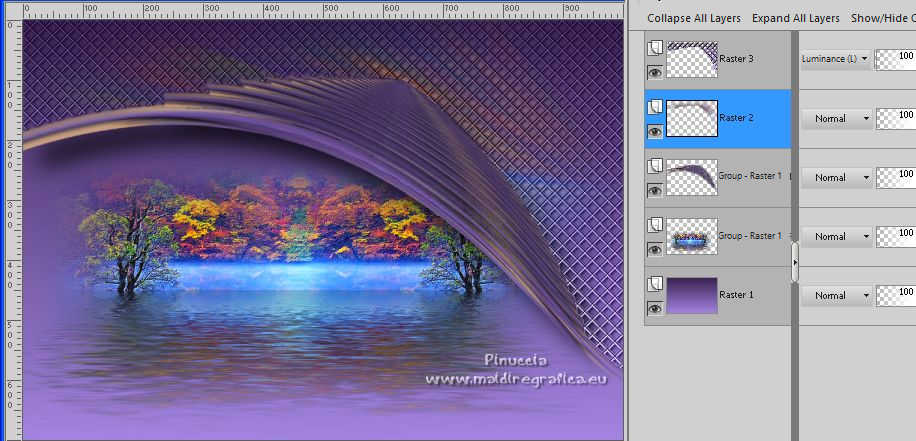
Layers>Duplicate.
Again Layers>Duplicate.
Image>Mirror>Mirror Vertical (Image>Flip).
28. Layers>New Mask layer>From image
Open the menu under the source window
and select again the mask fadesuave.

Layers>Duplicate, to apply the mask 2 times.
Layers>Merge>Merge Group.
29. Effects>3D Effects>Drop Shadow.
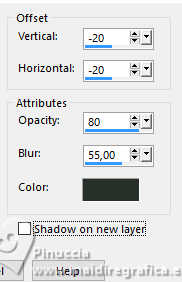
Your tag and the layers; adapt Blend Mode and opacity according to your colors.
If there are any signs that disturb the image, as happened in my example,
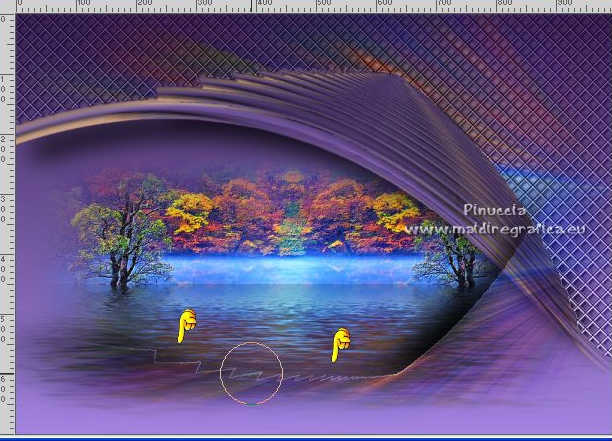
dab lightly with the Eraser tool 
or change the layer's blending mode, or whatever you prefer;
For my example, I used the Push tool
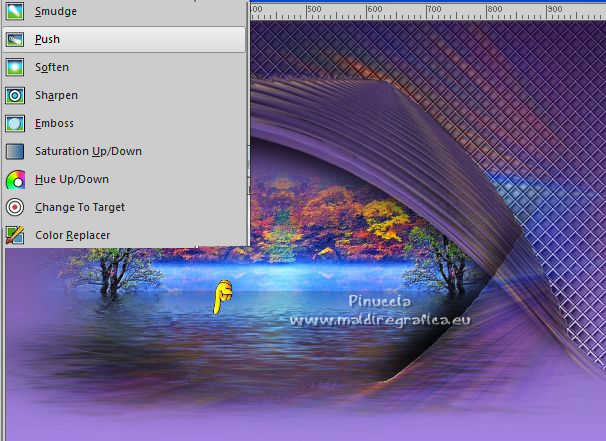
30. Activate your top layer.
Activate again the woman's tube and go to Edit>Copy.
Go back to your work and go to Edit>Paste as new layer.
Move  the tube at the upper right. the tube at the upper right.
Effects>3D Effects>Drop Shadow, at your choice.
31. Layers>Merge>Merge visible.
Sign your work and save as jpg.
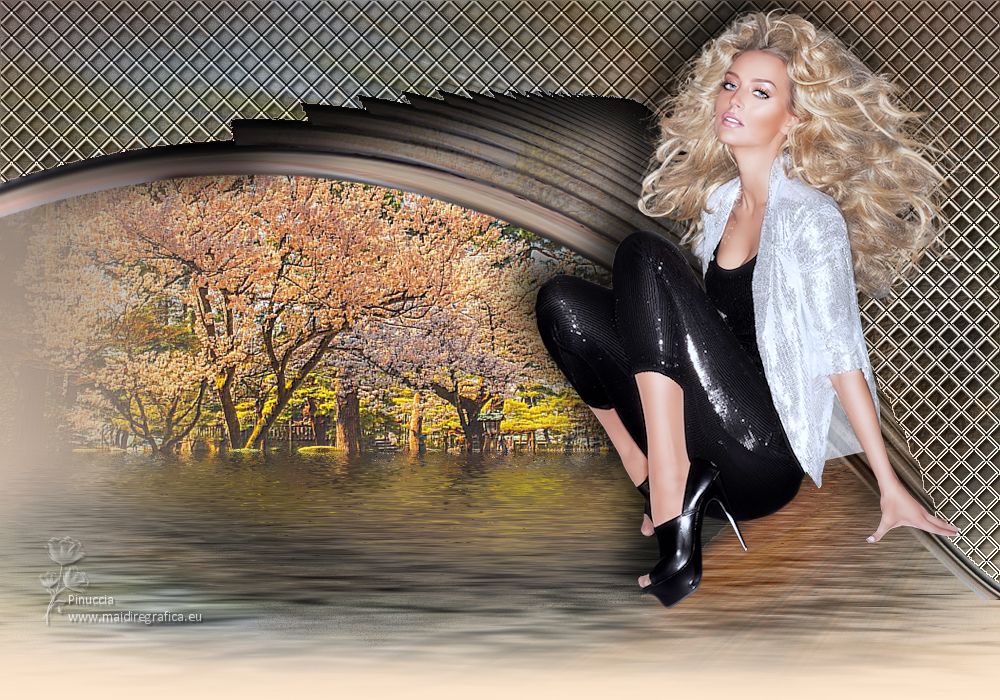
For the tube of this version thanks Azalée; the misted is mine.

If you have problems or doubts, or you find a not worked link,
or only for tell me that you enjoyed this tutorial, write to me.
18 April 2025

|

