|
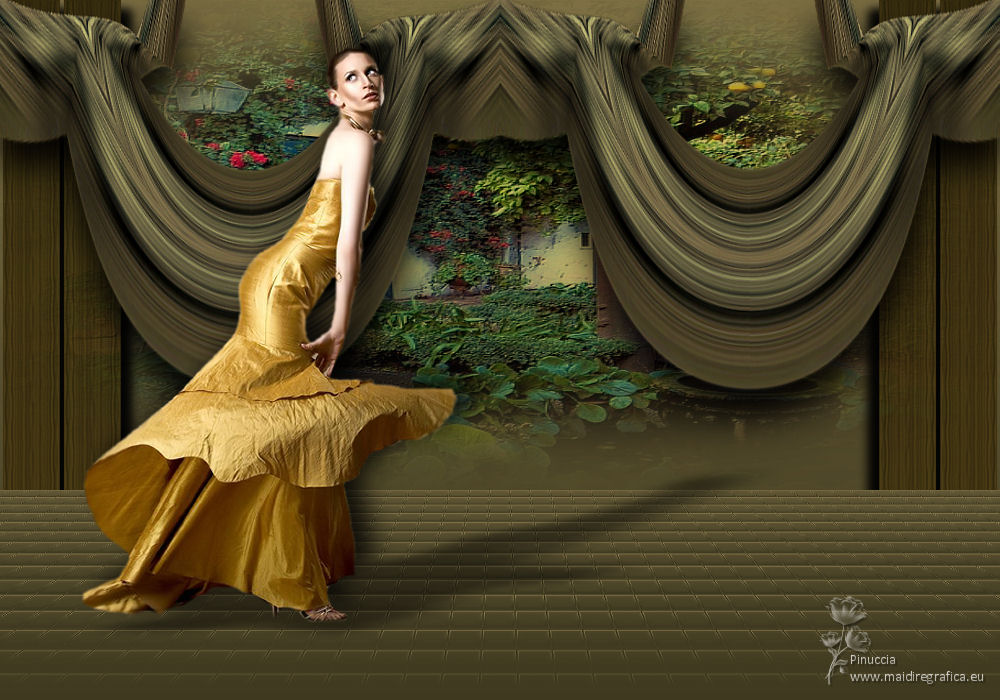
TOP CORNISAS


Thanks Luz Cristina for your invitation to translate your tutorials into english

This tutorial, created with PSP9, was translated with Psp2020, but it can also be made using other versions of PSP.
Since version PSP X4, Image>Mirror was replaced with Image>Flip Horizontal,
and Image>Flip with Image>Flip Vertical, there are some variables.
In versions X5 and X6, the functions have been improved by making available the Objects menu.
In the latest version X7 command Image>Mirror and Image>Flip returned, but with new differences.
See my schedule here
 French Translation here French Translation here
 Your versions here Your versions here

For this tutorial, you will need:

For the tubes thanks Luz Cristina and Grisi
(The links of the tubemakers here).

consult, if necessary, my filter section here
Filters Unlimited 2.0 here
Simple - Top Bottom Wrap (bonus) here
FM Tile Tools - Blend Emboss, Saturation Emboss here
Eye Candy 3.1 - Perspective Shadow here
Mura's Meister - Perspective Tiling here
Filters Simple can be used alone or imported into Filters Unlimited.
(How do, you see here)
If a plugin supplied appears with this icon  it must necessarily be imported into Unlimited it must necessarily be imported into Unlimited

You can change Blend Modes according to your colors.
In the newest versions of PSP, you don't find the foreground/background gradient (Corel_06_029).
You can use the gradients of the older versions.
The Gradient of CorelX here

Copy the texture in the Textures Folder.
Open the mask and minimize it with the rest of the material.
1. Open a new transparent image 1000 x 600 pixels.
Selections>Select All.
2. Ouvrir l'image en jpg imagem jpg 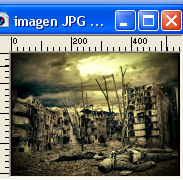
Edit>Copy.
Go back to your work and go to Edit>Paste into Selection.
Selections>Select None.
You are free to search for an image that harmonizes with the colors you use in your work.
3. Adjust>Blur>Motion Blur.
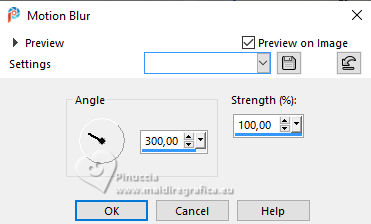
Repeat this Effects two times.
Effects>Edge Effects>Enhance More.
4. Image>Resize, to 70%, resize all layers not checked.
Image>Mirror>Mirror Vertical (Image>Flip).
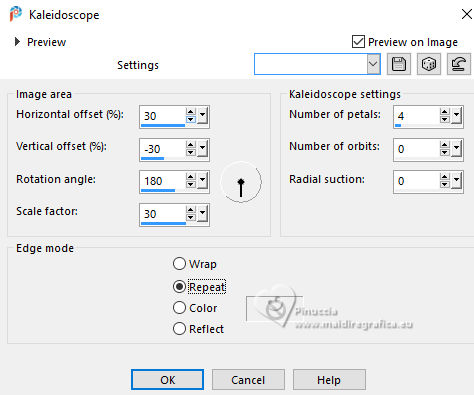
5. Effects>Reflection Effects>Kaleidoscope.
6. Effects>Distortion Effects>Pinch.

Edit>Repeat Cintrage.
7. Effects>Plugins>Simple - Top Bottom Wrap.
This Effect works without window; result:
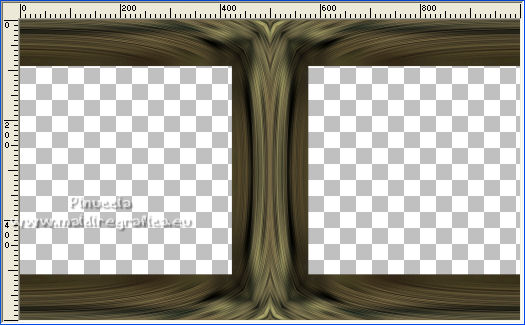
8. Image>Canvas Size - 1000 x 700 pixels.
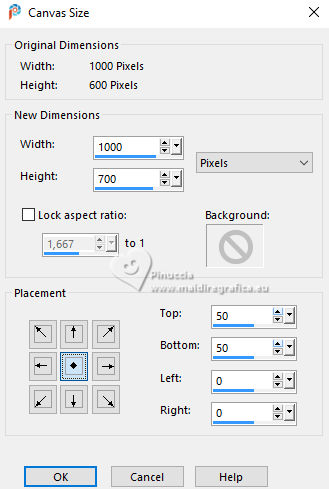
9. Effects>Geometric Effects>Perspective horizontal.

Image>Mirror>Mirror Horizontal.
10. Activate your Magic Wand Tool 
and click in the top transparent part to select it.
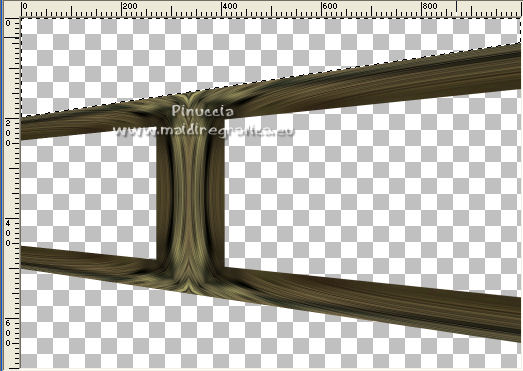
Selections>Invert.
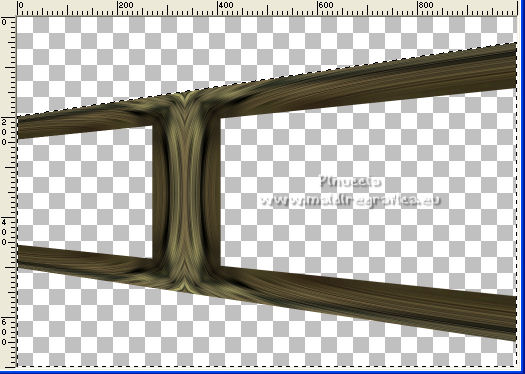
11. Effects>Reflection Effects>Rotating Mirror.
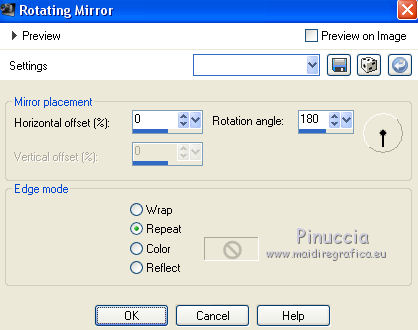
Selections>Select None.
12. Effects>Geometric Effects>Spherize.

13. Effects>Distortion Effects>Polar Coordinates.
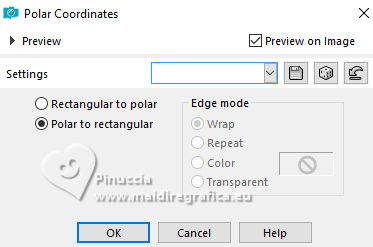
14. Image>Mirror>Mirror Vertical (Image>Flip).
Adjust>Sharpness>Sharpen More.
15. Effects>Image Effects>Offset.

16. Effects>3D Effects>Drop Shadow.
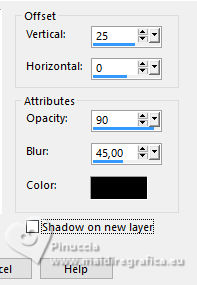
17. Layers>New Raster Layer.
Layers>Arrange>Send to Bottom.
18. Set your foreground color to #3f391f,
and your background color to #786b41.
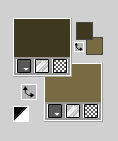
Set your foreground color to a Foreground/Background Gradient, style Linear.
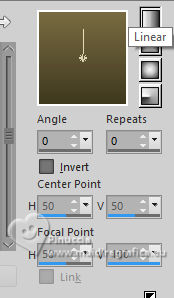
Flood Fill  the layer with your Gradient. the layer with your Gradient.
19. Effects>Texture Effects>Mosaic - Glass.
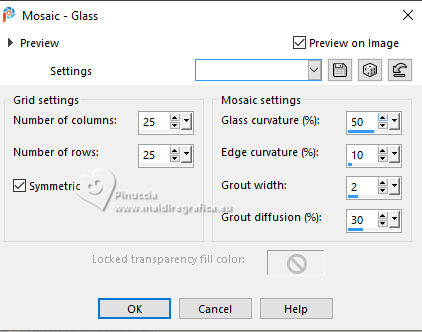
20. Effects>Plugins>FM Tile Tools - Blend Emboss, default settings.

21. Effects>Plugins>Mura's Meister - Perspective Tiling.
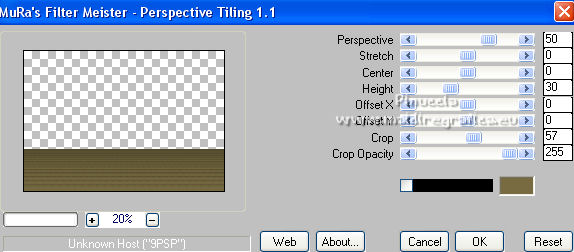
22. Activate your Magic Wand Tool 
and click in the transparent part to select it.
Layers>New Raster Layer.
Open your landscape tube 1811-luzcristina 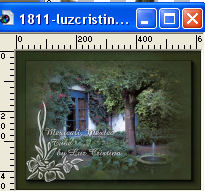
Edit>Copy.
Go back go your work and and go to Edit>Paste into Selection.
Selections>Select None.
23. Effects>Plugins>FM Tile Tools - Saturation Emboss, default settings.

24. Activate the layer Raster 2 (the Mura's effect).
Layers>New Mask layer>From image
Open the menu under the source window and you'll see all the files open.
Select the mask masque-Fade-suave.
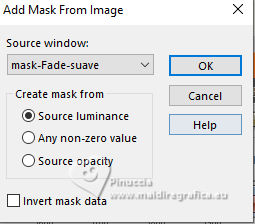
Layers>Merge>Merge Group.
25. Layers>New Raster Layer.
Layers>Arrange>Send to Bottom.
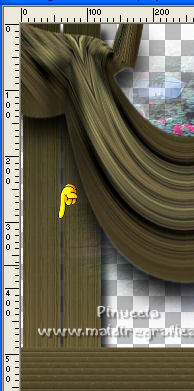
Activate your Selection Tool  , rectangle , rectangle
and draw a small bar - long as below - which passes a little above the ground
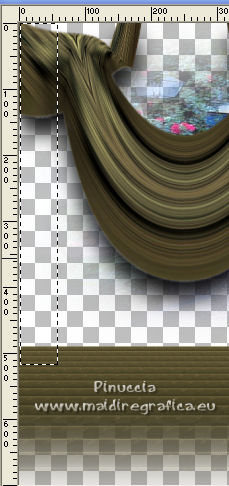
26. Invert the gradient's colors
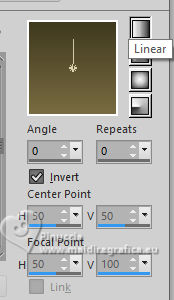
Flood Fill  the selection with your Gradient. the selection with your Gradient.
27. Effects>Texture Effects>Texture - select the texture bg516

Selections>Select None.
28. Effects>3D Effects>Drop Shadow.
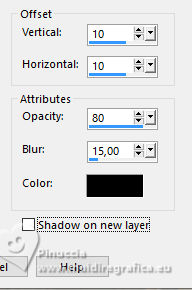
29. Layers>Duplicate.
Effects>Image Effects>Offset.

Here, it depends on the thickness of your bar that will move.
The offset should be slightly separated only by the drop shadow.
If necessary, move the bar slightly to the right.
30. Close the other layers except these two layers.
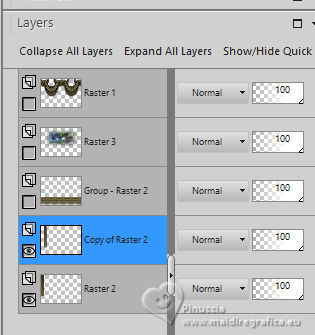
Layers>Merge>Merge visible.
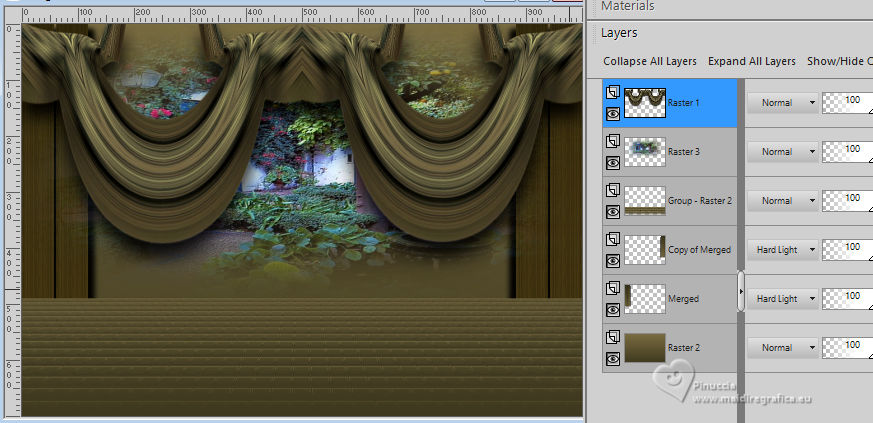
Change the Blend Mode of this layer to Hard Light.
Layers>Duplicate.
Image>Mirror>Mirror Horizontal.
Layers>View>All.

31. Layers>New Raster Layer.
Layers>Arrange>Send to Bottom.
Change again the settings of your Gradient, Invert not checked.

Flood Fill  the layer with your Gradient. the layer with your Gradient.
32. Activate your top layer.
Open your woman's tube 719-luzcristina 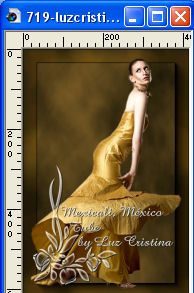
Edit>Copy.
Go back to your work and go to Edit>Paste as new layer.
Move  the tube to the left side. the tube to the left side.
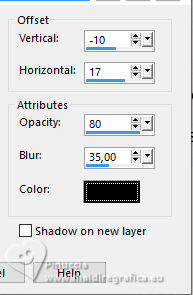
33. Effects>3D Effects>Drop Shadow.
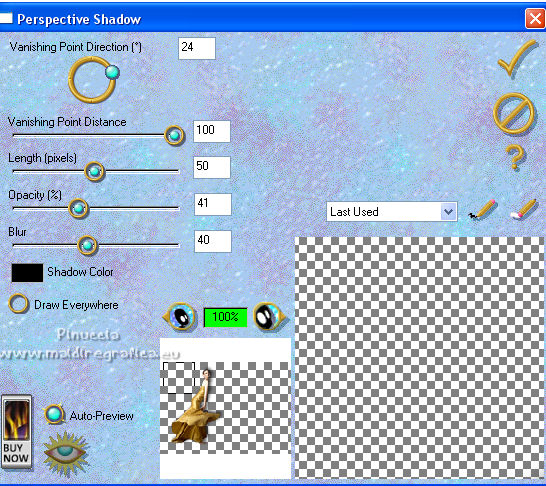
34. Effects>Plugins>Eye Candy 3.1 - Perspective Shadow.
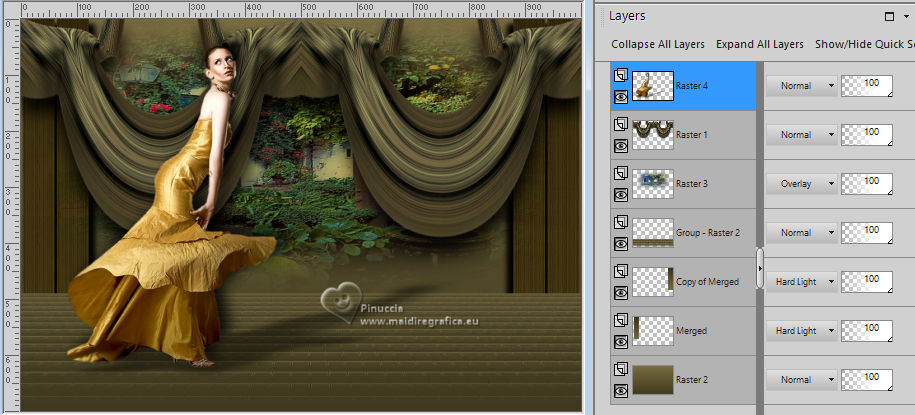
35. Your tag and the layers - adapt Blend Mode to your liking.
36. Sign your work on a new layer.
Layers>Merge>Merge All and save as jpg.
Note: To your liking, I recommend looking for a slightly dark image,
more or less like the one provided in the materials.
Depending on the jpg image you use, the curtain folds will be more visible.
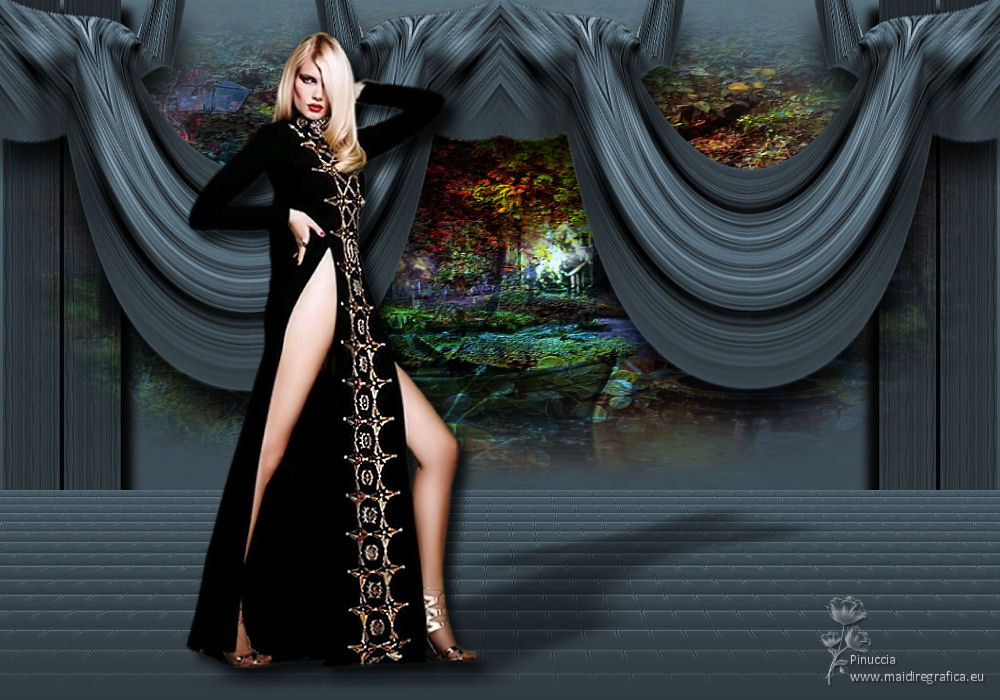
For the tubes of this version thanks Beatriz and Luz Cristina

For the tubes of this version thanks Luz Cristina et Silvie

If you have problems or doubts, or you find a not worked link,
or only for tell me that you enjoyed this tutorial, write to me.
18 April 2025

|

