|
TOP DIKA


Thanks Luz Cristina for your invitation to translate your tutorials into english
This tutorial, created with PSP2022, was translated with PspX7, but it can also be made using other versions of PSP.
Since version PSP X4, Image>Mirror was replaced with Image>Flip Horizontal,
and Image>Flip with Image>Flip Vertical, there are some variables.
In versions X5 and X6, the functions have been improved by making available the Objects menu.
In the latest version X7 command Image>Mirror and Image>Flip returned, but with new differences.
See my schedule here
 French Translation here French Translation here
 Your versions here Your versions here

For this tutorial, you will need:

Thanks for the tube Guismo and Lori Rhae.
(The links of the tubemakers here).

consult, if necessary, my filter section here
Mura's Meister - Perspective Tiling, Copies ici
FM Tile Tools - Saturation Emboss Emboss ici
Andromeda - Perspective ici
Alien Skin Eye Candy 5 Impact - Extrude ici

You can change Blend Modes according to your colors.
Copy the Picture tube in the Picture tubes Folder.
Copy the preset Emboss 3 in the Presets Folder.
Copy the mask !!!20-21 in the Masks Folder.
Open the second mask in PSP and minimize it with the rest of the material.
1. Open a new transparent image 1000 x 900 pixels.
Set your foreground color to #000000,
and your background color to #ffffff.
Flood Fill  the transparent image with the color black #000000. the transparent image with the color black #000000.
2. Layers>New Raster Layer.
Flood Fill the layer with the color white #ffffff.
3. Layers>New Mask layer>From image
Open the menu under the source window and you'll see all the files open.
Select the mask Masck-Texture Pack.

Layers>Merge>Merge Group.
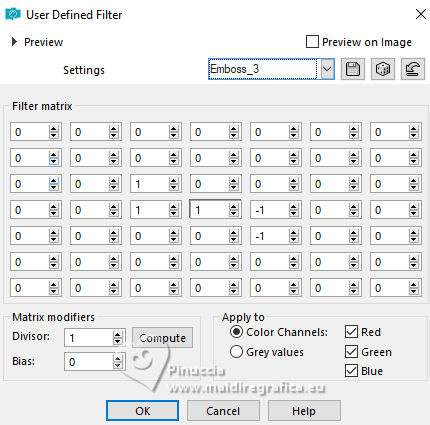
4. Effects>User Defined Filter - select the preset Emboss 3 and ok.
5. Adjust>Hue and Saturation>Colorize.

(optional; you are free to change the settings as you wish)
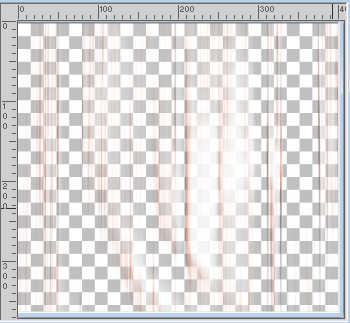
Below is the mask after the effect
This tutorial was created and translated with PSP9.
Unfortunately, after this version, it is no longer possible to colorize the white layers.
I added the mask layer in red and blue to the material to copy and paste as a new layer.
6. Layers>Duplicate.
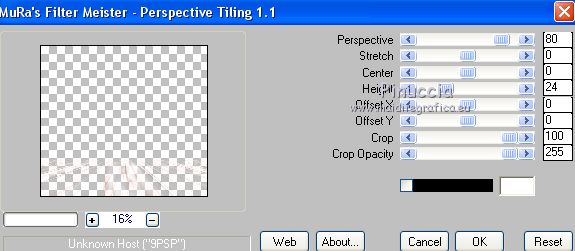
7. Effects>Plugins>Mura's Meister - Perspective Tiling.
8. Effects>Geometric Effects>Pentagon.

9. Layers>Duplicate.
Image>Mirror>Mirror Vertical (Image>Flip).
10. Effects>Distortion Effects>Polar Coordinates.

Image>Mirror>Mirror Vertical (Image>Flip).
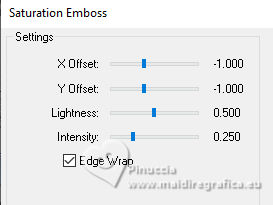
11. Effects>Plugins>FM Tile Tools - Saturation Emboss, default settings.
12. Effects>Image Effects>Offset.

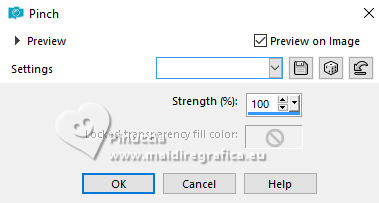
13. Effects>Distortion Effects>Pinch.
14. Open the misted calguismistpn289 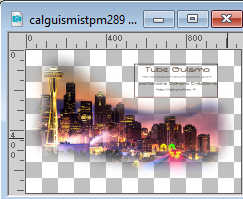
Edit>Copy.
Go back to your work and go to Edit>Paste as new layer.
Move  the tube to the edge of the "floor". the tube to the edge of the "floor".
Layers>Arrange>Move Down.
15. Layers>New Raster Layer.
Layers>Arrange>Bring to Top.
16. Activate your Selection Tool 
(no matter the type of selection, because with the custom selection your always get a rectangle)
clic on the Custom Selection 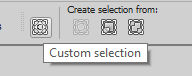
and set the following settings.

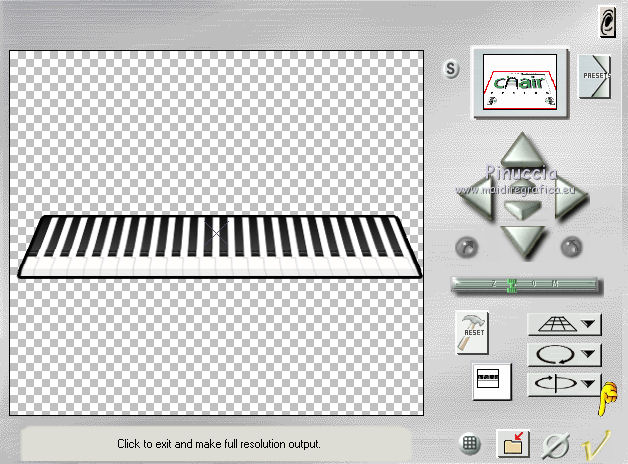
17. Activate your Picture Tubes Tool 
Look for and select the picture tube DiPianokeys

apply the tube to the left as below, by double-clicking on the same spot,
one click on the other, without releasing the mouse button.
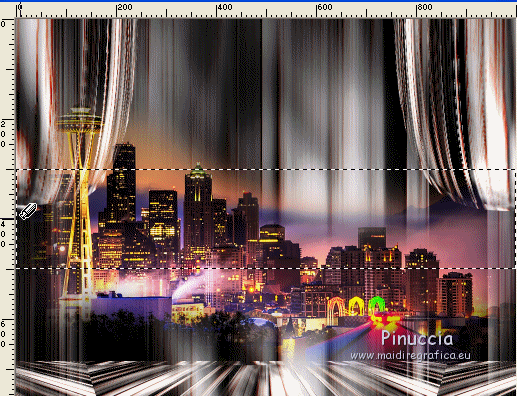
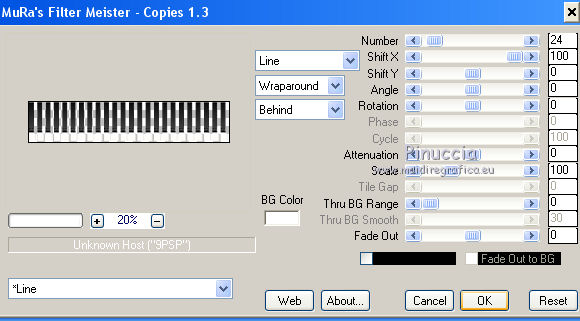
18. Effects>Plugins>Mura's Meister - Copies.
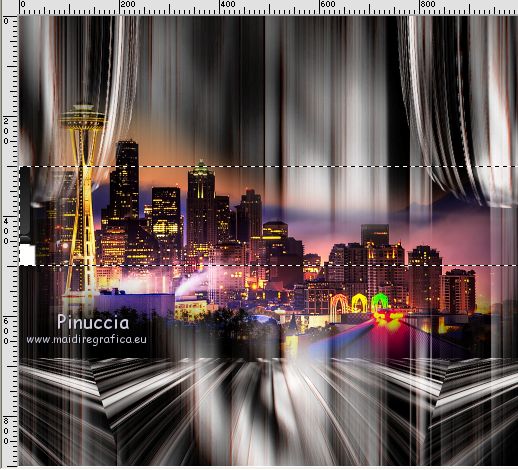
19. Layers>New Raster Layer.
Layers>Arrange>Move Down.
Flood Fill the layer with the color white #ffffff.

Activate your top layer, Raster 3.
Layers>Merge>Merge Down.
Selections>Select None.
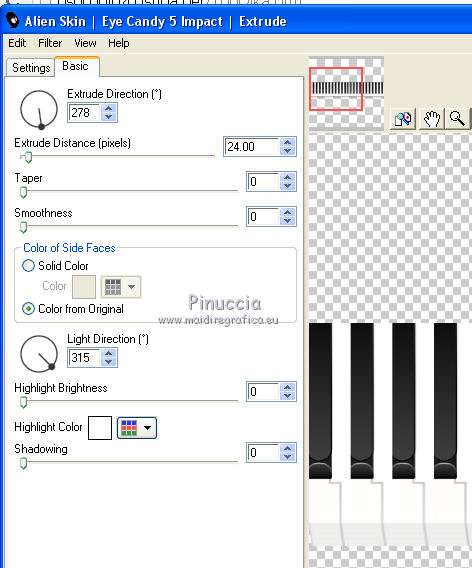
20. Effects>Plugins>Alien Skin Eye Candy 5 Impact - Extrude.
21. Selections>Select All.
Selections>Float.
Selections>Modify>Select Selection Borders.

Flood Fill the borders with the color black.
Selections>Select None.
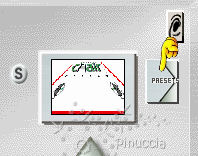
22. Effects>Plugins>Andromeda - Perspective
Click on Presets
Set the settings and click the check mark in the bottom right corner to apply.
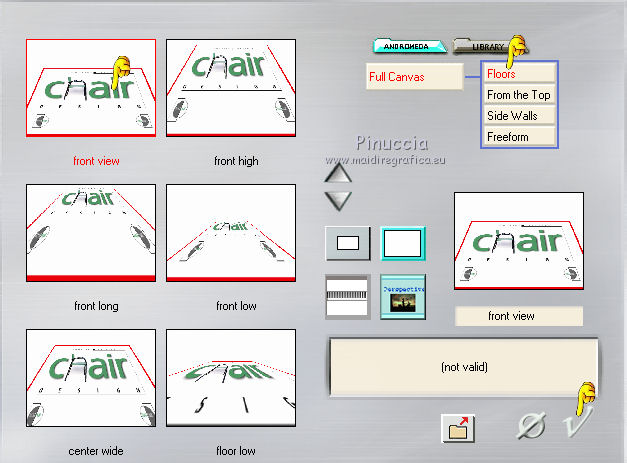
Again click the check mark in the bottom right corner to close.
Apply this Effect another time.
23. Effects>3D Effects>Drop Shadow.

24. Effects>Image Effects>Offset.

25. Layers>Duplicate.
Effects>Distortion Effects>Wave.

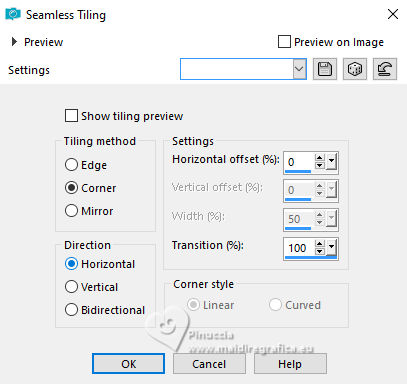
26. Effects>Image Effects>Seamless Tiling.
27. Layers>Load/Save Mask>Load Mask from Disk.
Look for and load the mask !!!20-21.

Layers>Merge>Merge Group.
28. Effects>Image Effects>Offset.

It's time to play with the Blend Modes of the layers.
I set the curtain layer and the floor layers to Hard Light mode.
The other layers all to Normal.

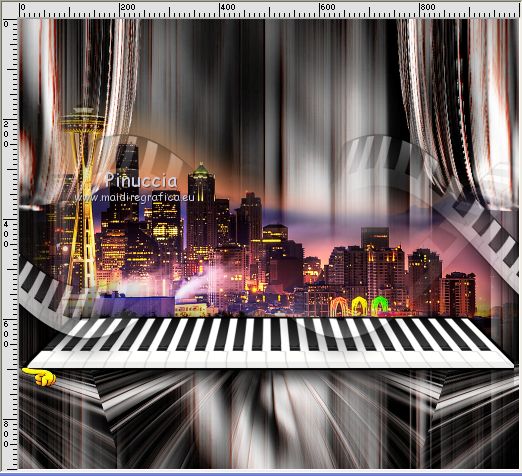
29. Activate the layer of the piano
Move / the corner of the piano a little further down, at 700 pixels
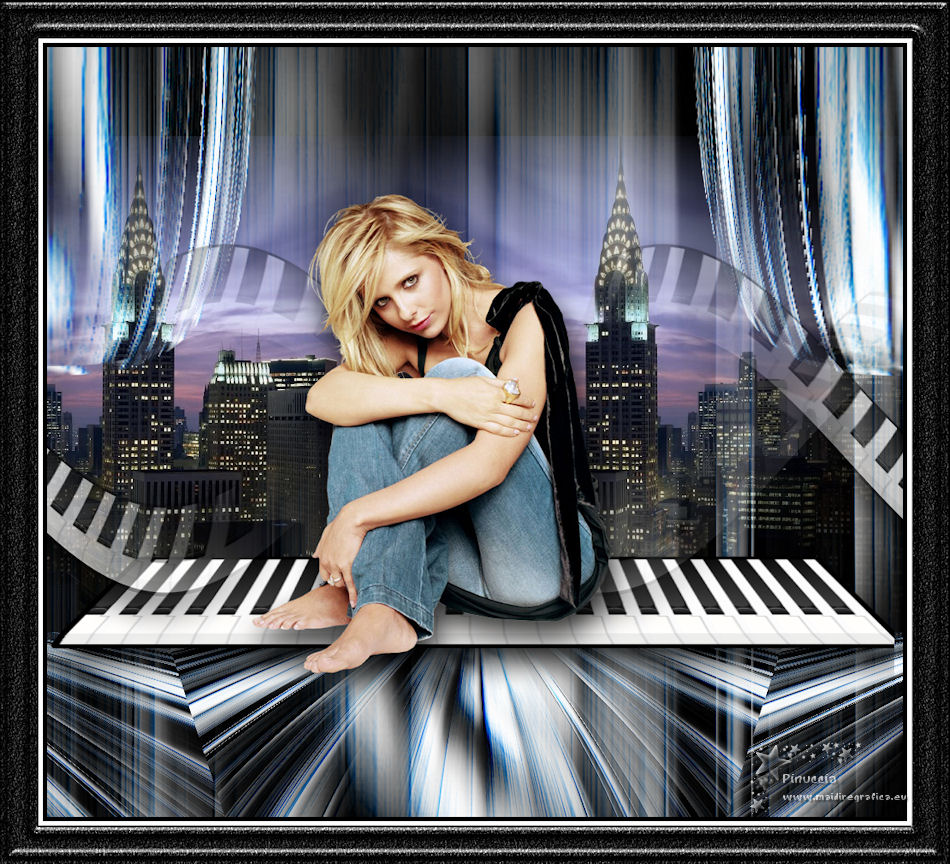
30. Open the tube ShadesofGrey 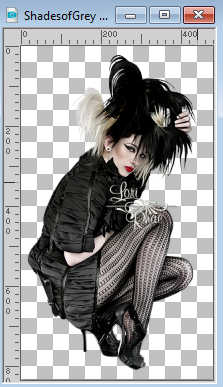
Edit>Copy.
Go back to your work and go to Edit>Paste as new layer.
Image>Resize, 2 times to 90%, resize all layer not checked.
Place correctly the tube.
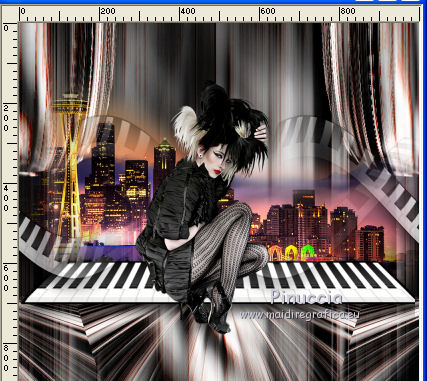
Effects>3D Effects>Drop Shadow, at your choice.
31. Image>Add Borders, 5 pixels, symmetric, color black.
Image>Add Borders, 5 pixels, symmetric, color white.
Image>Add Borders, 45 pixels, symmetric, color black.
Activate your Magic Wand Tool 
and click in the last border to select it.
32. Adjust>Add/Remove Noise>Add Noise.

33. Effects>User Defined Filter - Emboss 3.
34. Effects>3D Effects>Inner Bevel.

Edit>Repeat Inner Bevel.
Selections>Select None.
35. Image>Resize, 84%, resize all layer checked.
36. Add, if you want the author and the translator's watermark.
Sign your work and save as jpg.
For the tubes of this version thanks Cyrene and Luna.br


If you have problems or doubts, or you find a not worked link,
or only for tell me that you enjoyed this tutorial, write to me.
20 July 2025
|