|
TOP ESCORPION


Thanks Luz Cristina for your invitation to translate your tutorials into english

This tutorial, created with PSP9, was translated with PspX9, but it can also be made using other versions of PSP.
Since version PSP X4, Image>Mirror was replaced with Image>Flip Horizontal,
and Image>Flip with Image>Flip Vertical, there are some variables.
In versions X5 and X6, the functions have been improved by making available the Objects menu.
In the latest version X7 command Image>Mirror and Image>Flip returned, but with new differences.
See my schedule here
 French Translation here French Translation here
 Your versions here Your versions here

For this tutorial, you will need:

For the tubes thanks AnaRidzi and LuzCristina.
(The links of the tubemakers here).

consult, if necessary, my filter section here
Filters Unlimited 2.0 here
Mura's Meister - Pole Transform here
Flaming Pear - Flood here
Transparency - Eliminate Black here
Simple - Blintz here
FM Tile Tools - Blend Emboss here
AAA Frames - Texture Frame here
Filters Transparency and Simple can be used alone or imported into Filters Unlimited.
(How do, you see here)
If a plugin supplied appears with this icon  it must necessarily be imported into Unlimited it must necessarily be imported into Unlimited

You can change Blend Modes according to your colors.
In the newest versions of PSP, you don't find the foreground/background gradient (Corel_06_029).
You can use the gradients of the older versions.
The Gradient of CorelX here

Copy the preset Emboss 3 in the Presets Folder.
Copy the pattern Gold in the Patterns Folder.
Open the mask in PSP and minimize it with the rest of the material.
1. Open a new transparent image 1000 x 100 pixels.
2. Set your foreground color to #b4773d,
and your background color to #3f2815.
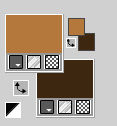
Set your foreground color to a Foreground/Background Gradient, style Linear.
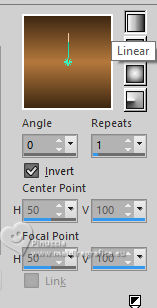
Flood Fill  the transparent image with your Gradient. the transparent image with your Gradient.
3. Activate your Erase Tool  with these settings. with these settings.

Move the mouse from left to right without releasing the cursor.

4. Effects>User Defined Filter - select the preset Emboss 3 and ok.

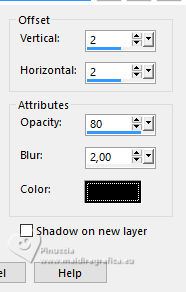
3D Effects>Drop Shadow.
6. Layers>New Raster Layer.
Layers>Arrange>Send to Bottom.
Flood Fill  the layer with your dark background color #3f2815. the layer with your dark background color #3f2815.
Layers>Merge>Merge visible.
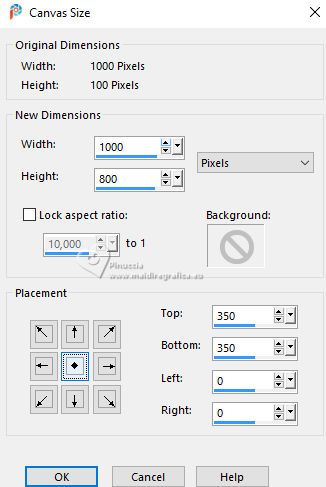
7. Image>Canvas Size - 1000 x 800 pixels.
8. Image>Resize, to 70%, resize all layers not checked.
9. Effects>Geometric Effects>Skew.
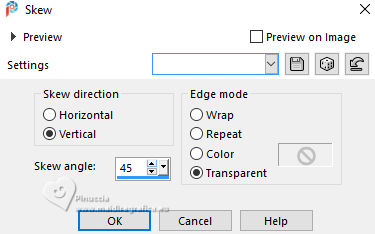
10. Image>Resize, to 80%, resize all layers not checked.
11. Layers>Duplicate.
12. Effects>Image Effects>Offset.
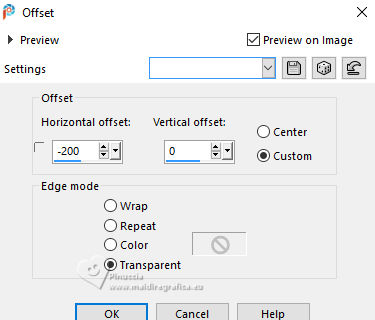
Layers>Merge>Merge visible.
13. Activate your Warp Brush Tool  with these settings with these settings

We're going to join the ends:
Place the cursor at 100 x 700 pixels
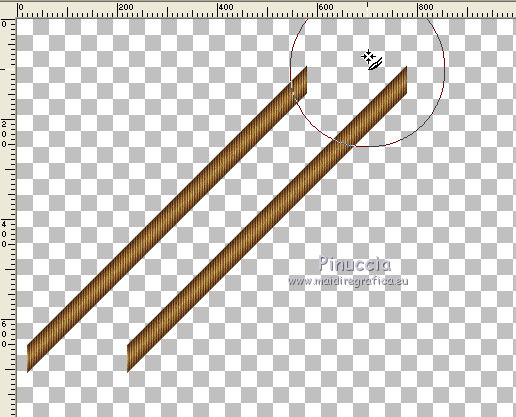
Hold down the cursor until the ends close
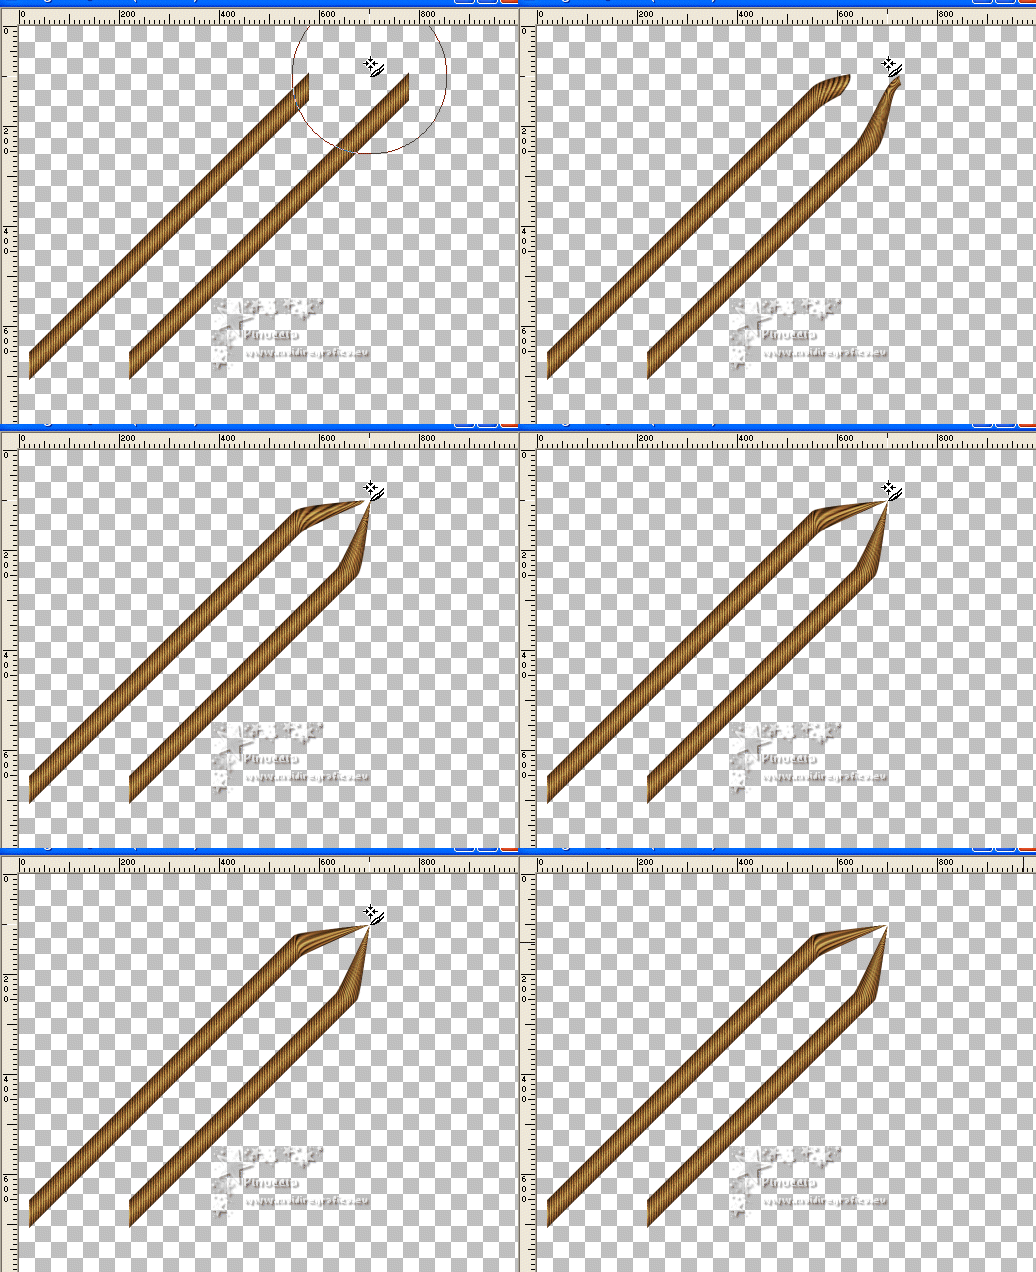
Do the same thing at the bottom: place the cursor at 100 x 700 pixels
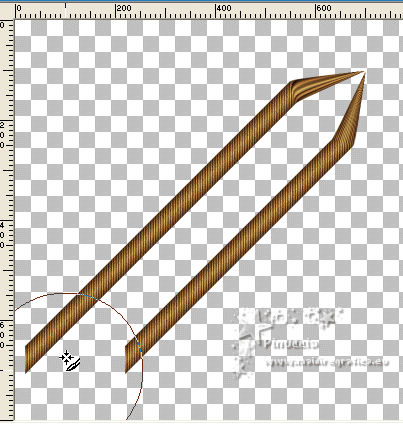
Hold down the cursor until the ends join.

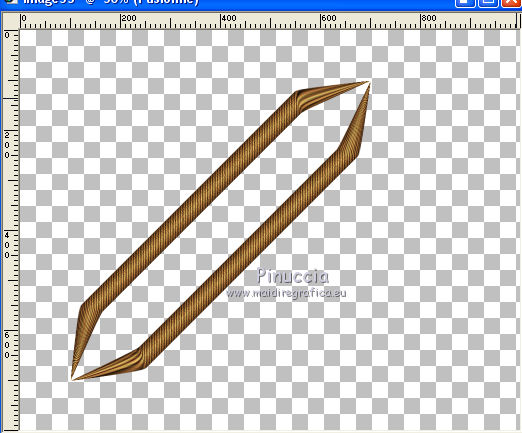
14. Activate your Magic Wand Tool 
and click inside the shape to select it.
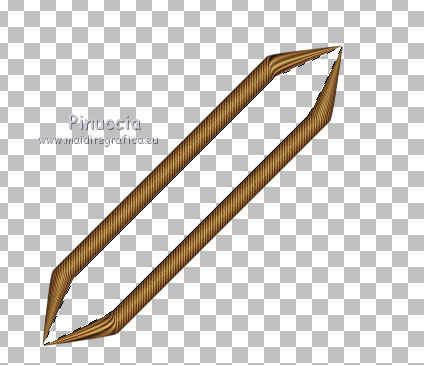
Selections>Modify>Expand - 4 pixels.
Flood Fill  with your dark background color #3f2815. with your dark background color #3f2815.
Keep selected.
15. Layers>New Raster Layer.
Flood Fill  again with your dark color. again with your dark color.
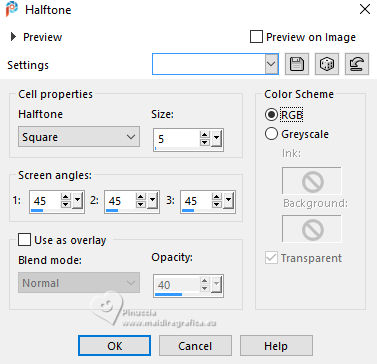
16. Effects>Artistic Effects>Halftone.
17. Effects>Plugins>Transparency - Eliminate Black.
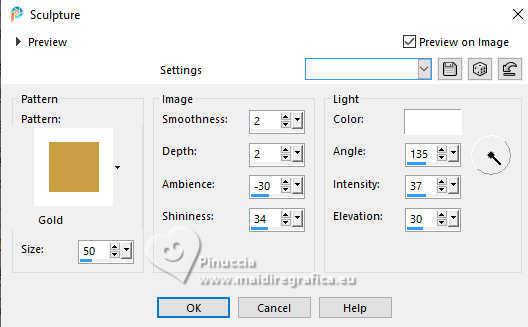
18. Effects>Texture Effects>Sculpture - select the pattern Gold
19. Effects>Edge Effects>Enhance.
Selections>Select None.
Layers>Merge>Merge visible.
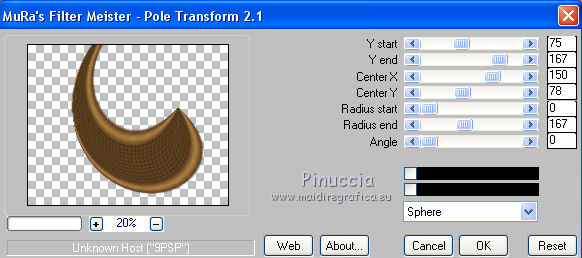
20. Effects>Plugins>Mura's Meister - Pole Transform.
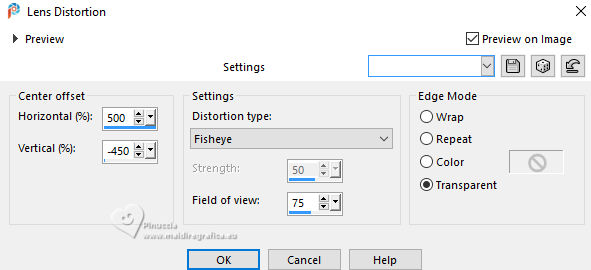
21. Effects>Distortion Effects>Lens Distortion.
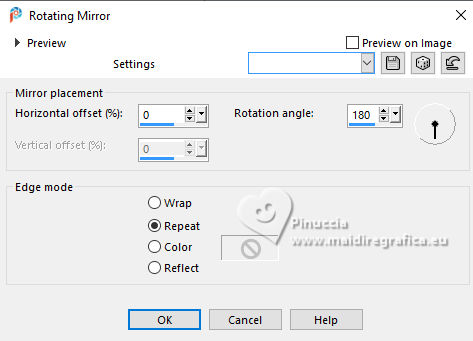
22. Effects>Reflection Effects>Rotating Mirror.
23. Image>Redimensionner, to 80%, resize all layers not checked.
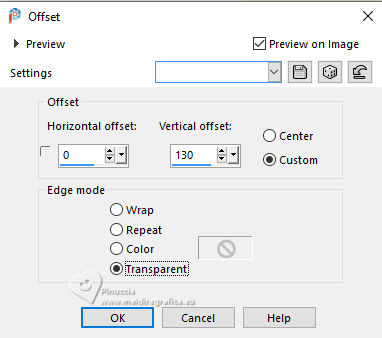
24. Effects>Image Effects>Offset.
25. Activate your Magic Wand Tool 
and click in the center to select it.
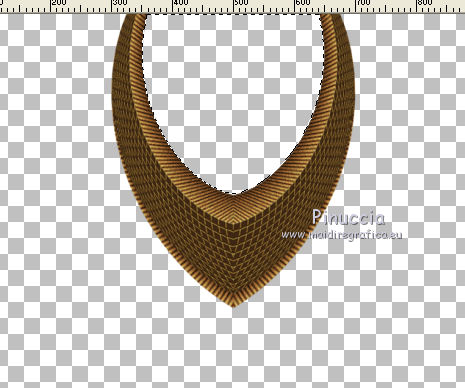
Selections>Modify>Expand - 4 pixels.
Layers>New Raster Layer.
Layers>Arrange>Move Down.
Change the settings of your Gradient
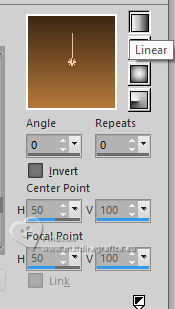
Reduce the opacity of your Flood Fill Tool to 50%.
Flood Fill  the selection with your Gradient. the selection with your Gradient.
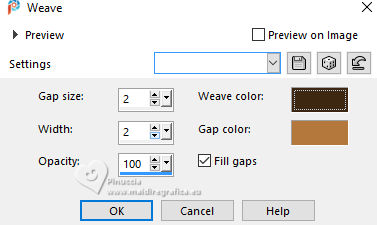
26. Effects>Texture Effects>Weave
weave color: dark color
gap color: light color
Selections>Select None.
27. Effects>Plugins>FM Tile Tools - Blend Emboss, default settings.

Layers>Merge>Merge visible.
28. Effects>Plugins>Simple - Blintz.
Edit>Repeat Blintz.
29.- Effects>Reflection Effects>Rotating Mirror.

30. Activate your Pick Tool 
mode Scale 
and pull the lower central node
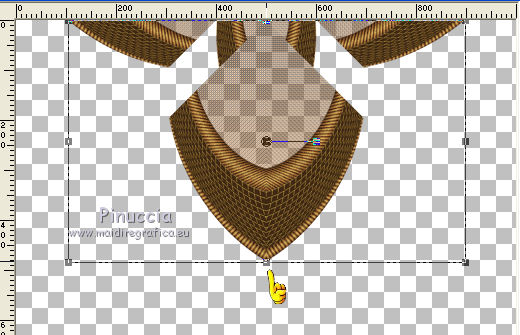
up, to 400 pixels.
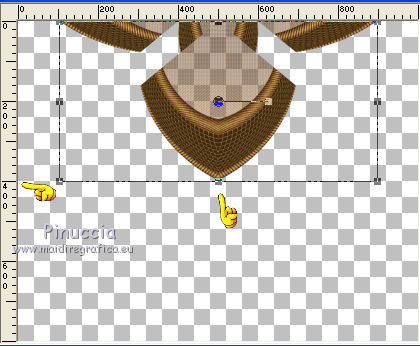
31. Effects>3D Effects>Drop Shadow.
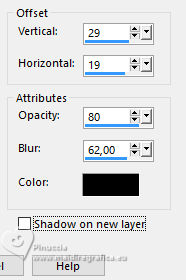
32. Layers>Duplicate.
Image>Mirror>Mirror vertical (Image>Flip).
33. Effects>Image Effects>Offset, last settings.

Layers>Arrange>Move Down.
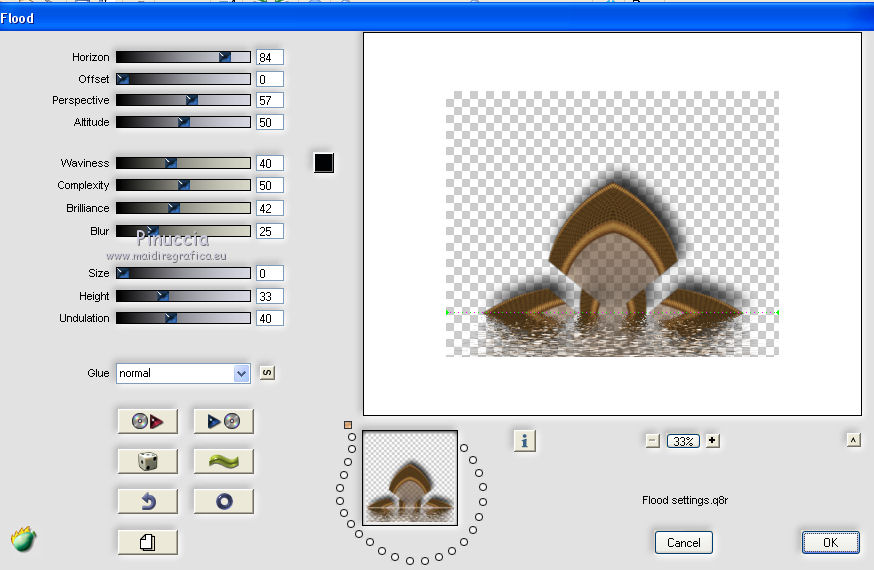
34. Effects>Plugins>Flaming Pear - Flood
35. Layers>New Mask layer>From image
Open the menu under the source window and you'll see all the files open.
Select the mask !!!mask.ket-fadesuave.
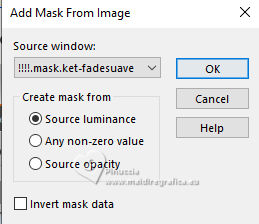
Layers>Merge>Merge Group.
Optional, according to your colors: apply the mask another time.
36. Layers>New Raster Layer.
Layers>Arrange>Send to Bottom.
Set the opacity of your Flood Fill Tool to 100
Flood Fill  the layer with the last Gradient. the layer with the last Gradient.
37. Open the landscape pajsagem-LuzC 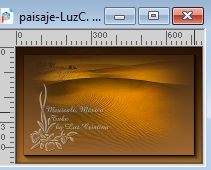
Edit>Copy.
Go back to your work and go to Edit>Paste as new layer.
Move  the tube at the upper left. the tube at the upper left.
Layers>Duplicate.
Image>Mirror>Mirror horizontal.
Layers>Merge>Merge Down.
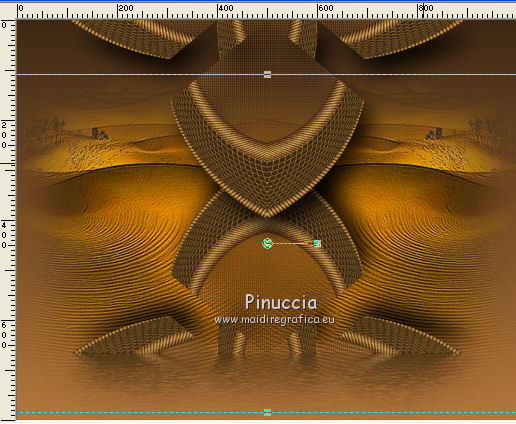
38. Activate your Pick Tool 
and pull the image down roughly like below
39. Activate your top layer.
Open the woman's tube ar264 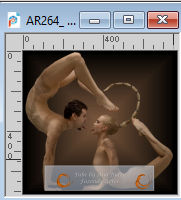
Edit>Copy.
Go back to your work and go to Edit>Paste as new layer.
Move  the tube down. the tube down.
Layers>New Mask layer>From image
Open the menu under the source window
and select again the mask !!!mask.ket-fadesuave.

Layers>Merge>Merge Group.
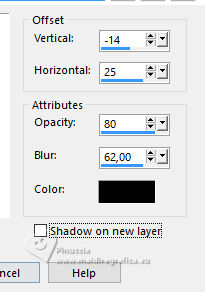
40. Effects>3D Effects>Drop Shadow.
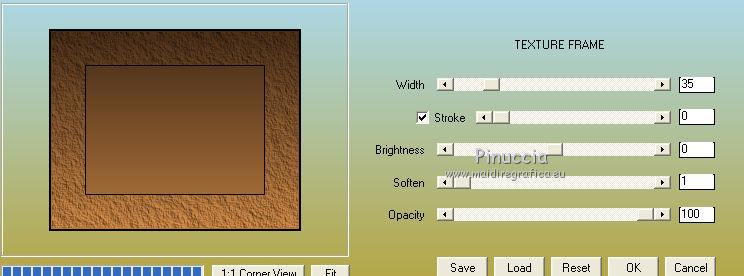
41. Activate your bottom layer, Raster 1.
Effects>Plugins>AAA Frames - Texture Frame.
42. Sign your work on a new layer.
Layers>Merge>Merge All and save as jpg.
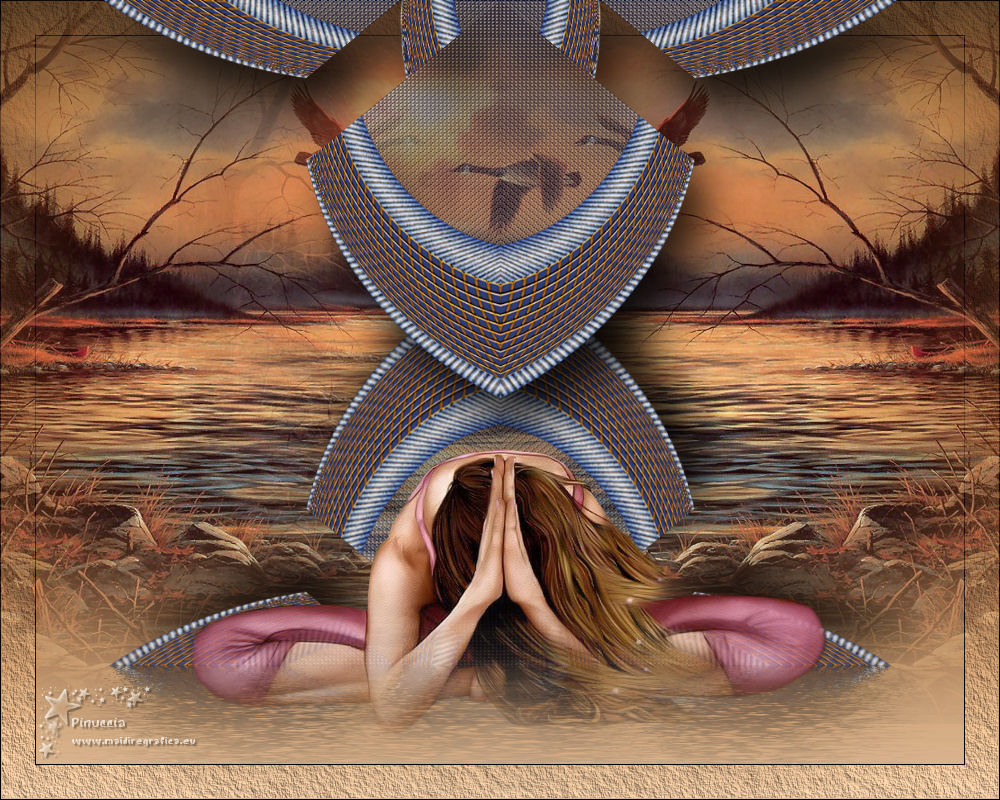
For the tubes of this version thank Luz Cristina
 Vos versioni ici Vos versioni ici

If you have problems or doubts, or you find a not worked link,
or only for tell me that you enjoyed this tutorial, write to me.
19 June 2025
|


