|
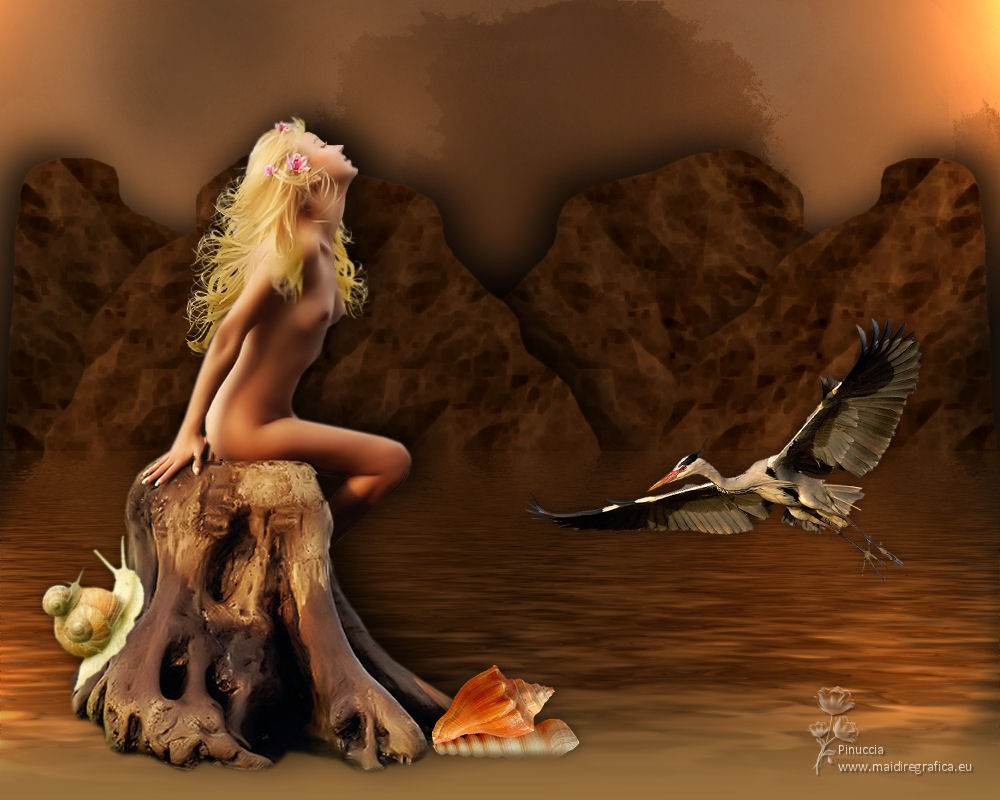
TOP GENESIS


Thanks Luz Cristina for your invitation to translate your tutorials into english

This tutorial, created with PSP9, was translated with PspX9, but it can also be made using other versions of PSP.
Since version PSP X4, Image>Mirror was replaced with Image>Flip Horizontal,
and Image>Flip with Image>Flip Vertical, there are some variables.
In versions X5 and X6, the functions have been improved by making available the Objects menu.
In the latest version X7 command Image>Mirror and Image>Flip returned, but with new differences.
See my schedule here
 French Translation here French Translation here
 Your versions here Your versions here

For this tutorial, you will need:

For the tubes thanks Tocha and Mou.
(The links of the tubemakers here).

consult, if necessary, my filter section here
Flaming Pear - Flood here

You can change Blend Modes according to your colors.
In the newest versions of PSP, you don't find the foreground/background gradient (Corel_06_029).
You can use the gradients of the older versions.
The Gradient of CorelX here

Copy the script nubes_LuzC02 in the Script Folder.
Copy the gradient in the Gradients Folder.
Open the mask and the pattern Paper in PSP and minimize them with the rest of the material.
1. Open a new transparent image 1000 x 450 pixels.
2. Activate your Freehand Selection Tool  with these settings with these settings

and we make mountains more or less like below
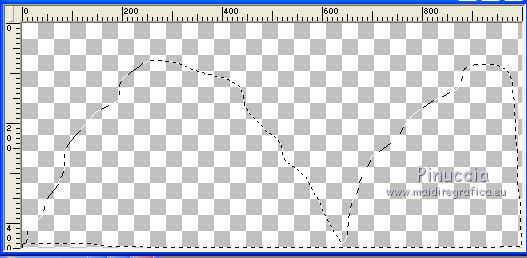
Remember not to release the cursor until you reach the other shore where you started.
I started at the bottom left, made the mountains,
went down, and then back up along the shore until I reached the starting point.
3. Set your foreground color to Pattern and select the pattern paper
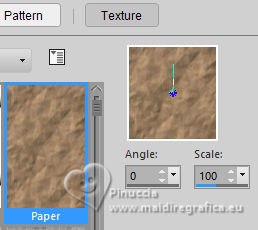
Flood Fill  the selection with your foreground pattern. the selection with your foreground pattern.
4. Adjust>Brightness and Contrast>Brightness and Contrast.
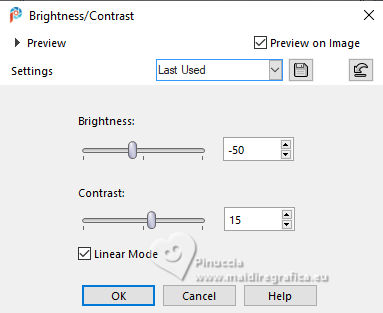
5. Effects>Edge Effects>Erode - 2 times.
Selections>Select None.
6. Effects>3D Effects>Drop Shadow.
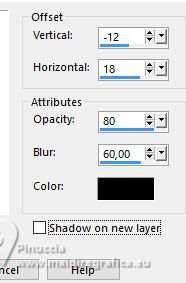
7.- Layers>Duplicate.
Image>Mirror>Mirror Horizontal.
8. Layers>Arrange>Move Down.
Layers>Merge>Merge visible.
9. Layers>New Raster Layer.
Layers>Arrange>Send to Bottom.
10. Image>Canvas Size - 1000 x 800 pixels.
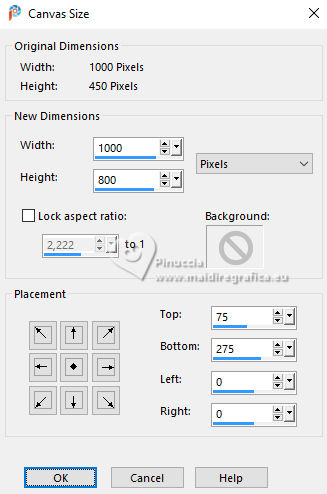
11. Set your foreground color to the golden Gradient Metal Brass, style Linear.
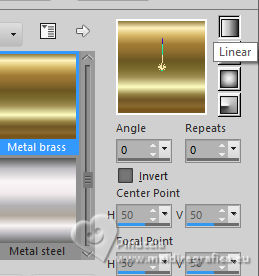
Flood Fill  the layer with your Gradient. the layer with your Gradient.
12. Set your foreground color to #99703e,
and your background color to #421f06.
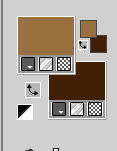
Set your foreground color to a Foreground/Background Gradient, style Linear.
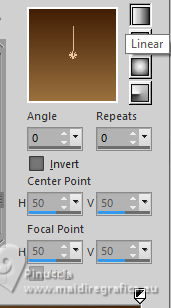
Layers>New Raster Layer.
Flood Fill  the layer with your gradient. the layer with your gradient.
Change the Blend Mode of this layer to Dissolve and reduce the opacity to 98%.
13. Layers>New Raster Layer.
If you don't see the Scripts Bar: View>Toolbars>Script
Open the menu and select the script nubes LuzC_02

Click on the black arrow to run the script.
Don't move anything until it stops
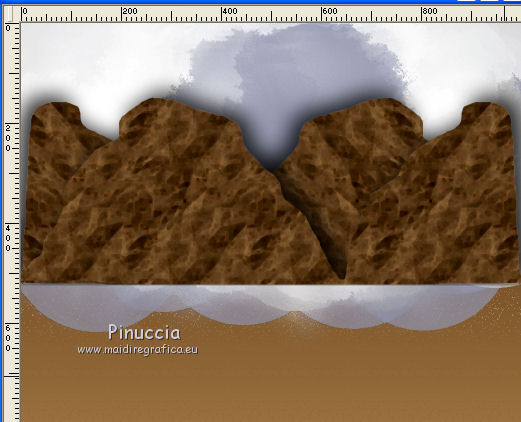
14. Adjust>Hue and Saturation>Hue/Saturation/Lightness
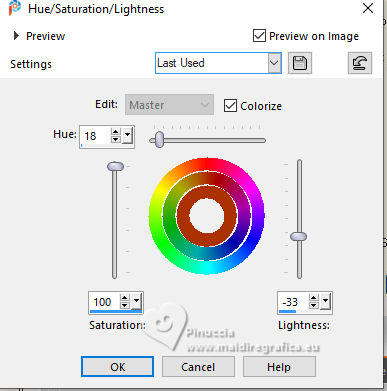
Change the Blend Mode of this layer to Luminance (legacy).
15. Layers>Merge>Merge visible.
16. Effects>Plugins>Flaming Pear - Flood - foreground color #99703e.
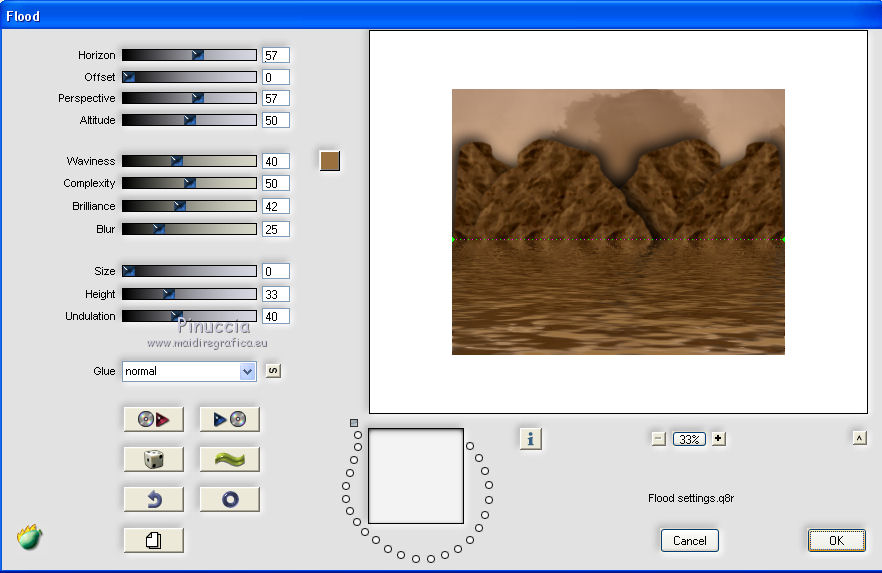
17. Layers>New Mask layer>From image
Open the menu under the source window and you'll see all the files open.
Select the mask mask-fadesuave.
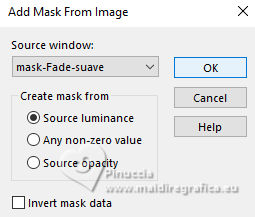
Layers>Duplicate, to apply the mask 2 times.
Layers>Merge>Merge group.
18. Layers>New Raster Layer.
Layers>Arrange>Send to Bottom.
Flood Fill  the layer with your gradient. the layer with your gradient.
19. Activate your top layer.
Activate your Smudge Tool 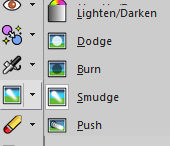 with these settings with these settings

Brush along the shore that divides the water and the mountains to soften it
20. Open the tube Girl 23393 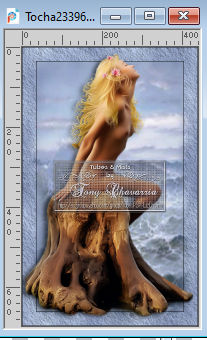
Edit>Copy.
Go back to your work and go to Edit>Paste as new layer.
Move  the tube to the left side. the tube to the left side.
Effects>3D Effects>Drop Shadow, same settings.
21.Copy/Paste as new layer the other tubes
and place them  to your liking; for me to your liking; for me

Effects>3D Effects>Drop Shadow, at your choice.
22. Activate the mask's layer (the clouds).
Effects>Illumination Effects>Lights, foreground color .
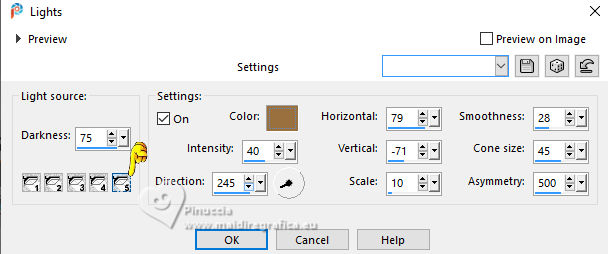
The tutorial only provides the settings for projector number 5.
Adjust the settings for the other projectors to your liking;
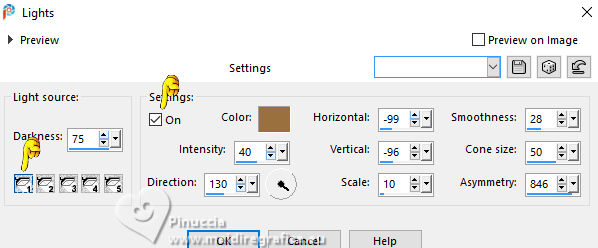
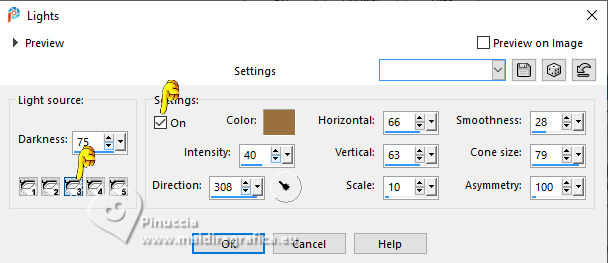
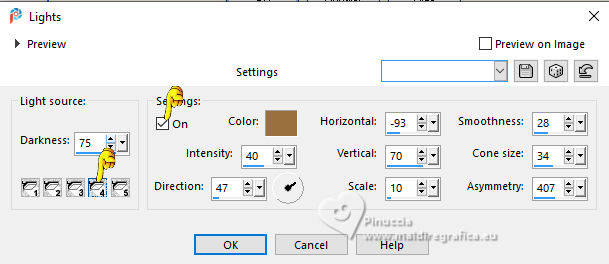
For me, I activated projectors 1, 3, and 4 with these settings:
Projector 1
projector 3
projector 4
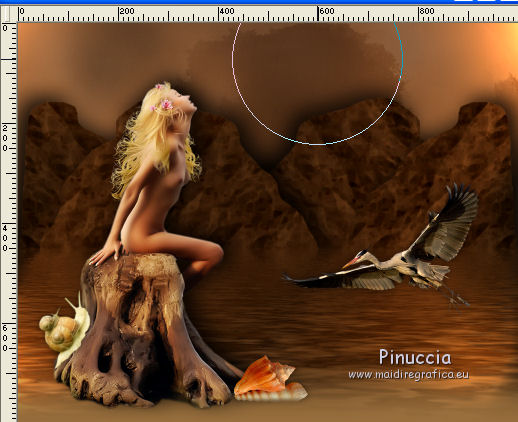
23. Activate your Lighten/Darken Brush  with these settings. with these settings.

and give a few strokes in the areas where you want to highlight the color more,
whether in the clouds or the mountains.
24. Sign your work on a new layer.
Layers>Merge>Merge All and save as jpg.
 Vos versioni here Vos versioni here

If you have problems or doubts, or you find a not worked link,
or only for tell me that you enjoyed this tutorial, write to me.
19 June 2025

|

