|
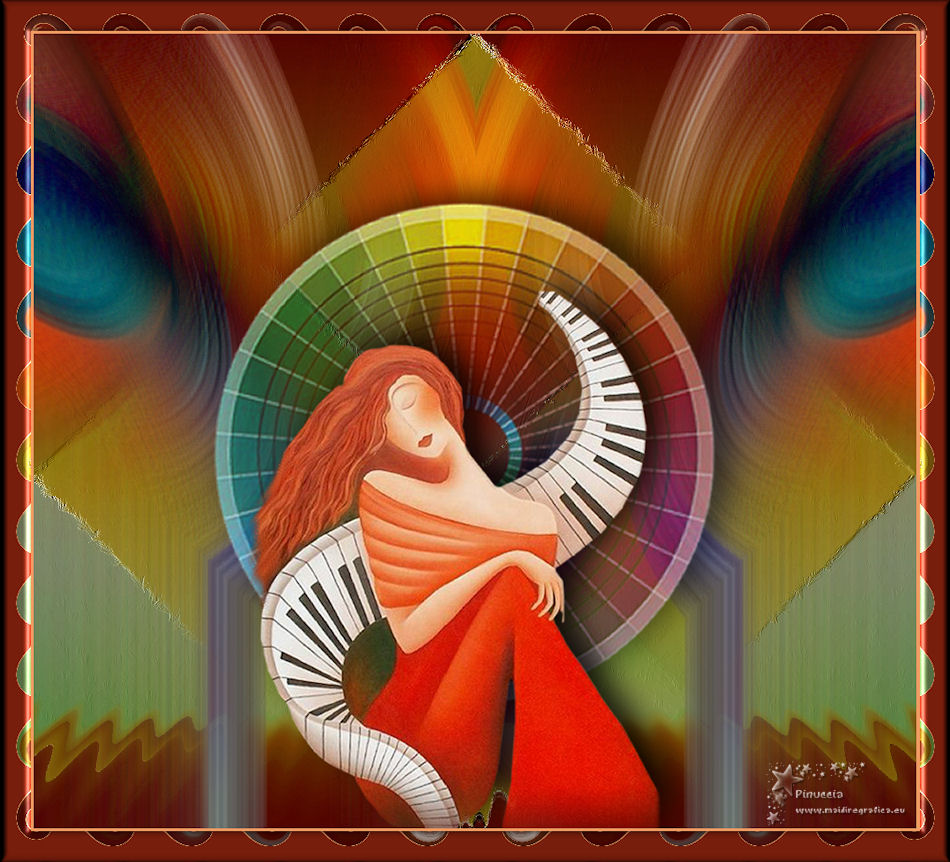
TOP ISABELA


Thanks Luz Cristina for your invitation to translate your tutorials into english

This tutorial, created with PSP9, was translated with PspX9, but it can also be made using other versions of PSP.
Since version PSP X4, Image>Mirror was replaced with Image>Flip Horizontal,
and Image>Flip with Image>Flip Vertical, there are some variables.
In versions X5 and X6, the functions have been improved by making available the Objects menu.
In the latest version X7 command Image>Mirror and Image>Flip returned, but with new differences.
See my schedule here
 French Translation here French Translation here
 Your versions here Your versions here

For this tutorial, you will need:

For the tubes thanks Luz Cristina and Cady.
(The links of the tubemakers here).

consult, if necessary, my filter section here
Mehdi - Sorting Tiles here
AP Gradient - Gradient Combo3 - here
FM Tile Tools - Saturation Emboss here
Mura's Meister - Perspective Tiling here

You can change Blend Modes according to your colors.
In the newest versions of PSP, you don't find the foreground/background gradient (Corel_06_029).
You can use the gradients of the older versions.
The Gradient of CorelX here

Copy the preset Emboss 3 in the Presets Folder.
Open the mask in PSP and minimize it with the rest of the material.
1. Open a new transparent image 1000 x 900 pixels.
2. Set your foreground color to #f09c63,
and your background color to #8e2410.
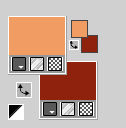
Set your foreground color to a Foreground/Background Gradient, style Linear.
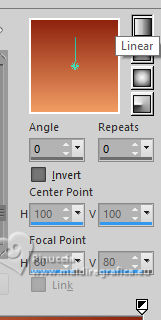
Flood Fill  the transparent image with your Gradient. the transparent image with your Gradient.
3. Effects>Plugins>AP [Gradient] - Gradient - GradientCombo3
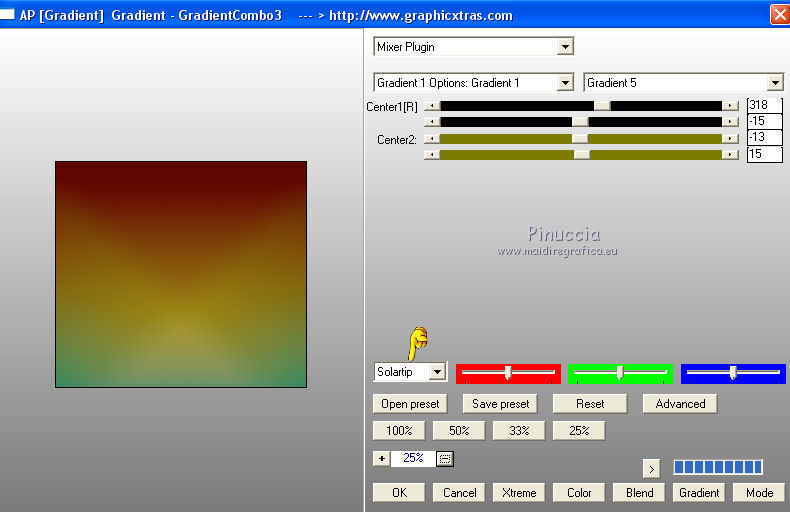
If you have trouble finding the effect, add the entire filter folder to your File Locations.
4. Effects>Plugins>Mehdi - Sorting Tiles.
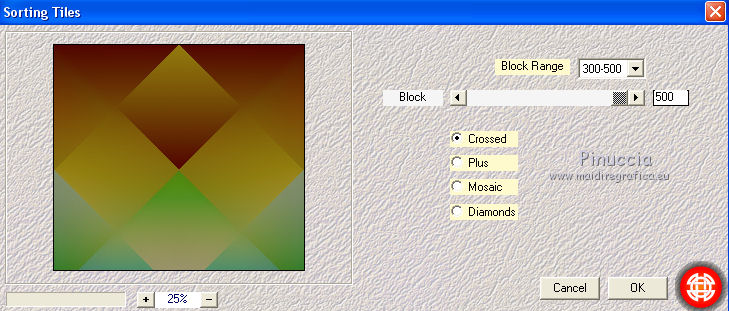
5. Effects>Art Media Effects>Brush Strokes.

6. Layers>Duplicate.
Image>Mirror>Mirror vertical (Image>Flip).
7. Effects>Plugins>Mura's Meister - Perspective Tiling.
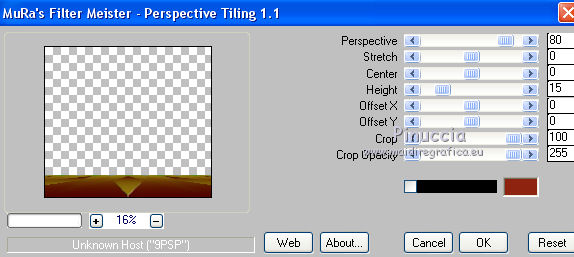
8. Close the layer Raster 1.
Activate your Magic Wand Tool  , feather 30, , feather 30,

and click in the transparent part to select it.
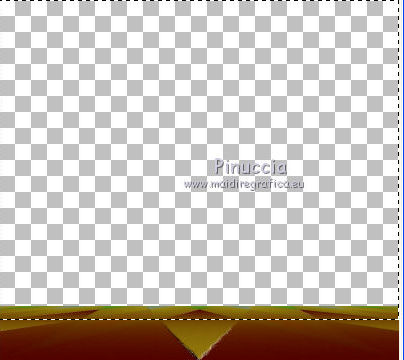
Press a few times CANC on the keyboard 
Selections>Select None.
Open again the layer Raster 1 and stay on the layer of the copy.
9. Open the tube pisabtubeluzcristina 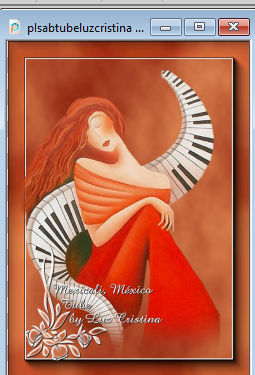
Edit>Copy.
Go back to your work and go to Edit>Paste as new layer.
10. Layers>Duplicate.
Layers>Arrange>Move Down.
11. Adjust>Blur>Radial Blur.
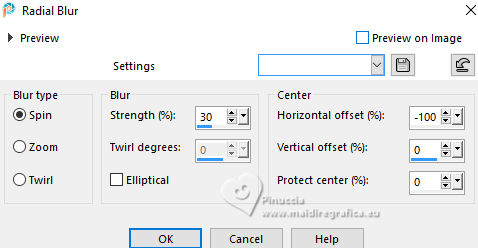
12. Effects>Image Effects>Seamless Tiling.

13. Effects>Reflection Effects>Rotating Mirror.

14. Effects>User Defined Filter - select the preset Emboss 3 and ok.

15. Layers>New Mask layer>From image
Open the menu under the source window and you'll see all the files open.
Select the mask Marge-topfade.
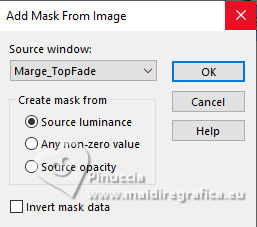
Layers>Merge>Merge Group.
16. Effects>Distortion Effects>Pinch.

17. Effects>Image Effects>Offset.
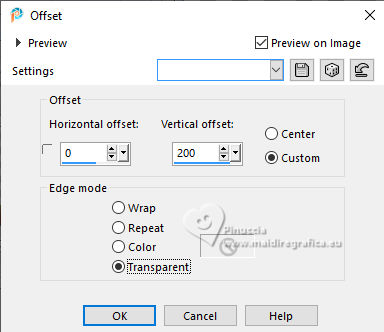
18. Change the Blend Mode of this layer to Hard Light (or to your liking).
19. Layers>Duplicate.
20. Effects>Geometric Effects>Skew.
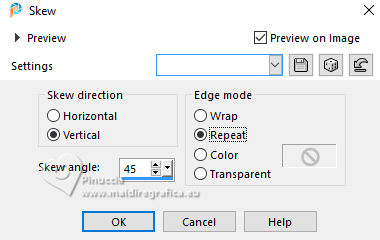
21. Effects>Reflection Effects>Rotating Mirror.

22. Image>Mirror>Mirror Vertical (Image>Flip).
23. Change the Blend Mode of this layer to Difference (or to your liking).
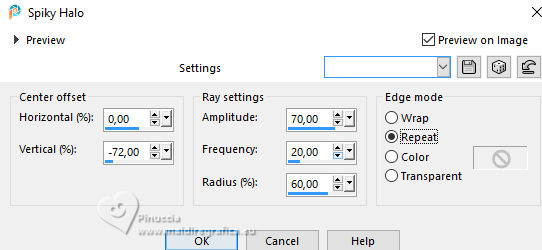
24. Activate the ground's layer, Copy of Raster 1.
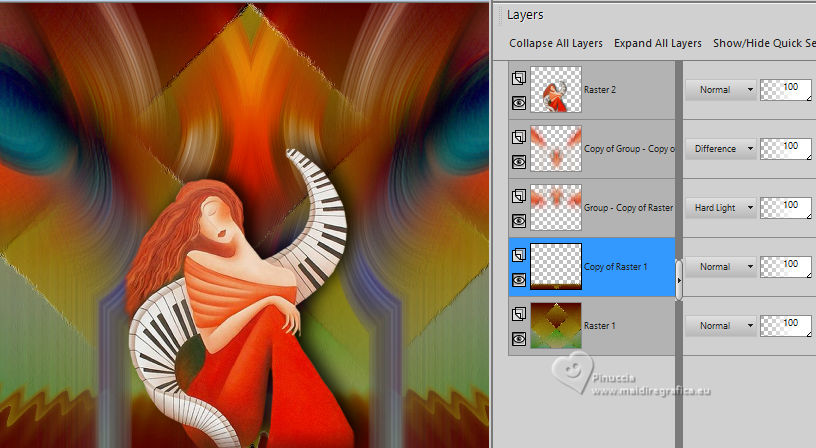
Effects>Distortion Effects>Spiky Halo.
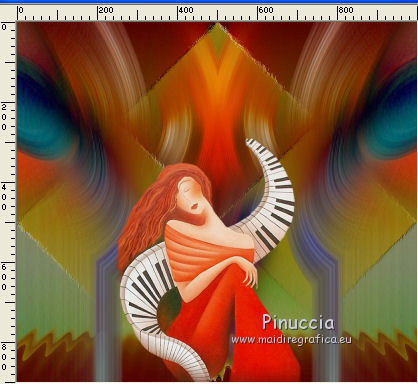
25. Activate your top layer of the original tube.
Move  the tube down. the tube down.
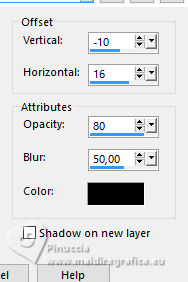
26. Effects>3D Effects>Drop Shadow.
27. Open the tube NMuF6qR4 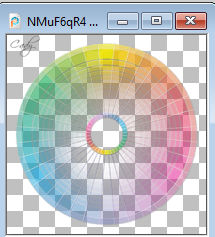
Edit>Copy.
Go back to your work and go to Edit>Paste as new layer.
Layers>Arrange>Move Down.
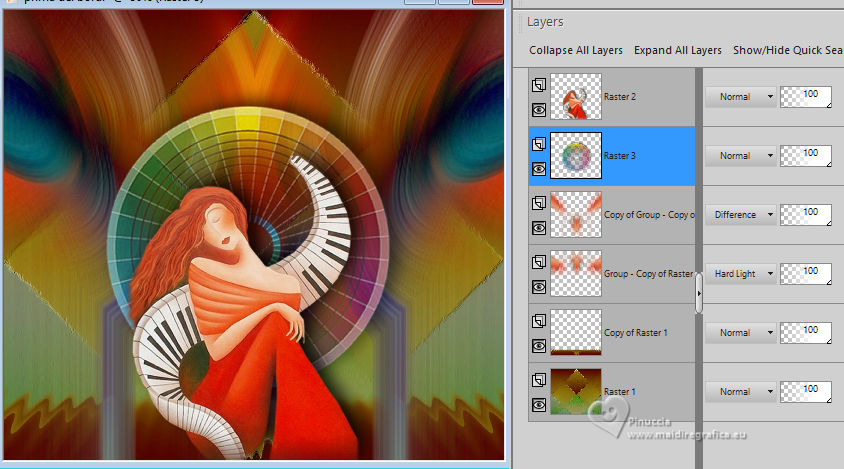
Place  correctly the tube in the center. correctly the tube in the center.
Effects>3D Effects>Drop shadow, same settings.
28. Image>Add Borders, 3 pixels, symmetric, light color.
Image>Add Borders, 35 pixels, symmetric, dark color.
29. Activate your Magic Wand Tool  , feather 0, , feather 0,
and click in the dark border to select it.
30. Effects>Distortion Effects>Curlicues.
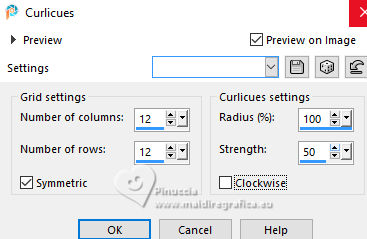
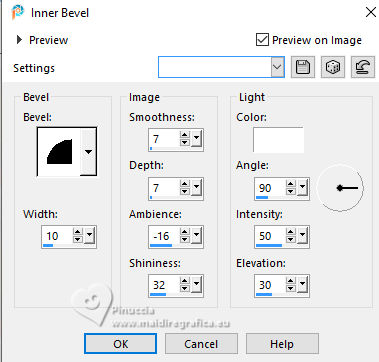
31. Effects>3D Effects>Inner Bevel.
32. Effects>Reflection Effects>Rotating Mirror.

Selections>Select None
33. Image>Resize, to 86%, resize all layers checked.
34. Sign your work and save as jpg.
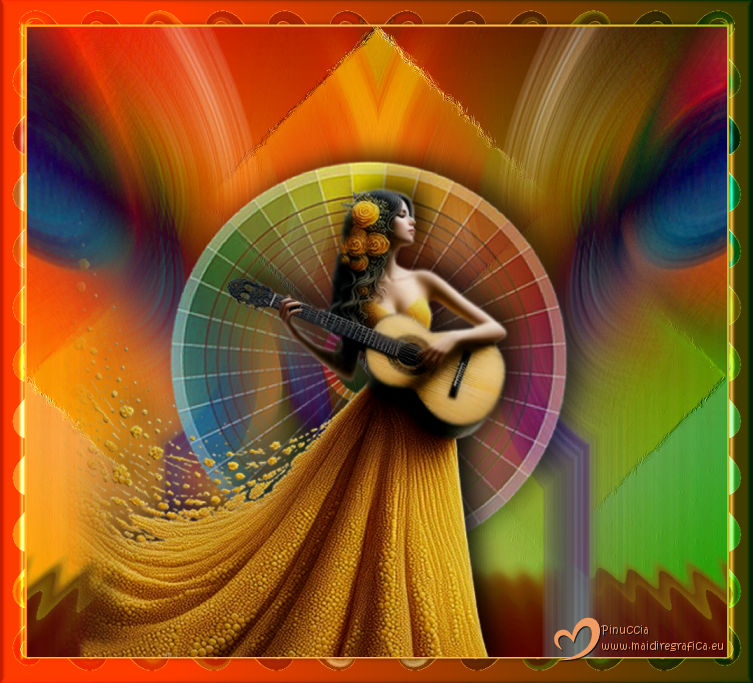
For the tube of this version thanks Luz Cristina

If you have problems or doubts, or you find a not worked link,
or only for tell me that you enjoyed this tutorial, write to me.
19 June 2025
|

