|
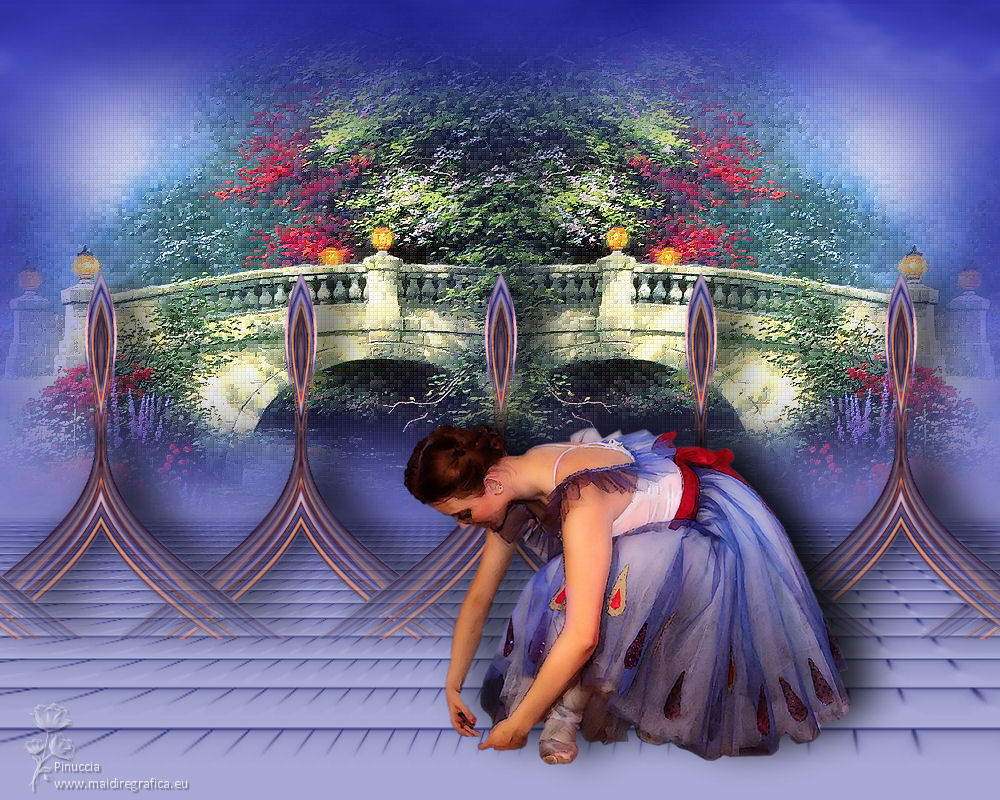
TOP JANEIZA


Thanks Luz Cristina for your invitation to translate your tutorials into english

This tutorial, created with PSP9, was translated with PspX9, but it can also be made using other versions of PSP.
Since version PSP X4, Image>Mirror was replaced with Image>Flip Horizontal,
and Image>Flip with Image>Flip Vertical, there are some variables.
In versions X5 and X6, the functions have been improved by making available the Objects menu.
In the latest version X7 command Image>Mirror and Image>Flip returned, but with new differences.
See my schedule here
 French Translation here French Translation here
 Your versions here Your versions here

For this tutorial, you will need:

For the tube thanks AnaRidzi
(The links of the tubemakers here).

consult, if necessary, my filter section here
Filters Unlimited 2.0 here
Mura's Meister - Perspective Tiling here
Mura's Meister - Copies here
FM Tile Tools - Saturation Emboss here
Xero - Fritillary here

You can change Blend Modes according to your colors.
In the newest versions of PSP, you don't find the foreground/background gradient (Corel_06_029).
You can use the gradients of the older versions.
The Gradient of CorelX here

Open the mask in PSP and minimize it with the rest of the material.
1. Open a new transparent image 1000 x 600 pixels.
2. Set your foreground color to #a8a9d4,
and your background color to #393c80.
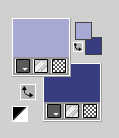
Set your foreground color to a Foreground/Background Gradient Lineair.
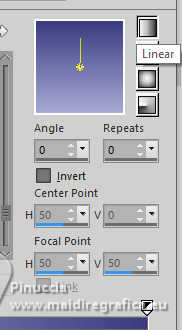
Flood Fill  the transparent image with your gradient. the transparent image with your gradient.
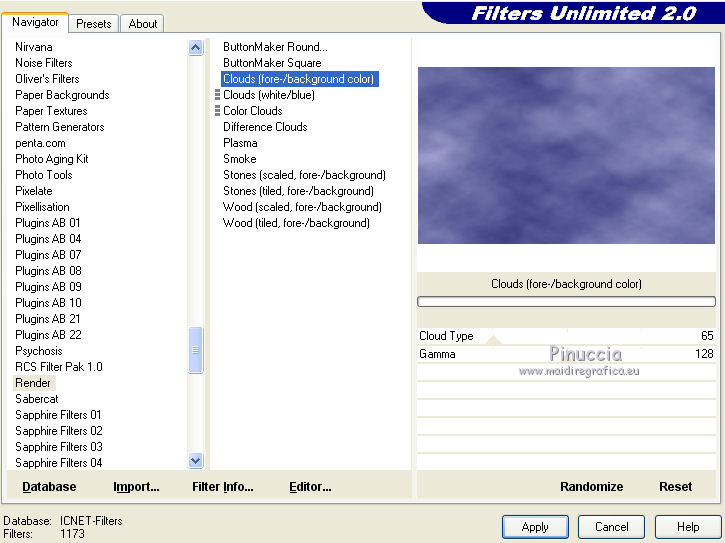
3. Effects>Plugins>Filters Unlimited 2.0 - Render - Cloud fore/background color, default settings.
4. Layers>New Mask layer>From image
Open the menu under the source window and you'll see all the files open.
Select the mask marge-topfade.
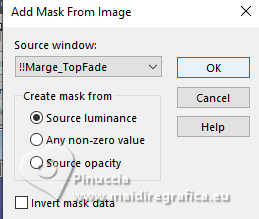
Layers>Merge>Merge Group.
Change the Blend Mode of this layer to Hard Light (optional).
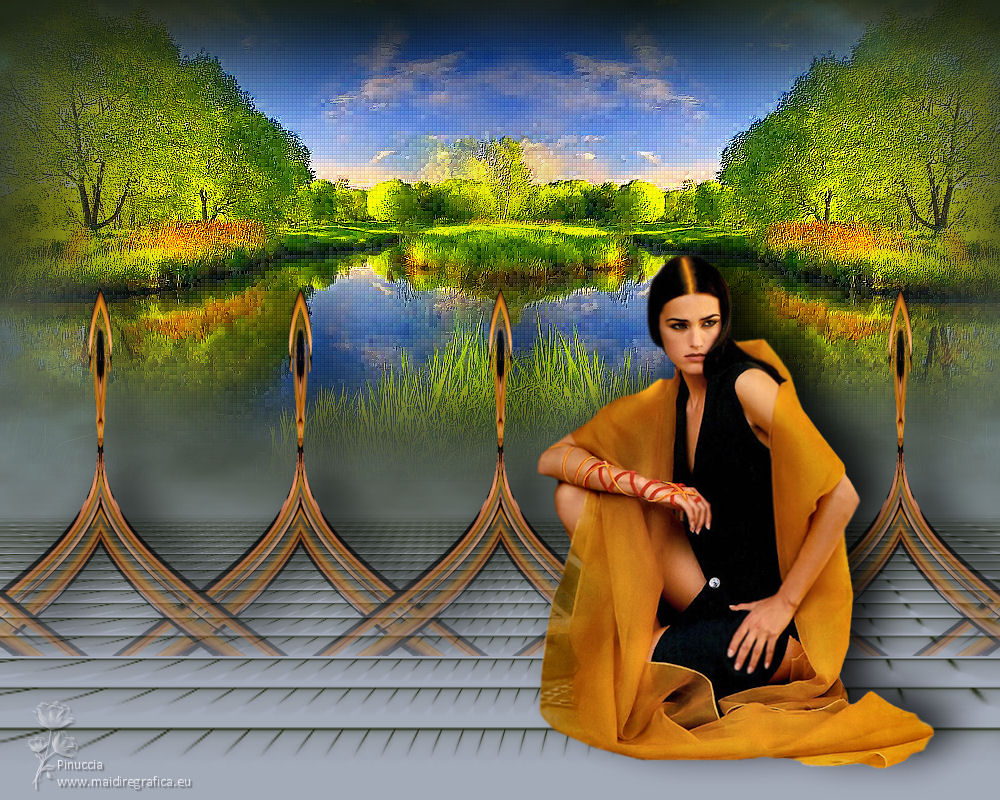
5. Open the landscape misted kunst039 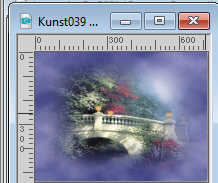
Edit>Copy.
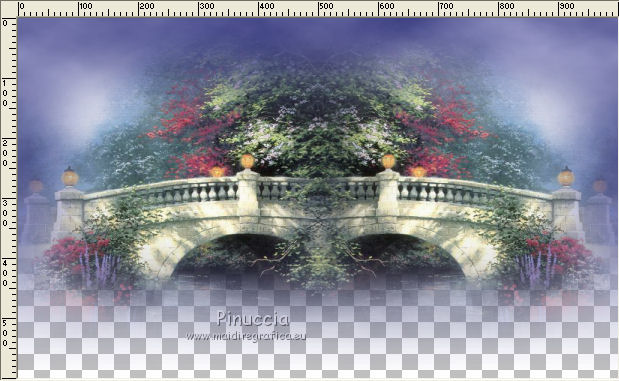
Go back to your work and go to Edit>Paste as new layer.
Layers>Duplicate.
Image>Mirror>Mirror Horizontal.
Place  correctly the two tubes. correctly the two tubes.
6. Activate the upper layer.
Layers>Merge>Merge Down.
7. Effects>Plugins>FM Tile Tools - Saturation Emboss, default settings.

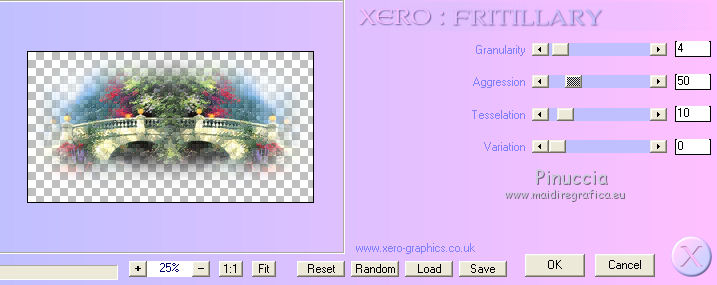
8. Effects>Plugins>Xero - Fritillary.
9. Adjust>Sharpness>Sharpen.
10. Image>Canvas Size - 1000 x 800 pixels.
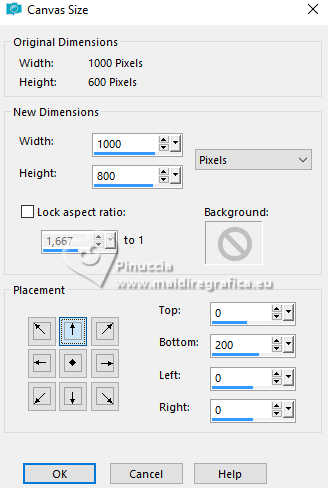
11. Layers>New Raster Layer.
Layers>Arrange>Send to Bottom.
Flood Fill  the layer with your gradient. the layer with your gradient.
12. Effects>Texture Effects>Mosaic de verre
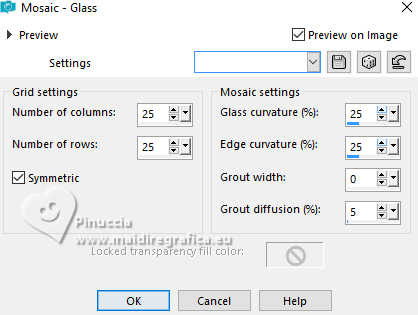
13. Effects>Plugins>Mura's Meister - Perspective Tiling.
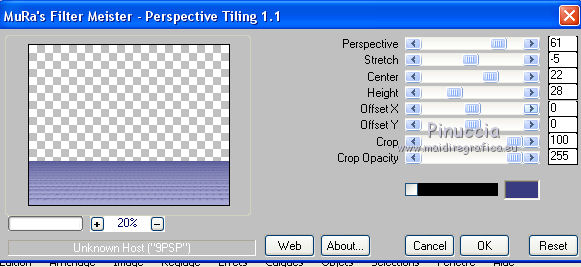
14. Effects>Distortion Effects>Pinch.

15. Activate your Magic Wand Tool  with these settings with these settings

click in the transparent part to select it.
Press 4-5 times CANC on the keyboard 
Selections>Select None.
don't forget to set again tolerance and feather to 0
16. Layers>New Raster Layer.
Layers>Arrange>Send to Bottom.
Flood Fill  the layer with your gradient. the layer with your gradient.
17. Activate your top layer, Raster 1.
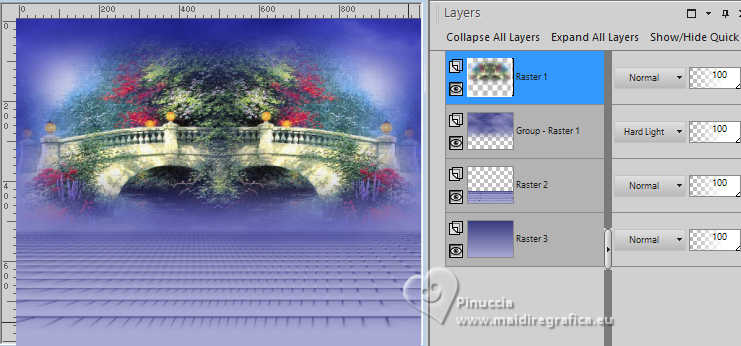
Layers>New Raster Layer.
Selections>Select All.
Open the tube ar559 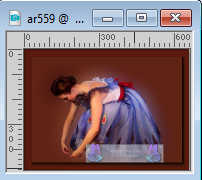
Edit>Copy.
Go back to your work and go to Edit>Paste into Selection.
Selections>Select None.
18. Effects>Image Effects>Seamless Tiling, default settings.

19. Effects>Geometric Effects>Perspective Vertical.
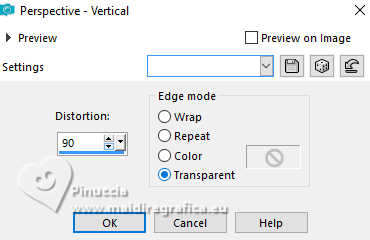
Image>Mirror>Mirror Vertical (Image>Flip).
Repeat Effects>Geometric Effects>Perspective Vertical, same settings.
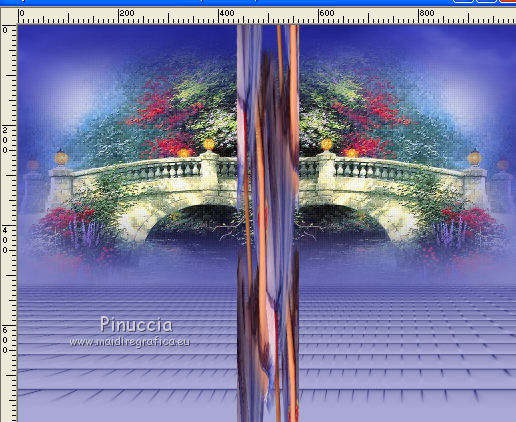
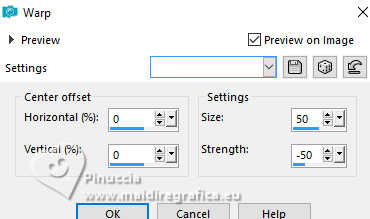
20. Effects>Distortion Effects>Warp.
21. Effects>Distortion Effects>Wave.
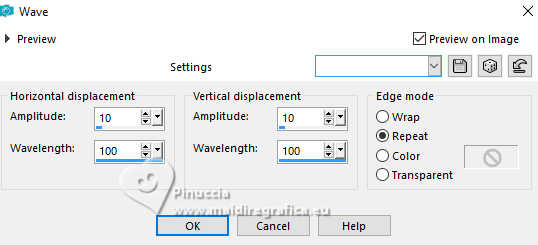
22. Image>Resize, to 85%, resize all layers not checked.
23. Effects>Distortion Effects>Skew.
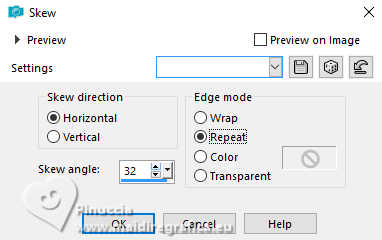
24. Effects>Reflection Effects>Rotating Mirror.

25. Image>Resize, to 70%, resize all layers not checked.
26. Effects>Plugins>Mura's Meister - Copies.
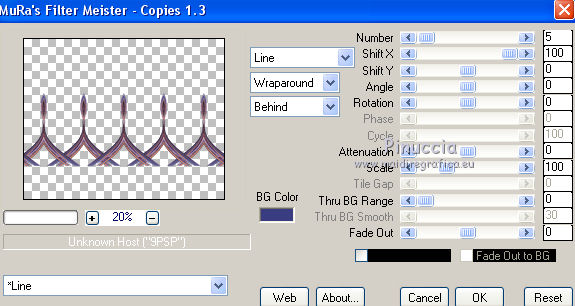
27. Layers>New Mask layer>From image
Open the menu under the source window
and select again the mask marge-topfade.

Layers>Merge>Merge Group.
28. Effects>3D Effects>Drop Shadow.

29. Edit>Paste as new layer - the woman's tube is still in memory.
Effects>3D Effects>Drop Shadow, same settings.
30. Sign your work on a new layer.
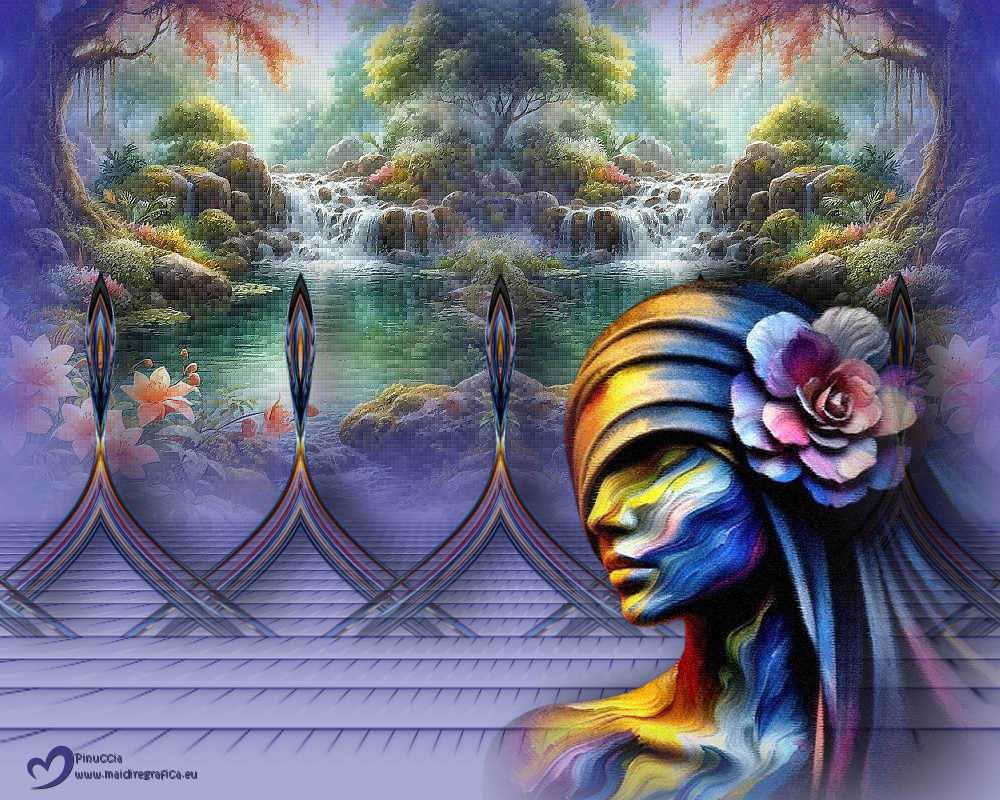
Layers>Merge>Merge All and save as jpg.
Versions avec tubes de Luz Cristina

If you have problems or doubts, or you find a not worked link,
or only for tell me that you enjoyed this tutorial, write to me.
19 June 2025

|

