|
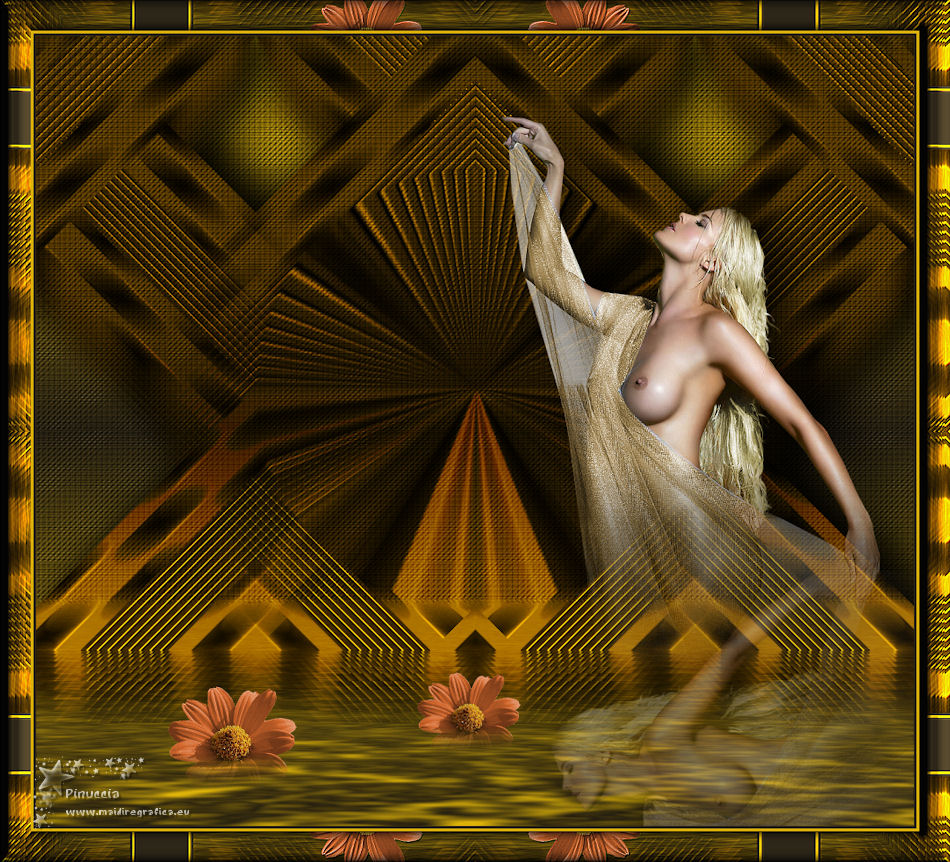
TOP MALVINÉ


Thanks Luz Cristina for your invitation to translate your tutorials into english

This tutorial was translated with PSP 2022, but it can also be made using other versions of PSP.
Since version PSP X4, Image>Mirror was replaced with Image>Flip Horizontal,
and Image>Flip with Image>Flip Vertical, there are some variables.
In versions X5 and X6, the functions have been improved by making available the Objects menu.
In the latest version X7 command Image>Mirror and Image>Flip returned, but with new differences.
See my schedule here
 French Translation here French Translation here
 Your versions here Your versions here

For this tutorial, you will need:

(The links of the tubemakers here).
*It is forbidden to remove the watermark from the supplied tubes, distribute or modify them,
in order to respect the work of the authors

consult, if necessary, my filter section here
Filters Unlimited 2.0 here
Mura's Seamless - Polkadot here
FM Tile Tools - Blend Emboss here
Flaming Pear - Flood here
Mura's Meister - Copies here
Filters Mura's Seamless can be used alone or imported into Filters Unlimited.
(How do, you see here)
If a plugin supplied appears with this icon  it must necessarily be imported into Unlimited it must necessarily be imported into Unlimited

You can change Blend Modes according to your colors.
In the newest versions of PSP, you don't find the foreground/background gradient (Corel_06_029).
You can use the gradients of the older versions.
The Gradient of CorelX here

Copy the preset Emboss 3 in the Presets Folder.
Copy the texture in the Textures Folder.
1. Open a new transparent image 1000 x 900 pixels.
2. Set your foreground color to #ddb20a,
and your background color to #2d2617.
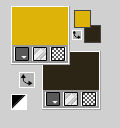
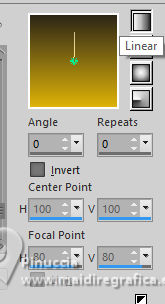
Set your foreground color to a Foreground/Background Gradient, style Linear.
3. Activate your Selection Tool 
(no matter the type of selection, because with the custom selection your always get a rectangle)
clic on the Custom Selection 
and set the following settings.
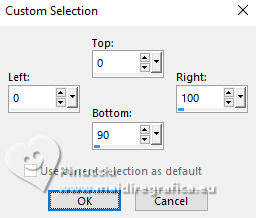
Flood Fill  the transparent image with your Gradient. the transparent image with your Gradient.
4. Effects>Plugins>Mura's Seamless - Polkadot.
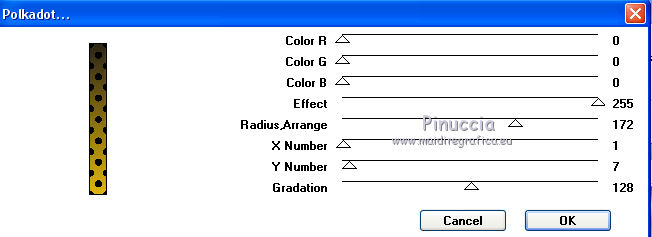
5. Adjust>Blur>Motion Blur
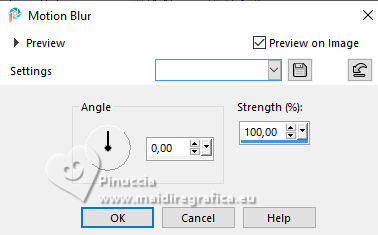
6. Effects>User Defined Filter - select the preset Emboss 3 and ok.

Selections>Select None.
7. Edit>Copy.
8. Custom Selection 
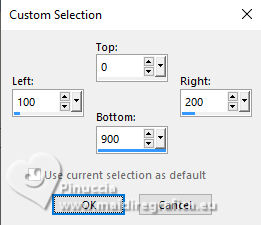
Flood Fill  the selection with your Gradient. the selection with your Gradient.
9. Effects>Texture Effects>Weave
weave color: light foreground color
gap color: dark background color
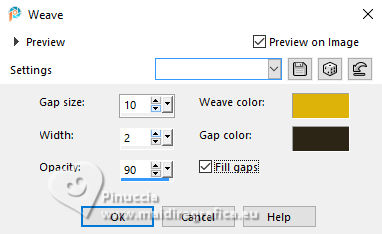
10. Adjust>Blur>Motion Blur, same settings

11. Effects>User Defined Filter - select the preset Emboss 3 and ok.

Selections>Select None.
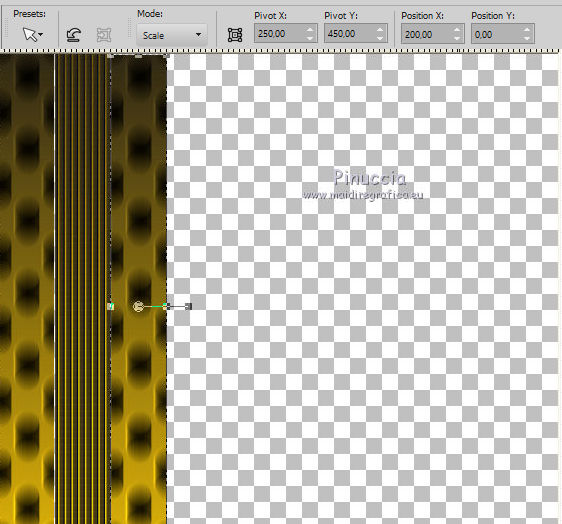
12. Edit>Paste as new layer (the image copied at step 7)

Place  the image as below. the image as below.
13. Layers>Merge>Merge visible.
14. Custom Selection 
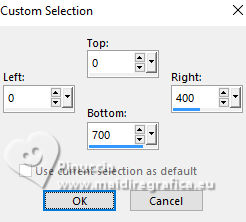
Selections>Invert.
Press CANC on the keyboard 
Selections>Select None.
15. Effects>Reflection Effects>Rotating Mirror.

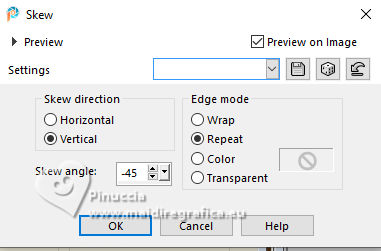
16. Effects>Geometric Effects>Skew.
Result
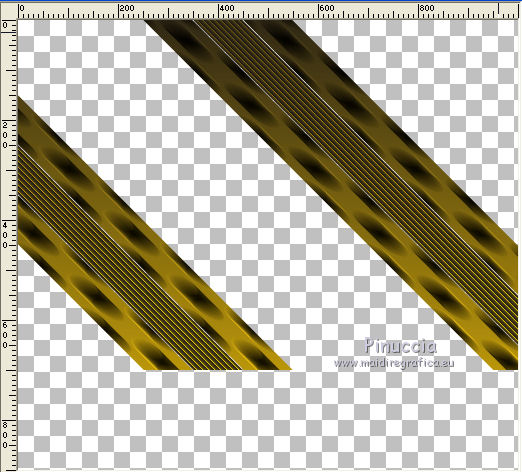
17. If you see gray areas
(this depends on the position of the lines,
but if - in step 12 - you positioned the third bar as in my example,
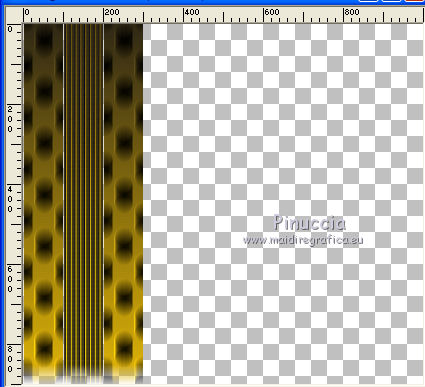
you shouldn't have this problem),
activate the Magic Wand tool 
and click on the gray areas to select them.
Press CANC on the keyboard.
Selections>Select None.
18. Effects>Image Effects>Seamless Tiling

19. Layers>Duplicate.
Image>Mirror>Mirror Horizontal.
Layers>Merge>Merge visible.
20. Effects>Reflection Effects>Rotating Mirror, same settings.

21. Activate your Warp Brush Tool 
with these settings

Position the mouse at 500 x 400 pixels.
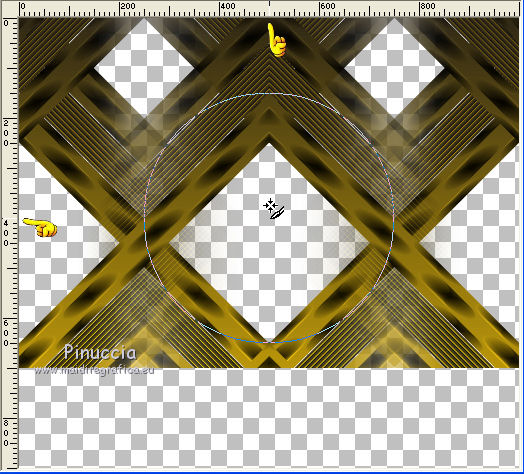
Hold down the left mouse button until you see this.
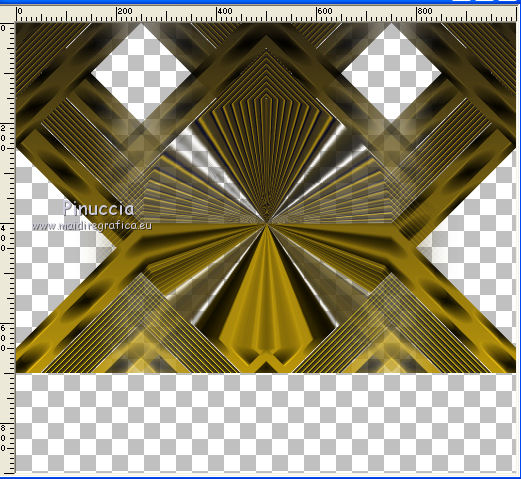 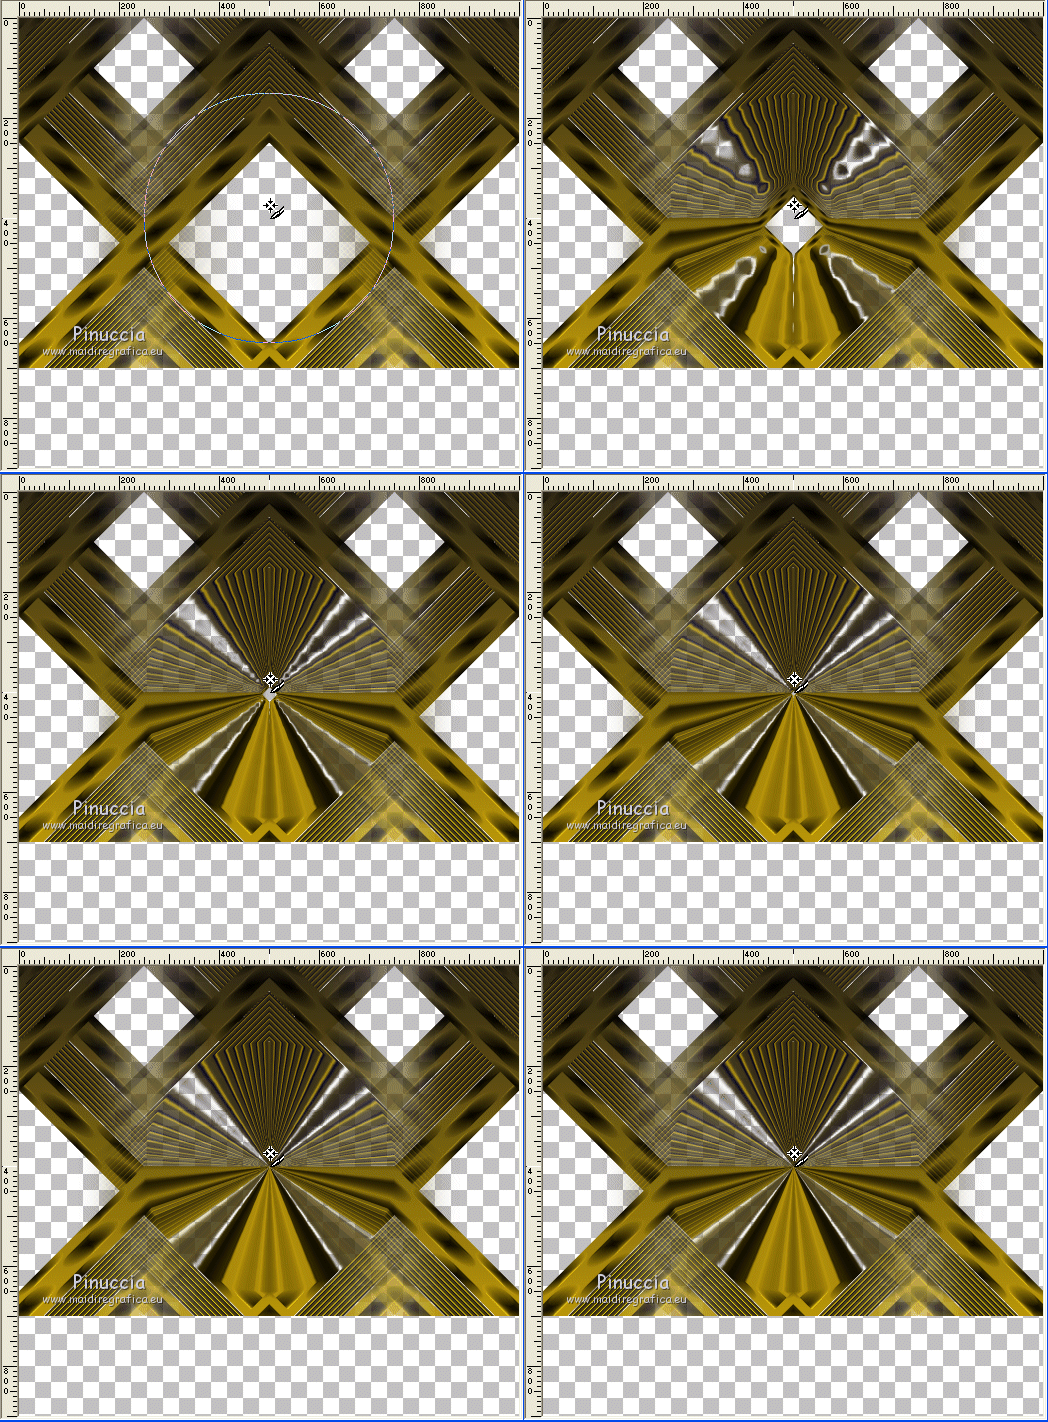
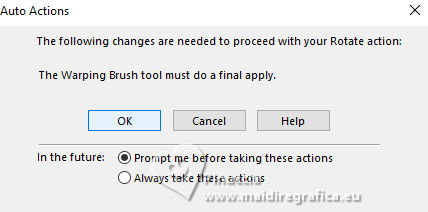
Before the next step, this message may appear.
Click OK and continue.
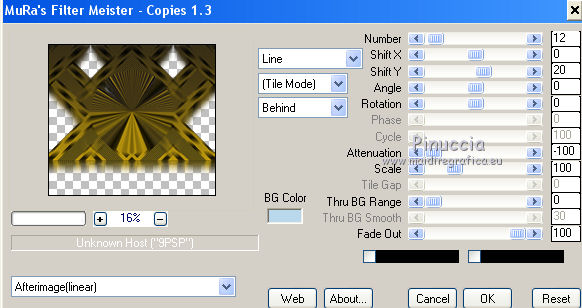
22. Effects>Plugins>Mura's Meister - Copies.
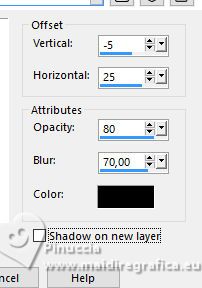
23. Effects>3D Effects>Drop Shadow.
24. Layers>New Raster Layer.
Layers>Arrange>Send to Bottom.
Flood Fill  the layer with your Gradient. the layer with your Gradient.
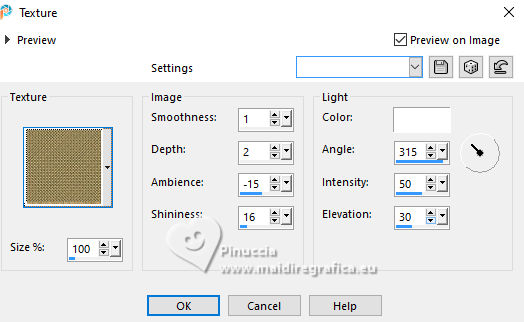
25. Effects>Texture Effects>Texture - select the texture TopMagoldfill.
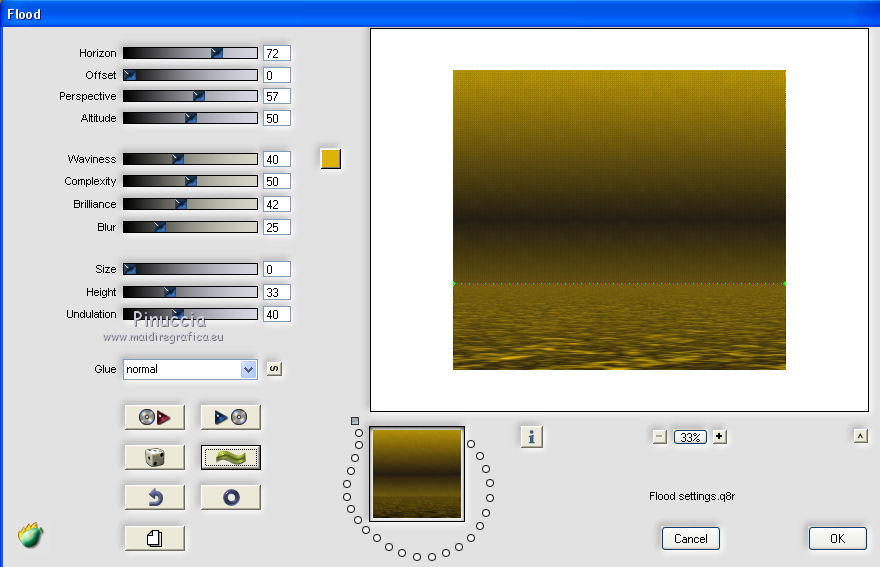
26. Effects>Plugins>Flaming Pear - Flood - foreground color #ddb20a.
27. Activate your top layer.
Open the flowers tube OrangeDaisy7-06-LM 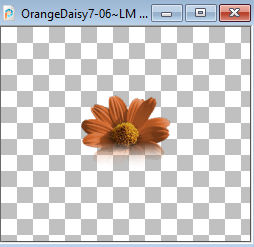
Edit>Copy.
Go back to your work and go to Edit>Paste as new layer.
Place  the tube to your liking. the tube to your liking.
28. Open the woman's tube MMDesignz_067199 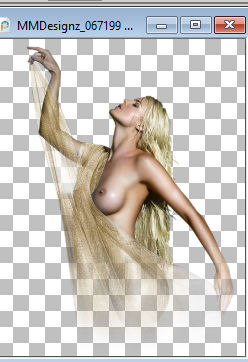
Edit>Copy.
Go back to your work and go to Edit>Paste as new layer.
Move  the tube to the right side. the tube to the right side.
Effects>3D Effects>Drop Shadow, same settings.
29. Layers>Duplicate.
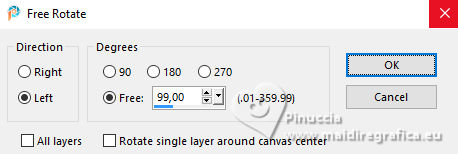
Image>Free Rotate - 99 degrees to left
30. Layers>Arrange>Move Down.
31. Image>Resize, to 90%, resize all layers not checked.
Place  the tube again the original. the tube again the original.
Reduce the opacity of this layer to 30%.
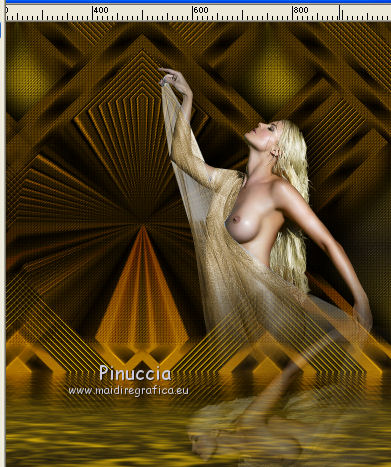
32. Change the Blend Mode of the layer Merged to Hard Light (optional).
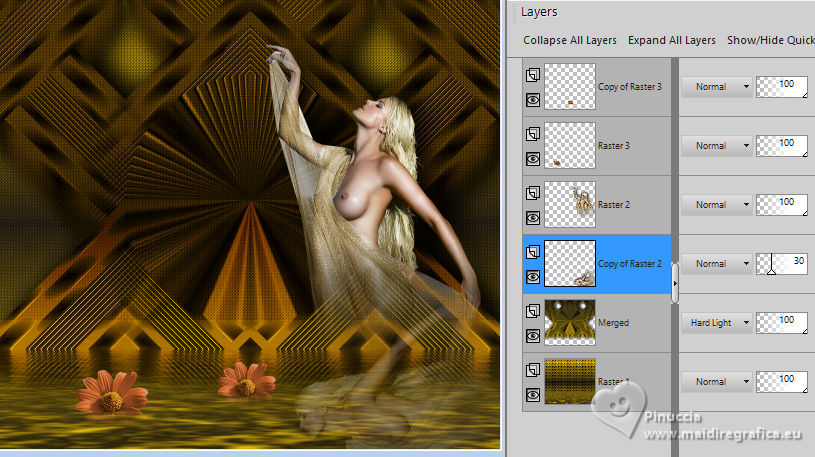
33. Image>Add Borders, 3 pixels, symmetric, dark color.
Image>Add Borders, 3 pixels, symmetric, light color.
Image>Add Borders, 35 pixels, symmetric, dark color.
34. Activate your Magic Wand Tool 
and click in the last border to select it.
35. Effects>Reflection Effects>Kaleidoscope.
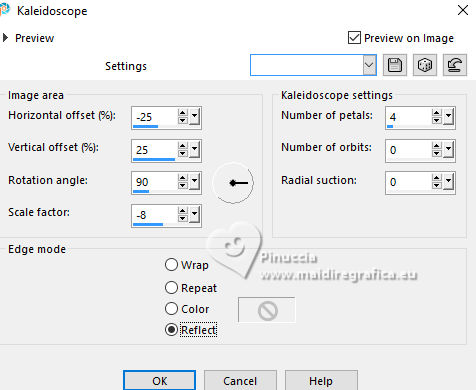
36. Effects>3D Effects>Inner Bevel.
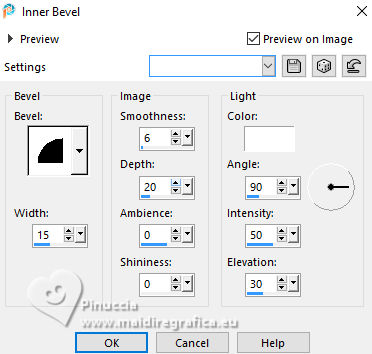
37. Effects>Plugins>FM Tile Tools - Blend Emboss, default settings.

Selections>Select None.
38. Image>Resize, to 86%, or to your liking, resize all layers checked.
39. Sign your work and save as jpg.
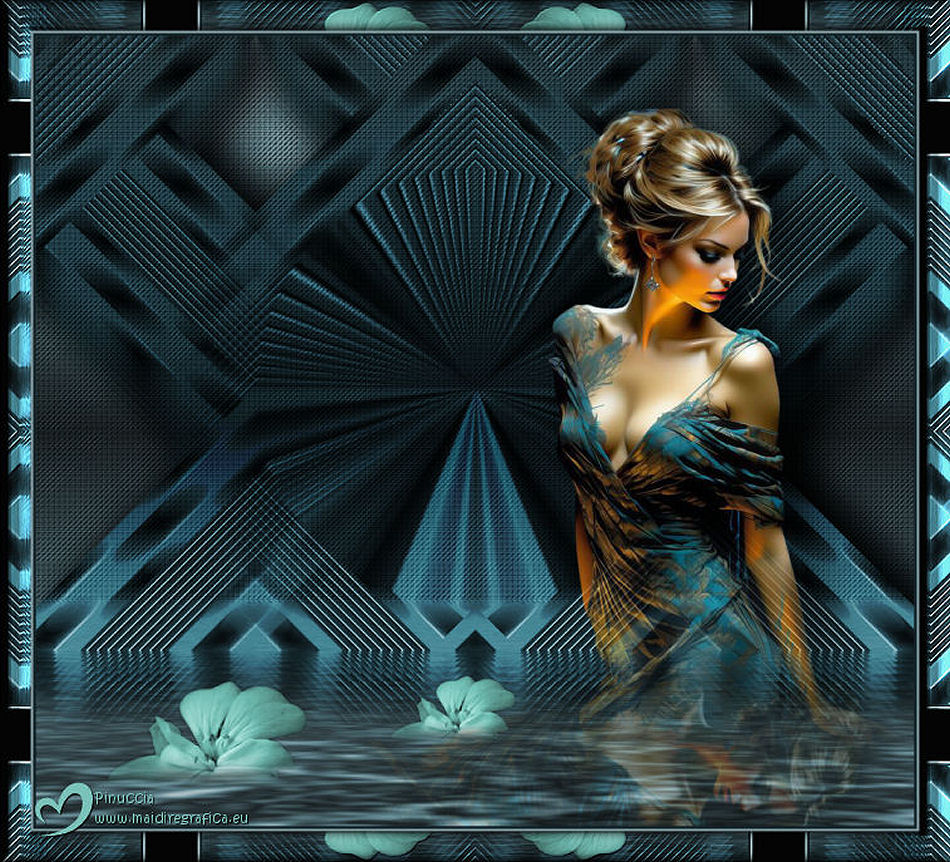
Version with my tube from an image by Pinterest


If you have problems or doubts, or you find a not worked link,
or only for tell me that you enjoyed this tutorial, write to me.
20 juillet 2025
|

