|
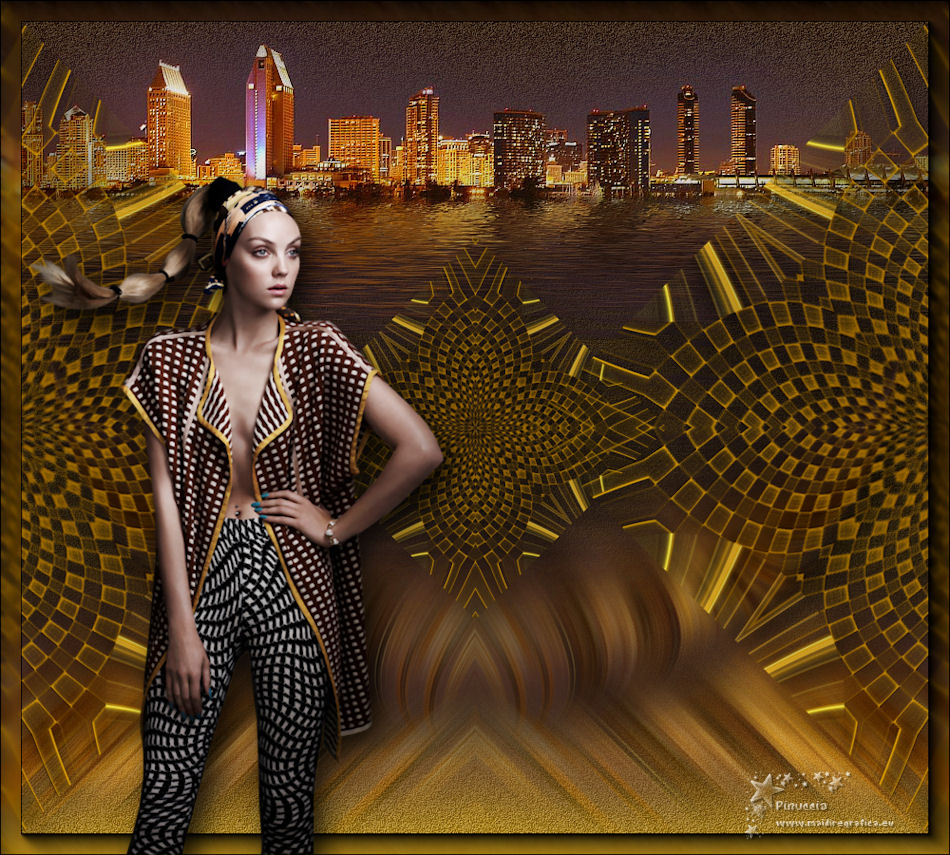
TOP MARTHA


Thanks Luz Cristina for your invitation to translate your tutorials into english

This tutorial, created with PSP9, was translated with PspX9, but it can also be made using other versions of PSP.
Since version PSP X4, Image>Mirror was replaced with Image>Flip Horizontal,
and Image>Flip with Image>Flip Vertical, there are some variables.
In versions X5 and X6, the functions have been improved by making available the Objects menu.
In the latest version X7 command Image>Mirror and Image>Flip returned, but with new differences.
See my schedule here
 French Translation here French Translation here
 Your versions here Your versions here

For this tutorial, you will need:

For the tubes thanks Syl and Guismo and for a mask Linda.
(The links of the tubemakers here).

consult, if necessary, my filter section here
Filters Unlimited 2.0 here
Simple - Top Left Mirror here
Simple - Top Bottom Wrap (bonus) here
FM Tile Tools - Saturation Emboss here
Flaming Pear - Flexify 2 here
Flaming Pear - Flood here
AAA Frames - Foto Frame here
Filters Simple can be used alone or imported into Filters Unlimited.
(How do, you see here)
If a plugin supplied appears with this icon  it must necessarily be imported into Unlimited it must necessarily be imported into Unlimited

You can change Blend Modes according to your colors.
In the newest versions of PSP, you don't find the foreground/background gradient (Corel_06_029).
You can use the gradients of the older versions.
The Gradient of CorelX here

Open the masks in PSP and minimize them with the rest of the material.
1. Open a new transparent image 1000 x 900 pixels.
2. Set your foreground color to #988038,
and your background color to #2c1f10.
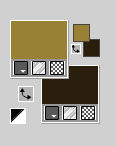
Set your foreground color to a Foreground/Background Gradient, style Linear.
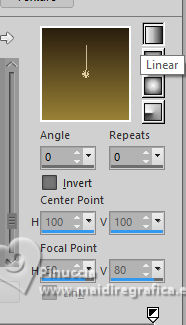
Flood Fill  the transparent image with your Gradient. the transparent image with your Gradient.
3. Layers>Duplicate.
4. Layers>New Mask layer>From image
Open the menu under the source window and you'll see all the files open.
Select the mask LF-233.
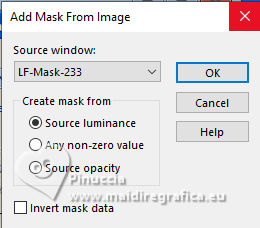
Layers>Merge>Merge Group.
don't worry if you see nothing
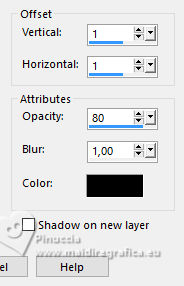
5. Effects>3D Effects>Drop Shadow, color black
And now here is the result of the mask
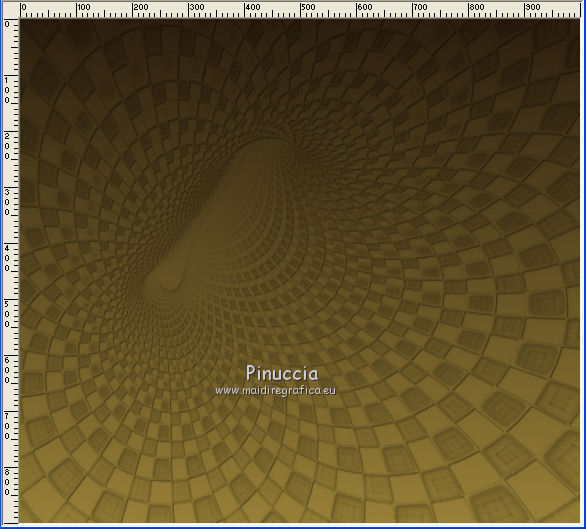
6. Effects>Plugins>FM Tile Tools - Saturation Emboss - 2 times (optional in your version)

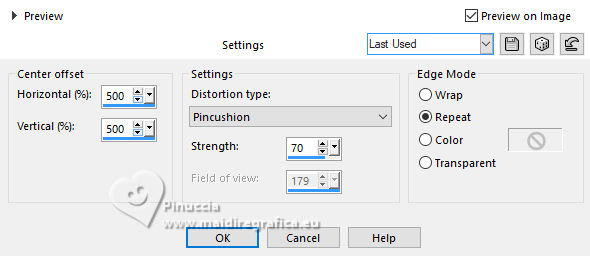
7. Effects>Distortion Effects>Lens Distortion.
8. Effects>Reflection Effects>Rotating Mirror.

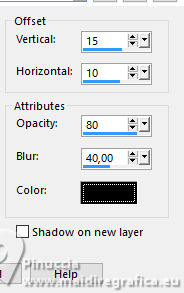
9. Effects>3D Effects>Drop Shadow, color black.
10. Image>Mirror>Mirror Vertical (Image>Flip)
11. Effects>Plugins>Simple - Top Left Mirror
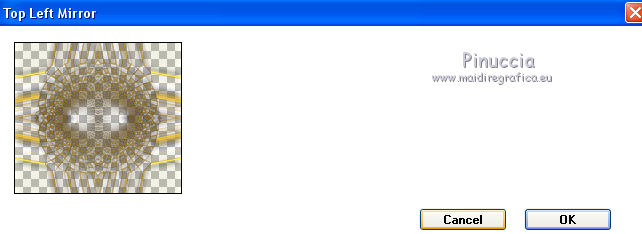
12. Effects>Plugins>Flaming Pear - Flexify 2.

13. Effects>Image Effects>Offset.
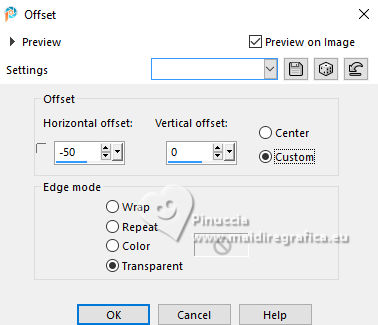
14. Effects>Reflection Effects>Rotating Mirror.

Image>Mirror>Mirror Vertical (Image>Flip).
15. Effects>Plugins>Simple - Top Left Mirror.
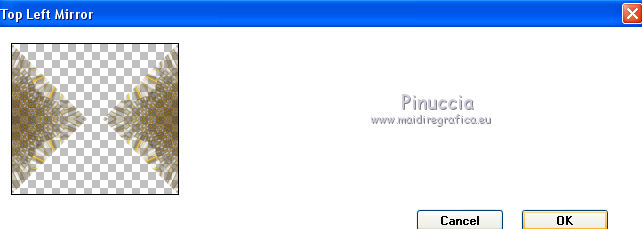
16. Layers>Duplicate.
17. Image>Free Rotate - 90 degrees to right.
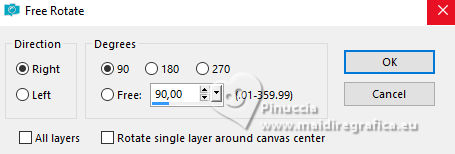
18. Effects>Plugins>Simple - Top Bottom Wrap.
19. Image>Resize, to 45%, resize all layers not checked.
20. Layers>Merge>Merge Down.
21. Effects>3D Effects>Drop Shadow, same settings.
22. Open the misted calguisSanDiegomisted29022012 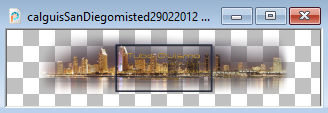
Edit>Copy.
Go back to your work and go to Edit>Paste as new layer.
23. Layers>Arrange>Move Down.
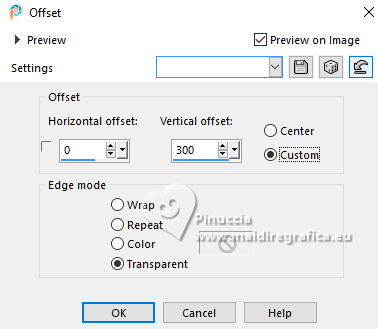
24. Effects>Image Effects>Offset.
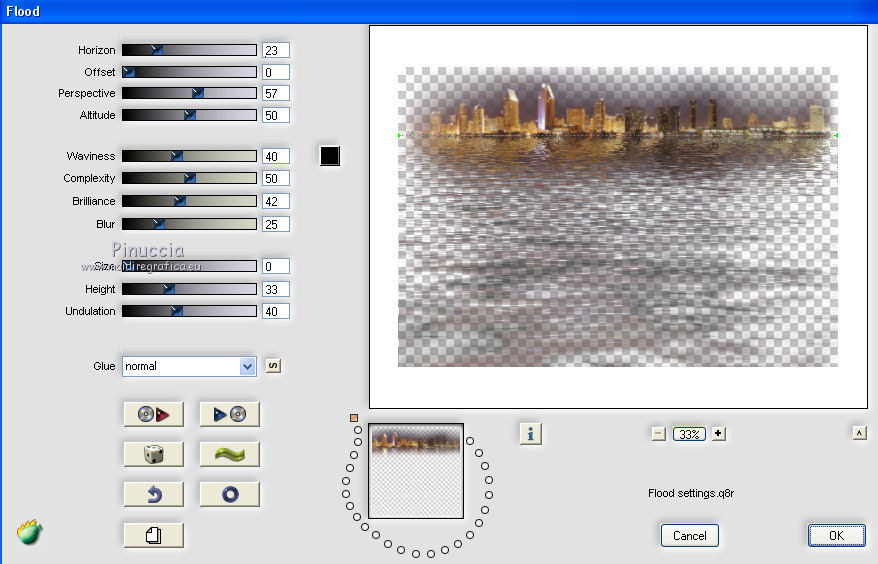
25. Effects>Plugins>Flaming Pear - Flood.
26. Layers>New Mask layer>From image
Open the menu under the source window
and select the mask Marge-topfade.
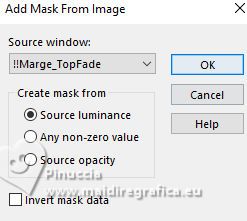
Layers>Duplicate, to apply the mask 2 times.
Layers>Merge>Merge Group.
27. Layers>Duplicate.
Image>Miroir>Miroir vertical (Image>Flip).
28. Adjust>Blur>Motion Blur - 3 times.
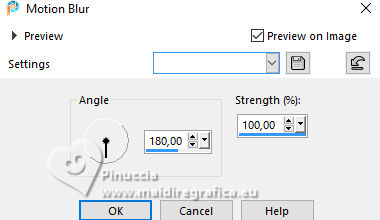
29. Layers>New Mask layer>From image
Open the menu under the source window
and select the mask mask Fadesuave.
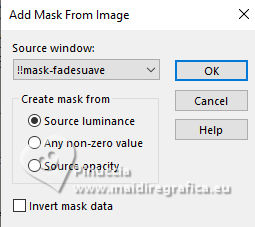
Layers>Merge>Merge Group.
30. Effects>Geometric Effects>Skew.
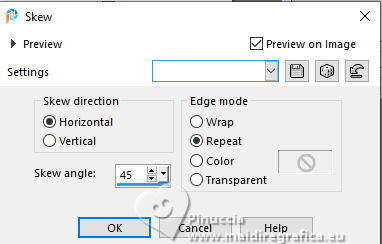
31. Effects>Reflection Effects>Rotating Mirror.

32. Effects>Plugins>FM Tile Tools - Saturation Emboss, default settings.

33. Layers>Duplicate.
34. Effects>Geometric Effects>Circle.

35. Effects>Image Effects>Offset.
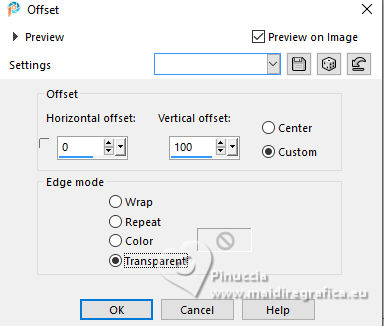
36. Effects>3D Effects>Drop Shadow, same settings.
37. Activate the layer Raster 1.

Adjust>Add/Remove Noise>Add Noise.
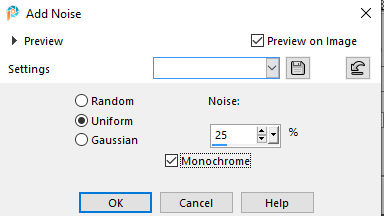
38. Effects>Plugins>FM Tile Tools - Saturation Emboss, default settings.
39. Activate the layer of the misted.
Effects>Plugins>FM Tile Tools - Saturation Emboss, to accentuate the colors and give them light.
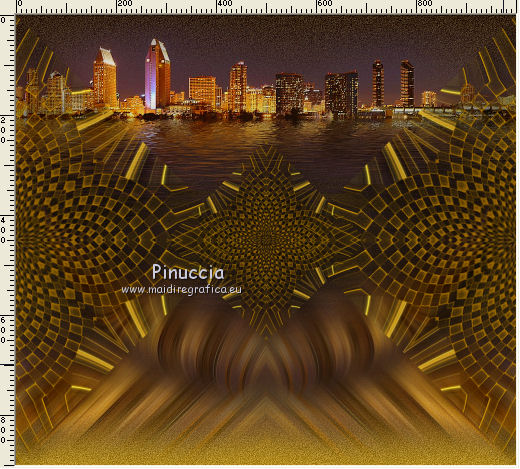
40. Layers>Merge>Merge visible.
41. Effects>Plugins>AAA Frames - Foto Frame.
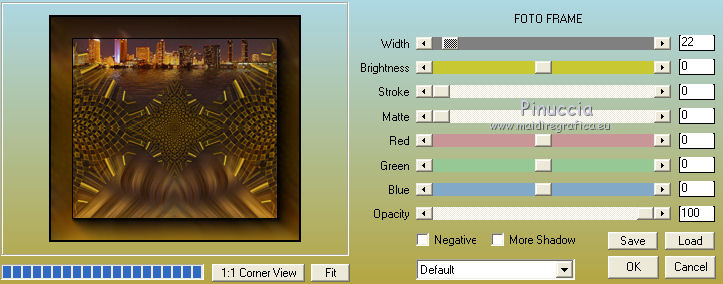
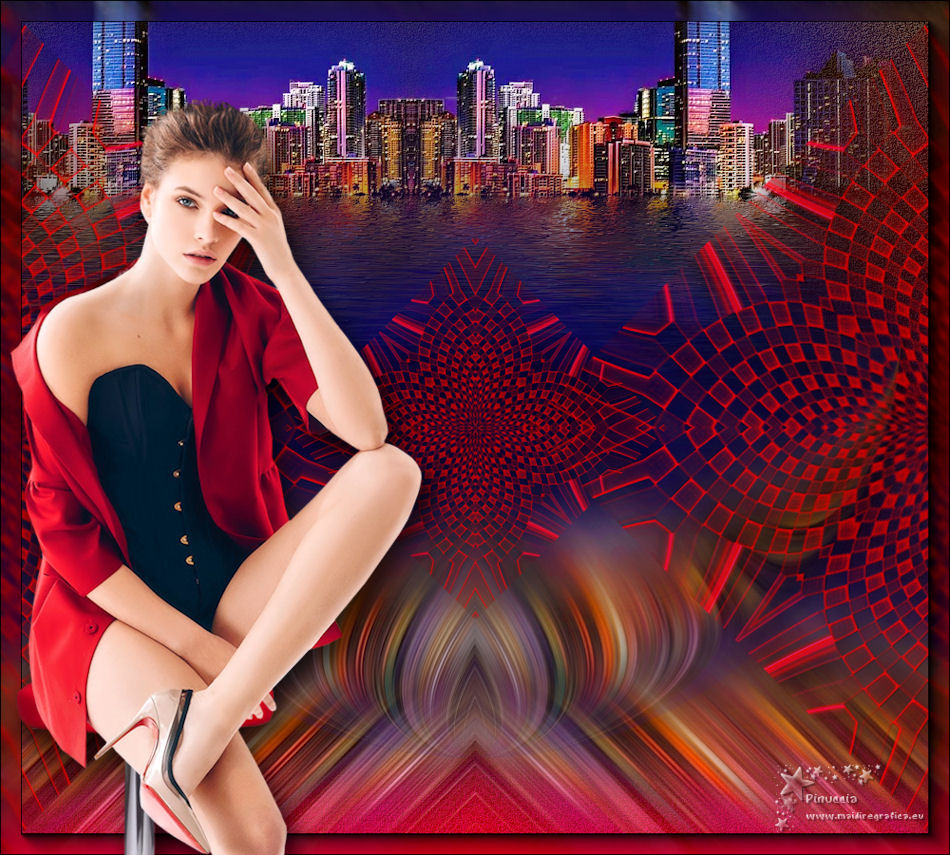
42. Open the tube SvB380Beauty 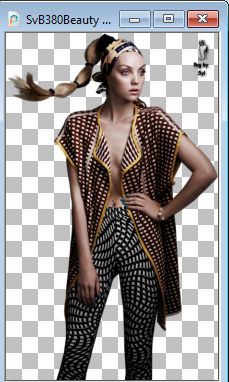
Erase the watermark and go to Edit>Copy.
Go back to your work and go to Edit>Paste as new layer.
Move  the tube to the left side. the tube to the left side.
43. Effects>3D Effects>Drop Shadow, last settings.
44. Sign your work on a new layer.
Layers>Merge>Merge All, resize to your liking and save as jpg.
For the tube of this version thanks Azalée; the misted is mine.

If you have problems or doubts, or you find a not worked link,
or only for tell me that you enjoyed this tutorial, write to me.
19 June 2025
|

