|
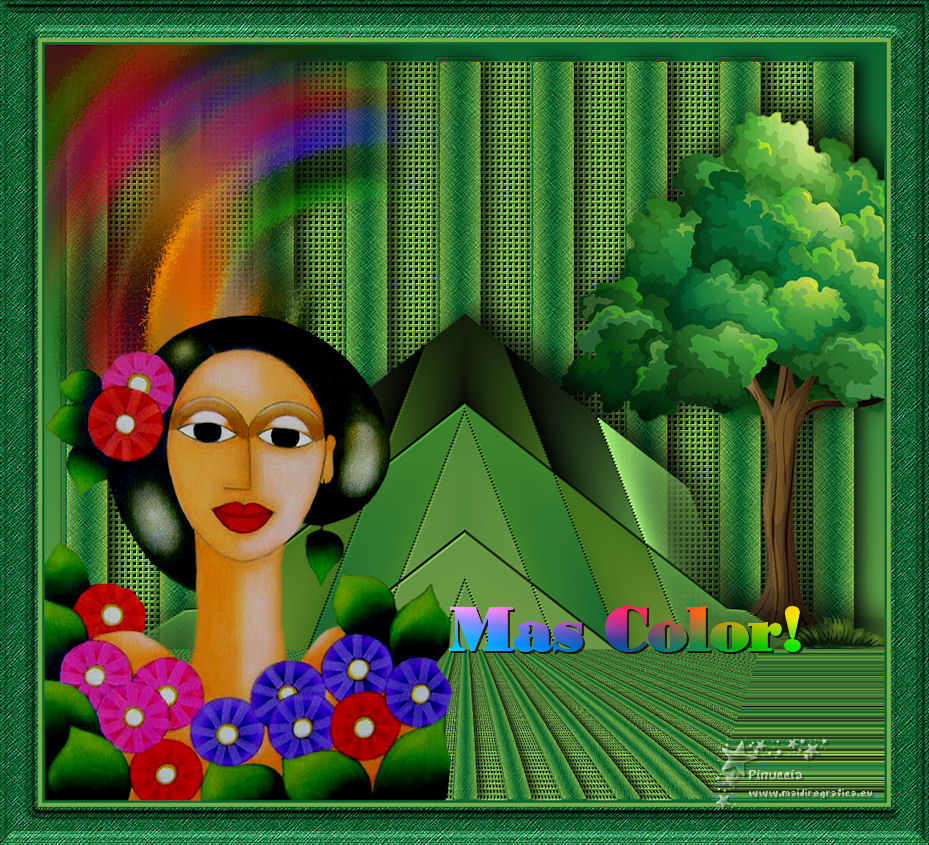
TOP MAS COLOR


Thanks Luz Cristina for your invitation to translate your tutorials into english

This tutorial, created with PSP2022, was translated with PspX7, but it can also be made using other versions of PSP.
Since version PSP X4, Image>Mirror was replaced with Image>Flip Horizontal,
and Image>Flip with Image>Flip Vertical, there are some variables.
In versions X5 and X6, the functions have been improved by making available the Objects menu.
In the latest version X7 command Image>Mirror and Image>Flip returned, but with new differences.
See my schedule here
 French Translation here French Translation here
 Your versions here Your versions here

For this tutorial, you will need:

Thanks for the tube Luz Cristina.
(The links of the tubemakers here).

consult, if necessary, my filter section here
Filters Unlimited 2.0 here
Brush Strokes - Crosshatch here
FM Tile Tools - Blend Emboss, Saturation Emboss here
Toadies - Plain Mosaic Blur here
Mura's Meister - Perspective Tiling, Copies here
Flaming Pear - Flexify 2 here
Filters Toadies can be used alone or imported into Filters Unlimited.
(How do, you see here)
If a plugin supplied appears with this icon  it must necessarily be imported into Unlimited it must necessarily be imported into Unlimited

You can change Blend Modes according to your colors.
In the newest versions of PSP, you don't find the foreground/background gradient (Corel_06_029).
You can use the gradients of the older versions.
The Gradient of CorelX here

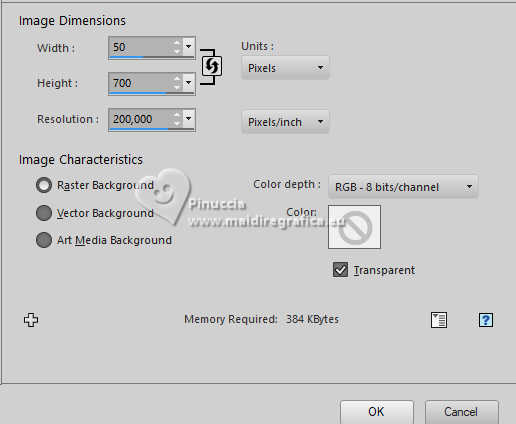
1. Open a new transparent image 50 x 700 pixels.
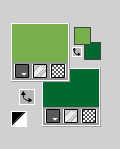
2. Set your foreground color to #76af4b,
and your background color to #096731.
Set your foreground color to a Foreground/Background Gradient, style Linear.
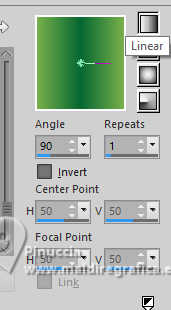
Flood Fill  the transparent image with your Gradient. the transparent image with your Gradient.
3. Image>Canvas Size - 1000 x 900 pixels.
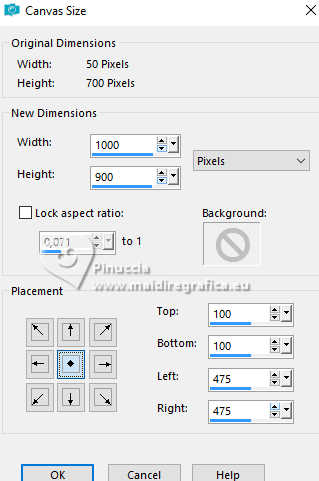
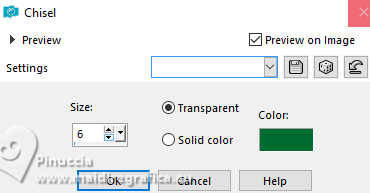
4. Effects>3D Effects>Chisel.
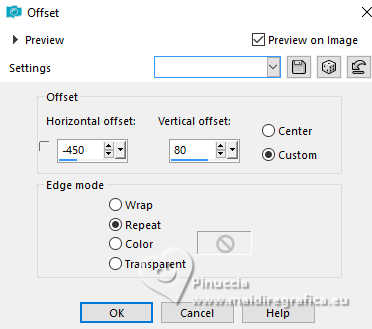
5. Effects>Image Effects>Offset.
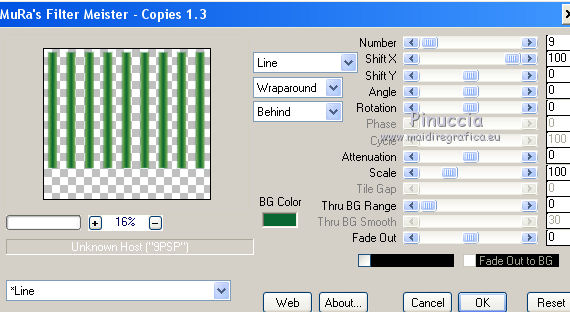
6. Effects>Plugins>Mura's Meister - Copies.
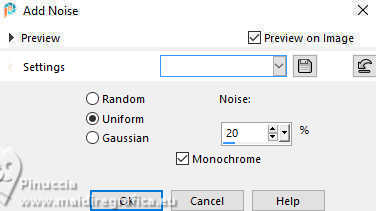
7. Adjust>Add/Remove Noise>Add Noise.
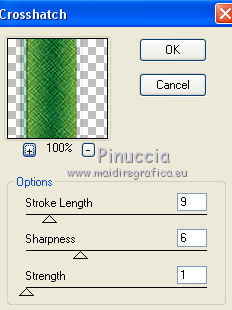
8. Effects>Plugins>Brush Strokes - Crosshatch.
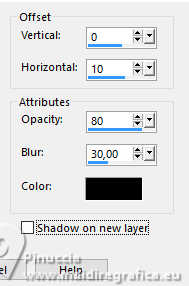
9. Effects>3D Effects>Drop Shadow.
10. Layers>New Raster Layer.
Layers>Arrange>Move Down.
11. Activate your Selection Tool 
(no matter the type of selection, because with the custom selection your always get a rectangle)
clic on the Custom Selection 
and set the following settings.
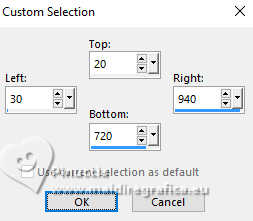
The selection doesn't cover all the lines created by the Copies filter.
To do this, I added this step:
Selections>Modify the selection and the selected area will turn red.
Activate the Pick tool 
in Scale mode 
push the center nodes to the right and left
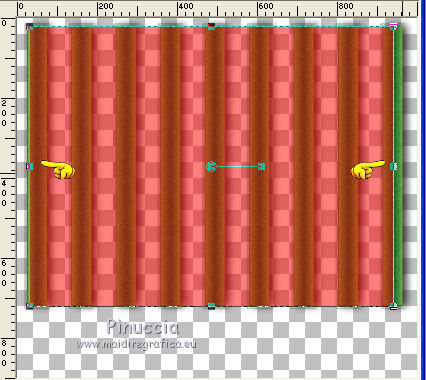
until the lines are completely covered.
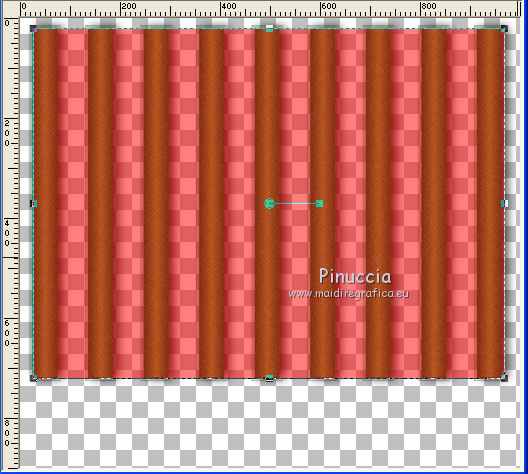
À New Selections>Modify Selection and the selected area will become normal.
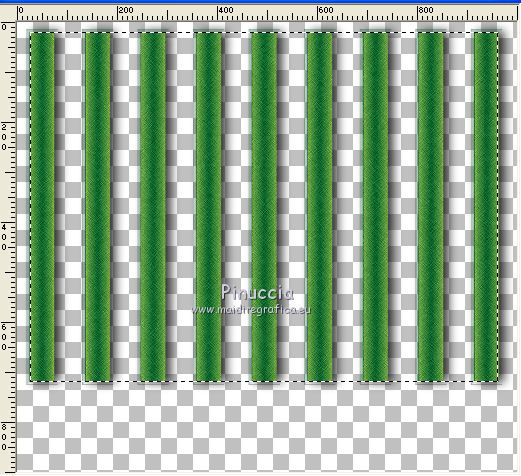
12. Set your foreground color to Color.
Flood Fill  the selection with your foreground color. the selection with your foreground color.
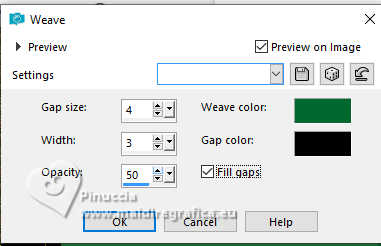
13. Effects>Texture Effects>Weave
weave color: background color,
gap color: black
14. Effects>Plugins>FM Tile Tools - Blend Emboss, default settings.

Selections>Select None.
15. Layers>Merge>Merge visible.
16. Layers>New Raster Layer.
Layers>Arrange>Send to Bottom.
Set again your foreground color to the Linear Gradient and change the settings.
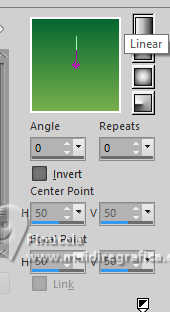
Flood Fill  the layer with your Gradient. the layer with your Gradient.
17. Activate the layer Merged.
Layers>Duplicate.
18. Effects>Plugins>Mura's Meister - Perspective Tiling.
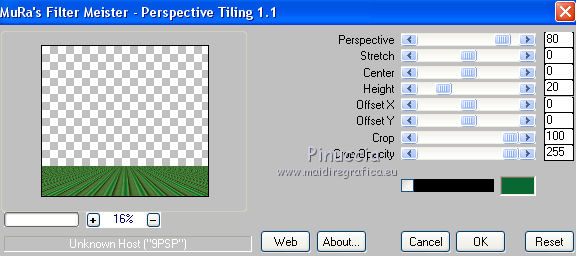
19. Layers>Arrange>Move Down.
20. Effects>Geometric Effects>Pentagon.
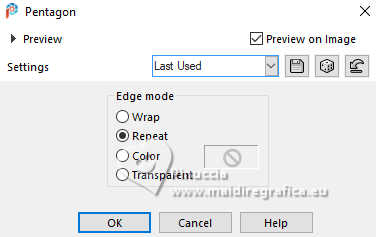
21. Activate again the layer Merged.
Layers>Duplicate.
22. Effects>Plugins>Toadies - Plain Mosaic Blur.
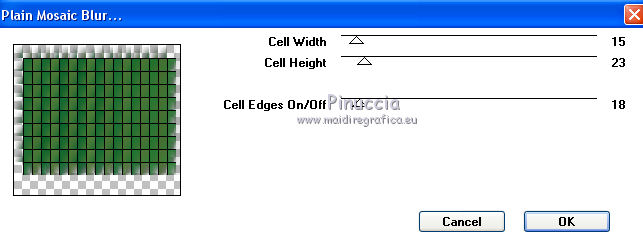
23. Effects>Geometric Effects>Skew.
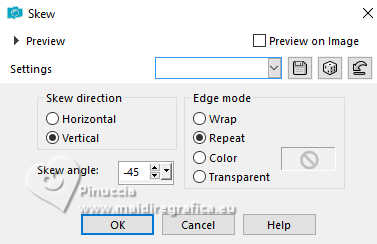
Edit>Repeat Skew.
24. Layers>Duplicate.
Image>Mirror>Mirror Horizontal.
Layers>Merge>Merge Down.
25. Effects>Plugins>Flaming Pear - Flexify 2.
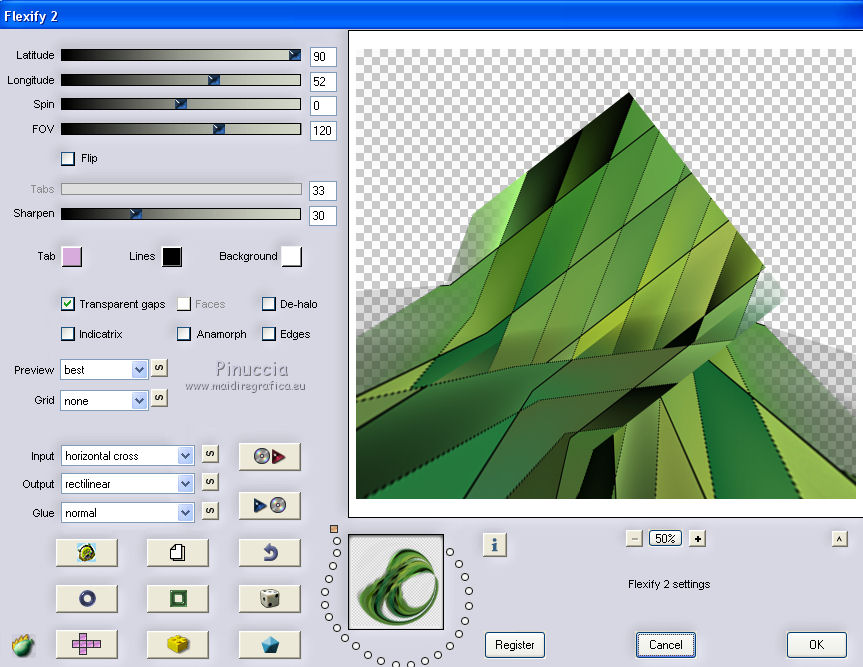
26. Effects>Reflection Effects>Rotating Mirror.

27. Effects>Plugins>FM Tile Tools - Blend Emboss, default settings.

28. Effects>Image Effects>Offset.
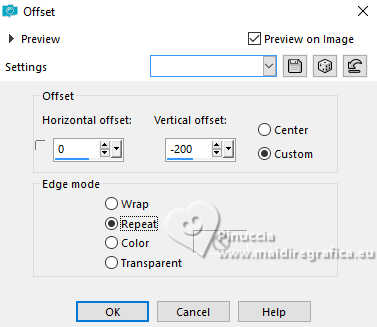
29. Effects>3D Effects>Drop Shadow.
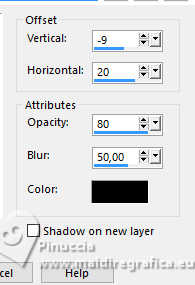
30. Activate the ground layer.
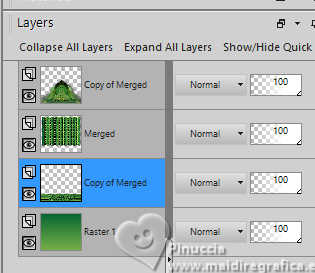
Layers>Arrange>Bring to Top.
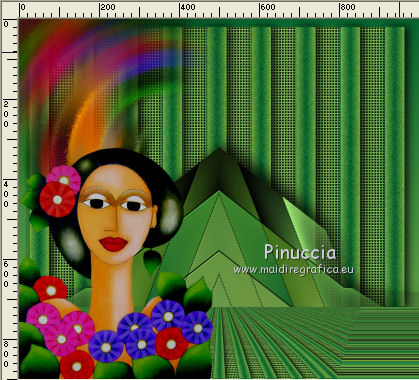
31. Open your woman's tube 5411-luzcristina 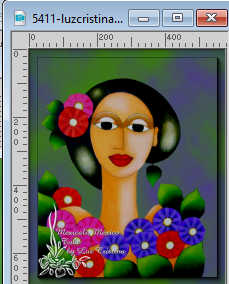
Edit>Copy.
Go back to your work and go to Edit>Paste as new layer.
Move  the tube at the bottom left. the tube at the bottom left.
32. Effects>3D Effects>Drop Shadow, same settings.

33. Layers>Duplicate.
Layers>Arrange>Move Down.
34. Adjust>Blur>Radial Blur.
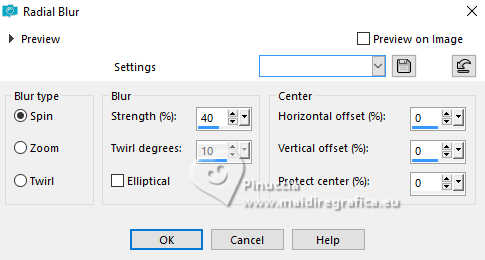
35. Image>Mirror>Mirror Horizontal.
36. Effects>Texture Effects>Mosaic Glass
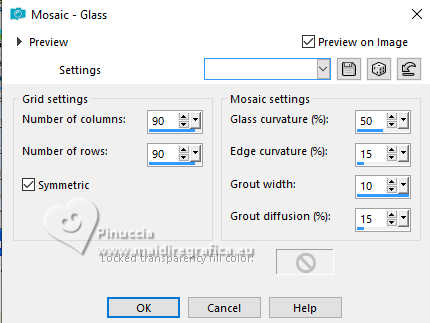
37. Effects>Edge Effects>Erode (optional, at your choice).
38. Effects>Plugins>FM Tile Tools - Saturation Emboss, default settings.

39. Image>Resize, to 80%, resize all layers not checked.
Image>Mirror>Mirror Vertical (Image>Flip).
Image>Mirror>mirror horizontal.
Place  correctly the image in the top left corner. correctly the image in the top left corner.
40. Open the tree's tube 5415-luzcristina 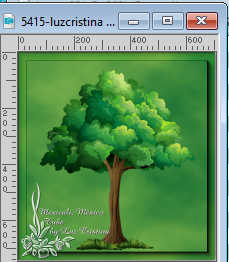
Edit>Copy.
Go back to your work and go to Edit>Paste as new layer.
Move  the tube at the upper left. the tube at the upper left.
41. Move the layer under the central image.
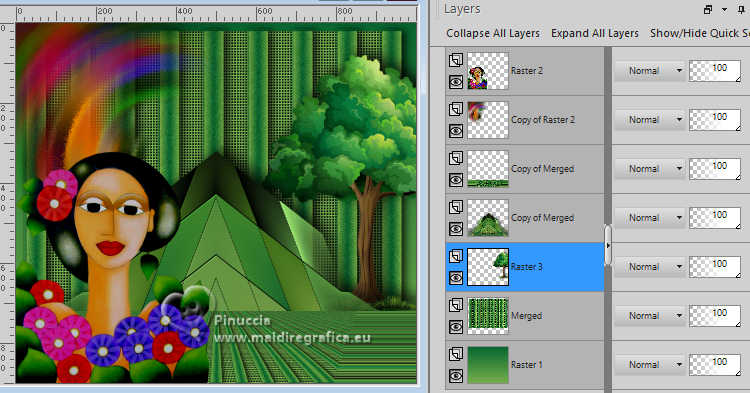
42. Effects>3D Effects>Drop shadow, same settings.
43. Image>Add Borders, 3 pixels, symmetric, dark color.
Image>Add Borders, 3 pixels, symmetric, light color.
Image>Add Borders, 45 pixels, symmetric, dark color.
44. Activate your Magic Wand Tool 
and click in the last border to select it.
Adjust>Add/Remove Noise>Add Noise, same settings.

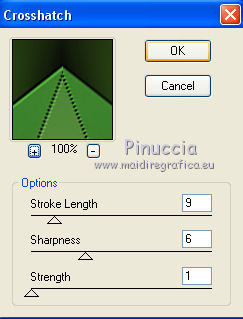
45. Effects>Plugins>Brush Strokes - Crosshatch, same settings.
46. Effects>Plugins>FM Tile Tools - Blend Emboss, default settings.
47. Effects>3D Effects>Inner Bevel.
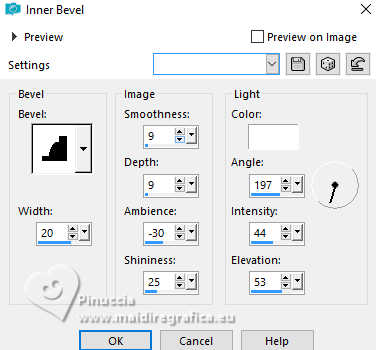
Selections>Select None.
48. Image>Resize, to 84%, resize all layers checked.
49. Open the text pmasctexto 
Edit>Copy.
Go back to your work and go to Edit>Paste as new layer.
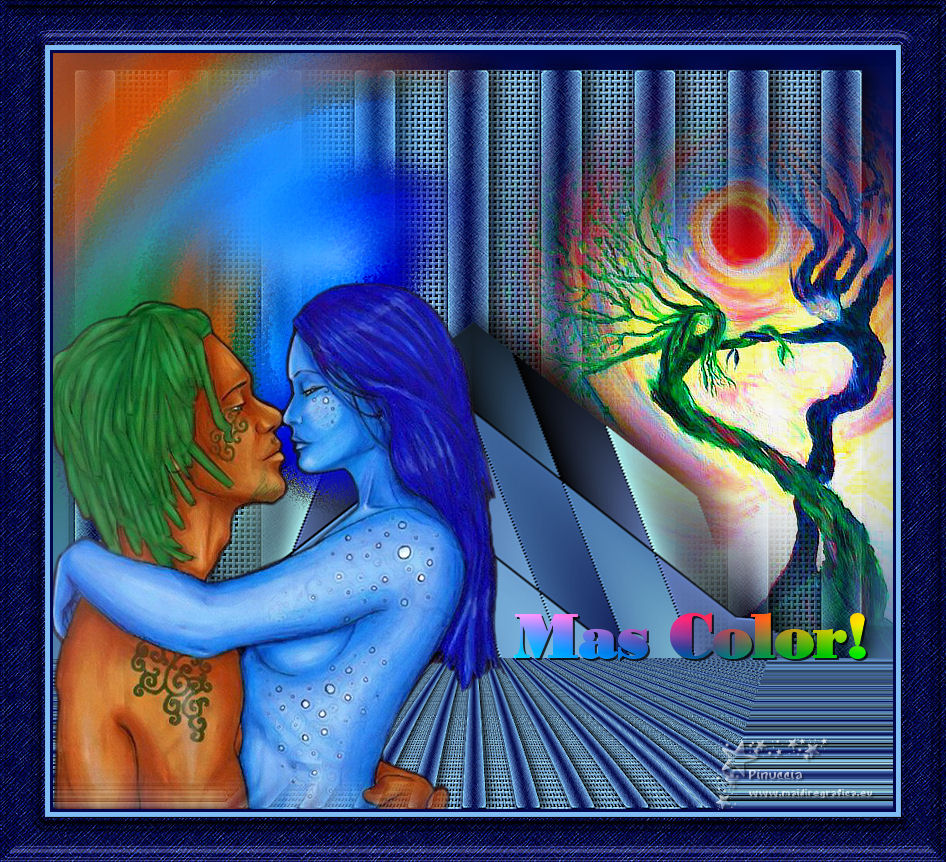
Move  the text to the right, see my example. the text to the right, see my example.
50. If you want, add the author and the translator's watermark.
Sign your work and save as jpg.


If you have problems or doubts, or you find a not worked link,
or only for tell me that you enjoyed this tutorial, write to me.
20 July 2025
|

