|
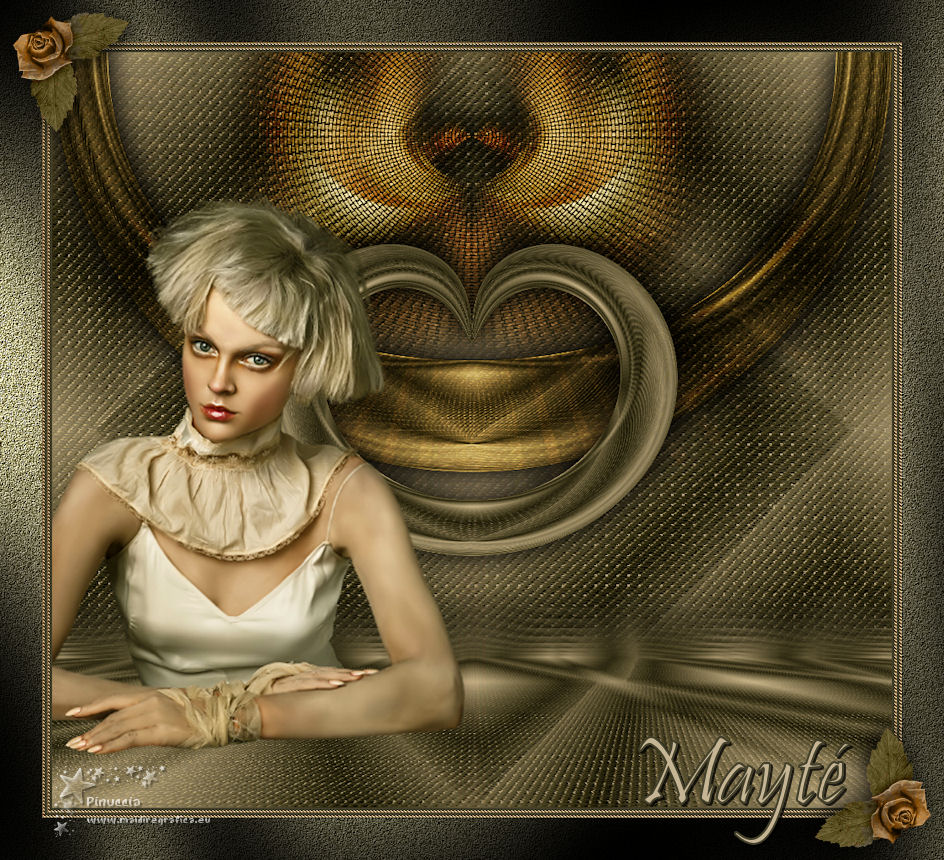
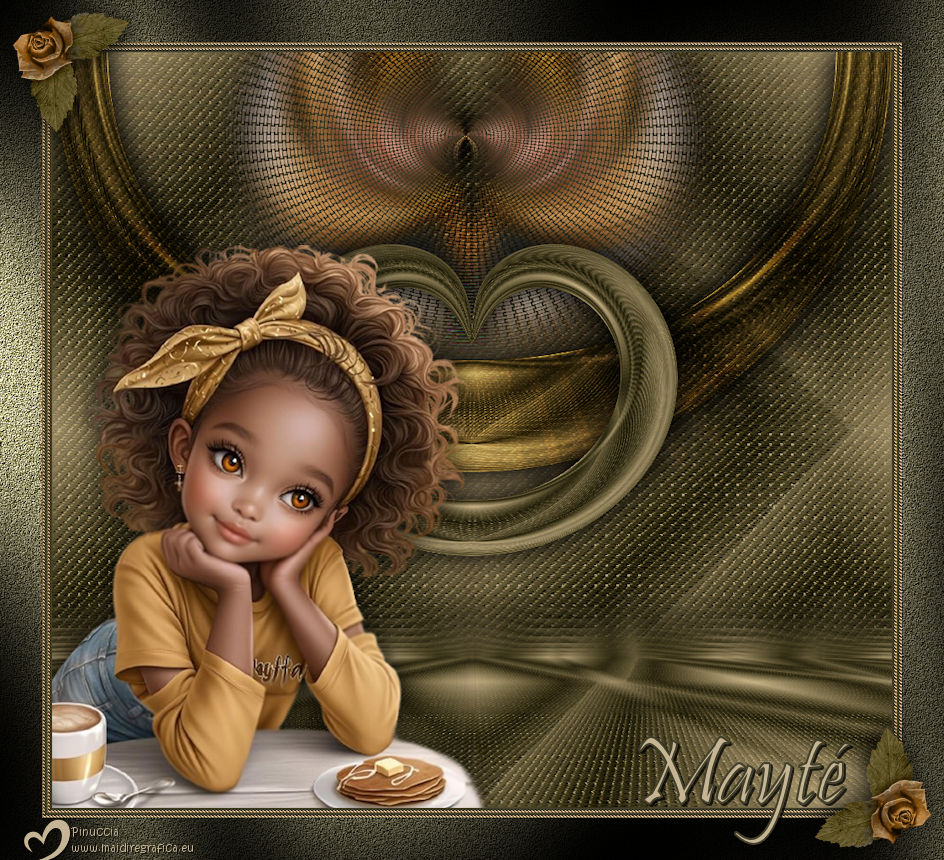
TOP MAYTÉ 2


Thanks Luz Cristina for your invitation to translate your tutorials into english

This tutorial, created with PSP2022, was translated with PspX7, but it can also be made using other versions of PSP.
Since version PSP X4, Image>Mirror was replaced with Image>Flip Horizontal,
and Image>Flip with Image>Flip Vertical, there are some variables.
In versions X5 and X6, the functions have been improved by making available the Objects menu.
In the latest version X7 command Image>Mirror and Image>Flip returned, but with new differences.
See my schedule here
 French Translation here French Translation here
 Your versions here Your versions here

For this tutorial, you will need:

Tubes by Luz Cristina .
(The links of the tubemakers here).
*It is forbidden to remove the watermark from the supplied tubes, distribute or modify them,
in order to respect the work of the authors

consult, if necessary, my filter section here
Filters Unlimited 2.0 here
Simple - Blintz, Top Left Mirror here
Artistic - Rough Pastels here
FM Tile Tools - Blend Emboss here
Mura's Meister - Perspective Tiling, Copies here
Flaming Pear - Flexify 2 here
Tramages - Pool Shadow here
Filters Simple and Tramages can be used alone or imported into Filters Unlimited.
(How do, you see here)
If a plugin supplied appears with this icon  it must necessarily be imported into Unlimited it must necessarily be imported into Unlimited

You can change Blend Modes according to your colors.
In the newest versions of PSP, you don't find the foreground/background gradient (Corel_06_029).
You can use the gradients of the older versions.
The Gradient of CorelX here

Open the pattern in PSP and minimize it with the rest of the material.
1. Open a new transparent image 1000 x 900 pixels.
2. Set your foreground color to #c5b594,
and your background color to #423f2a.
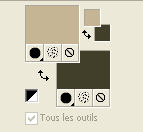
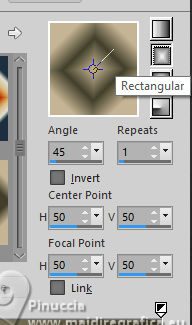
Set your foreground color to a Foreground/Background Gradient, style Rectangular.
Flood Fill  the transparent image with your Gradient. the transparent image with your Gradient.
3. Effects>Texture Effects>Mosaic - Glass.

4. Effects>Plugins>Simple - Blintz.
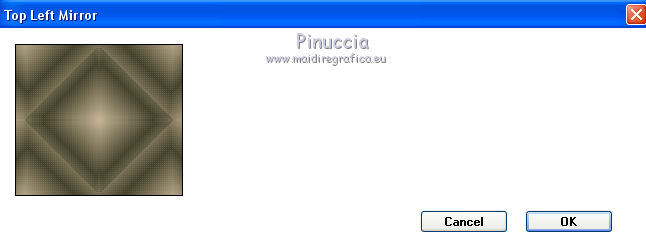
5. Effects>Plugins>Simple - Top Left Mirror.
6. Effects>Plugins>Artistic - Rough Pastel
If you use the french version of this filter (the result doesn't change):
Effects>Plugins>Artistiques - Pastels
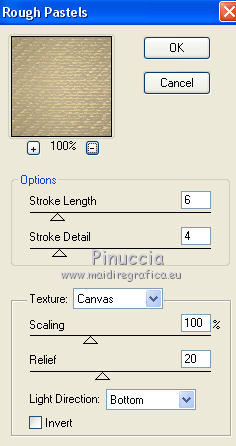 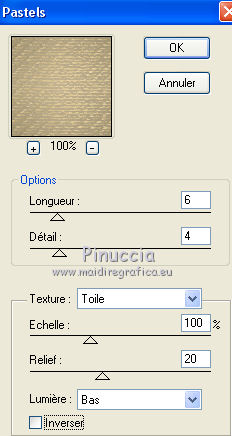
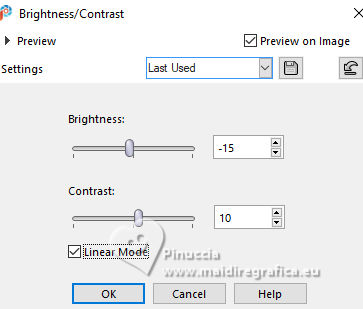
7. Adjust>Brightness and Contrast>Brightness and Contrast (optional).
8. Layers>Duplicate.
Effects>Plugins>Mura's Meister - Perspective Tiling.

9. Layers>Duplicate.
Effects>Plugins>Flaming Pear - Flexify 2.

10. Effects>Image Effects>Offset.
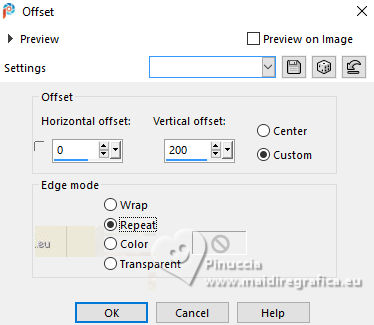
11. Effects>3D Effects>Drop Shadow.
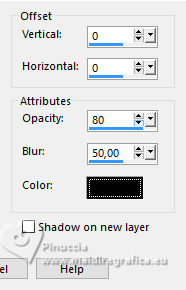
Change the Blend Mode of this layer to Hard Light (optional).
12. Adjust>Sharpness>Sharpen More.
13. Layers>Duplicate.
Effects>Distortion Effects>Polar Coordinates.
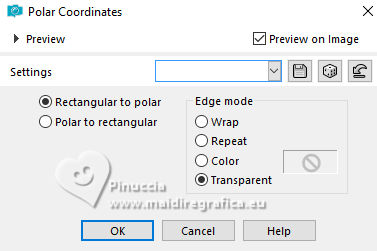
14. Effects>Image Effects>Offset.
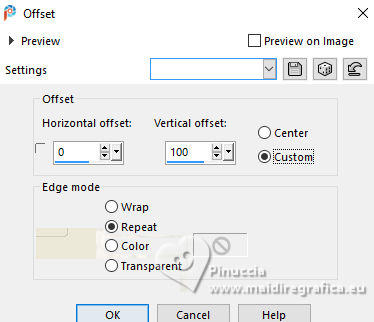
Set the Blend Mode of this layer to Normal.

Effects>3D Effects>Drop Shadow, same settings.
15. Activate the layer Copy of Raster 1.
Effects>Plugins>Mura's Meister - Copies.
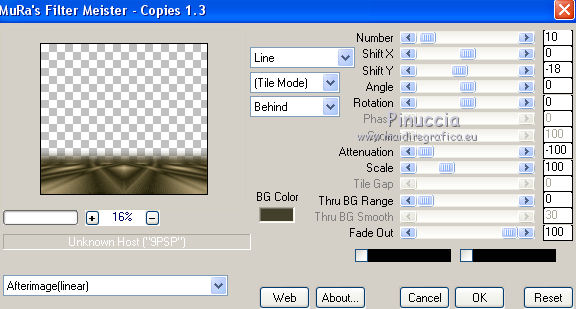
16. Effects>3D Effects>Drop Shadow, same settings.
17. Activate your top layer.
Open the woman's tube 6226-Luz Cristina 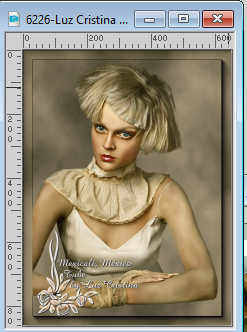
Edit>Copy.
Go back to your work and go to Edit>Paste as new layer.
Image>Resize, to 85%, resize all layers not checked.
18. Effects>Image Effects>Offset
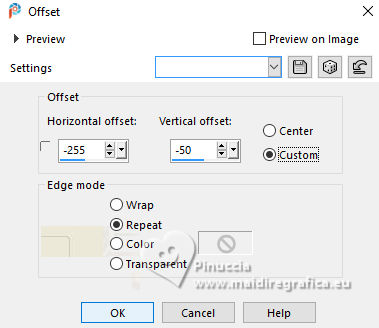
These settings are for the supplied tube. If you use a different tube:
Move  the tube to the left. the tube to the left.
19. Layers>Duplicate.
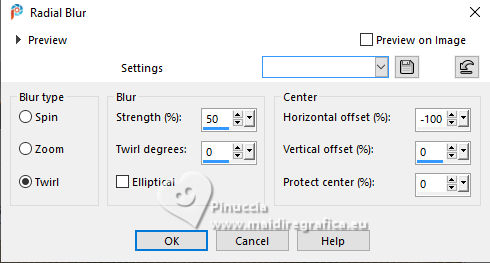
Adjust>Blur>Radial Blur.
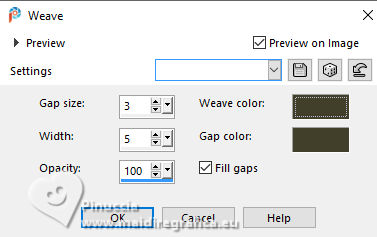
20. Effects>Texture Effects>Weave
both colors: dark color
21. Effects>Reflection Effects>Rotating Mirror.

22. Effects>Image Effects>Offset.
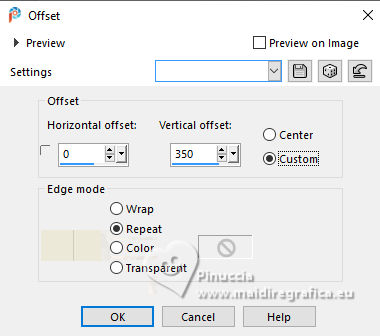
23. Effects>Distortion Effects>Polar Coordinates, same settings

(The shape of this figure may vary, depending on the tube used)
24. Image>Mirror>Mirror vertical (Image>Flip).
Layers>Arrange>Move Down - 3 times.
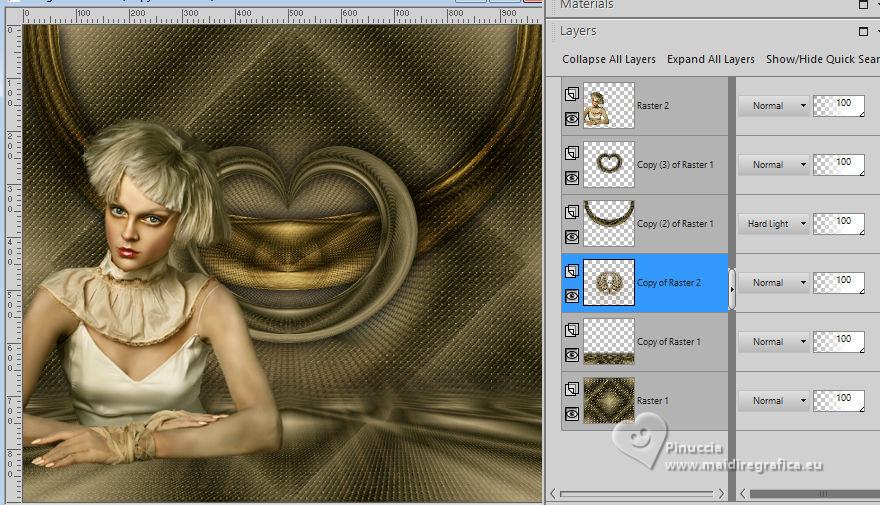
25. Effects>Image Effects>Offset, same settings.

26. Adjust>Sharpness>Sharpen More (optional).
Effects>3D Effects>Drop Shadow, at your choice.
For my example, I change the Blend Mode of this layer to Hard Light
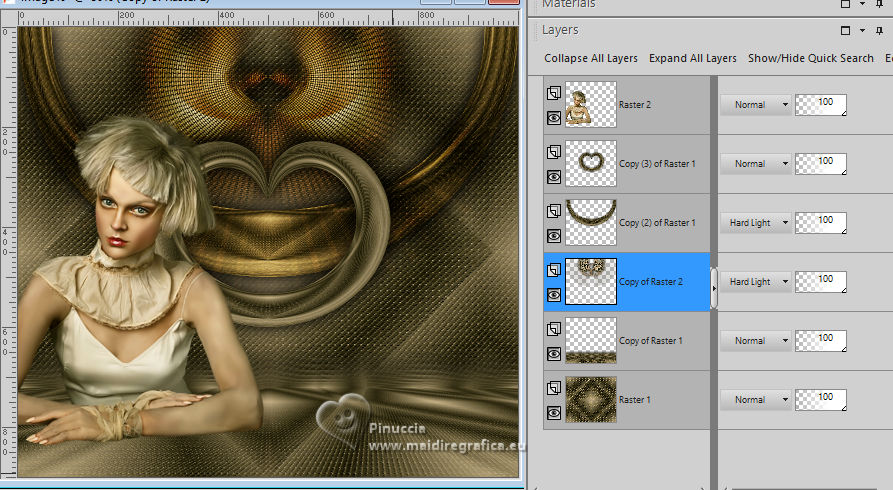
For my second version, I change the Blend Mode to Overlay
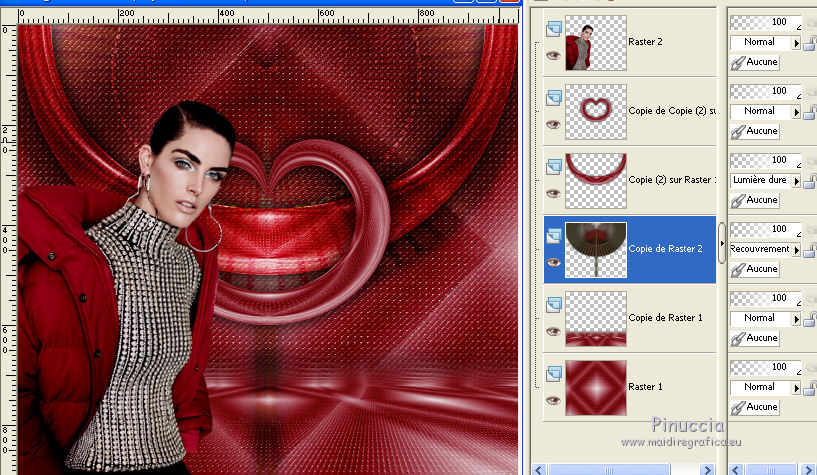
for my third version, after several tests,
I noticed that the best result is obtained by reducing and positioning the tube as in the first version.
So I did this

and finally, at the top of the layers palette, I correctly positioned the tube
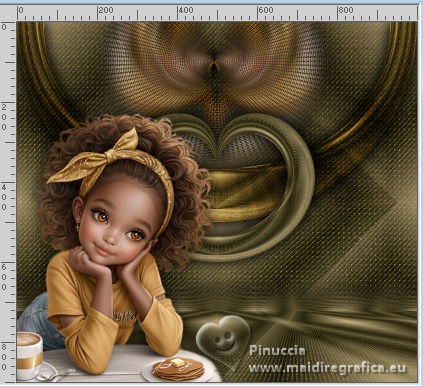
Eventually, this always depends on the tube (as I did it in this version),
delete the tube layer and copy/paste the tube again without resizing.
27. Image>Add borders, 3 pixels, symmetric, dark color.
Image>Add Borders, 3 pixels, symmetric, light color.
Activate your Magic Wand Tool 
and click in the light border to select it.
28. Set your foreground color to Pattern and select the golden pattern.
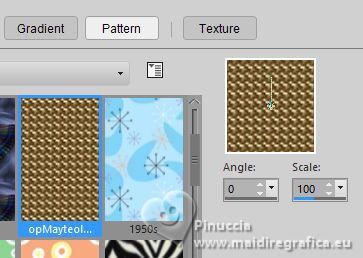
Flood Fill  the selection with your golden pattern. the selection with your golden pattern.
Selections>Select None.
29. Image>Add borders, 3 pixels, symmetric, dark color.
Image>Add borders, 3 pixels, symmetric, light color.
Select the light border with your Magic Wand Tool 
Flood Fill  the selection with your golden pattern. the selection with your golden pattern.
30. Image>Add borders, 50 pixels, symmetric, dark color.
Select this border with your Magic Wand Tool 
Adjust>Add/Remove Noise>Add Noise.
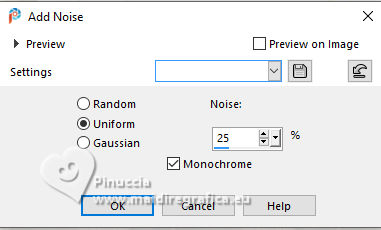
Selections>Select None.
31. Effects>Plugins>FM Tile Tools - Blend Emboss.

32. Effects>Plugins>Tramages - Pool Shadow, default settings - apply 2 times.
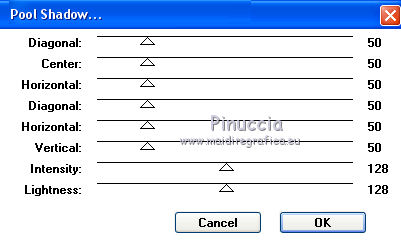
Selections>Select None.
33. Image>Resize, to 84%, resize all layers checked.
34. Open the flower tube HD-Flower2 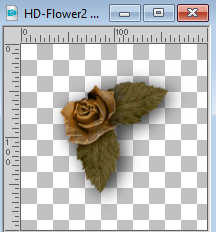
Edit>Copy.
Go back to your work and go to Edit>Paste as new layer.
Move  the tube at the upper left. the tube at the upper left.
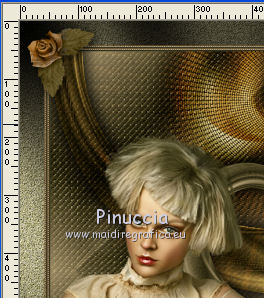
Layers>Duplicate.
Image>Mirror>Mirror Horizontal (Image>Mirror).
Image>Mirror>Mirror Vertical (Image>Flip).
35. Open the text opMayteTexto 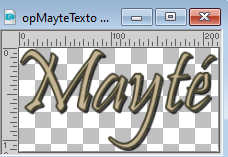
Edit>Copy.
Go back to your work and go to Edit>Paste as new layer.
Move  the text at the bottom right. the text at the bottom right.
36. Sign your work on a new layer.
Layers>Merge>Merge All and save as jpg.
Versions with tubes by Luz Cristina
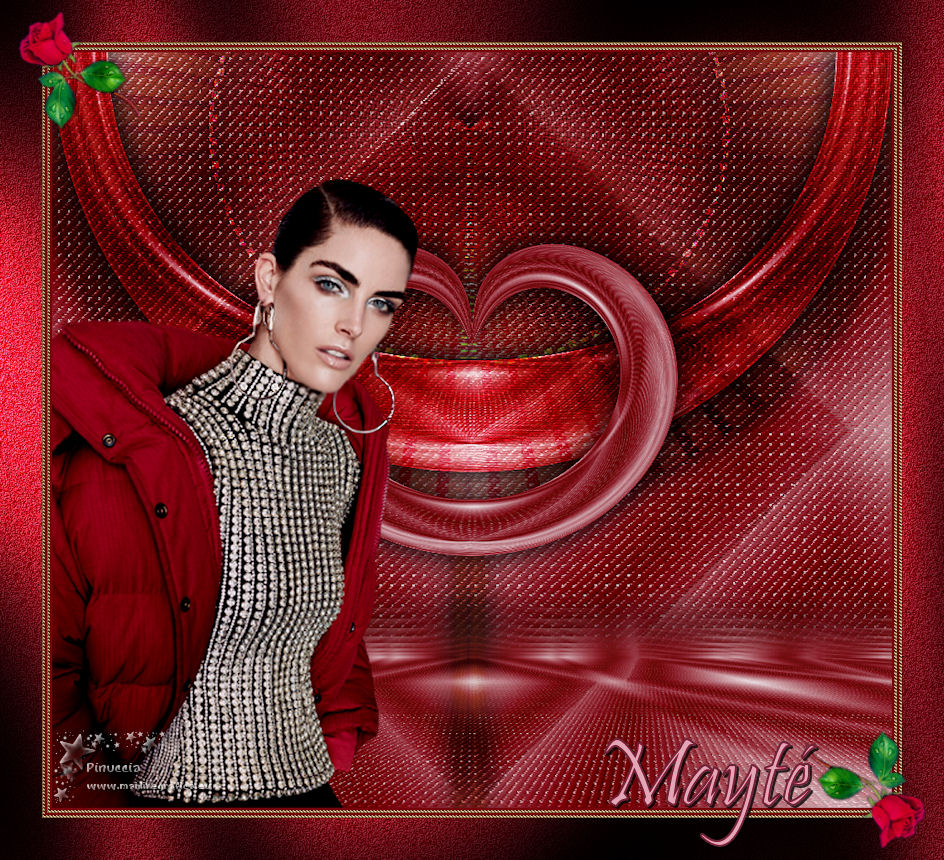


If you have problems or doubts, or you find a not worked link,
or only for tell me that you enjoyed this tutorial, write to me.
20 March 2025
|

