|
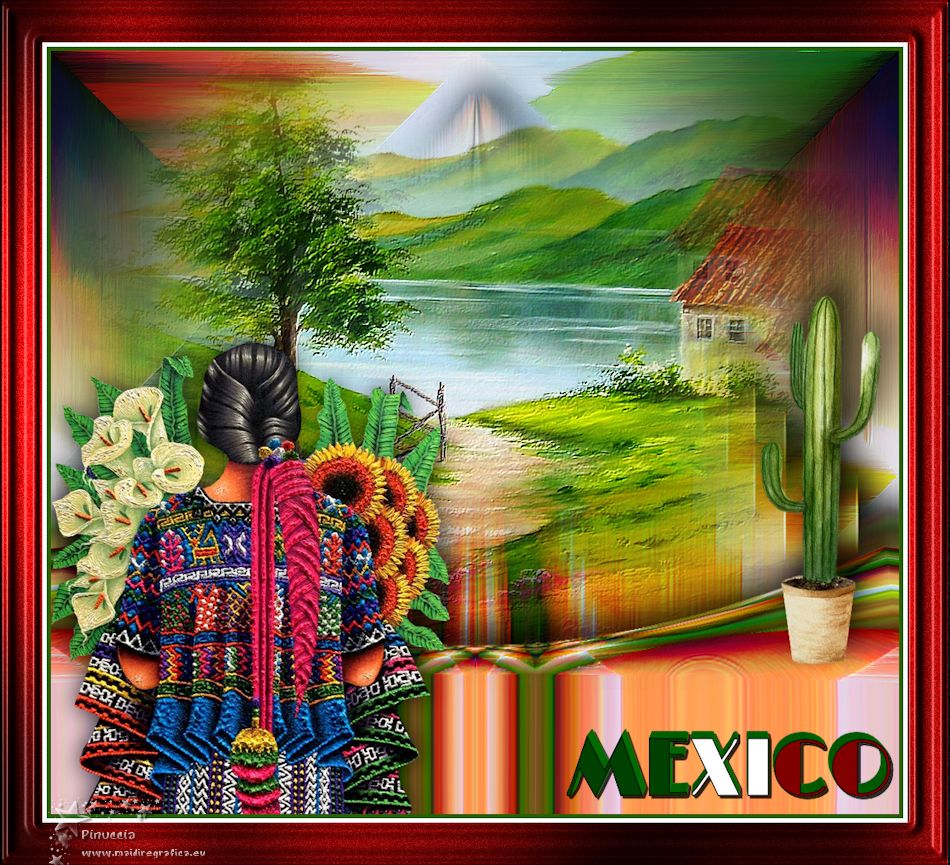
TOP MEXICO


Thanks Luz Cristina for your invitation to translate your tutorials into english

This tutorial, created with PSP2022, was translated with PspX7, but it can also be made using other versions of PSP.
Since version PSP X4, Image>Mirror was replaced with Image>Flip Horizontal,
and Image>Flip with Image>Flip Vertical, there are some variables.
In versions X5 and X6, the functions have been improved by making available the Objects menu.
In the latest version X7 command Image>Mirror and Image>Flip returned, but with new differences.
See my schedule here
 French Translation here French Translation here
 Your versions here Your versions here

For this tutorial, you will need:

Tubes by Luz Cristina.
(The links of the tubemakers here).

consult, if necessary, my filter section here
Filters Unlimited 2.0 here
Sandflower Specials - Color Gradiant (to import in Unlimited) here
Mehdi - Sorting Tiles here
Mura's Meister - Perspective Tiling here
Tramages - Pool Shadow here
FM Tile Tools - Blend Emboss, Saturation Emboss here
Filters Tramages can be used alone or imported into Filters Unlimited.
(How do, you see here)
If a plugin supplied appears with this icon  it must necessarily be imported into Unlimited it must necessarily be imported into Unlimited

You can change Blend Modes according to your colors.
In the newest versions of PSP, you don't find the foreground/background gradient (Corel_06_029).
You can use the gradients of the older versions.
The Gradient of CorelX here

Copy the preset in the Presets Folder.
1. Open a new transparent image 1000 x 900 pixels.
2. Set your foreground color to #004302,
and your background color to #ae974f.

Set your foreground color to a Foreground/Background Gradient, style Linear.

Flood Fill  the transparent image with your Gradient. the transparent image with your Gradient.
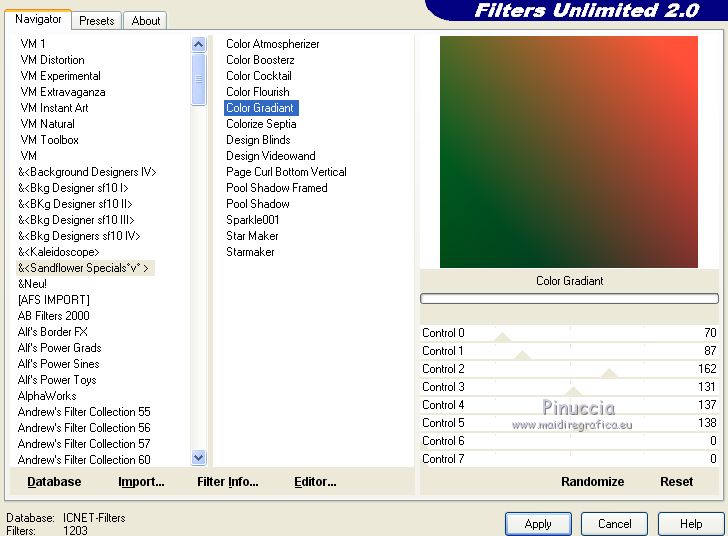
3. Effects>Plugins>Filters Unlimited 2.0 - &Sandflower specials - Color Gradiant.
4. Selections>Select All.
Open the misted 3015-luzcristina 
Edit>Copy.
Go back to your work and go to Edit>Paste into Selection.
Selections>Select None.
5. Effects>Image Effects>Seamless Tiling, default settings.

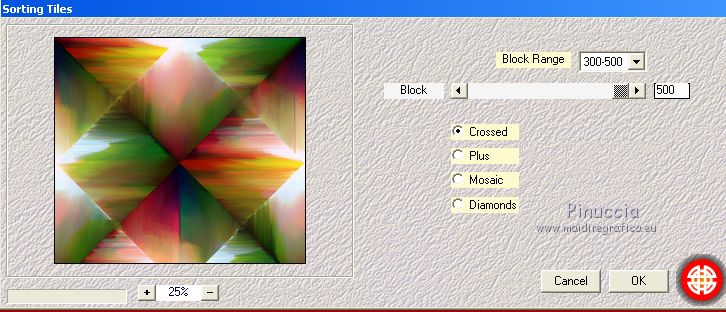
6. Effects>Plugins>Mehdi - Sorting Tiles.
7. Effects>Plugins>FM Tile Tools - Blend Emboss, 2 times, default settings.

8. Layers>Duplicate.
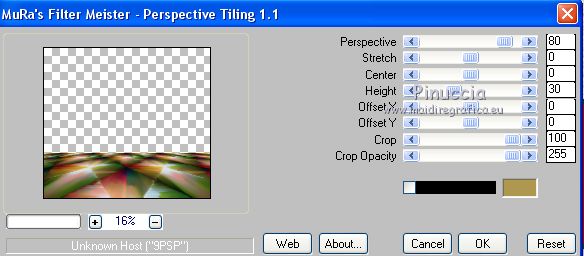
Effects>Plugins>Mura's Meister - Perspective Tiling.
9. Effects>Distortion Effects>Warp.

10. Effects>Distortion Effects>Lens Distortion - 2 times.

11. Effects>Reflection Effects>Rotating Mirror.

12. Effects>Plugins>FM Tile Tools - Saturation Emboss (optional)

13. Layers>Duplicate.
Layers>Arrange>Move Down.
14. Effects>Reflection Effects>Feedback.

15. Adjust>Blur>Motion Blur

16. Effects>User Defined Filter - select the preset Emboss 3 and ok.

Optional: change the Blend Mode of this layer to Hard Light.
17. Effects>3D Effects>Drop Shadow.

18. Activate the layer above, Copy of Raster 1.
Edit>Repeat Drop Shadow.
19. Edit>Paste as new layer (the misted is still in memory).
Place  correctly the tube correctly the tube
Layers>Duplicate.
Move  this layer a little further down, this layer a little further down,
so that it looks like a third dimension
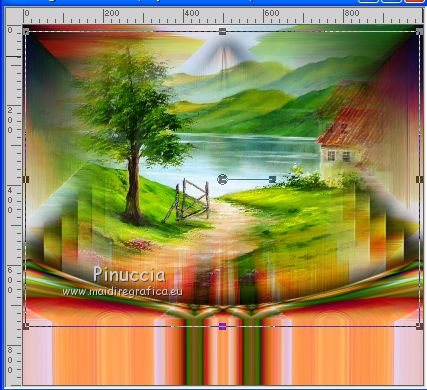
On the layer of the copy: Effects>Plugins>FM Tile Tools - Blend Emboss.
20. Open the cactus tube 4693-luzcristina 
Edit>Copy.
Go back to your work and go to Edit>Paste as new layer.
Move  the tube to the right. the tube to the right.
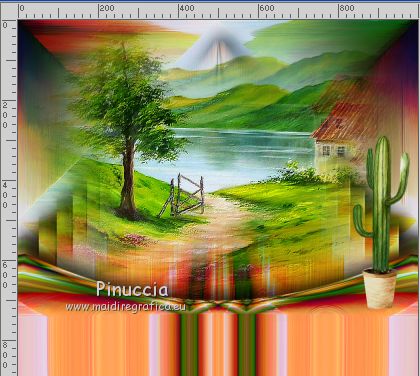
Effects>3D Effects>Drop Shadow, same settings.
21. Open the texte opMexiTexto 
Edit>Copy.
Go back to your work and go to Edit>Paste as new layer.
Move  the text at the bottom right. the text at the bottom right.
Effects>3D Effects>Drop shadow.

22. Open the woman's tube 5456-luzcristina 
Edit>Copy.
Go back to your work and go to Edit>Paste as new layer.
Move  the tube at the bottom left. the tube at the bottom left.
Effects>3D Effects>Drop shadow, at your choice.
23. Image>Add Borders, 5 pixels, symmetric, with a green color of your background.
Image>Add Borders, 5 pixels, symmetric, color white.
Image>Add Borders, 50 pixels, symmetric, color #8b0101.
24. Activate your Magic Wand Tool 
and click in the last border to select it.
Adjust>Add/Remove Noise>Add Noise.

25. Effects>Plugins>Tramages - Pool Shadow, default settings.
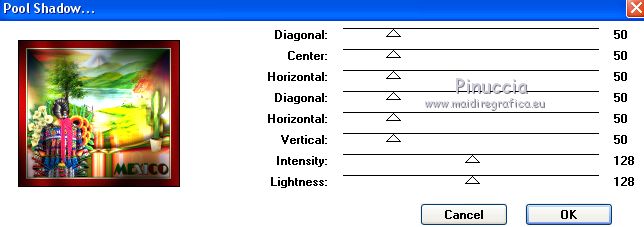
26. Effects>3D Effects>Inner Bevel.

Selections>Select None.
27. Image>Resize, to 84%, resize all layers checked.
Sign your work and save as jpg.
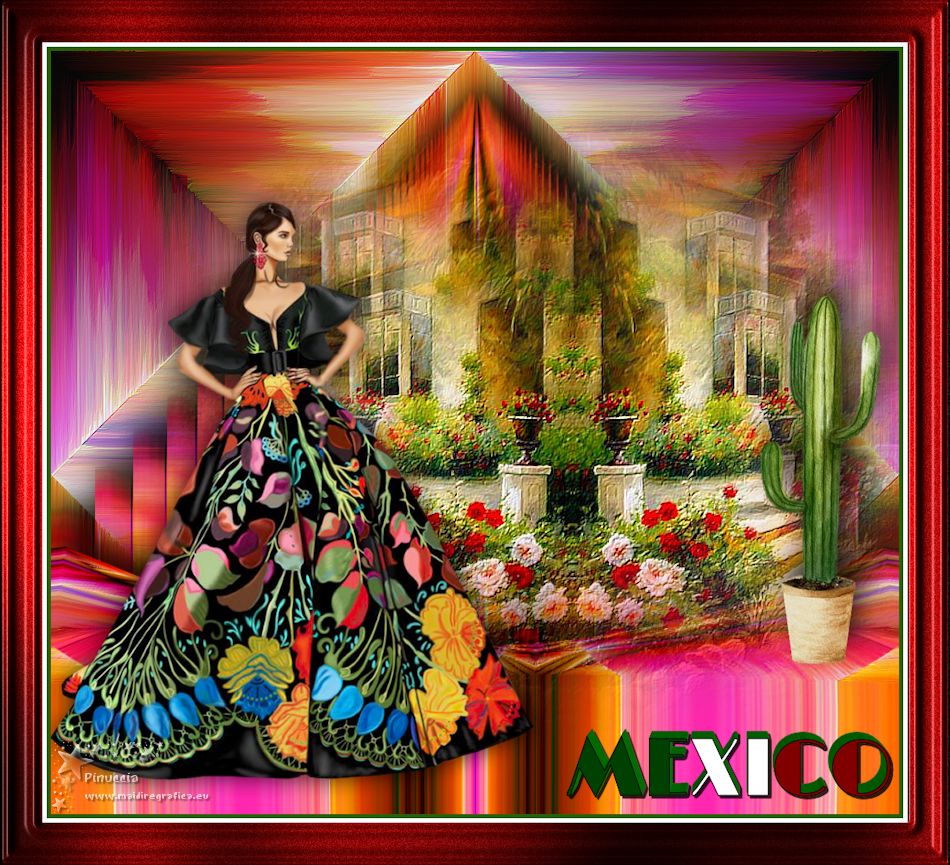
Version with tubes by Luz Cristina


If you have problems or doubts, or you find a not worked link,
or only for tell me that you enjoyed this tutorial, write to me.
25 Juillet 2025
|

