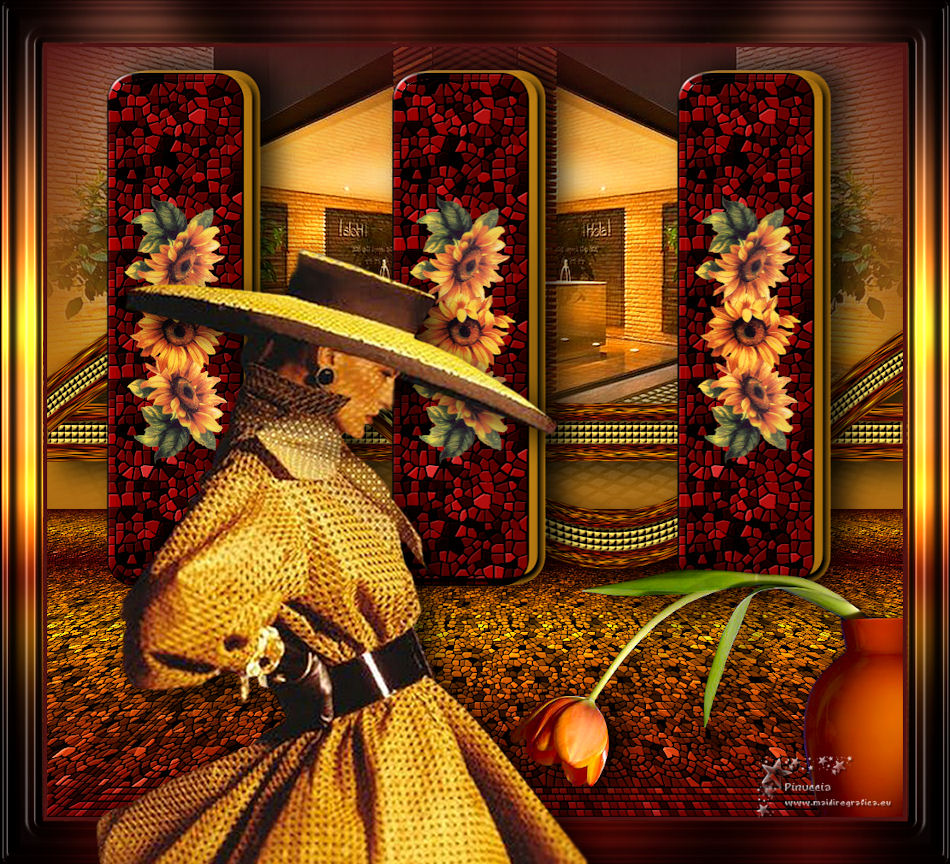
|
TOP MIMI


Thanks Luz Cristina for your invitation to translate your tutorials into english

This tutorial, created with PSP2022, was translated with PspX7, but it can also be made using other versions of PSP.
Since version PSP X4, Image>Mirror was replaced with Image>Flip Horizontal,
and Image>Flip with Image>Flip Vertical, there are some variables.
In versions X5 and X6, the functions have been improved by making available the Objects menu.
In the latest version X7 command Image>Mirror and Image>Flip returned, but with new differences.
See my schedule here
 French Translation here French Translation here
 Your versions here Your versions here

For this tutorial, you will need:

Thanks for the tube Luz Cristina.
(The links of the tubemakers here).

consult, if necessary, my filter section here
Filters Unlimited 2.0 here
Mura's Meister - Copies here
Mura's Meister - Perspective Tiling here
Alien Skin eye Candy 5 Impact - Extrude, Bevel here
Alien Skin Xenofex 2 - Classic Mosaic here
FM Tile Tools - Saturation Emboss here
Tramages - Pool Shadow here
Filters Tramages can be used alone or imported into Filters Unlimited.
(How do, you see here)
If a plugin supplied appears with this icon  it must necessarily be imported into Unlimited it must necessarily be imported into Unlimited

You can change Blend Modes according to your colors.
In the newest versions of PSP, you don't find the foreground/background gradient (Corel_06_029).
You can use the gradients of the older versions.
The Gradient of CorelX here

Copy the texture opmitexture4 in the Textures Folder.
Copy the pattern opmiGold in the Patterns Folder.
1. Open a new transparent image 1000 x 900 pixels.
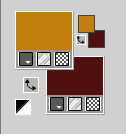
Set your foreground color to #c17f11,
and your background color to #501212.
2. Activate your Selection Tool 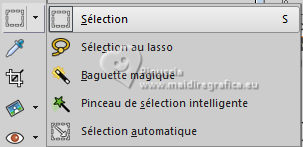 , Rounded Rectangle , Rounded Rectangle

If you don't see the rules: View>Rules
Place the mouse at a width of 120 pixels and a height of 80 pixels.
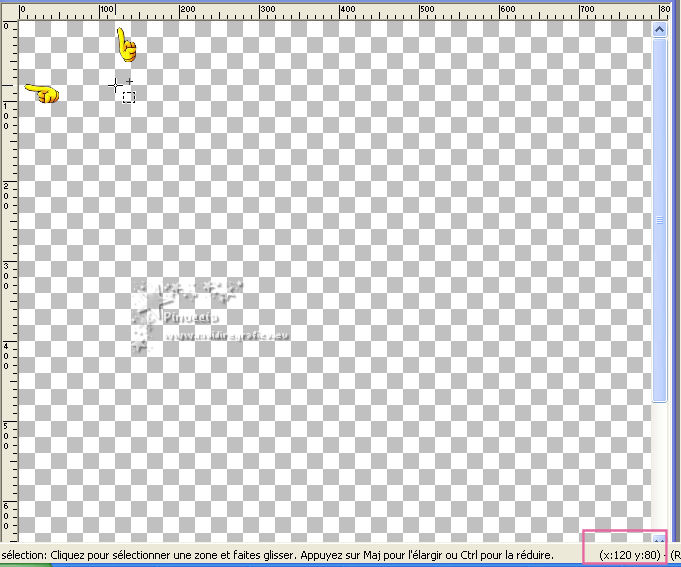
Design a rectangle up to 280 pixels wide and 680 pixels high.
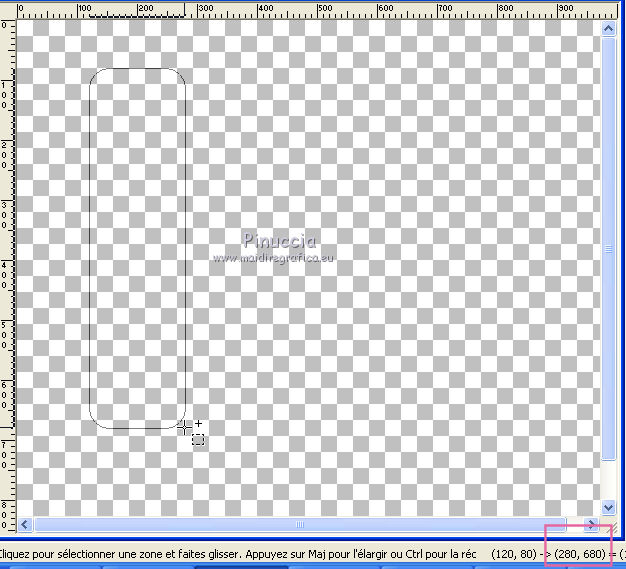
If you have trouble making the selection,
use my selection here
Place the selection in the Selection folder.
Selections>Load/Save a selection, etc.
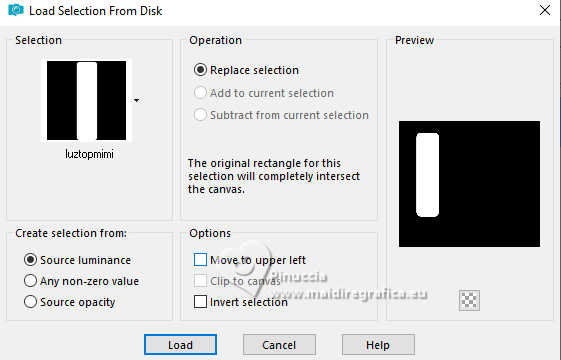
Flood Fill  the selection with your background color #501212. the selection with your background color #501212.
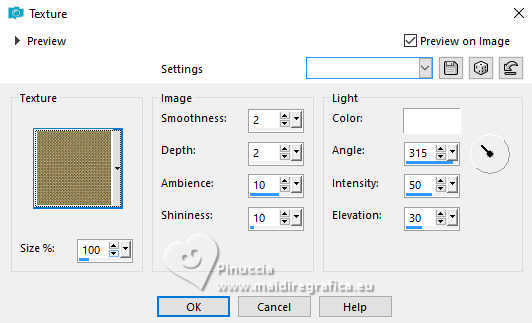
3. Effects>Texture Effects>Texture - select the texture opmitexture4.
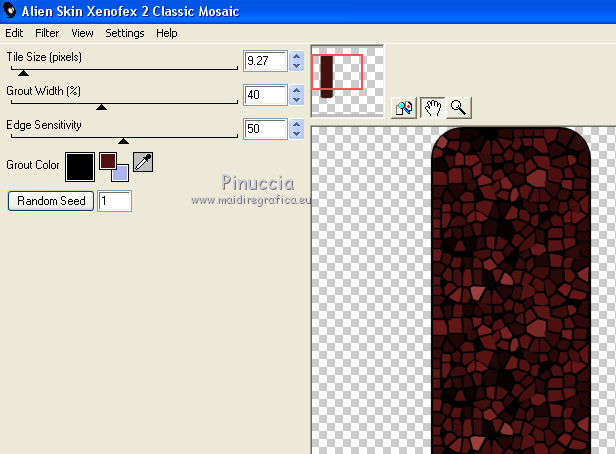
4. Effects>Plugins>Alien Skin Xenofex 2 - Classic Mosaic
Grout color - #000000 (black)
5. Effects>Plugins>FM Tile Tools - Saturation Emboss, default settings.

Selections>Select None.
6. Open the tube Girasoles 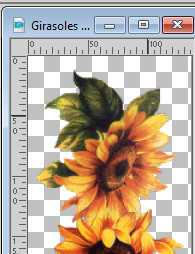
Edit>Copy.
Go back to your work and go to Edit>Paste as new layer.
Move  the tube in the center of the forme. the tube in the center of the forme.
7. Layers>Merge>Merge visible.
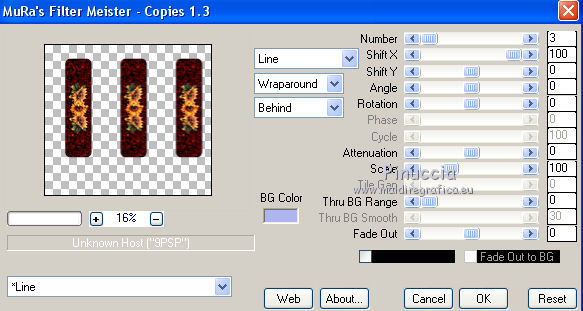
8. Effects>Plugins>Mura's Meister - Copies.
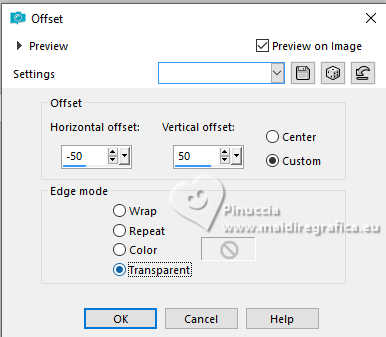
9. Effects>Image Effects>Offset.
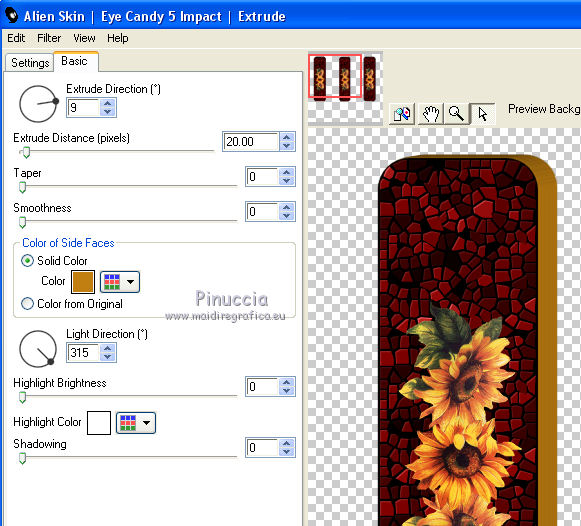
10. Effects>Plugins>Alien Skin Eye Candy 5 Impact - Extrude.
Solid Color: foreground color #c17f11
11. Effects>Plugins>Alien Skin Eye Candy 5 Impact - Bevel.

12. Adjust>Brightness and Contrast>Clarify
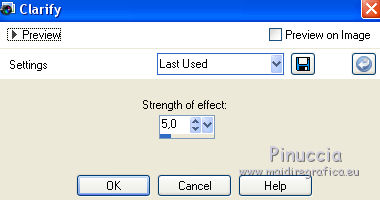
Edit>Repeat Clarify.
This effect is not available in versions after PSPX4.
You can apply Adjust>Hue and Saturation>Vibrancy,
or another effect from the menu Adjust
13. Effects>3D Effects>Drop Shadow.
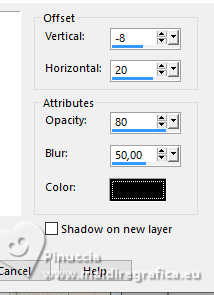
14. Layers>New Raster Layer.
Layers>Arrange>Send to bottom.
Set your foreground color to a Foreground/Background Gradient, style Linear.
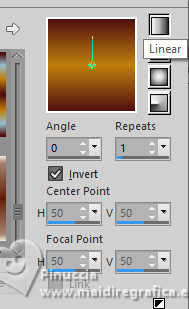
Flood Fill  the layer with your Gradient. the layer with your Gradient.
15. Effects>Texture Effects>Texture, same settings.

16. Effects>Plugins>Alien Skin Xenofex 2 - Classic Mosaic, same settings
17. Effects>Plugins>Mura's Meister - Perspective Tiling.
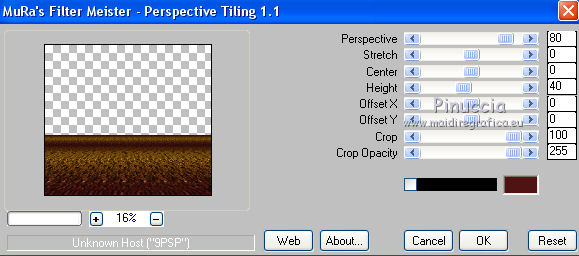
18. Effects>Plugins>FM Tile Tools - Saturation Emboss, default settings.

19. Layers>Duplicate.
20. Effects>Geometric Effects>Perspective Horizontal.
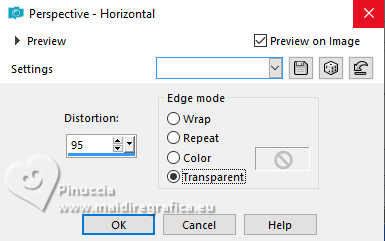
Image>Mirror>Mirror horizontal.
Effects>Geometric Effects>Perspective horizontal, same settings.
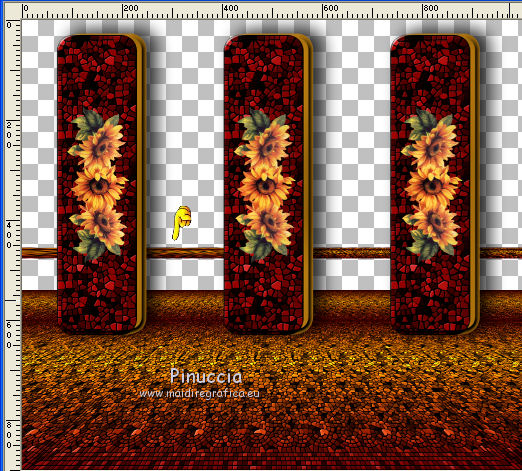
Close the layer Merged to work better,
and stay on the layer Copy of Raster 1.
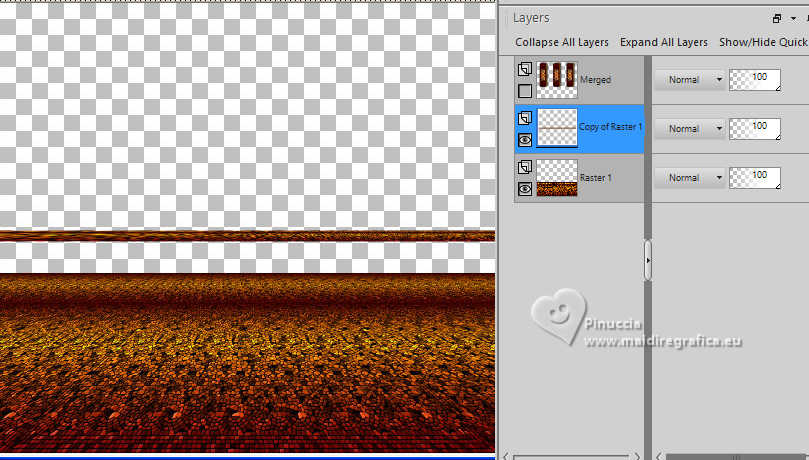
21. Effects>Plugins>Graphics Plus - Quick Tile I.
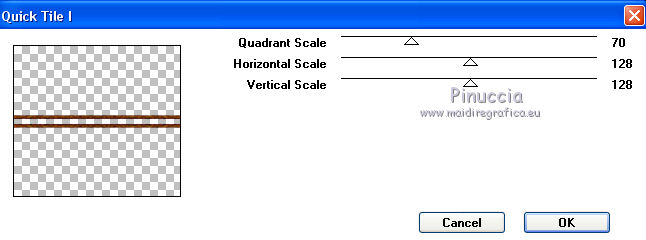
Activate your Magic Wand Tool 
and click in the central part to select it.
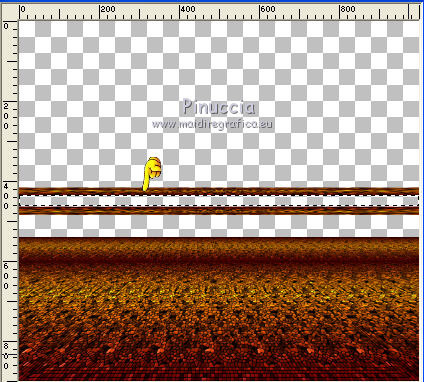
22. Layers>New Raster Layer.
Layers>Arrange>Move Down.
23. Selections>Modify>Feather - 3 pixels.
Set your foreground color to Color.
Flood Fill  the selection with your foreground color #c17f11. the selection with your foreground color #c17f11.
24. Effects>Artistic Effects>Halftone.
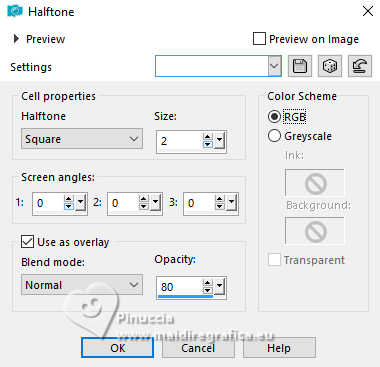
25. Effects>Texture Effects>Sculpture - select the pattern opmiGold.

Selections>Select None.
26. Activate the layer Copy of Raster 1.
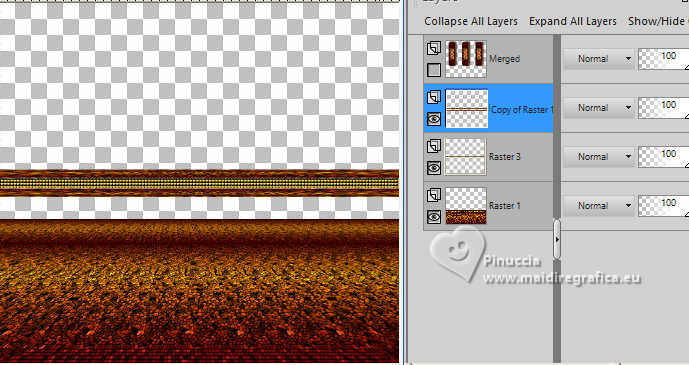
Layers>Merge>Merge Down.
27. Layers>Duplicate.
Effects>Distortion Effects>Wave.
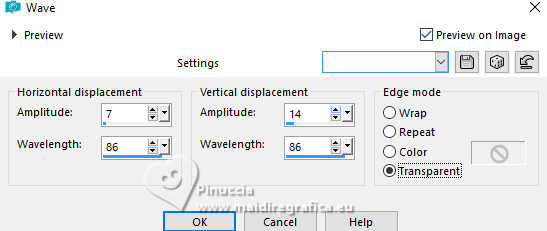
28. Activate your Pick Tool 
Pull the knots to the right and left
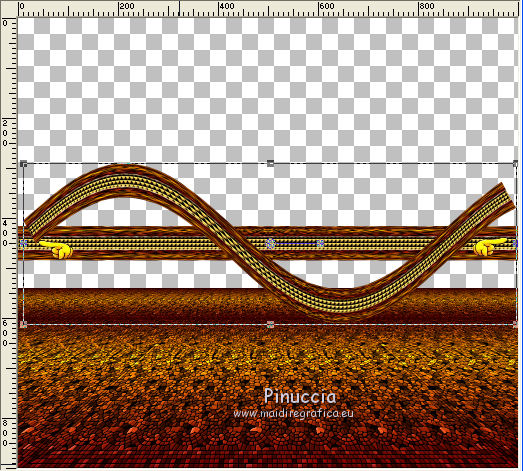
up to the edges
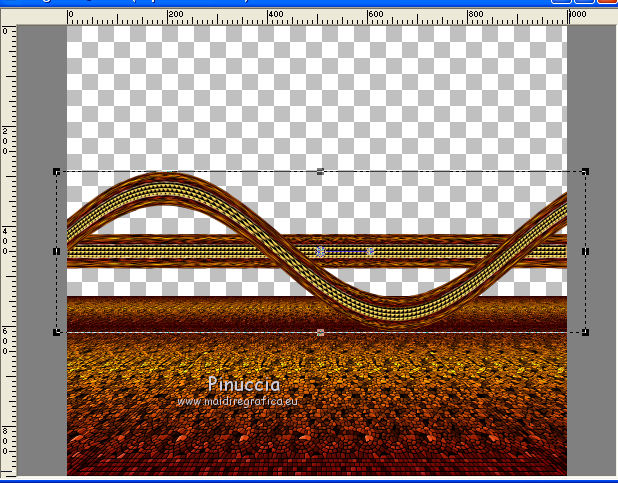
29. Layers>Merge>Merge Down.
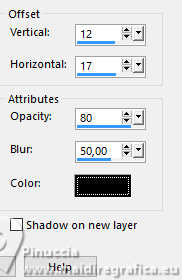
30. Effects>3D Effects>Drop Shadow.
31. Open the misted 4689-luzcristina 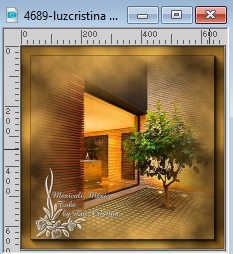
Edit>Copy.
Go back to your work and go to Edit>Paste as new layer.
Move  the tube to the right. the tube to the right.
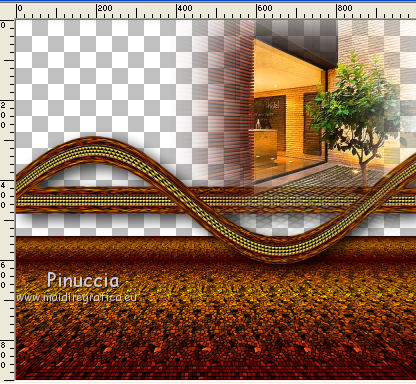
Layers>Duplicate.
Image>Miroir>Miroir horizontal.
32. Layers>Merge>Merge Down
Layers>Arrange>Move Down.
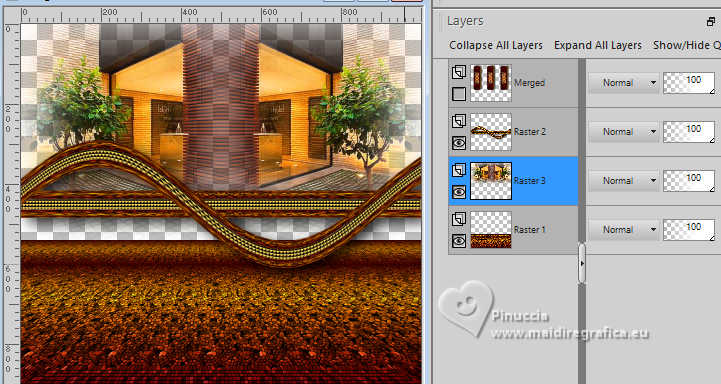
33. Set again your foreground color to Gradient.
Layers>New Raster Layer.
Layers>Arrange>Send to Bottom.
Flood Fill  the layer with your Gradient. the layer with your Gradient.
34. Open your top layer.
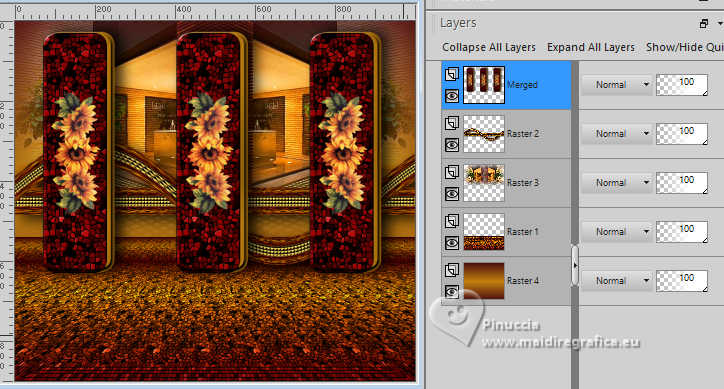
Layers>Merge>Merge visible.
35. Open the tube Image5HighStyle_LR 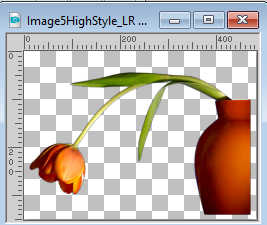
Edit>Copy.
Go back to your work and go to Edit>Paste as new layer.
Move  the tube at the bottom right. the tube at the bottom right.
Effects>3D Effects>Drop Shadow, same settings.
36. Image>Add Borders, 5 pixels, symmetric, background color 501212.
Edit>Copy.
Image>Add Borders, 50 pixels, symmetric, foreground color #c17f11.
37. Activate your Magic Wand Tool 
and click in the last border to select it.
Edit>Paste into Selection.
38. Adjust>Blur>Gaussian Blur - radius 20.

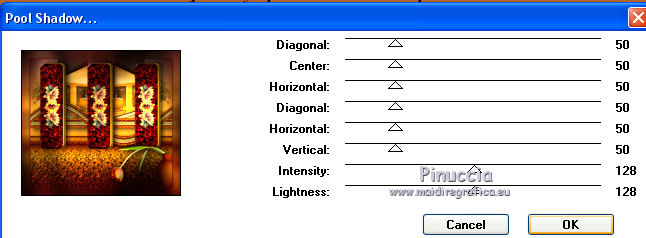
39. Effects>Plugins>Tramages - Pole Shadow, default settings - 2 times.
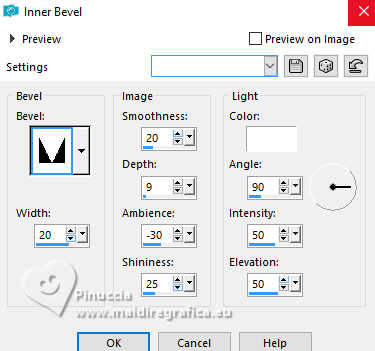
40. Effects>3D Effects>Inner Bevel.
41. Effects>Reflection Effects>Rotating Mirror.

Selections>Select None.
42. Open the woman's tube 3693-luzcristina 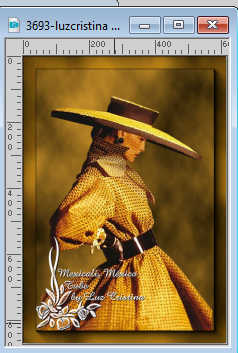
Edit>Copy.
Go back to your work and go to Edit>Paste as new layer.
Move  the tube at the bottom left. the tube at the bottom left.
Effects>3D Effects>Drop Shadow, same settings.
44. Layers>Merge>Merge visible.
Image>Resize, to 85%, resize all layer checked.
45. Sign your work and save as jpg.
For the tubes of this version thanks Beatriz and Luz Cristina
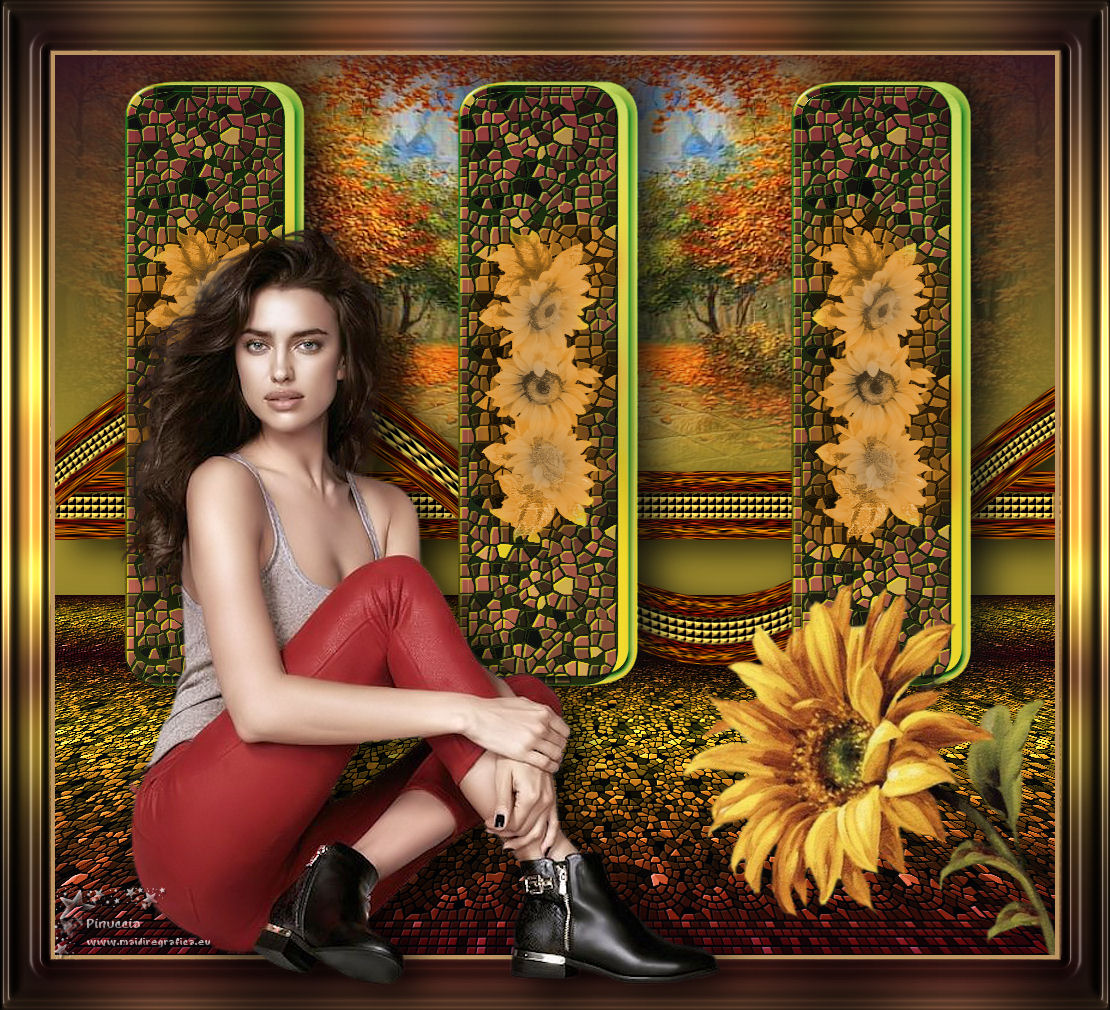


If you have problems or doubts, or you find a not worked link,
or only for tell me that you enjoyed this tutorial, write to me.
20 July 2025
|

