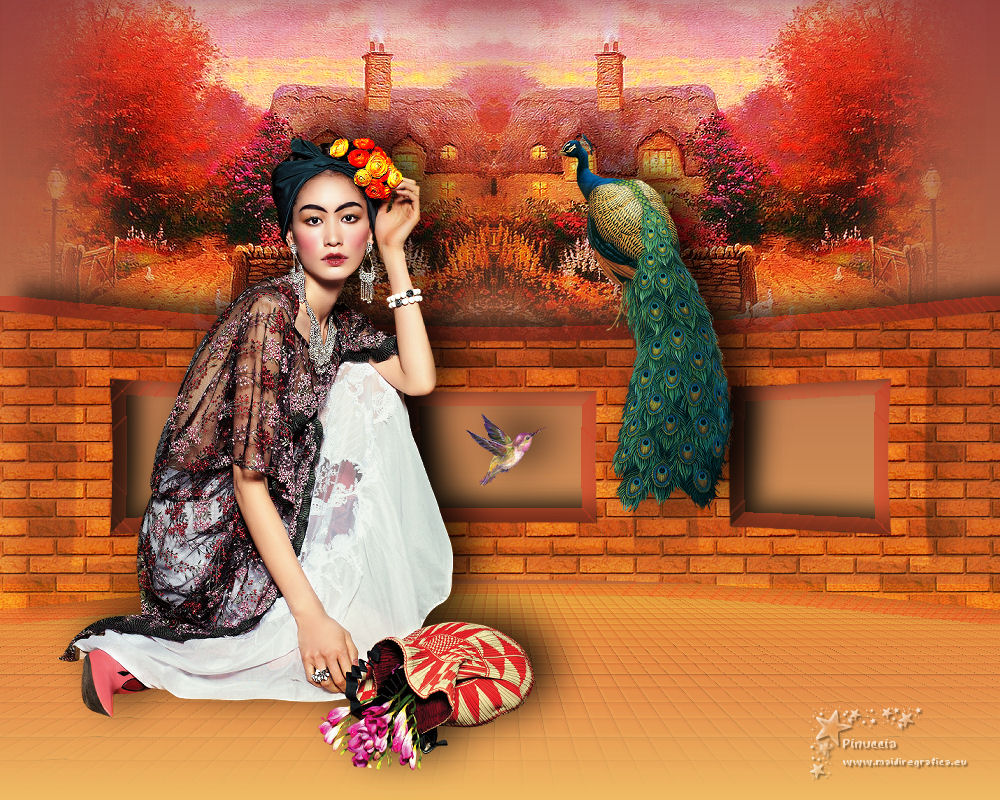
|
TOP MURO


Thanks Luz Cristina for your invitation to translate your tutorials into english

This tutorial, created with PSP9, was translated with PspX9, but it can also be made using other versions of PSP.
Since version PSP X4, Image>Mirror was replaced with Image>Flip Horizontal,
and Image>Flip with Image>Flip Vertical, there are some variables.
In versions X5 and X6, the functions have been improved by making available the Objects menu.
In the latest version X7 command Image>Mirror and Image>Flip returned, but with new differences.
See my schedule here
 French Translation here French Translation here
 Your versions here Your versions here

For this tutorial, you will need:

For the tubes thanks Tocha and Luz Cristina.
(The links of the tubemakers here).

consult, if necessary, my filter section here
FM Tile Tools - Blend Emboss, Saturation Emboss here
Mura's Meister - Perspective Tiling here

You can change Blend Modes according to your colors.
In the newest versions of PSP, you don't find the foreground/background gradient (Corel_06_029).
You can use the gradients of the older versions.
The Gradient of CorelX here

Open the masks and the pattern bg559 in PSP and minimize them with the rest of the material.
1. Open a new transparent image 1000 x 300 pixels.
2. Set your foreground color to Pattern and select the pattern bg559 with these settings.
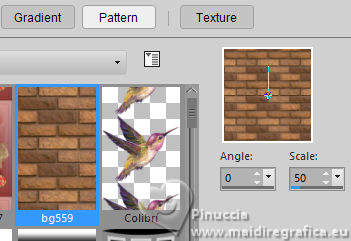
Flood Fill  the transparent image with your foreground Pattern. the transparent image with your foreground Pattern.
3. Layers>New Mask layer>From image
Open the menu under the source window and you'll see all the files open.
Select the mask mask-TP-23.
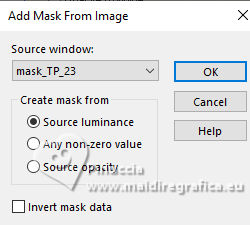
Layers>Merge>Merge Group.
4. Effects>Plugins>FM Tile Tools - Saturation Emboss, default settings.

5. Set your foreground color to #efb963,
and your background color to #953f3a.
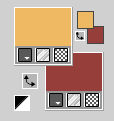
Set your foreground color to a Foreground/Background Gradient, style Linear.
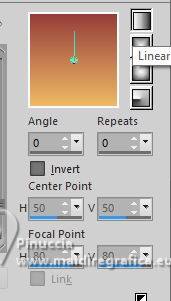
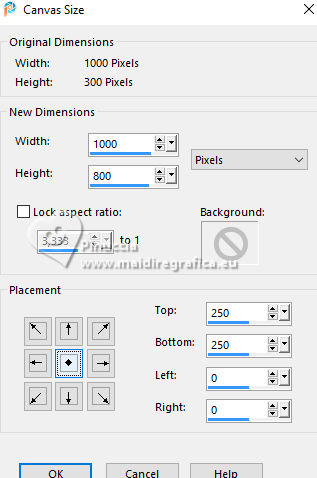
6. Image>Canvas Size - 1000 x 800 pixels.
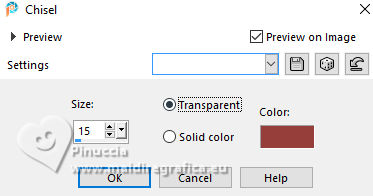
7- Effects>3D Effects>Chisel, background color.
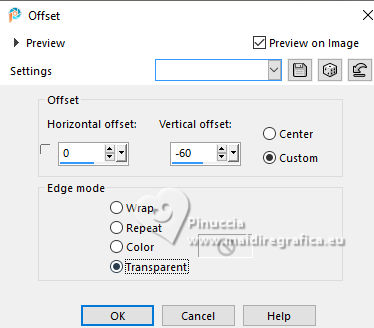
8. Effects>Image Effects>Offset
9. Effects>3D Effects>Drop Shadow, color black.
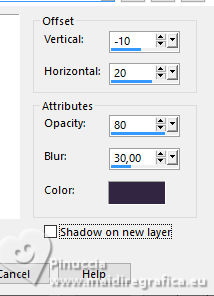
10. Layers>New Raster Layer.
Layers>Arrange>Send to Bottom.
Flood Fill  the layer with your Gradient. the layer with your Gradient.
11. Layers>Duplicate.
Effects>Texture Effects>Tiles.
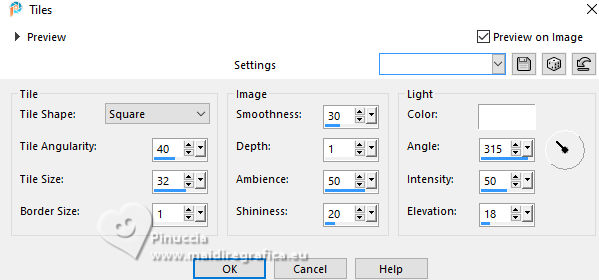
12. Image>Mirror>Mirror Vertical (Image>Flip).
Effects>Plugins>Mura's Meister - Perspective Tiling.
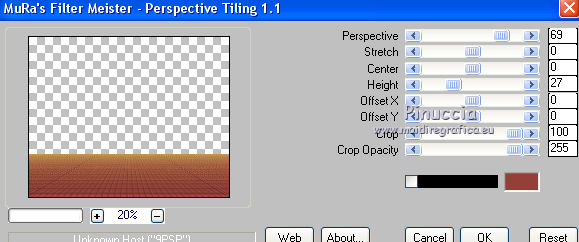
13. Layers>New Mask layer>From image
Open the menu under the source window
and select the mask marge-topfade.
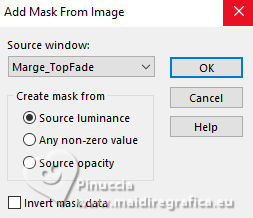
Layers>Merge>Merge Group.
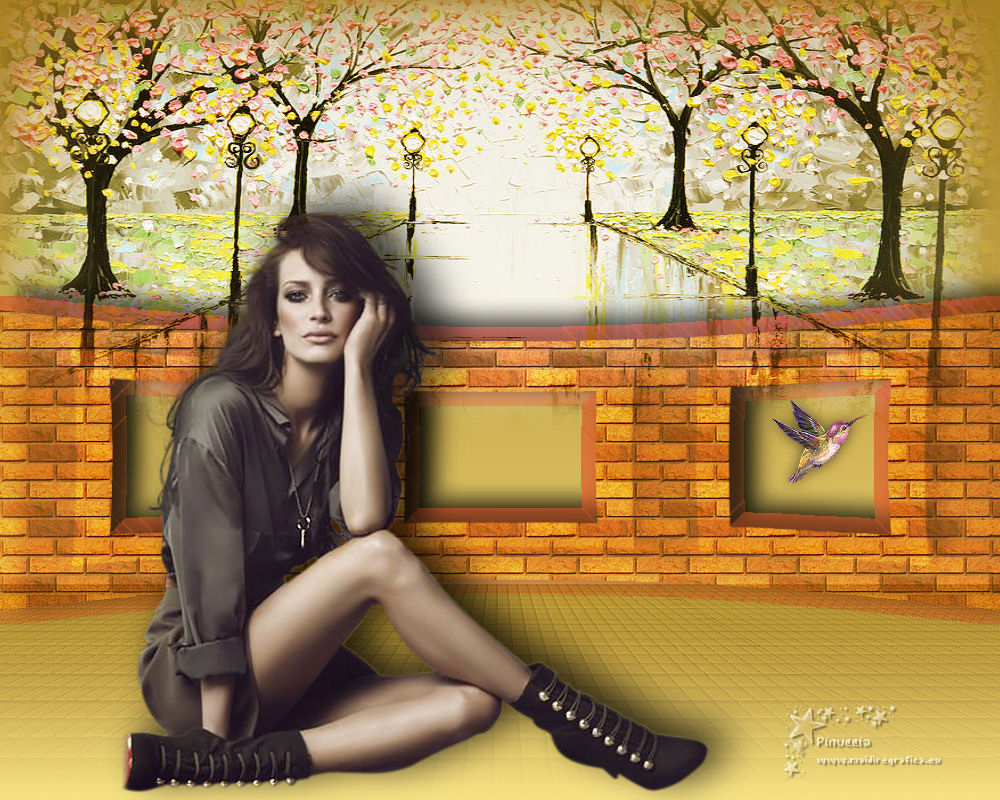
14. Open the misted paisaje-LuzC 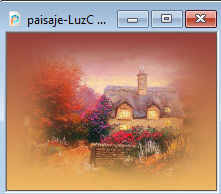
Edit>Copy.
Go back to your work and go to Edit>Paste as new layer.
Move  the tube at the upper left. the tube at the upper left.
15. Layers>Duplicate.
Image>Mirror>Mirror Horizontal,
and place  correctly the tube. correctly the tube.
Layers>Merge>Merge Down.
16. Change the Blend Mode of this layer to Hard Light or to your liking.
17. Activate your top layer.
Open the woman's tube Tocha23907 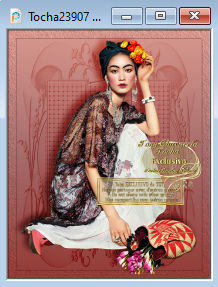
Edit>Copy.
Go back to your work and go to Edit>Paste as new layer.
Move  the tube to the left side. the tube to the left side.
Effects>3D Effects>Drop Shadow.
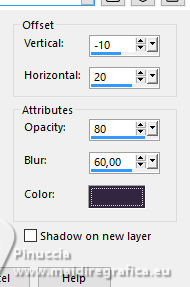
18. Except the background layer, set the layers to Hard Light mode, or to your liking.
You can also colorize the pattern according to your colors.
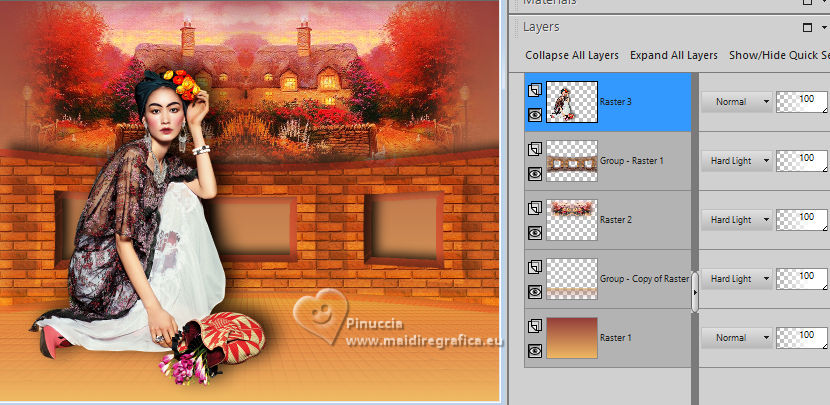
19. Copy/paste as new layer the hummingbird and peacock tubes,
and place them  to your liking. to your liking.
Effects>3D Effects>Drop Shadow, at your choice.
20. Sign your work on a new layer.
Layers>Merge>Merge All and save as jpg.
For the tubes of this version thanks Cal and Beatriz
 Vos versioni here Vos versioni here

If you have problems or doubts, or you find a not worked link,
or only for tell me that you enjoyed this tutorial, write to me.
19 June 2025
|

