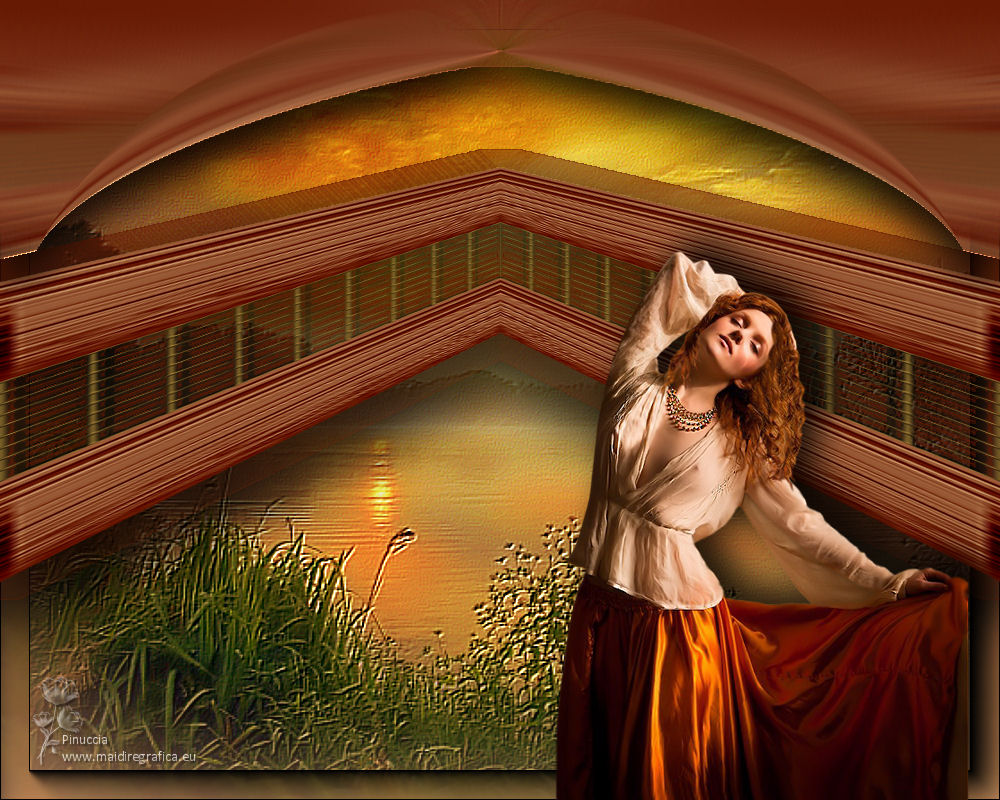
|
TOP NORMA


Thanks Luz Cristina for your invitation to translate your tutorials into english

This tutorial, created with PSP9, was translated with PspX9, but it can also be made using other versions of PSP.
Since version PSP X4, Image>Mirror was replaced with Image>Flip Horizontal,
and Image>Flip with Image>Flip Vertical, there are some variables.
In versions X5 and X6, the functions have been improved by making available the Objects menu.
In the latest version X7 command Image>Mirror and Image>Flip returned, but with new differences.
See my schedule here
 French Translation here French Translation here
 Your versions here Your versions here

For this tutorial, you will need:

For the tubes thanks Ivo and MC.
(The links of the tubemakers here).

consult, if necessary, my filter section here
AAA Frames - Foto Frame here
FM Tile Tools - Blend Emboss here
Flaming Pear - Flood here
Mura's Meister - Perspective Tiling here
VM Toolbox - Grid here
Filters Unlimited 2.0 here
Filters VM Toolbox can be used alone or imported into Filters Unlimited.
(How do, you see here)
If a plugin supplied appears with this icon  it must necessarily be imported into Unlimited it must necessarily be imported into Unlimited

You can change Blend Modes according to your colors.
In the newest versions of PSP, you don't find the foreground/background gradient (Corel_06_029).
You can use the gradients of the older versions.
The Gradient of CorelX here

Copy the golden pattern in the Patterns Folder.
Copy the preset Emboss 3 in the Presets Folder.
1. Open a new transparent image 1000 x 300 pixels.
2. Set your foreground color to #b4835b,
and your background color to #641600.
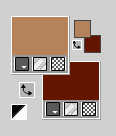
Set your foreground color to a Foreground/Background Gradient, style Linear.
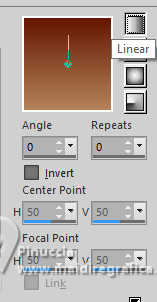
3. Activate your Selection Tool 
(no matter the type of selection, because with the custom selection your always get a rectangle)
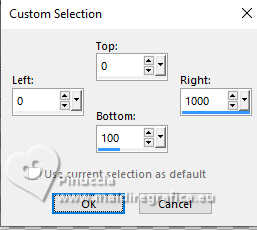
clic on the Custom Selection 
and set the following settings.
4. Flood Fill  the selection with your Gradient. the selection with your Gradient.
5. Effects>Plugins>Flaming Pear - Flood - background color #641600.
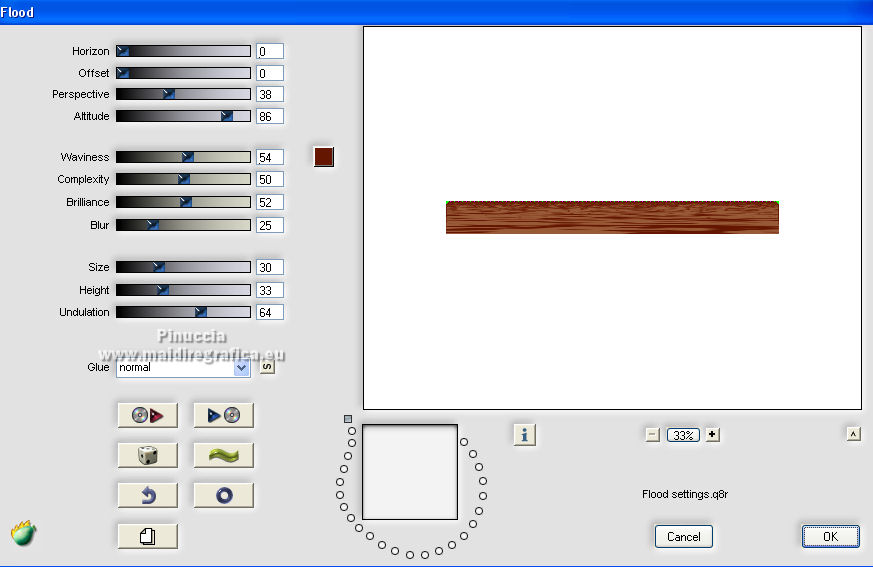
6. Effects>User Defined Filter - select the preset Emboss 3 and ok.

Selections>Select None.
7. Custom Selection 
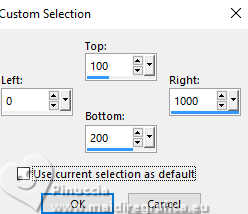
8. Effects>Plugins>VM Toolbox - Grid.
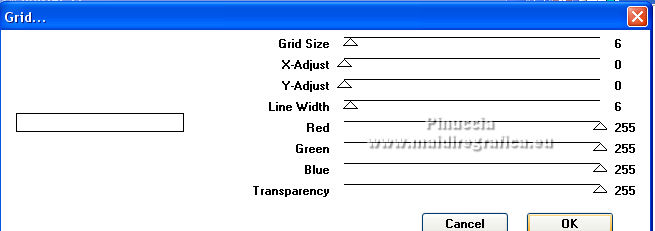
It may happen that a filter containing an effect of the same name,
previously added to the File Locations,
prevents you from seeing the effect in VM Toolbox.
In this case, you can use the effect in Unlimited
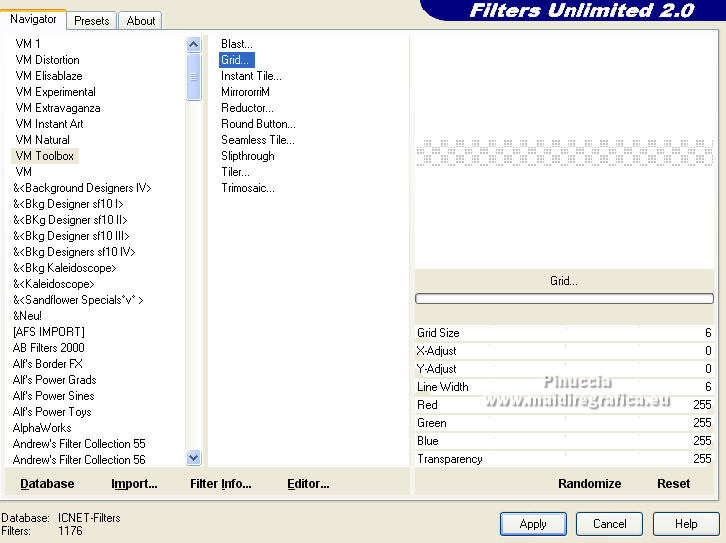
9. Effets>Effets de textures>Sculpture - select the golden pattern.
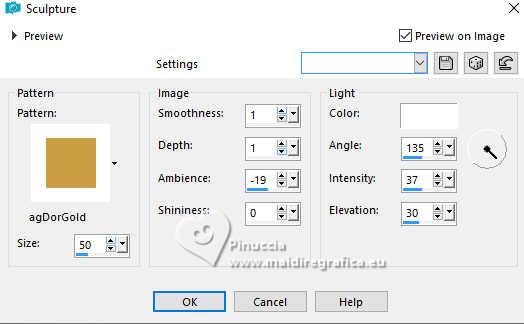
Selections>Select None.
10. Effects>3D Effects>Drop Shadow.
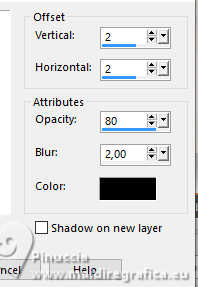
11. Custom Selection 
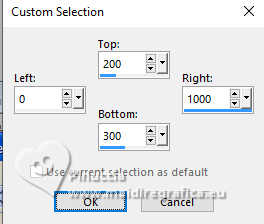
Flood Fill  the selection with your Gradient. the selection with your Gradient.
12. Effects>Plugins>Flaming Pear - Flood, same settings.
Effects>User Defined Filter - Emboss 3.
Selections>Select None.
13. Image>Canvas Size - 1000 x 800 pixels.
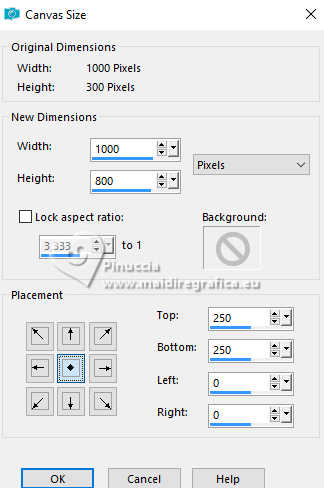
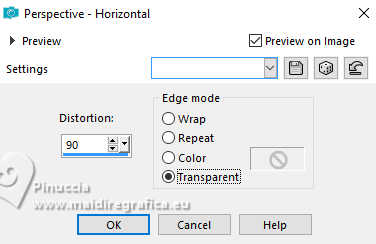
14. Effects>Geometric Effects>Perspective Horizontal.
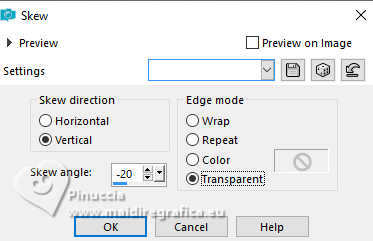
15. Effects>Geometric Effects>Skew.
16. Effects>Reflection Effects>Rotating Mirror.

17. Image>Mirror>Mirror Vertical (Image>Flip).
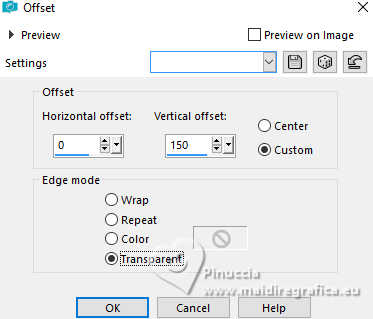
18. Effects>Image Effects>Offset.
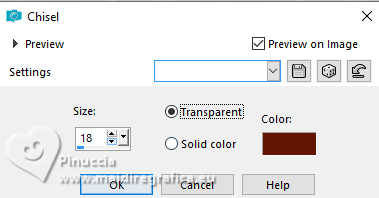
19. Effets>Effets 3D>Ciselage.
20. Edit>Copy.
Activate your Magic Wand Tool 
and click in the top transparent part to select it.
Layers>New Raster Layer.
Flood Fill  the layer with your gradient. the layer with your gradient.
Edit>Paste into Selection.
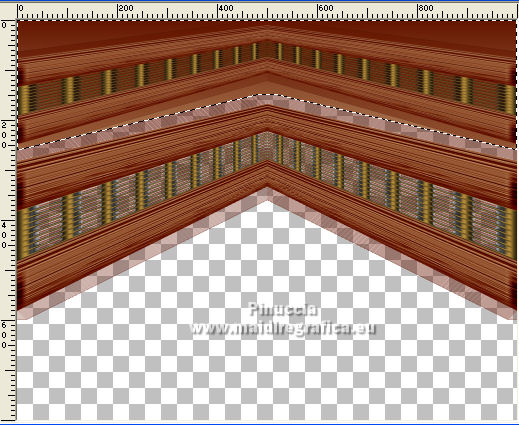
21. Adjust>Blur>Radial Blur.
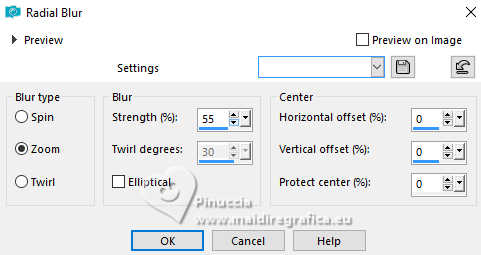
Effects>User Defined Filter - Emboss 3.
Selections>Select None.
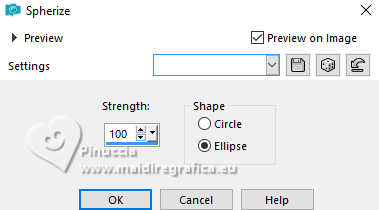
22. Effects>Geometric Effects>Spherize.
23. Effects>3D Effects>Drop Shadow.
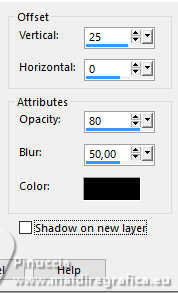
24. Activate the layer Raster 1.
Edit>Repeat Drop Shadow - 2 times.
25. Layers>New Raster Layer.
Layers>Arrange>Send to Bottom.
Flood Fill  the layer with your gradient. the layer with your gradient.
26. Layers>New Raster Layer.
Selections>Select All.
Open the misted mc2929 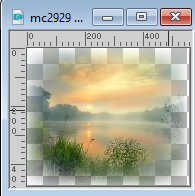
Edit>Copy.
Go back to your work and go to Edit>Paste into Selection.
Selections>Select None.
Change the Blend Mode of this layer to Hard Light, or to your liking.
27. Effects>Plugins>FM Tile Tools - Blend Emboss, default settings.

28. Layers>Merge>Merge Down.
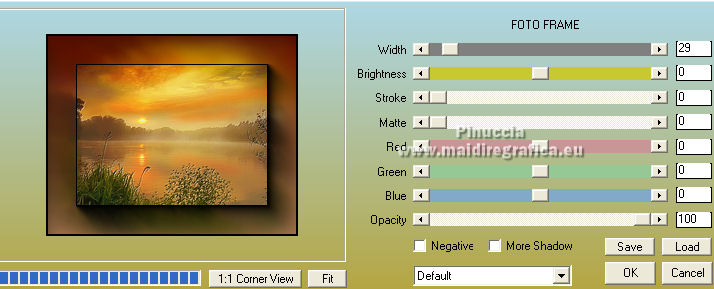
29. Effects>Plugins>AAA Frames - Foto Frame.
30. Activate your top layer.
Open the woman's tubes 46.Ivo-Ensueño 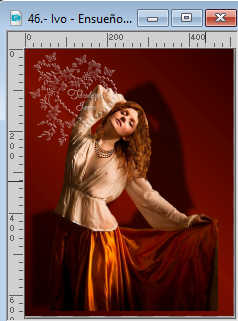
Edit>Copy.
Go back to your work and go to Edit>Paste as new layer.
Move  the tube at the bottom right. the tube at the bottom right.
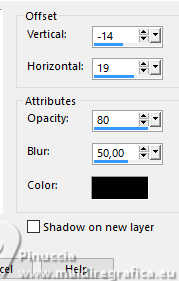
31. Effects>3D Effects>Drop Shadow.
32. Sign your work on a new layer.
Layers>Merge>Merge All and save as jpg.
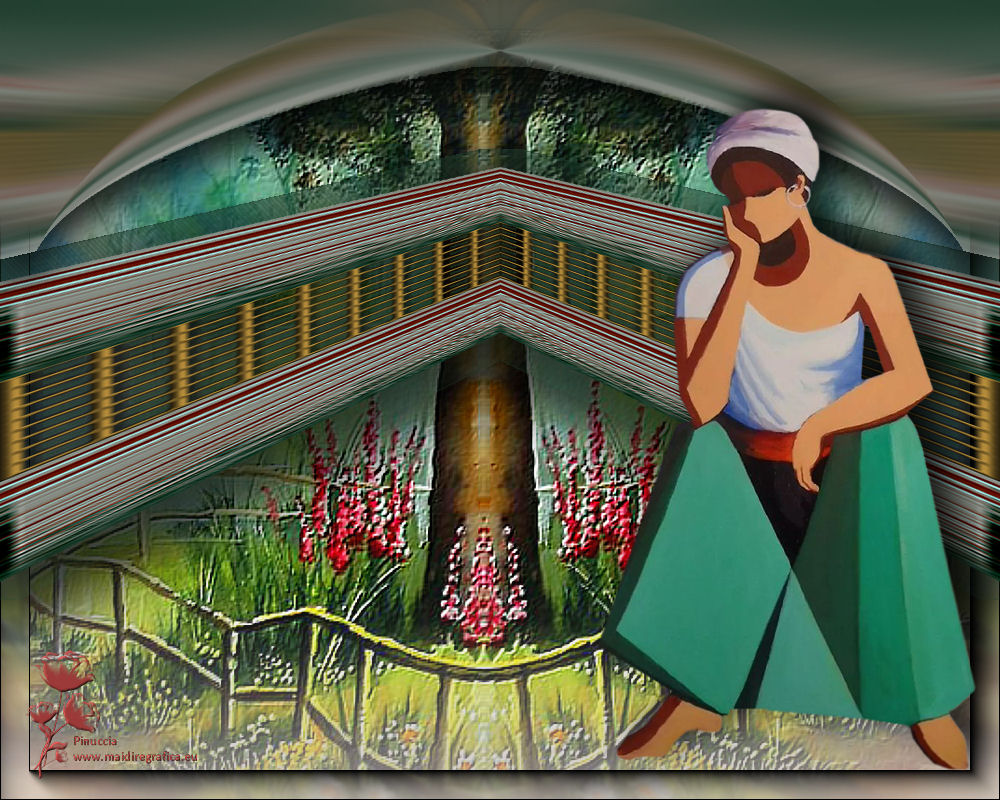
For the tubes of this version thanks Luz Cristina and Mentali
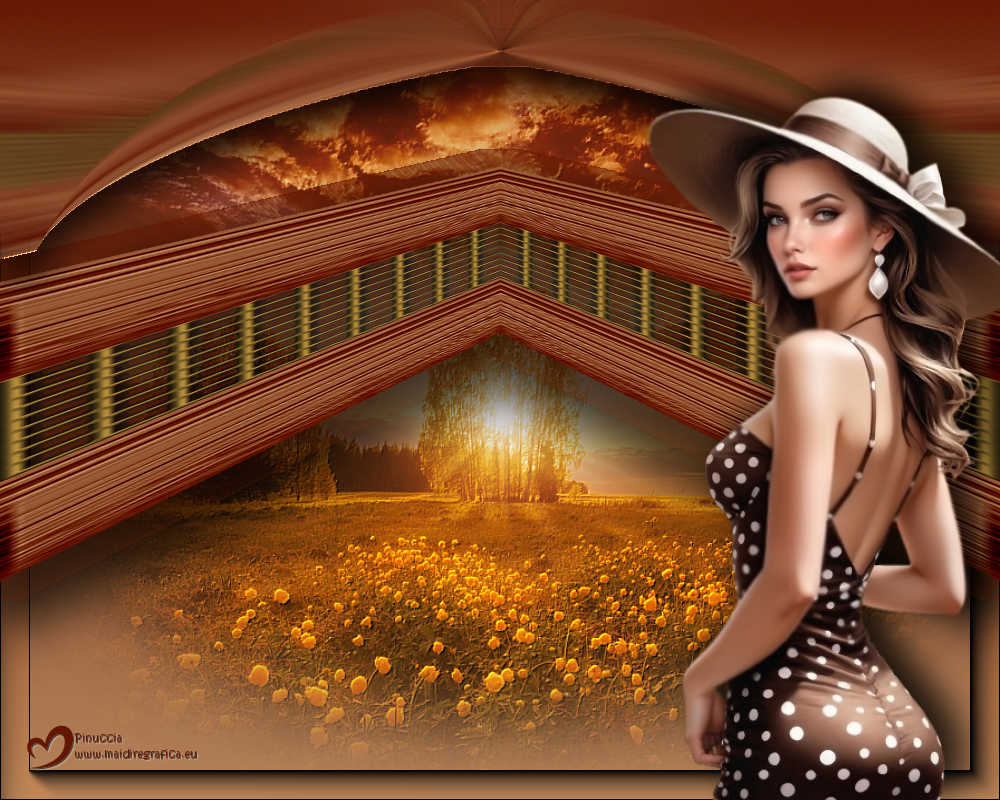
Version with tubes by Luz Cristina.

If you have problems or doubts, or you find a not worked link,
or only for tell me that you enjoyed this tutorial, write to me.
30 May 2025

|

