|
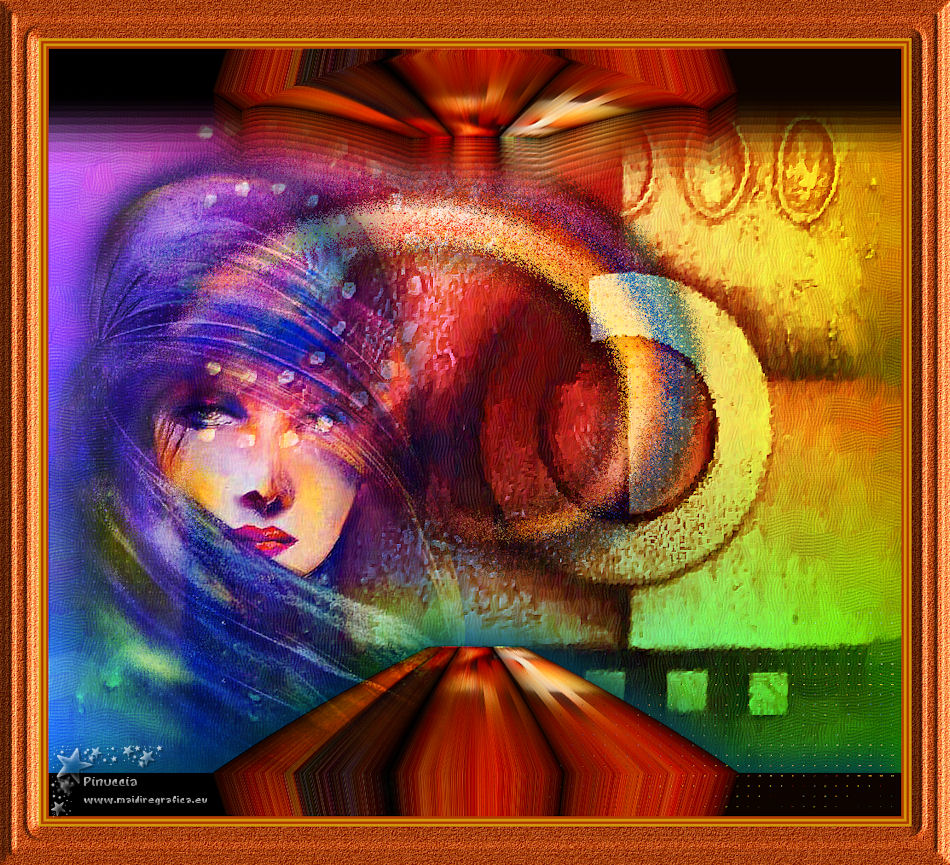
TOP PINTURA


Thanks Luz Cristina for your invitation to translate your tutorials into english

This tutorial, created with PSP2022, was translated with PspX7, but it can also be made using other versions of PSP.
Since version PSP X4, Image>Mirror was replaced with Image>Flip Horizontal,
and Image>Flip with Image>Flip Vertical, there are some variables.
In versions X5 and X6, the functions have been improved by making available the Objects menu.
In the latest version X7 command Image>Mirror and Image>Flip returned, but with new differences.
See my schedule here
 French Translation here French Translation here
 Your versions here Your versions here

For this tutorial, you will need:

Tubes by Luz Cristina (painting by David Tirado).
(The links of the tubemakers here).
*It is forbidden to remove the watermark from the supplied tubes, distribute or modify them,
in order to respect the work of the authors

consult, if necessary, my filter section here
Filters Unlimited 2.0 here
Virtual Painter here
Filter Factory Gallery M here
Mehdi 2 - Flat Median here
FM Tile Tools - Blend Emboss here
Mura's Seamless - Stripe of cylinder here
Mura's Meister - Copies here
Filters Factory Gallery and Mura's Seamless can be used alone or imported into Filters Unlimited.
(How do, you see here)
If a plugin supplied appears with this icon  it must necessarily be imported into Unlimited it must necessarily be imported into Unlimited

You can change Blend Modes according to your colors.

1. Open a new transparent image 1000 x 900 pixels.
2. Set your foreground color to a color at your choice.
Flood Fill  the transparent image with your color. the transparent image with your color.
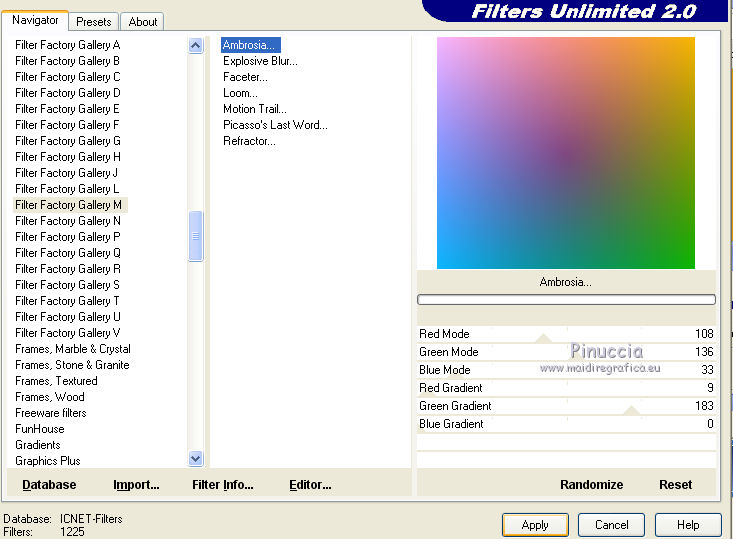
3. Effects>Plugins>Filters Unlimited 2.0 - Filter Factory Gallery M - Ambrosia, default settings.
4. Layers>New Raster Layer.
Selections>Select All.
Open your jpg image TopPinImagenJPG 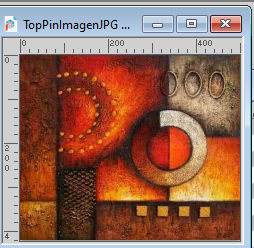
Edit>Copy.
Go back to your work and go to Edit>Paste into Selection.
Selections>Select None.
Change the Blend Mode of this layer to Overlay.
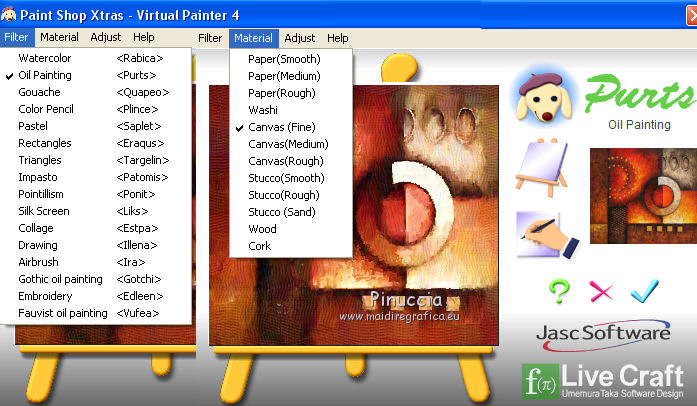
5. Effects>Plugins>Virtual Painter 4
Filter: Oil Painting - Material: Canvas Fine
6. Effects>Plugins>FM Tile Tools - Blend Emboss.

7. Layers>Duplicate.
Set again the Blend Mode to Normal.
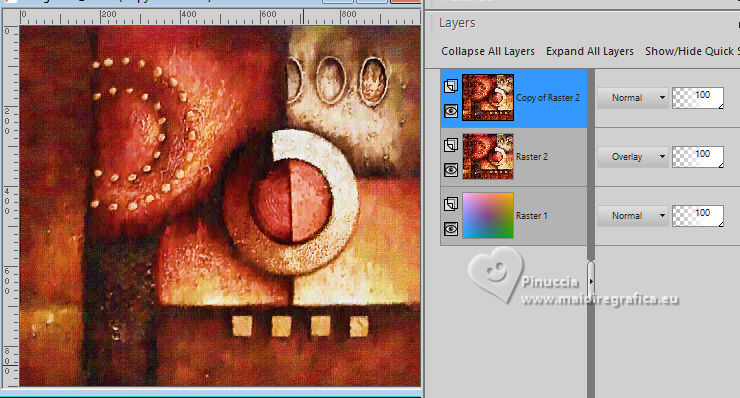
8. Effects>Plugins>Mehdi 2 - Flat Median.
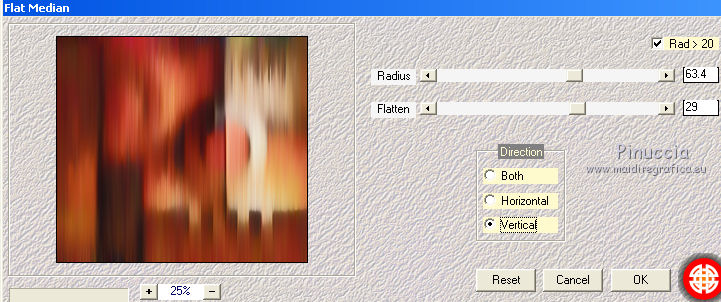
9. Effects>Plugins>Mura's Seamless - Stripe of Cylinder.
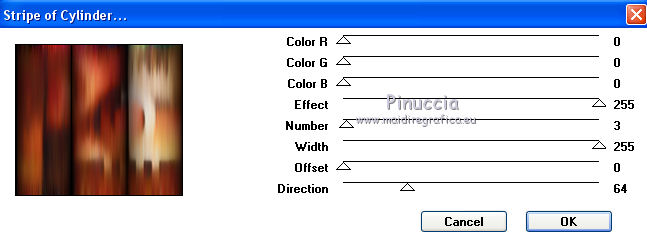
10. Effects>Geometric Effects>Perspective Vertical.
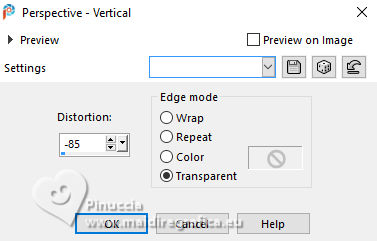
11. Activate your Pick Tool 
in mode Scale 
pull the central node down, until 750 pixels.
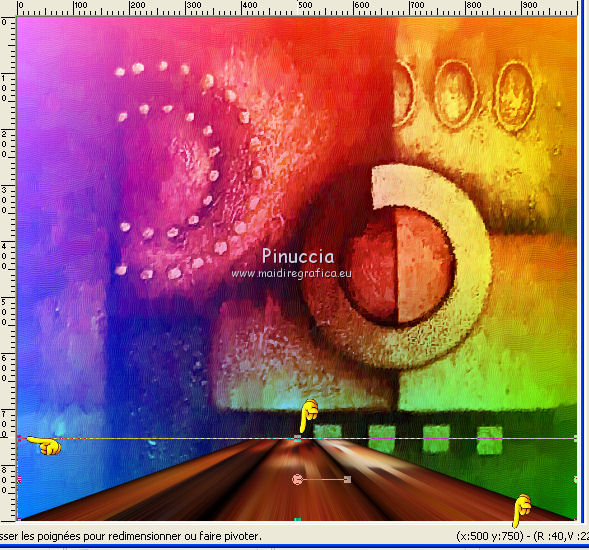
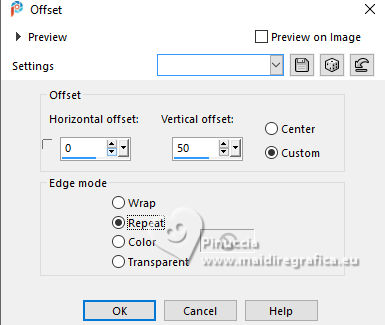
12. Effects>Image Effects>Offset.
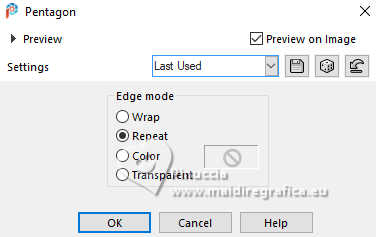
13. Effects>Geometric Effects>Pentagon.
14. Layers>Duplicate.
Image>Mirror>Mirror vertical (Image>Flip).
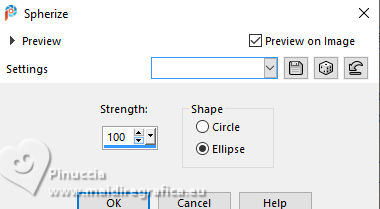
15. Effects>Geometric Effects>Spherize
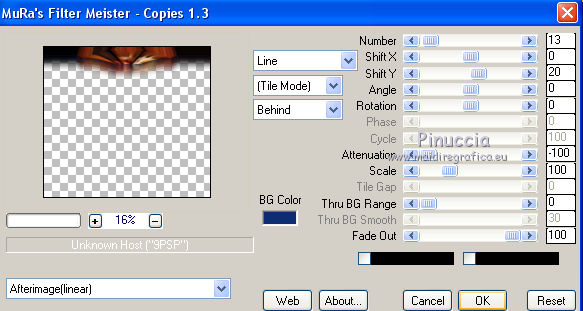
16. Effects>Plugins>Mura's Meister - Copies.
17. Activate the layer below, Copy of Raster 2.
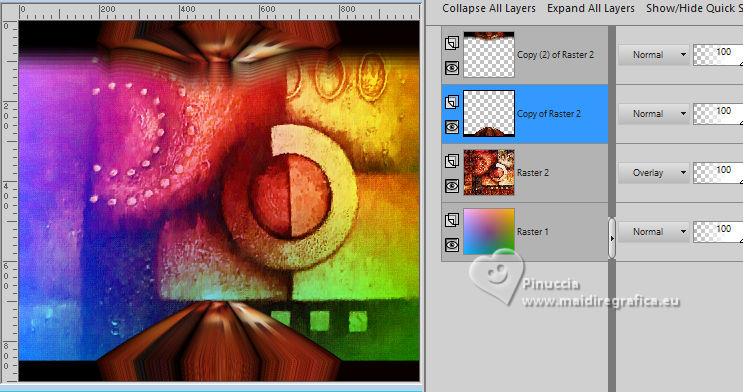
Effects>3D Effects>Drop Shadow.

18. Open the tube 5496-luzcristina 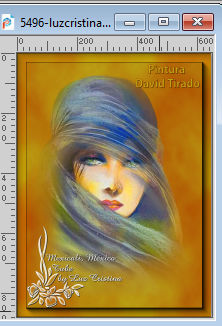
Edit>Copy.
Go back to your work and go to Edit>Paste as new layer.
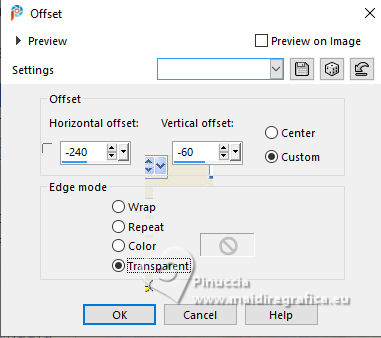
Effects>Image Effects>Offset.
Change the Blend Mode of this layer to Hard Light.
19. Effects>3D Effects>Drop Shadow.
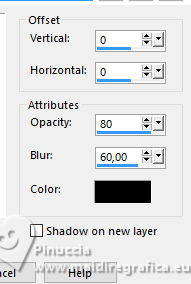
20. Layers>Duplicate.
Layers>Arrange>Move Down.
21. Effects>Distortion Effects>Twirl.
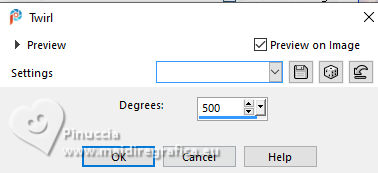
22. Effects>Texture Effects>Mosaic - Glass.
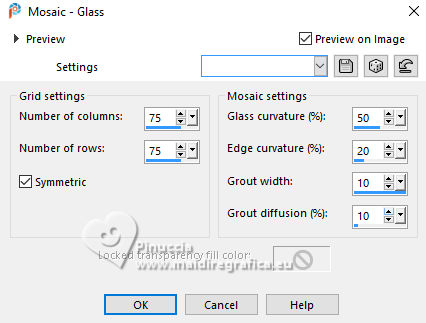
23. Activate the layer Copy of Raster 2.
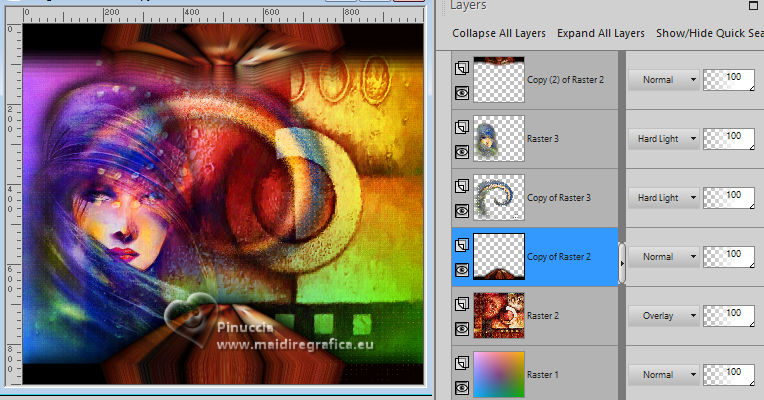
Effects>Plugins>FM Tile Tools - Saturation Emboss, default.

Activate your top layer, copy (2) of Raster 2.
Repeat the Effet Saturation Emboss.
24. Image>Add Borders, 3 pixels, symmetric, color #af3d01.
Image>Add Borders, 3 pixels, symmetric, color #d3930b.
Image>Add Borders, 3 pixels, symmetric, color #af3d01.
Image>Add Borders, 3 pixels, symmetric, color #d3930b.
Image>Add Borders, 45 pixels, symmetric, color #af3d01.
Activate your Magic Wand Tool 
and click in the last border to select it.
Adjust>Add/Remove Noise>Add Noise.
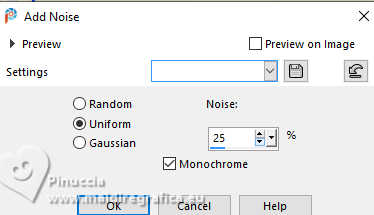
25. Effects>Plugins>FM Tile Tools - Blend Emboss, par défaut.

26. Effects>3D Effects>Inner Bevel.
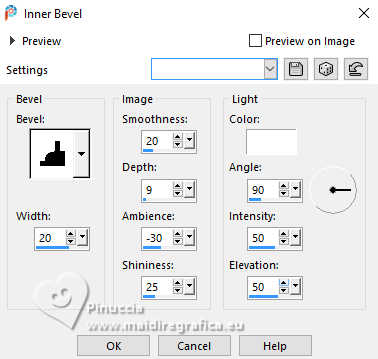
Selections>Select None.
27. Image>Resize, to 85%, resize all layers not checked.
Sign your work and save as jpg.
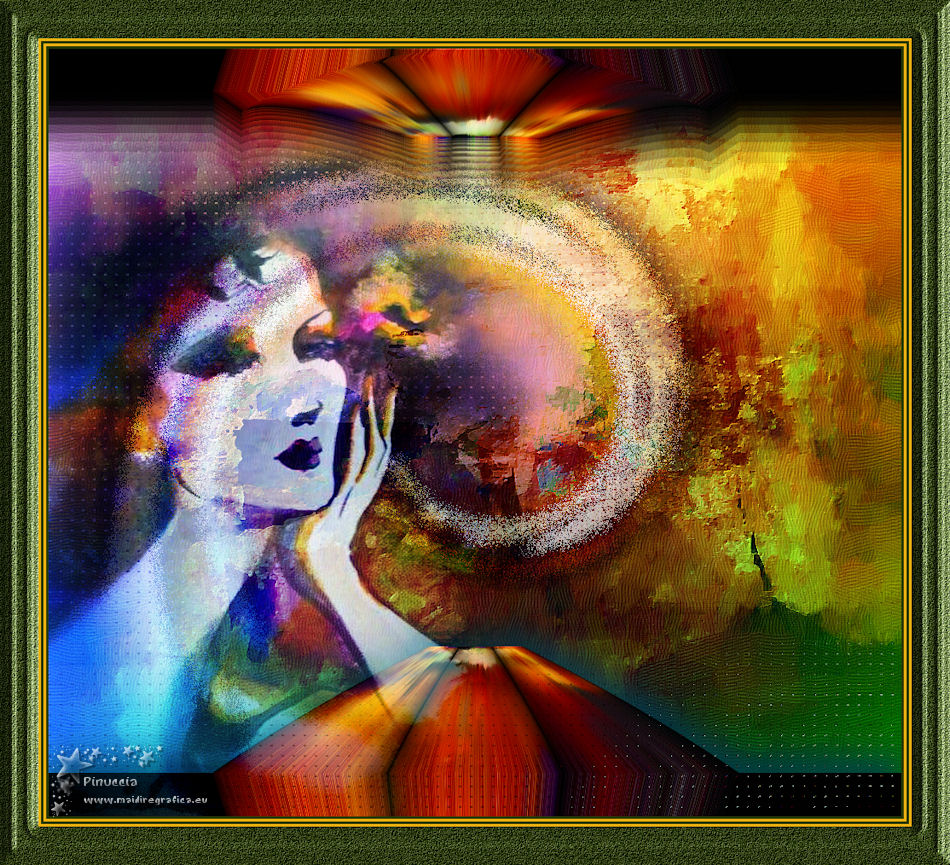
Version with mon tube (painting by D.Tirado) and an image en jpg from the net.
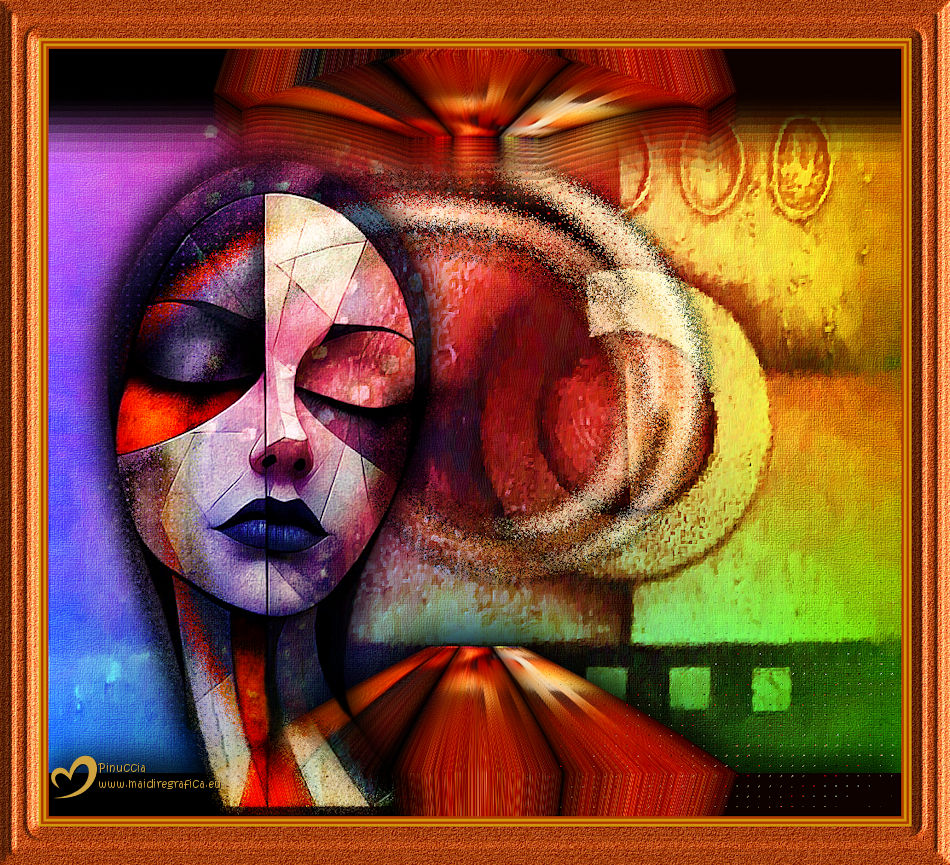
Version with tube by Luz Cristina


If you have problems or doubts, or you find a not worked link,
or only for tell me that you enjoyed this tutorial, write to me.
20 March 2025
|

