|
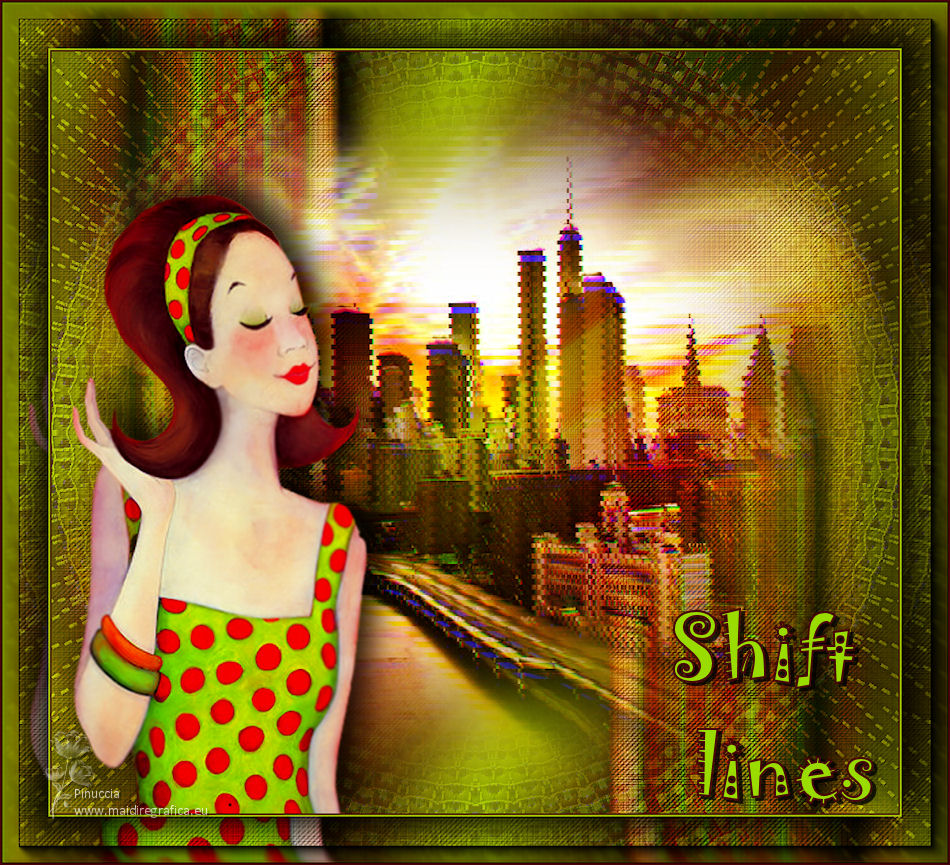
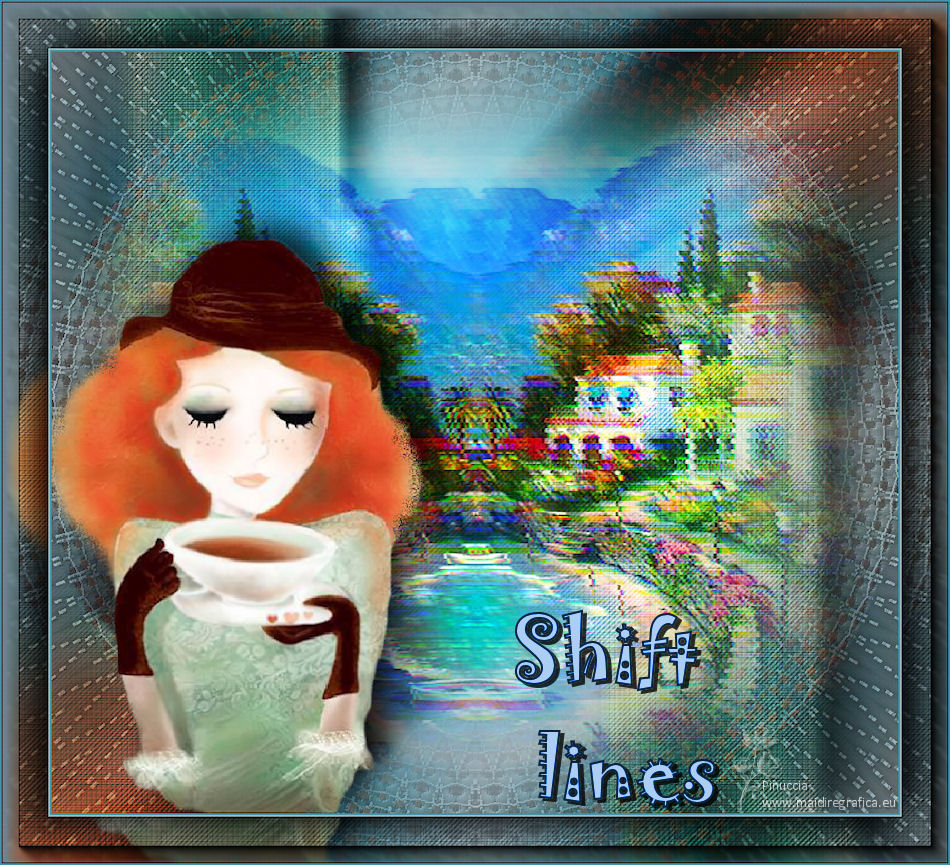
TOP SHIFT LINES


Thanks Luz Cristina for your invitation to translate your tutorials into english

This tutorial, created with PSP9, was translated with PspX7, but it can also be made using other versions of PSP.
Since version PSP X4, Image>Mirror was replaced with Image>Flip Horizontal,
and Image>Flip with Image>Flip Vertical, there are some variables.
In versions X5 and X6, the functions have been improved by making available the Objects menu.
In the latest version X7 command Image>Mirror and Image>Flip returned, but with new differences.
See my schedule here
 French Translation here French Translation here
 Your versions here Your versions here

For this tutorial, you will need:

Tubes by Luz Cristina .
(The links of the tubemakers here).

consult, if necessary, my filter section here
Filters Unlimited 2.0 - here
Sapphire Filters 1c - Shift Lines here
VM Distortion - Kaleidoscope here
FM Tile Tools - Blend Emboss here
AAA Frames - Foto Frame here
Filters Sapphire and VM Distortion can be used alone or imported into Filters Unlimited.
(How do, you see here)
If a plugin supplied appears with this icon  it must necessarily be imported into Unlimited it must necessarily be imported into Unlimited

You can change Blend Modes according to your colors.
In the newest versions of PSP, you don't find the foreground/background gradient (Corel_06_029).
You can use the gradients of the older versions.
The Gradient of CorelX here

Copy the texture goldfill in the Textures Folder.
Copy the mask in the Masks Folder.
1. Open a new transparent image1000 x 900 pixels.
2. Set your foreground color to #b0d300,
and your background color to #470509.
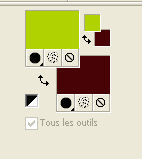
3. Set your foreground color to a Foreground/Background Gradient, style Sunburst.
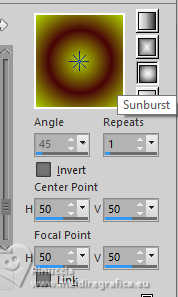
Flood Fill  the transparent image with your gradient. the transparent image with your gradient.
4. Effects>Geometric Effects>Skew.
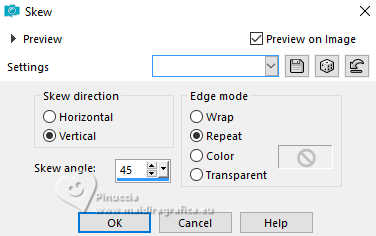
5. Effects>Image Effects>Seamless Tiling.
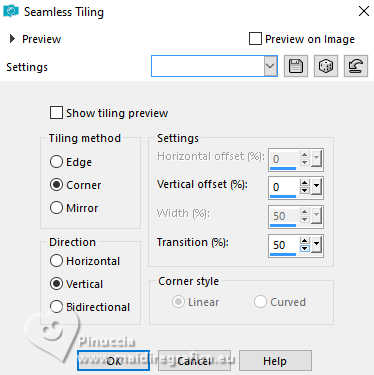
6. Layers>Duplicate.
7. Effects>Texture Effects>Tiles
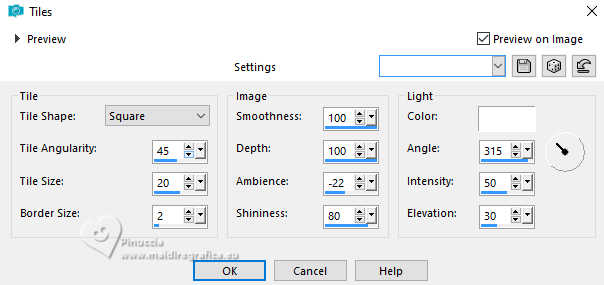
8. Layers>Load/Save Selection>Load Selection from Disk.
Look for and load the mask 20-21.
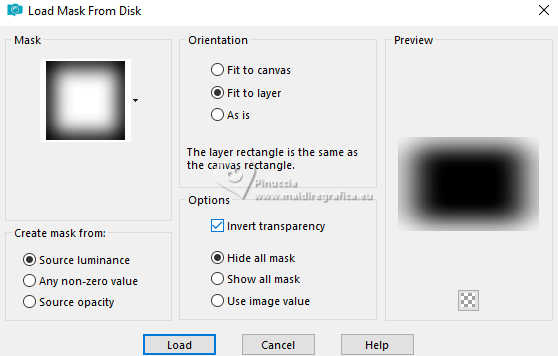
Layers>Duplicate - 2 times, to apply the mask 3 times.
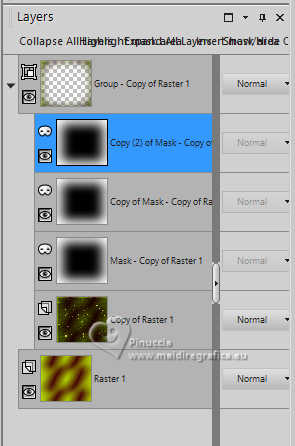
Layers>Merge>Merge Group.
Change the Blend Mode of this layer to Difference, or other.
9. Layers>New Raster Layer.
Selections>Select All.
Open the misted 7173-LuzCristina 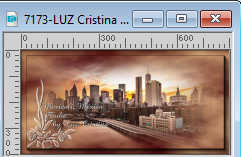
Go back to your work and go to Edit>Paste into Selection.
Selections>Select None.
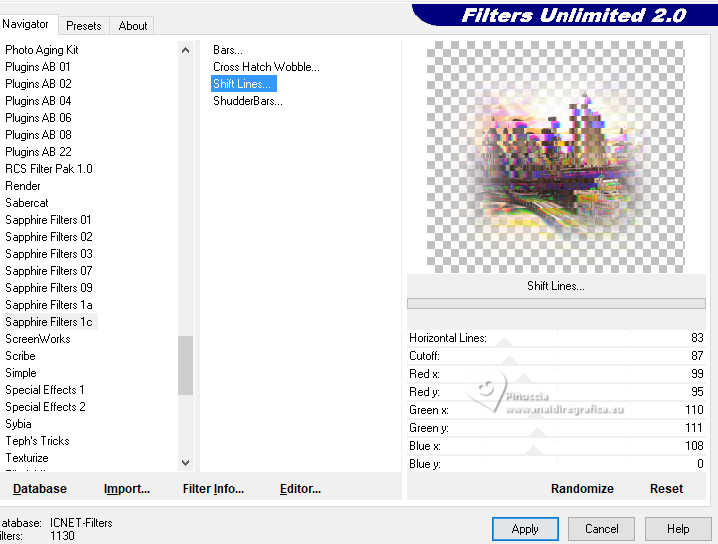
10. Effects>Plugins>Sapphire Filters 1c - Shift Lines.
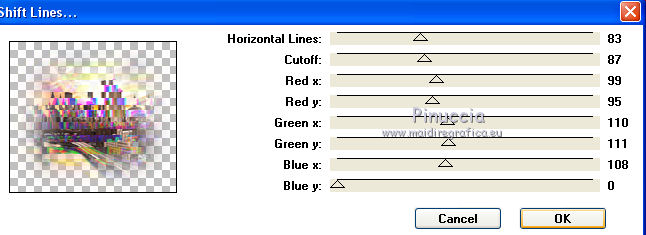
in Unlimited
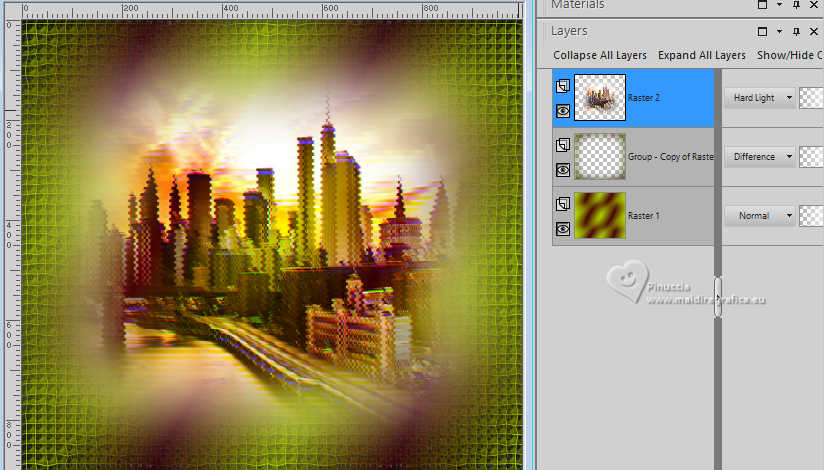
11. Change the Blend Mode of this layer to Hard Light.
12. Open your woman's tube 7063-LuzCristina 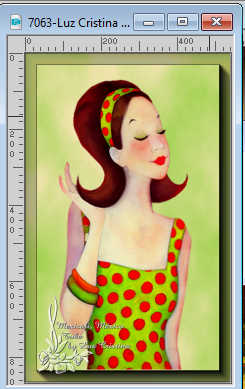
Edit>Copy.
Go back to your work and go to Edit>Paste as new layer.
13. Effects>Image Effects>Offset.
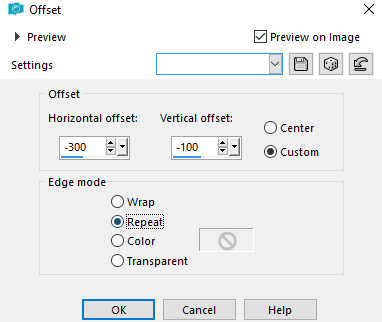
14. Layers>Duplicate.
15. Adjust>Blur>Radial Blur.
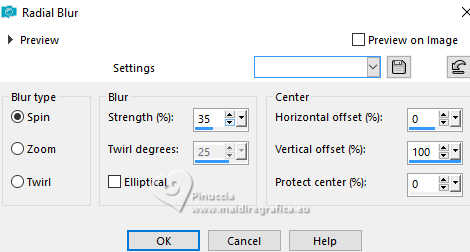
16. Image>Mirror>Mirror Horizontal.
17. Layers>Duplicate.
Image>Mirror>Mirror Horizontal.
Image>Mirror>Mirror Vertical (Image>Flip).
Layers>Merge>Merge Down.
18. Effects>Geometric Effects>Skew, same settings.

19. Layers>Arrange>Move Down - 2 times.
Change the Blend Mode of this layer to Hard Light or other.
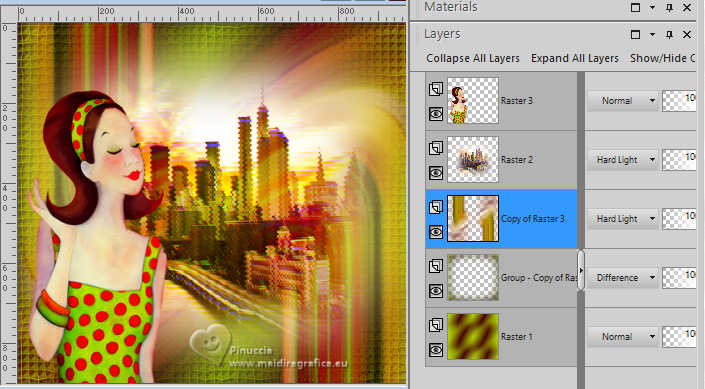
20. Effects>3D Effects>Drop Shadow, same settings
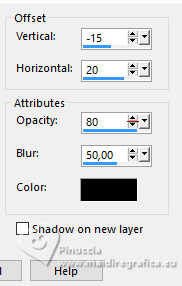
21. Effects>Texture Effects>Texture - select the texture goldfill
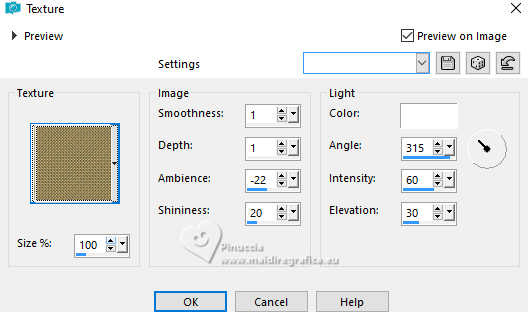
22. Activate the top layer (the tube).
Repeat Effects>3D Effects>Drop Shadow.

Activate the mask's layer.
Effects>Plugins>VM Distortion - Kaleidoscope.
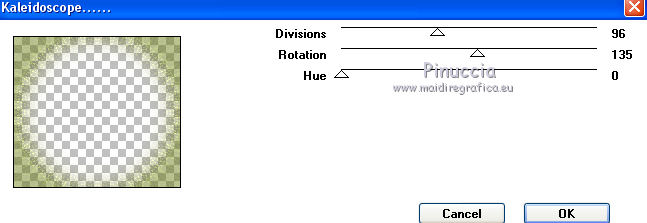
23. Effects>Plugins>FM Tile Tools - Blend Emboss.

24. Image>Add Borders, 2 pixels, symmetric, dark color.
Image>Add Borders, 2 pixels, symmetric, light color.
25. Edit>Copy.
Image>Add Borders, 55 pixels, symmetric, dark color.
26. Activate your Magic Wand Tool 
and click in this border to select it.
Edit>Paste into Selection
27. Adjust>Blur>Radial Blur.

28. Effects>Texture Effects>Texture

29. Selections>Invert.
Effects>3D Effects>Drop Shadow.

Repeat Effects>3D Effects>Drop Shadow.
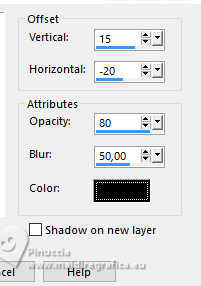
Selections>Select None.
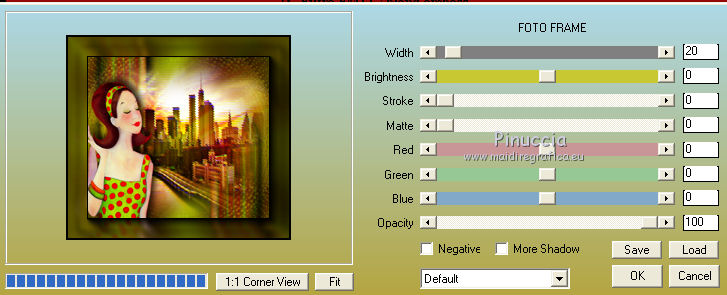
30. Effects>Plugins>AAA Frames - Foto Frame.
31. Open the text et Edit>Copy.
Go back to your work and go to Edit>Paste as new layer.
Positionner  the text to your liking. the text to your liking.
32. Sign your work on a new layer.
33. Image>Add Borders, 2 pixels, symmetric, dark color.
Image>Resize, to 85%, resize all layers checked.
Save as jpg.
For the tubes of this version thanks Luz Cristina


If you have problems or doubts, or you find a not worked link,
or only for tell me that you enjoyed this tutorial, write to me.
20 March 2025

|

