|
TOP TURQUIA


Thanks Luz Cristina for your invitation to translate your tutorials into english

This tutorial, created with PSP2022, was translated with PspX7, but it can also be made using other versions of PSP.
Since version PSP X4, Image>Mirror was replaced with Image>Flip Horizontal,
and Image>Flip with Image>Flip Vertical, there are some variables.
In versions X5 and X6, the functions have been improved by making available the Objects menu.
In the latest version X7 command Image>Mirror and Image>Flip returned, but with new differences.
See my schedule here
 French Translation here French Translation here
 Your versions here Your versions here

For this tutorial, you will need:

Tube by Luz Cristina.
(The links of the tubemakers here).

consult, if necessary, my filter section here
Filters Unlimited 2.0 here
Artistiques - Éponge here
Mehdi 2 - Flat Median here
FM Tile Tools - Blend Emboss here
Flaming Pear - Flood here
Simple - Blintz here
Filters Simple can be used alone or imported into Filters Unlimited.
(How do, you see here)
If a plugin supplied appears with this icon  it must necessarily be imported into Unlimited it must necessarily be imported into Unlimited

You can change Blend Modes according to your colors.
In the newest versions of PSP, you don't find the foreground/background gradient (Corel_06_029).
You can use the gradients of the older versions.
The Gradient of CorelX here

Open the mask in PSP and minimize it with the rest of the material.
1. Open a new transparent image 1000 x 900 pixels.
Set your foreground color to #c497cb
and your background color to #271427.
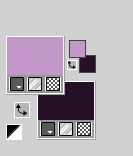
Set your foreground color to a Foreground/Background Gradient, style Linear.
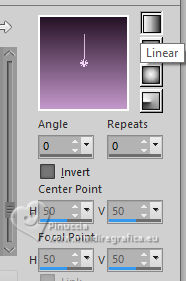
Flood Fill  the transparent image with your Gradient. the transparent image with your Gradient.
3. Selections>Select All.
Open the woman's tube 6181-LuzCristina 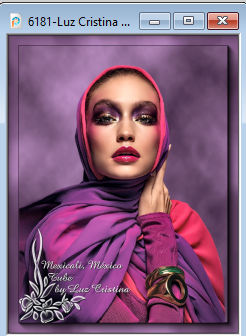
Edit>Copy.
Go back to your work and go to Edit>Paste into Selection.
Selections>Select None.
4. Effects>Image Effects>Seamless Tiling, default settings.

5. Effects>Plugins>Mehdi 2 - Flat Median.
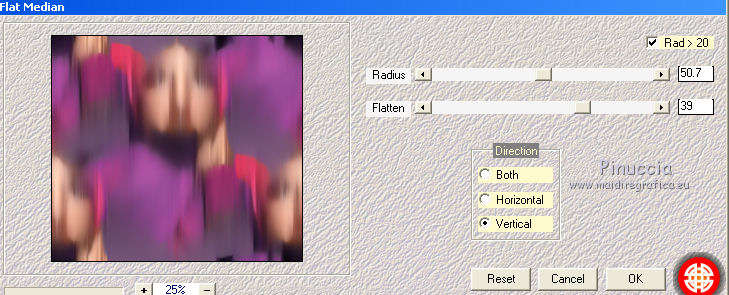
6. Effects>Reflection Effects>Rotating Mirror.

Effects>Edge Effects>Enhance.
7. Layers>Duplicate.
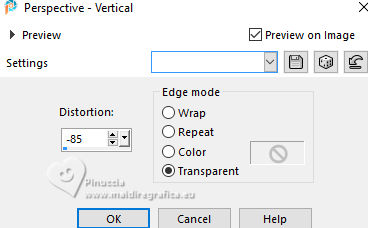
Effects>Geometric Effects>Perspective Vertical.
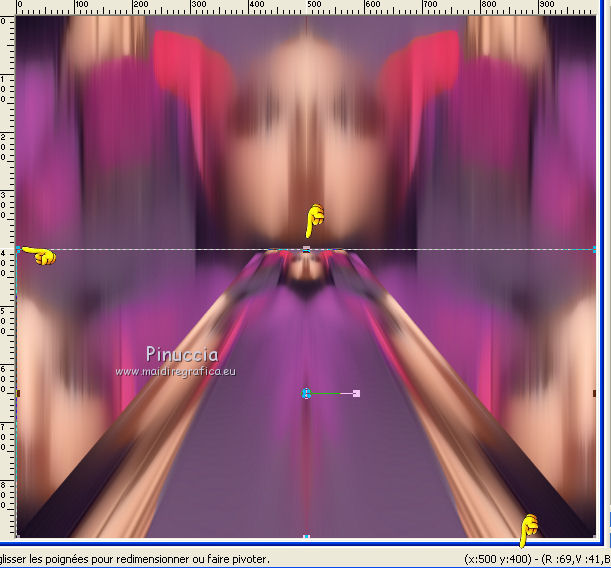
8. Activate your Pick Tool 
in mode Scale 
pull the top central node down until 400 pixels.
9. Effects>Image Effects>Seamless Tiling.

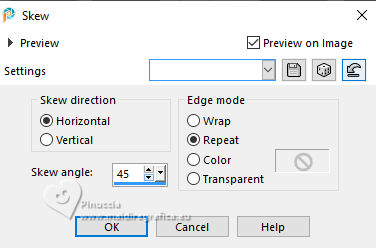
10. Effects>Geometric Effects>Skew.
11. Effects>Reflection Effects>Rotating Mirror.

12. Layers>Duplicate.
Effects>Distortion Effects>Polar Coordinates.
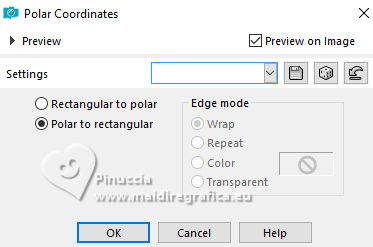
13. Layers>Arrange>Move Down.
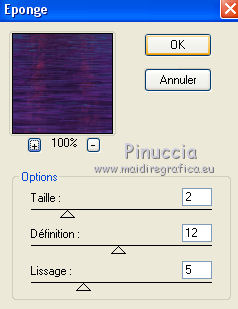
14. Effects>Plugins>Artistiques - Eponge
if you use the english version: Artistics>Sponge
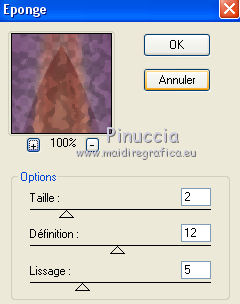 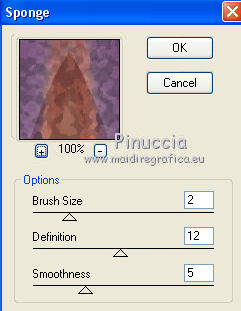
16. Effects>Plugins>Simple - Blintz.
17. Effects>Reflection Effects>Rotating Mirror.

Effects>Plugins>FM Tile Tools - Blend Emboss, default settings.

18. Effects>3D Effects>Drop Shadow.
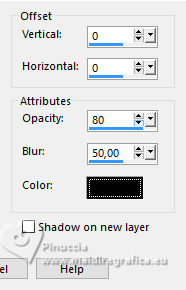
19. Effects>Reflection Effects>Feedback.
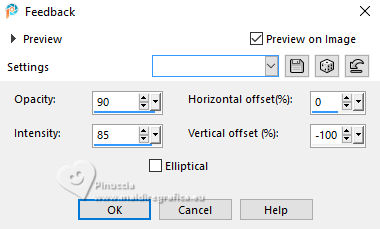
20. Open the misted 6182-LuzCristina 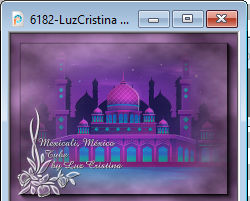
Edit>Copy.
Go back to your work and go to Edit>Paste as new layer.
21. Effects>Image Effects>Offset.
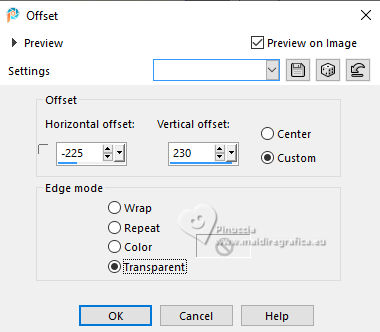
These settings are for the supplied tube.
You can move  your tube at the upper left. your tube at the upper left.
22. Effects>Reflection Effects>Rotating Mirror.

23. Effects>Plugins>Flaming Pear - Flood
adapt Horizon according to your image
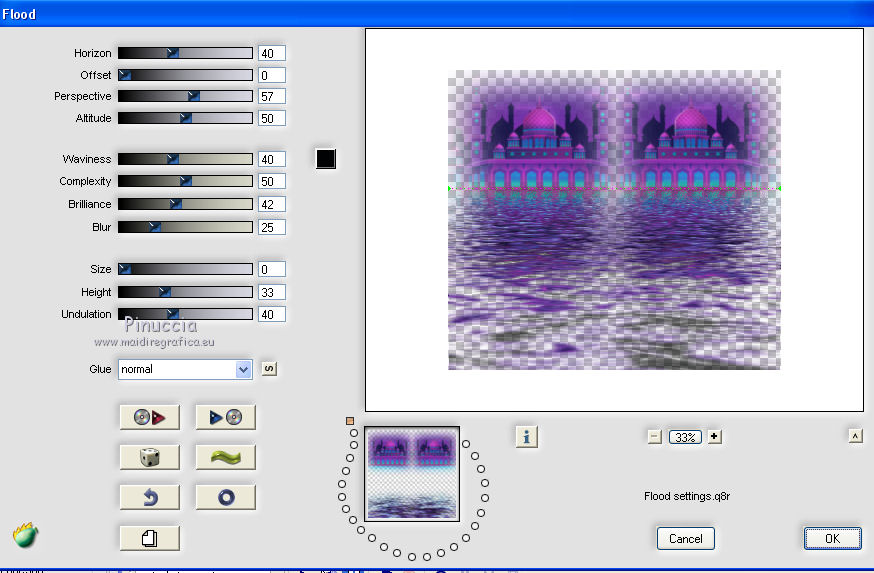
24. Layers>New Mask layer>From image
Open the menu under the source window and you'll see all the files open.
Select the mask marge-topfade
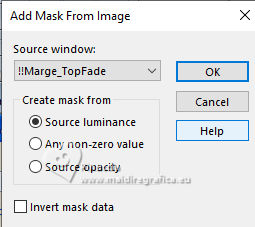
Layers>Duplicate, to apply the mask 2 times
Layers>Merge>Merge Group.
25. Activate your top layer, Copy of Raster 1.
Adjust>Add/Remove Noise>Add Noise.
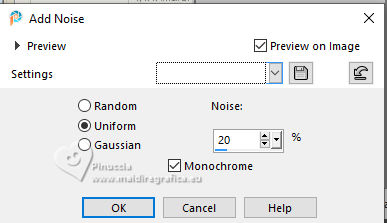
Effects>Edge Effects>Erode.
26. Effects>3D Effects>Drop Shadow.
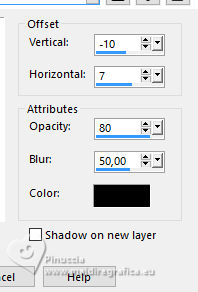
27. Effects>Plugins>FM Tile Tools - Blend Emboss, default settings.

28. Repeat Layers>New Mask layer>From image
Open the menu under the source window
and select the mask marge-topfade

Layers>Duplicate, to apply the mask 2 times.
Layers>Merge>Merge Group.
29. Repeat Effects>Geometric Effects>Perspective vertical.

Activate your Pick Tool 
in mode Scale 
pull the top central node down until 500 pixels.
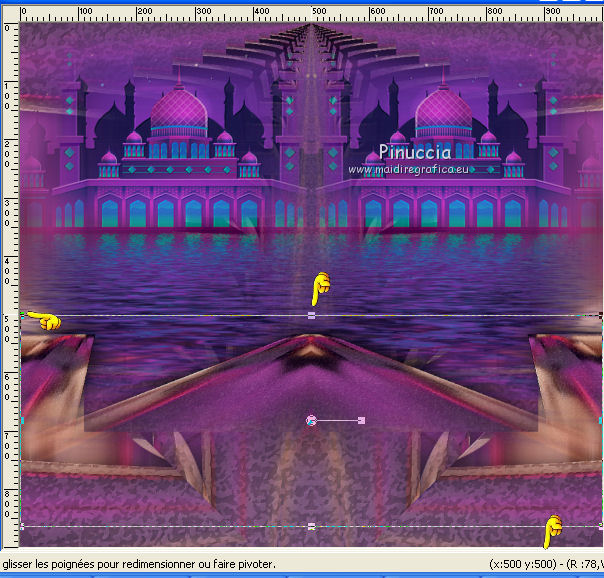
30. Activate again your woman's tube and go to Edit>Copy.
Go back to your work and go to Edit>Paste as new layer.
Image>Resize, to 90%, resize all layers not checked.
Move  the tube at the bottom left. the tube at the bottom left.
31. Effects>3D Effects>Drop Shadow, same settings.

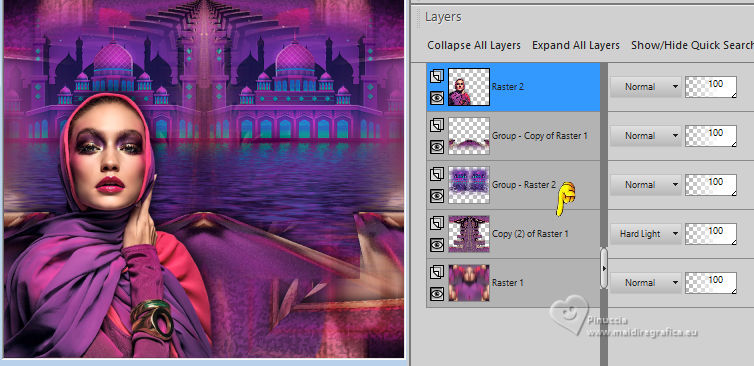
Change the Blend Mode of the layer Copy (2) of Raster 1 to Hard Light, or other.
32. Image>Add Borders, 2 pixels, symmetric dark color.
Image>Add Borders, 2 pixels, symmetric couleur claire.
Image>Add Borders, 2 pixels, symmetric dark color.
Image>Add Borders, 2 pixels, symmetric couleur claire.
Image>Add Borders, 45 pixels, symmetric dark color.
33. Activate your Magic Wand Tool 
and click in the last border to select it.
34. Effects>Plugins>Artistiques - Eponge, same settings
35. Effects>Plugins>FM Tile Tools - Blend Emboss, default settings.

Selections>Select None.
Image>Resize, to 86%, resize all layers checked.
36. Open the text agTurtexto 
Edit>Copy.
Go back to your work and go to Edit>Paste as new layer.
Move  the tube to your liking. the tube to your liking.
37. Sign your work and save as jpg.
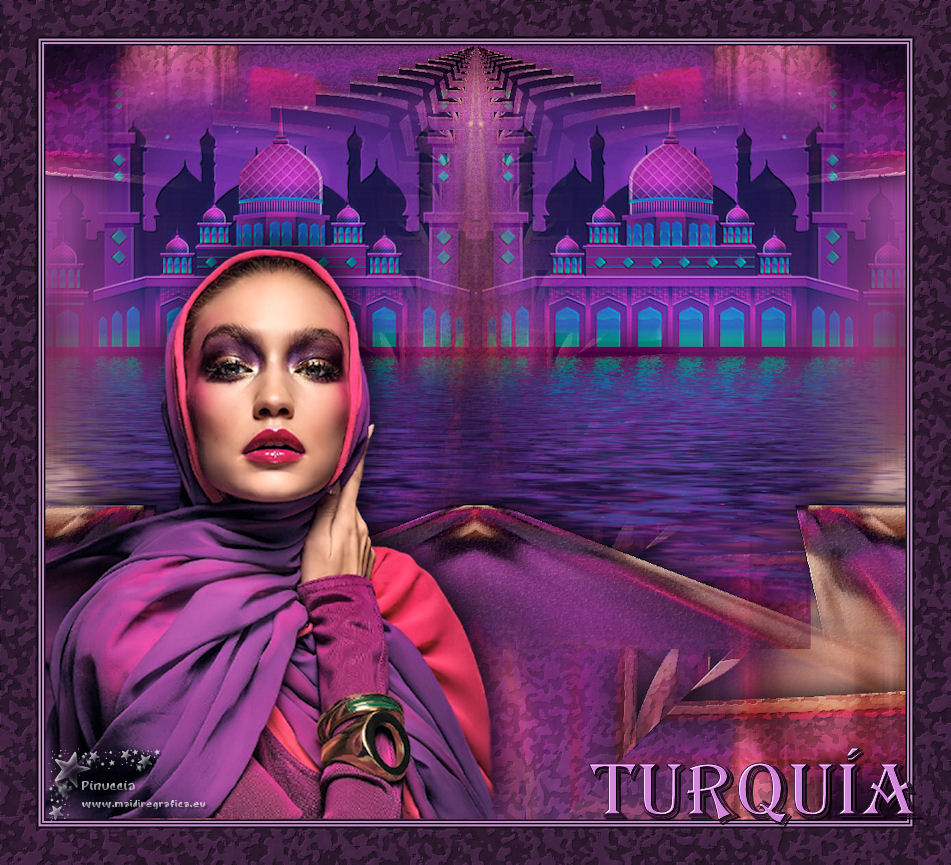
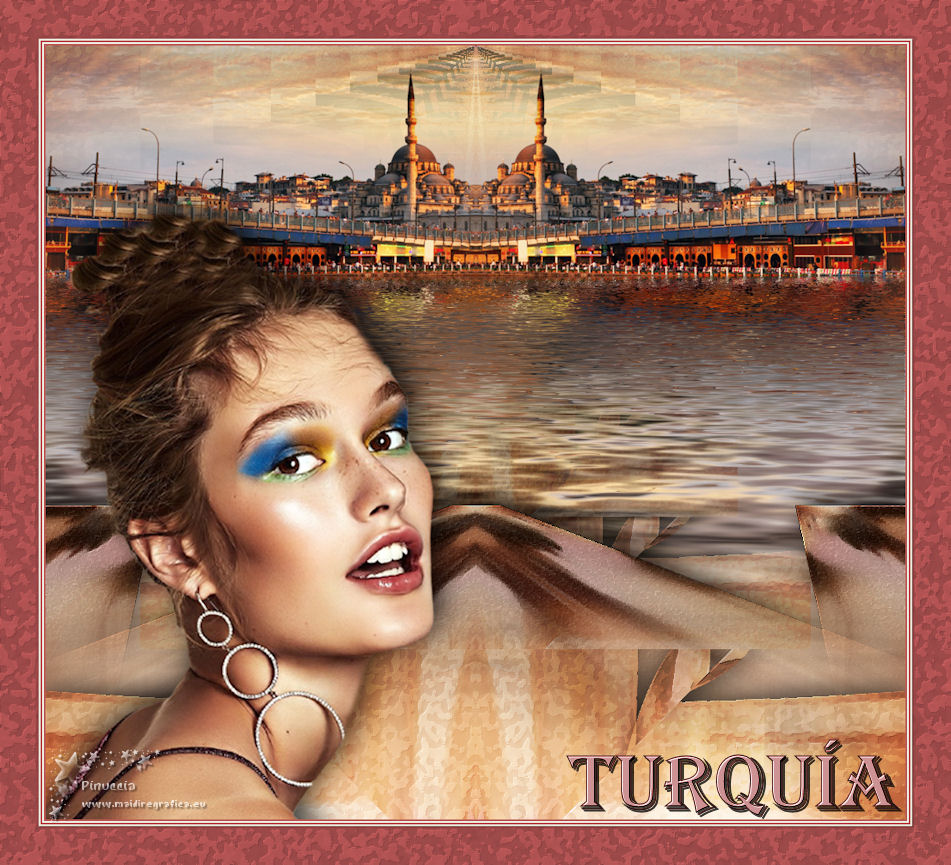
Version with tube by Luz Cristina (the landscape is mine)


If you have problems or doubts, or you find a not worked link,
or only for tell me that you enjoyed this tutorial, write to me.
20 July 2025
|

