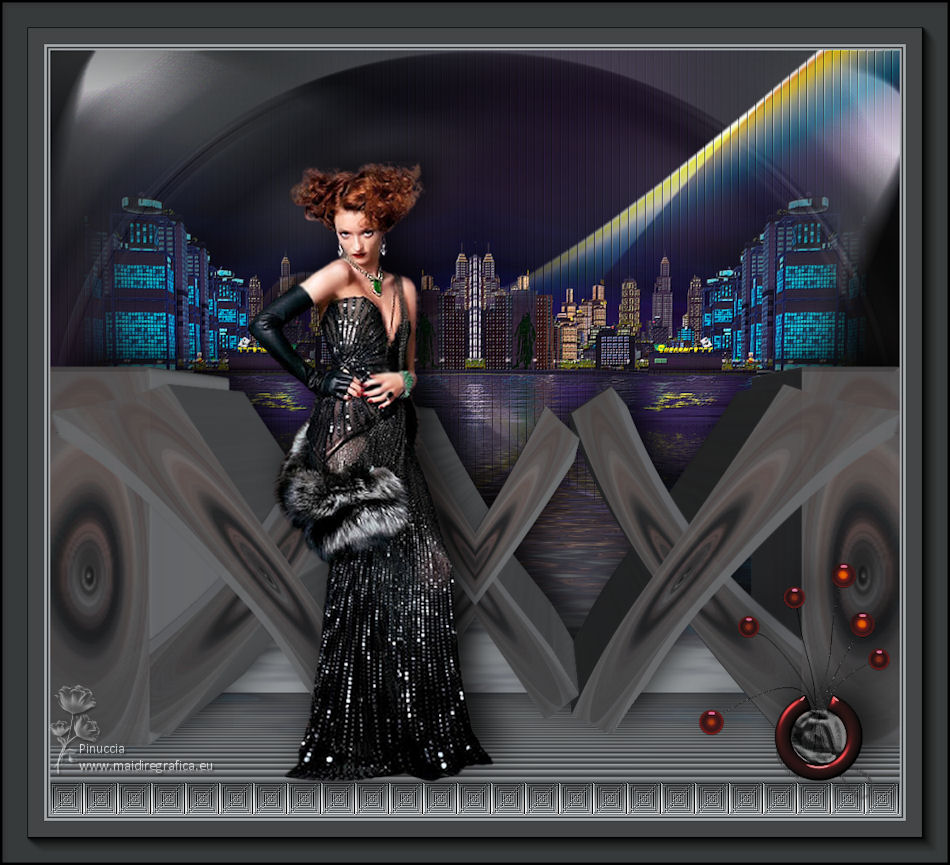
|
TOP VINTAGE


Thanks Luz Cristina for your invitation to translate your tutorials into english

This tutorial, created with PSP9, was translated with PspX9, but it can also be made using other versions of PSP.
Since version PSP X4, Image>Mirror was replaced with Image>Flip Horizontal,
and Image>Flip with Image>Flip Vertical, there are some variables.
In versions X5 and X6, the functions have been improved by making available the Objects menu.
In the latest version X7 command Image>Mirror and Image>Flip returned, but with new differences.
See my schedule here
 French Translation here French Translation here
 Your versions here Your versions here

For this tutorial, you will need:

Tube by Luz Cristina, Guismo and Cady.
(The links of the tubemakers here).

consult, if necessary, my filter section here
Mura's Meister - Copies, Perspective Tiling ici
Alien Skin Eye Candy 5 Impact - Extrude ici
FM Tile Tools - Saturation Emboss, Blend Emboss ici
Flaming Pear - Flood ici
AP [Lines] - Lines SilverLining ici
AAA Frames - Foto Frame ici

You can change Blend Modes according to your colors.
In the newest versions of PSP, you don't find the foreground/background gradient (Corel_06_029).
You can use the gradients of the older versions.
The Gradient of CorelX here

Open the mask in PSP and minimize it with the rest of the material.
1. Open a new transparent image 1000 x 900 pixels.
2. Set your foreground color to #a3a7aa,
and your background color to #434546.
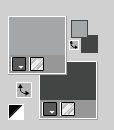
Set your foreground color to a Foreground/Background Gradient, style Linear.
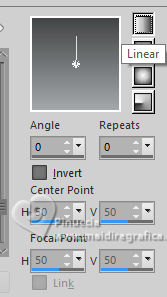
Flood Fill  the transparent image with your Gradient. the transparent image with your Gradient.
3. Layers>New Raster Layer.
Activate your Selection Tool 
(no matter the type of selection, because with the custom selection your always get a rectangle)
clic on the Custom Selection 
and set the following settings.
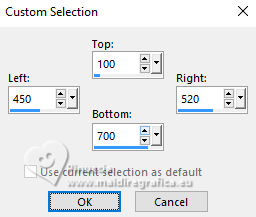
Flood Fill  the selection with your Gradient. the selection with your Gradient.
4. Open the woman's tube 6837-LuzCristina 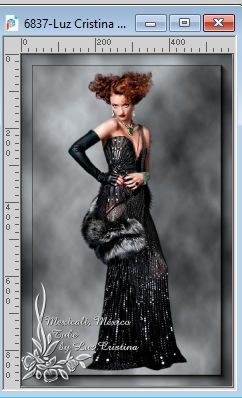
Edit>Copy.
Go back to your work and go to Edit>Paste into Selection.
6. Adjust>Blur>Radial Blur.
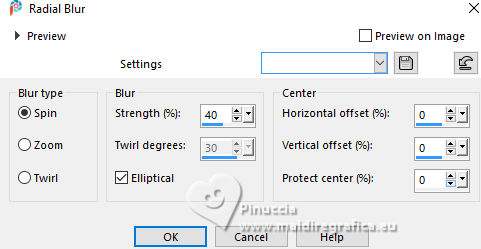
Selections>Select None.
7. Effects>Plugins>Alien Skin Eye Candy 5 Impact - Extrude.
Solid Color: background color
Highlight Color: foreground color
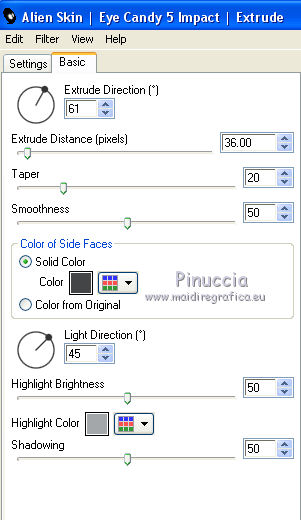
8. Effects>Plugins>Mura's Meister - Copies.
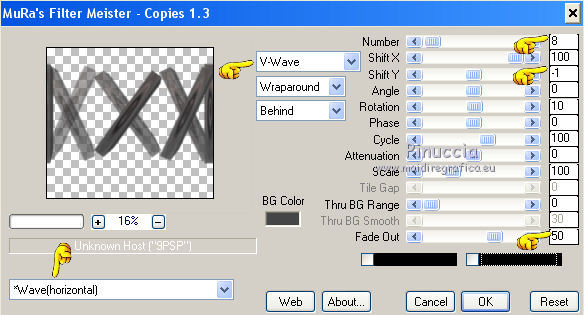
9. Image>Mirror>Mirror Horizontal.
10. Effects>Reflection Effects>Rotating Mirror.

11. Effects>Distortion Effects>Pinch.

12. Effects>Image Effects>Offset.
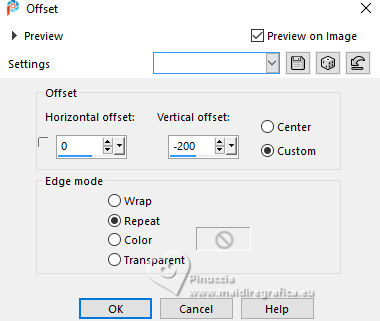
13. Repeat Effects>Plugins>Alien Skin Eye Candy 5 Impact - Extrude, same settings.

14. Effects>3D Effects>Drop Shadow.
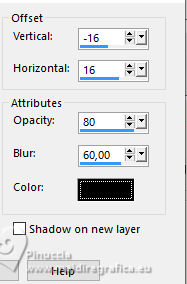
Layers>Duplicate.
Layers>Arrange>Move Down.
15. Adjust>Blur>Radial Blur, same settings.

16. Image>Mirror>Mirror Vertical (Image>Flip).
17. Effects>Geometric Effects>Spherize.
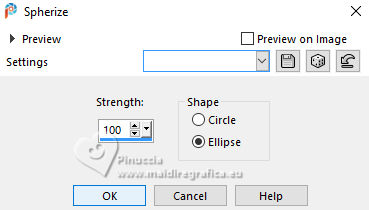
Edit>Repeat Spherize.
18. Effects>Plugins>FM Tile Tools - Saturation Emboss, default settings.

19. Effects>Illumination Effects>Lights
Select the default settings,
and change the settings of the light n.5.
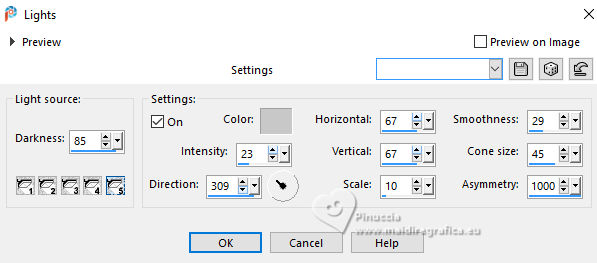
20. Change the Blend Mode of this layer to Hard Light (Optional).
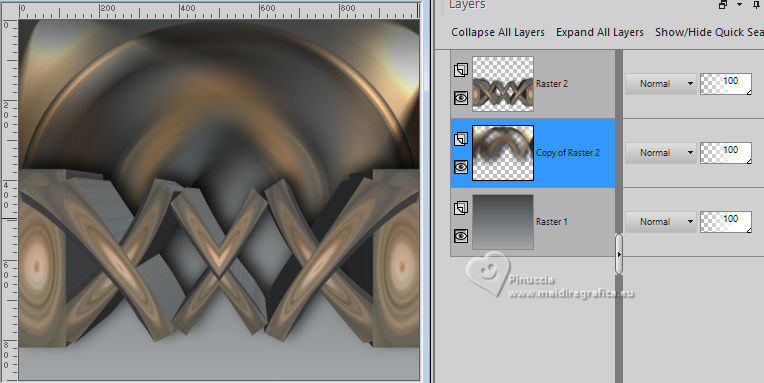
21. Activate your bottom layer, Raster 1.
Layers>Duplicate.
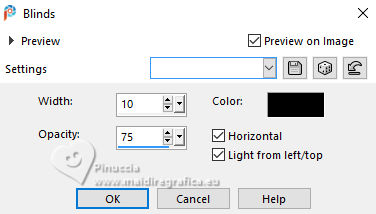
22. Effects>Texture Effects>Blinds.
23. Effects>Plugins>Mura's Meister - Perspective Tiling.

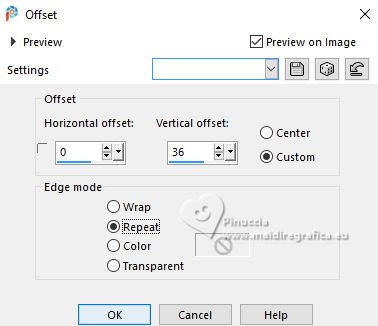
24. Effects>Image Effects>Offset.
25. Activate your Magic Wand Tool 
and click in the bottom lines to select it.
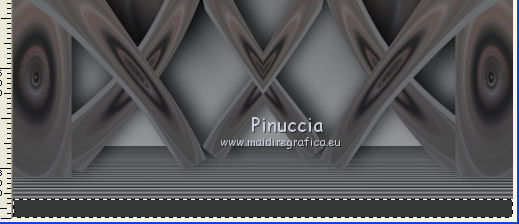
26. Flood Fill  the selection with your Gradient. the selection with your Gradient.
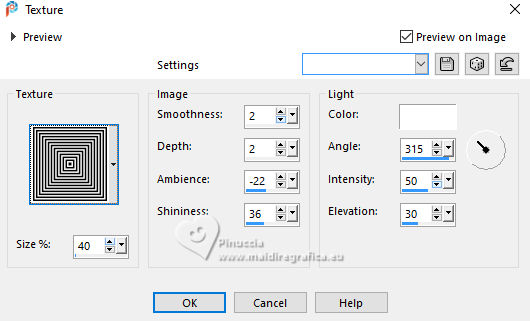
27. Effects>Texture Effects>Texture - select the texture Squares or Corel_15_012
28. Effects>Edge Effects>Enhance (optional).
Selections>Select None.
29. Open the landscape misted calguismistcity14092011 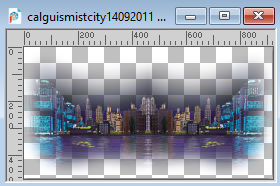
Edit>Copy.
Go back to your work and go to Edit>Paste as new layer.
Layers>Arrange>Move Up.
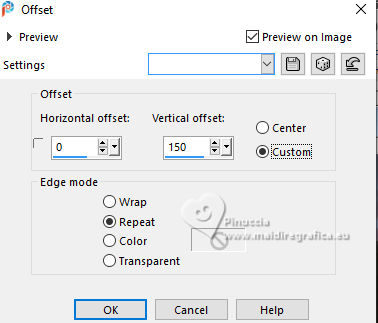
30. Effects>Image Effects>Offset.
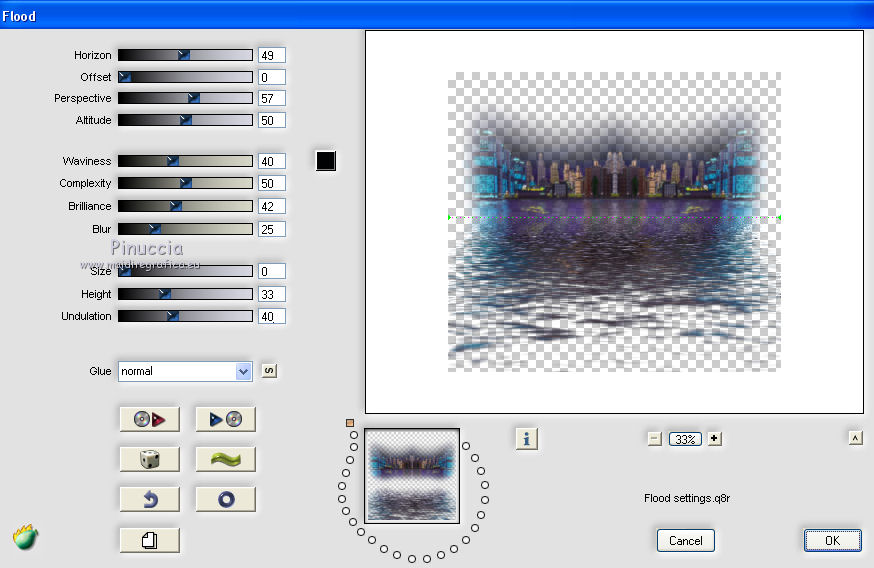
31. Effects>Plugins>Flaming Pear - Flood
(adapt Horizon according to your image)
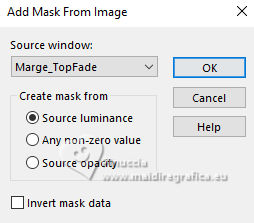
32. Optional: Layers>New Mask layer>From image
Open the menu under the source window and you'll see all the files open.
Select the mask marge-topfade.
Layers>Merge>Merge Group.
33. Layers>New Raster Layer.
Layers>Arrange>Move Down.
Selections>Select All.
Open the tube Deco de Cady 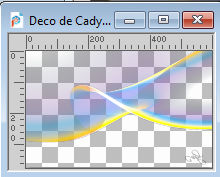
Erase the watermark and go to Edit>Copy.
Go back to your work and go to Edit>Paste into Selection.
Selections>Select None.
34. Effects>Plugins>AP [Lines] - Lines SilverLining.

35. Effects>Plugins>FM Tile Tools - Blend Emboss, default settings.

36. Activate your top layer.
Activate again your woman's tube and go to Edit>Copy.
Go back to your work and go to Edit>Paste as new layer.
Image>Resize, to 90%, resize all layers not checked.
Move  the tube a little to the left. the tube a little to the left.
Effects>3D Effects>Drop Shadow, last settings.
37. Open the tube LA_deco vase 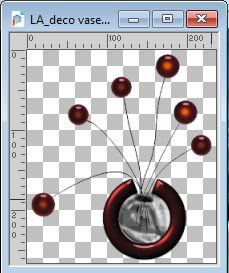
Edit>Copy.
Go back to your work and go to Edit>Paste as new layer.
Move  the tube to the right. the tube to the right.
Effects>3D Effects>Drop Shadow, last settings.
38. Image>Add Borders, 2 pixels, symmetric, light color.
Image>Add Borders, 2 pixels, symmetric, dark color.
Image>Add borders, 3 pixels, symmetric, light color.
Image>Add borders, 50 pixels, symmetric, dark color.
39. Effects>Plugins>AAA Frames - Foto Frame.
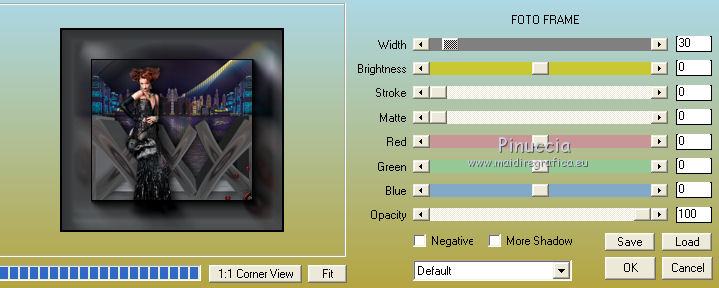
Image>Add Borders, 2 pixels, symmetric, color black.
40. Image>Resize, 84%, resize all layers checked.
Sign your work and save as jpg.
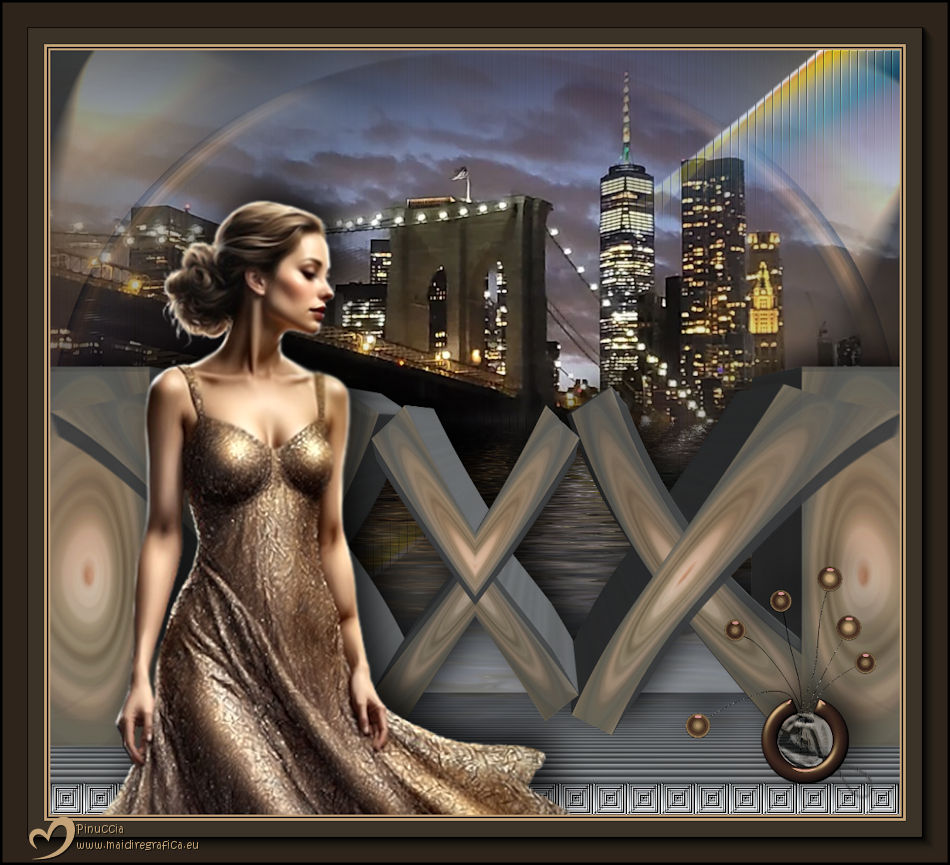
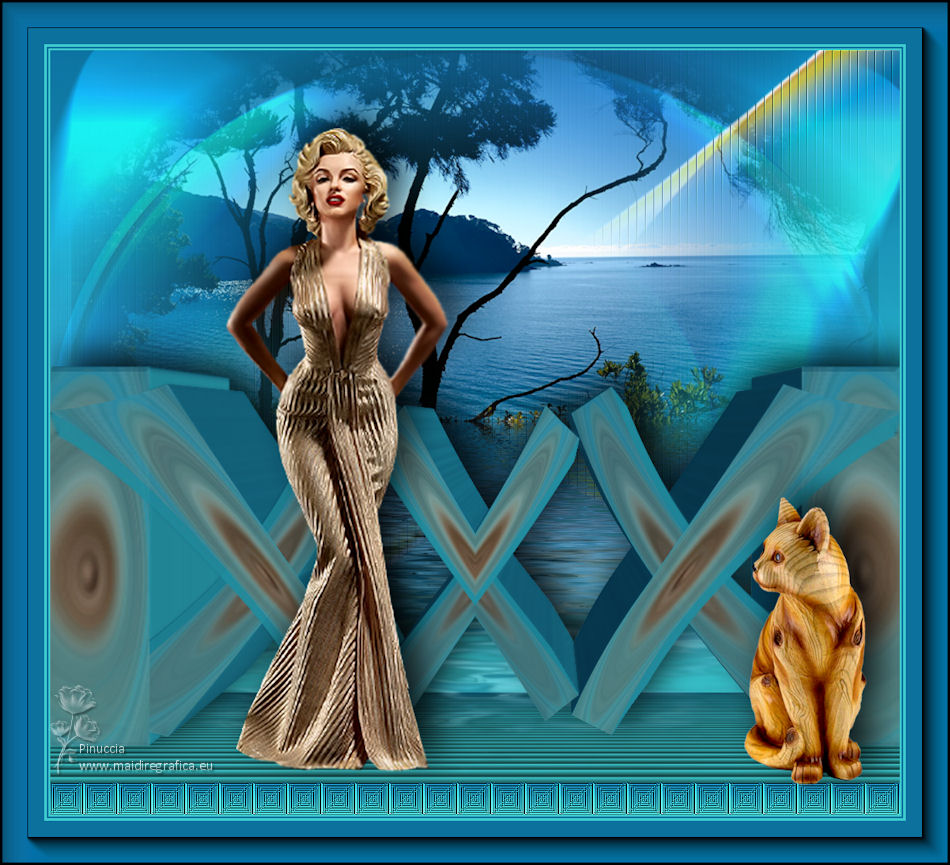
Version with tubes by Luz Cristina, Thafs and Nena Silva

If you have problems or doubts, or you find a not worked link,
or only for tell me that you enjoyed this tutorial, write to me.
19 May 2025

|

