|
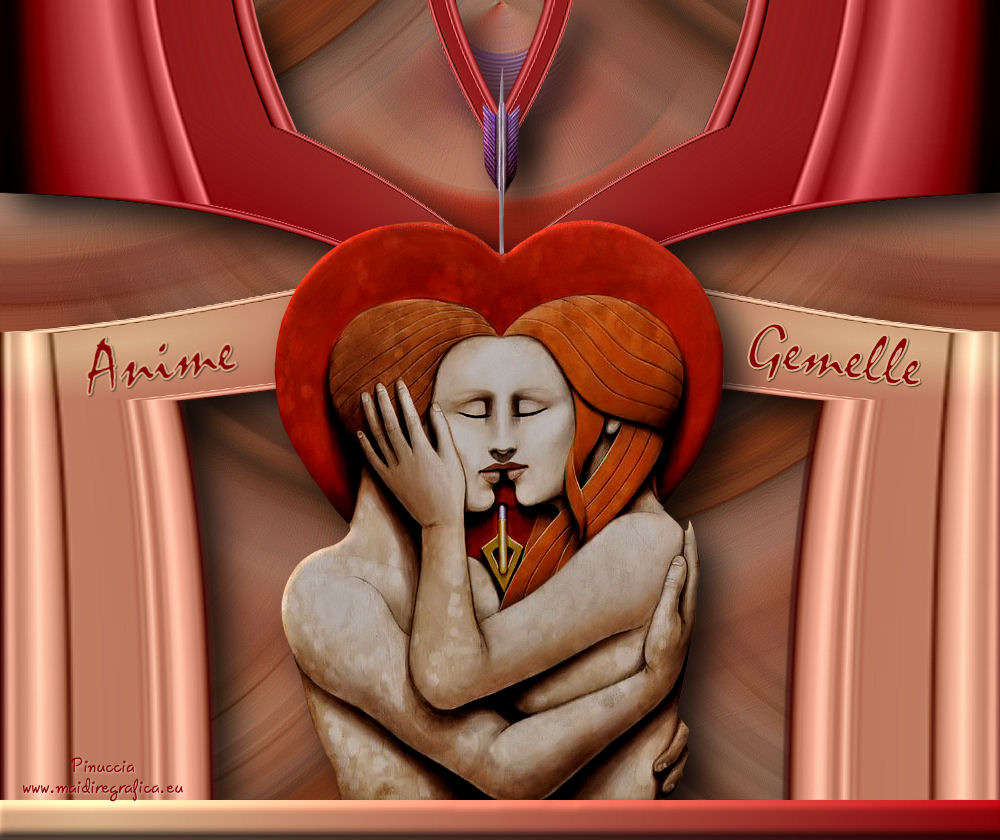
TOP ALMAS GEMELAS
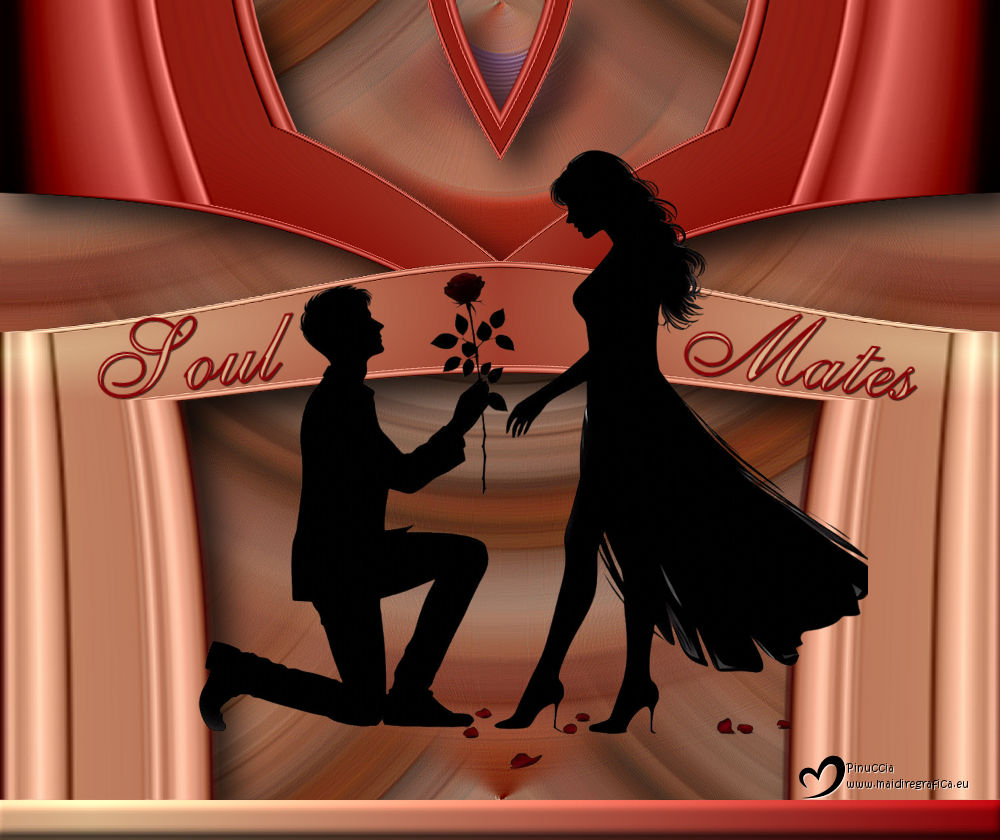
 SOUL MATES SOUL MATES


Thanks Luz Cristina for your invitation to translate your tutorials into english

This tutorial was translated with PSPX9 but it can also be made using other versions of PSP.
Since version PSP X4, Image>Mirror was replaced with Image>Flip Horizontal,
and Image>Flip with Image>Flip Vertical, there are some variables.
In versions X5 and X6, the functions have been improved by making available the Objects menu.
In the latest version X7 command Image>Mirror and Image>Flip returned, but with new differences.
See my schedule here
 French Translation here French Translation here
 Your versions here Your versions here

For this tutorial, you will need:

For the tube thanks Gabry
(The links of the tubemakers here).
*It is forbidden to remove the watermark from the supplied tubes, distribute or modify them,
in order to respect the work of the authors

consult, if necessary, my filter section here
Filters Unlimited 2.0 here

You can change Blend Modes according to your colors.
In the newest versions of PSP, you don't find the foreground/background gradient (Corel_06_029).
You can use the gradients of the older versions.
The Gradient of CorelX here

Copy the preset Emboss 3 in the presets Folder.
1. Open a new transparent image 1000 x 500 pixels.
2. Set your foreground color to #850700,
and your background color to #d8b188.
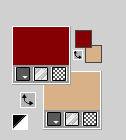
Set your foreground color to a Foreground/Background Gradient, style Sunburst.
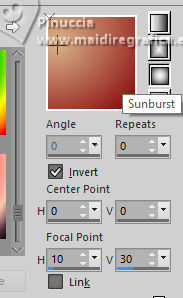
Flood Fill  the transparent image with your Gradient. the transparent image with your Gradient.
3. Effects>PluginsFilters Unlimited 2.0 - Buttons &Frames - 3D Glass Frame 1.

4. Image>Canvas Size - 1000 x 800 pixels.
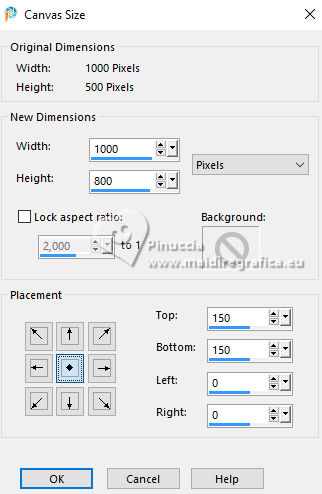
5. Image>Mirror>Mirror horizontal.
6. Effects>Geometric Effects>Perspective horizontal.
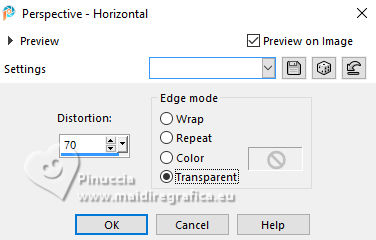
7. Effects>Geometric Effects>Skew.
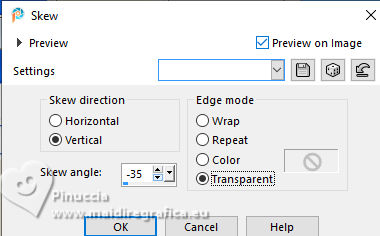
8. Layers>Duplicate.
Image>Mirror>Mirror horizontal.
Layers>Merge>Merge visible.
9. Image>Mirror>Mirror vertical (Image>Flip).
10. Effects>Distortion Effects>Lens Distortion.
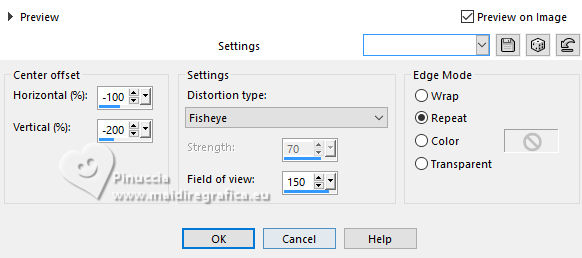
11. Activate your Magic Wand Tool  , tolerance 10/15, , tolerance 10/15,
and click in the dark zones to select them

Press CANC on the keyboard 
Selections>Select None.
Result.

12. Effects>Reflection Effects>Rotating Mirror.

13. Effects>Distortion Effects>Pinch.

14. Mirror>Mirror vertical (Image>Flip).
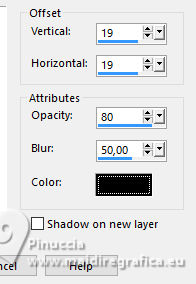
15. Effects>3D Effects>Drop Shadow.
16. Layers>New Raster Layer.
Layers>Arrange>Send to Bottom.
Flood Fill  the layer with your Gradient. the layer with your Gradient.
Selections>Select All.
Open the tube Gabry-coppia 10 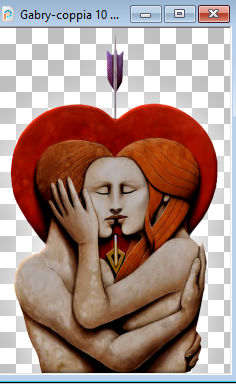
Edit>Copy.
Go back to your work and go to Edit>Paste into Selection.
Selections>Select None.
17. Effects>Image Effects>Seamless Tiling, default settings.

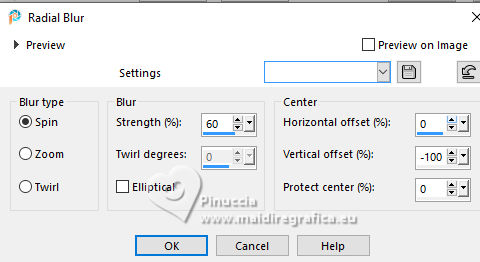
18. Adjust>Blur>Radial Blur
19. Again Effects>Image Effects>Seamless Tiling, default settings.

20. Effects>User Defined Filter, select the preset Emboss 3 and ok.

Effects>Edge Effects>Enhance.
21. Edit>Paste as new layer (the tube by Gabry is still in memory).
Layers>Arrange>Bring to Top.
22. Effects>3D Effects>Drop Shadow, same settings.

23. If you like, write any text on a new layer.
I wrote the text on two lines and two layers,
and I applied a 7-degree rotation (the first text on the left, the second on the right).
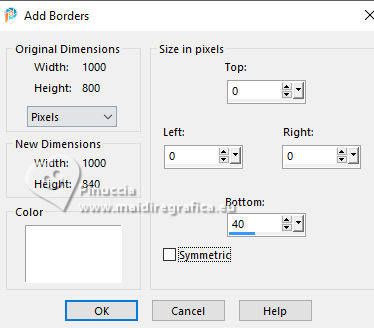
24. Image>Add borders, symmetric not checked, whatever color
25. Select the little border with your Magic Wand Tool  tolerance and feather 0, tolerance and feather 0,
Flood Fill  the selection with your Gradient. the selection with your Gradient.
26. Effects>3D Effects>Inner Bevel.
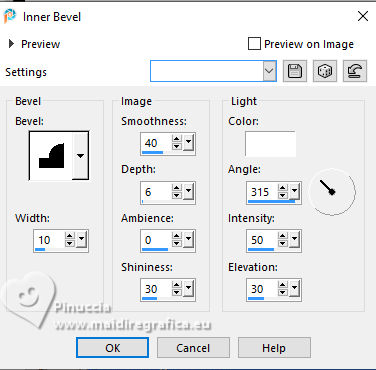
Selections>Promote Selection to Layer.
Selections>Select None.
27. Activate your Pick Tool 
mode Scale 
Pull the knots on the right and left outwards,
to hide the edges of the bevel.

28. Sign your work.
Layers>Merge>Merge All and save as jpg.
For the tubes of these versions thanks
Beatriz
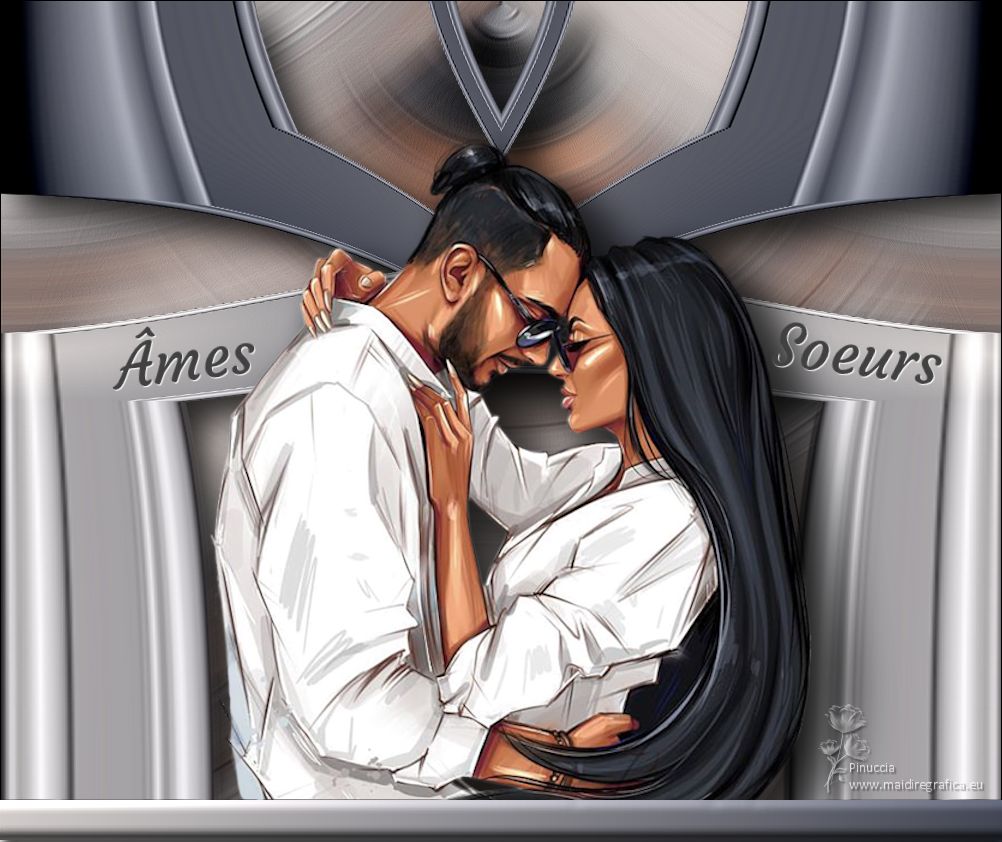
Macha


If you have problems or doubts, or you find a not worked link,
or only for tell me that you enjoyed this tutorial, write to me.
20 Juillet 2025
|
 SOUL MATES


 SOUL MATES