|
TOP PIERROT


Thanks Luz Cristina for your invitation to translate your tutorials into english

This tutorial was translated with PSPX9 but it can also be made using other versions of PSP.
Since version PSP X4, Image>Mirror was replaced with Image>Flip Horizontal,
and Image>Flip with Image>Flip Vertical, there are some variables.
In versions X5 and X6, the functions have been improved by making available the Objects menu.
In the latest version X7 command Image>Mirror and Image>Flip returned, but with new differences.
See my schedule here
 French Translation here French Translation here
 Your versions here Your versions here

For this tutorial, you will need:

For the tubes thanks Gabry and Luz Cristina
(The links of the tubemakers here).

consult, if necessary, my filter section here
Filters Unlimited 2.0 here
Filter Factory Gallery B - Button Deluxehere
Neology - Blend Mosaic here
Mura's Meister - Perspective Tiling here
Filters Factory Gallery and Neology can be used alone or imported into Filters Unlimited.
(How do, you see here)
If a plugin supplied appears with this icon  it must necessarily be imported into Unlimited it must necessarily be imported into Unlimited

You can change Blend Modes according to your colors.
In the newest versions of PSP, you don't find the foreground/background gradient (Corel_06_029).
You can use the gradients of the older versions.
The Gradient of CorelX here

Copy the preset Emboss 3 in the presets Folder.
1. Open a new transparent image 1000 x 600 pixels.
2. Set your foreground color to #a29dbf,
and your background color to #342c36.
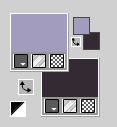
Set your foreground color to a Foreground/Background Gradient, style Linear.
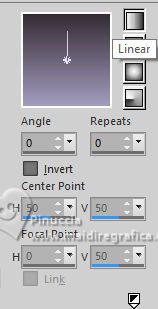
Flood Fill  the transparent image with your Gradient. the transparent image with your Gradient.
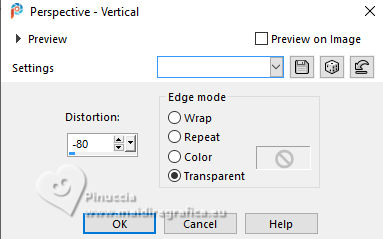
3. Effects>Geometric Effects>Perspective Vertical.
4. Effects>Distortion Effects>Pinch.

5. Effects>Plugins>Filter Factory Gallery B - Button deluxe.

6. Effects>User Defined Filter - Select the preset Emboss 3 and ok.

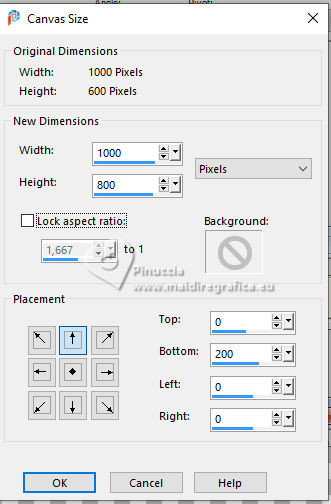
7. Image>Canvas Size - 1000 x 800 pixels.
8. Layers>New Raster Layer.
Layers>Arrange>Send to Bottom.
Flood Fill  the layer with your Gradient. the layer with your Gradient.
9. Open your misted 1366-luzcristina 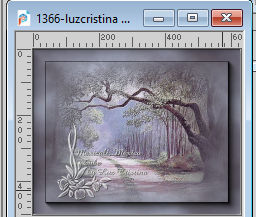
Edit>Copy.
Go back to your work and go to Edit>Paste as new layer.
Move  the tube at the upper left. the tube at the upper left.

Layers>Duplicate.
Image>Mirror>Mirror Horizontal.
Layers>Merge>Merge Down.
Change the Blend Mode of this layer to Hard Light.
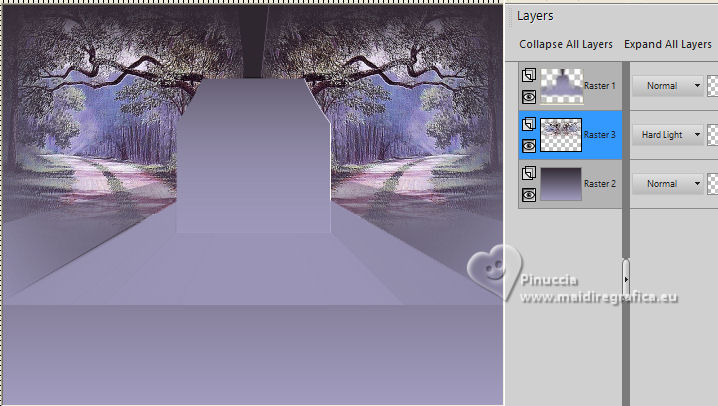
10. Activate the layer Raster 1.
Effects>Distortion Effects>Pinch.

11. Layers>Duplicate.
Image>Mirror>Mirror Vertical (Image>Flip).
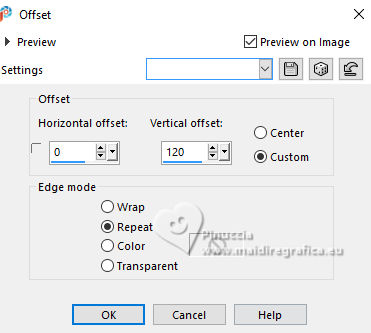
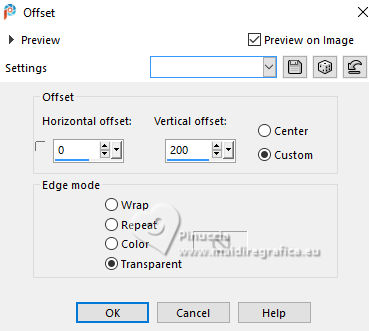
12. Effects>Image Effects>Offset.
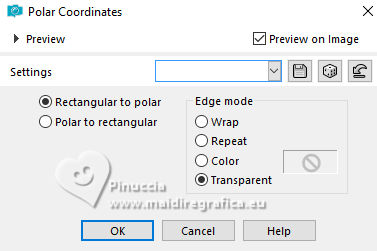
13. Effects>Distortion Effects>Polar Coordinates.
14. Effects>Image Effects>Offset.
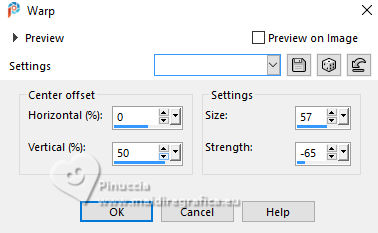
15. Effects>Distortion Effects>Warp.
16. If you see a black line under the figure,
activate your Erase Tool  to erase it. to erase it.
You should have this

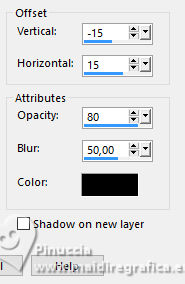
17. Effects>3D Effects>Drop Shadow.
18. Activate again Raster 1.
Repeat Effects>Distortion Effects>Warp.

19. Effects>3D Effects>Drop Shadow, same settings.
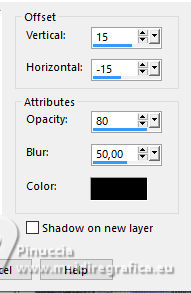
Repeat Drop Shadow, vertical and horizontal 15/-15.

Effects>Edge Effects>Enhance.
20. Activate your bottom layer - Raster 2.
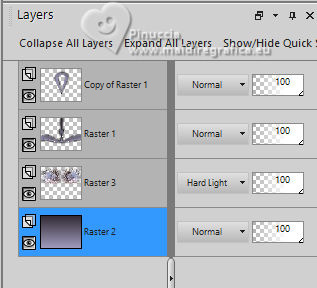
Layers>Duplicate.
22. Effects>Plugins>Neology - Blend Mosaic.

23. Effects>User Defined Filter - Emboss 3.
24. Effects>Plugins>Mura's Meister - Perspective Tiling.

25. Activate your Magic Wand Tool 

and click in the transparent part to select it.
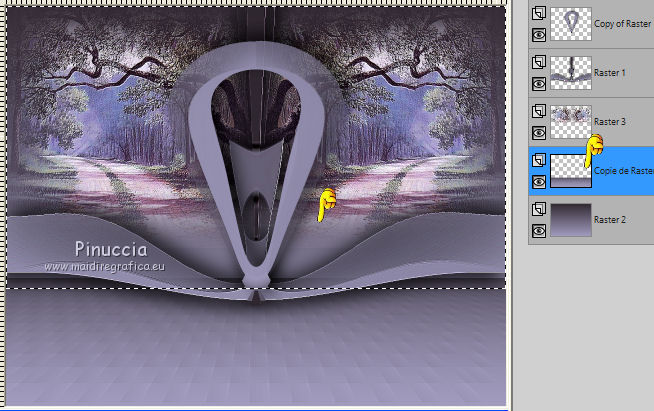
Press CANC several times on the keyboard  to soften the border. to soften the border.
25. Activate your top layer.
Open the tube Gabry-maschera-640 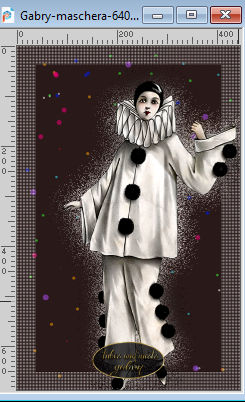
Edit>Copy.
Go back to your work and go to Edit>Paste as new layer.
Move  the tube to your liking, or see my example. the tube to your liking, or see my example.
26. Effects>3D Effects>Drop Shadow.

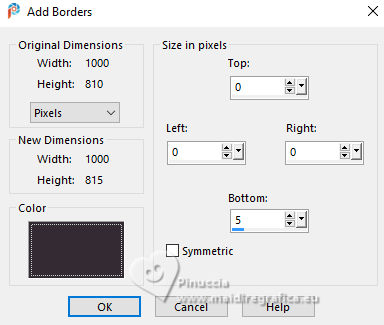
27. Image>Add Borders - symmetric not checked, dark color.
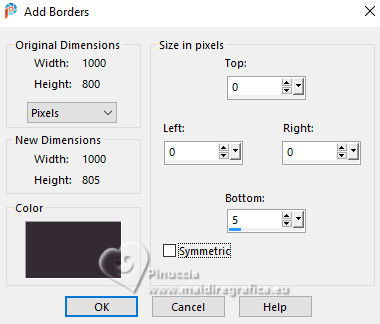
Image>Add Borders - same settings, but light color.
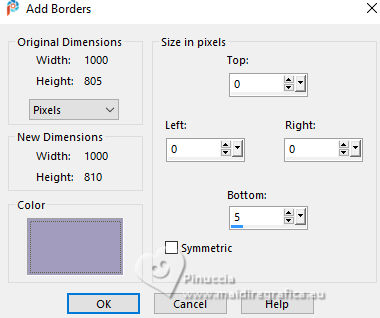
Image>Add Borders - same settings, again dark color.
28. Activate your Magic Wand Tool  , tolerance and feather 0, , tolerance and feather 0,
and click in the light border to select it.
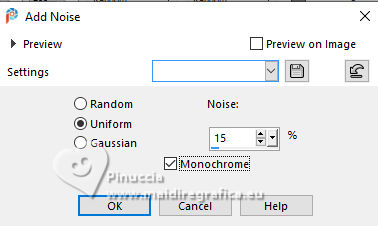
Adjust>Add/Remove Noise>Add Noise.
29. Effects>User Defined Filter - Emboss 3.
Selections>Select None.
30. Sign your work.
Layers>Merge>Merge All and save as jpg.
For the tubes of this version thanks Irene et Mentali


If you have problems or doubts, or you find a not worked link,
or only for tell me that you enjoyed this tutorial, write to me.
20 Juillet 2025
|


