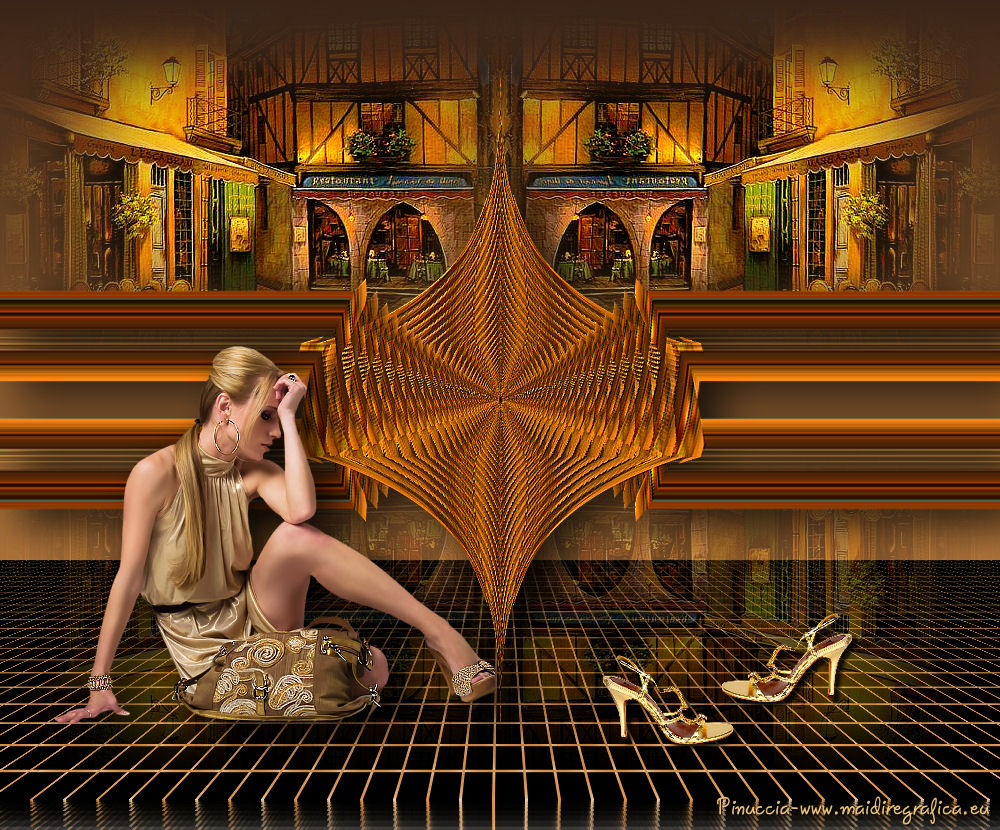
|
TOP ROCÍO


Thanks Luz Cristina for your invitation to translate your tutorials into english

This tutorial was translated with PSPX9 but it can also be made using other versions of PSP.
Since version PSP X4, Image>Mirror was replaced with Image>Flip Horizontal,
and Image>Flip with Image>Flip Vertical, there are some variables.
In versions X5 and X6, the functions have been improved by making available the Objects menu.
In the latest version X7 command Image>Mirror and Image>Flip returned, but with new differences.
See my schedule here
 French Translation here French Translation here
 Your versions here Your versions here

For this tutorial, you will need:

For the tube thanks Luz Cristina and Tocha
(The links of the tubemakers here).

consult, if necessary, my filter section here
Filters Unlimited 2.0 here
VM Instant Art - Tripolis here
Transparency - Eliminate black here
FM Tile Tools - Saturation Emboss here
Mura's Meister - Copies, Perspective Tiling here
Filters VM Instant Art and Transparency can be used alone or imported into Filters Unlimited.
(How do, you see here)
If a plugin supplied appears with this icon  it must necessarily be imported into Unlimited it must necessarily be imported into Unlimited

You can change Blend Modes according to your colors.
In the newest versions of PSP, you don't find the foreground/background gradient (Corel_06_029).
You can use the gradients of the older versions.
The Gradient of CorelX here

Copy the preset Emboss 3 in the Presets Folder.
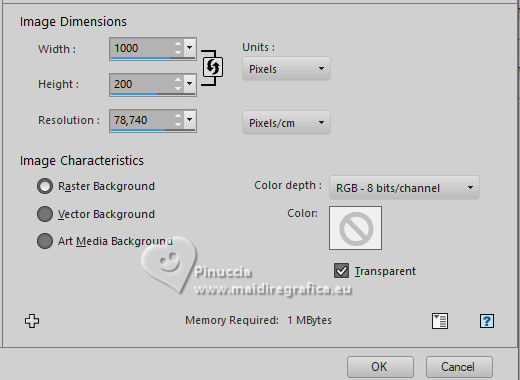
1. Open a new transparent image 1000 x 200 pixels.
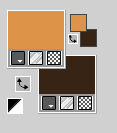
2. Set your foreground color to #dd9348,
and your background color to #392417.
Set your foreground color to a Foreground/Background Gradient, style Linear.
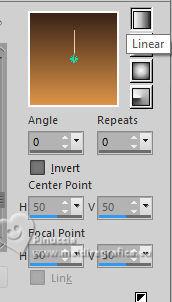
Flood Fill  the transparent image with your Gradient. the transparent image with your Gradient.
Selections>Select All.
Open the landscape 2011-luzcristina 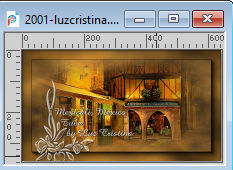
Edit>Copy.
Go back to your work and go to Edit>Paste into Selection.
Selections>Select None.
3. Effects>Image Effects>Seamless Tiling.

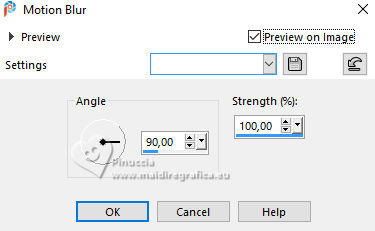
4. Adjust>Blur>Motion Blur
5. Effects>User Defined Filter - select the preset Emboss 3 and ok.

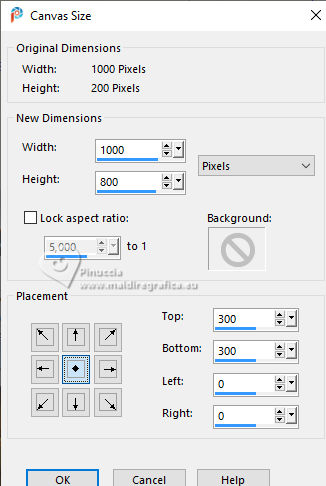
6. Image>Canvas Size - 1000 x 800 pixels.
7. Effects>Distortion Effects>Pinch.

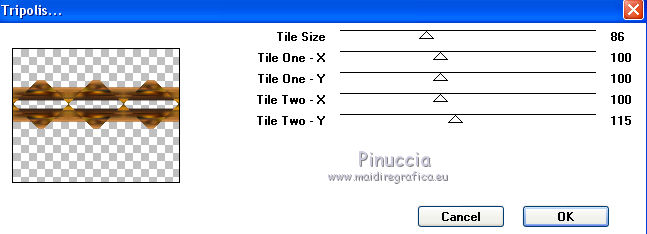
8. Effects>Plugins>VM Instant Art - Tripolis.
9. Activate your Magic Wand Tool 
and click in the three central zones to select them.
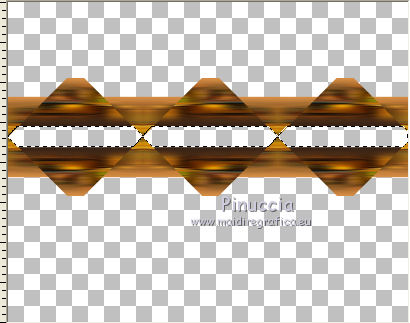
Layers>New Raster Layer.
Flood Fill  the selection with your Gradient. the selection with your Gradient.
Reduce the opacity of this layer to 50%.
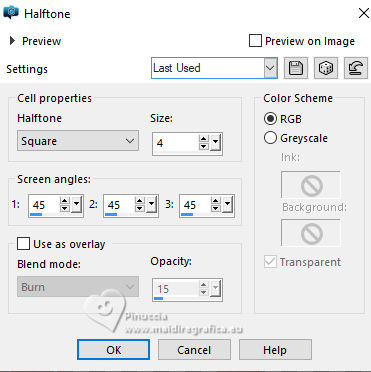
10. Effects>Artistic Effects>Halftone.
Result
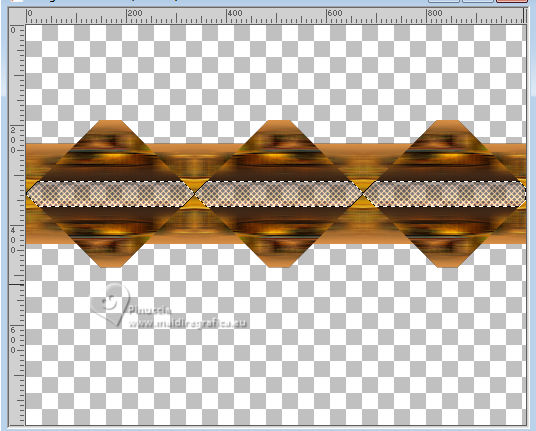
11. Effects>Plugins>Transparency - Eliminate black.
If you import it in Unlimited
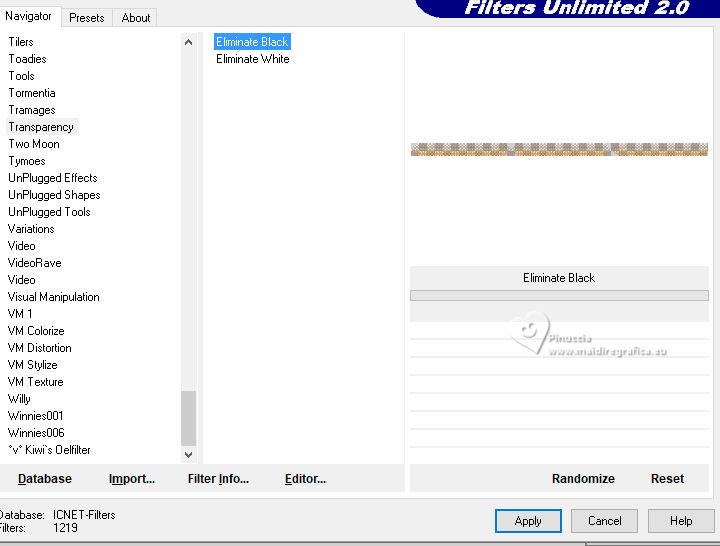
Result
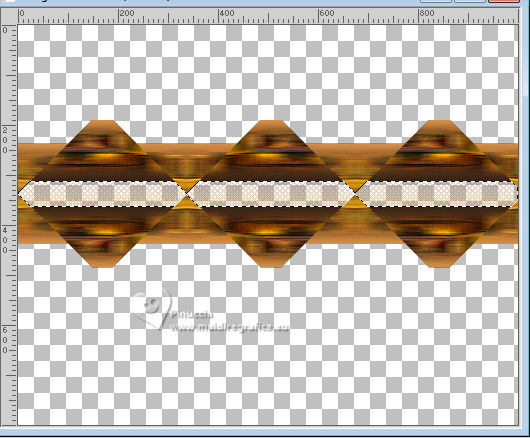
12. Effects>Texture Effects>Sculpture - select a golden texture at your choice
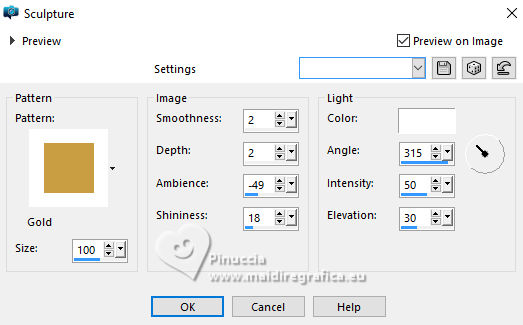
Selections>Select None.
13. Layers>Merge>Merge visible.
14. Effects>Distortion Effects>Pinch, same settings.

15. Effects>Distortion Effects>Lens Distortion
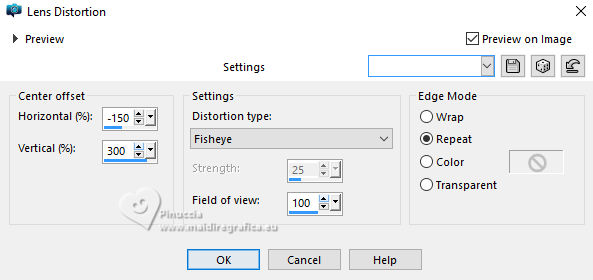
16. Effevts>Distortion Effects>Warp.
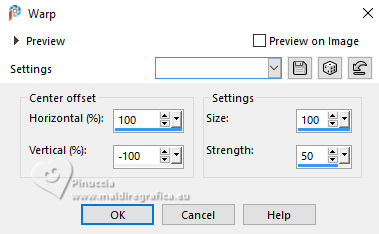
17. Image>Mirror>Mirror Vertical (Image>Flip).
18. Effects>Reflection Effects>Feedback.
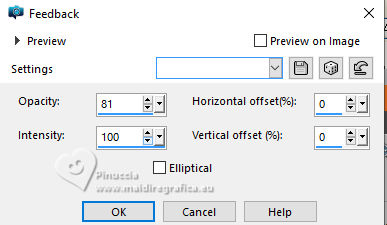
19. Effects>Geometric Effects>Cylinder horizontal.
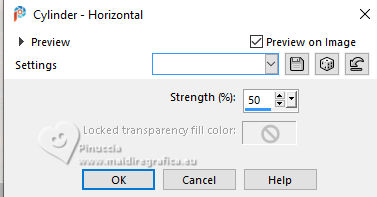
20. Effects>Geometric Effects>Pentagon.
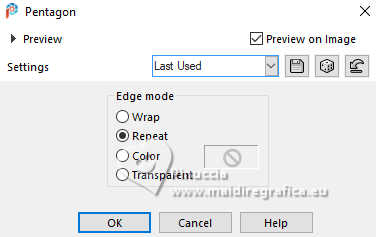
21. Effects>Reflection Effects>Rotating Mirror.

22. Again Effects>Geometric Effects>Pentagon.

23. Layers>Duplicate.
Image>Mirror>Mirror vertical (Image>Flip).
Layrs>Merge>Merge visible.
24. Effects>Distortion Effects>Pinch, same settings.

25. Effects>Plugins>FM Tile Tool - Saturation Emboss, default settings.

26. Effects>3D Effects>Drop Shadow.
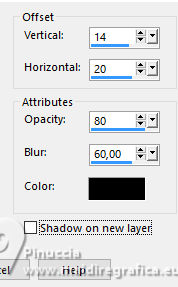
27. Layers>New Raster Layer.
Layers>Arrange>Send to Bottom.
Flood Fill  the layer with your Gradient. the layer with your Gradient.
28. Your landscape tube  is still in memory: is still in memory:
Edit>Paste as new layer.
Move  the tube at the upper left. the tube at the upper left.
Layers>Duplicate.
Image>Mirror>Mirror horizontal.
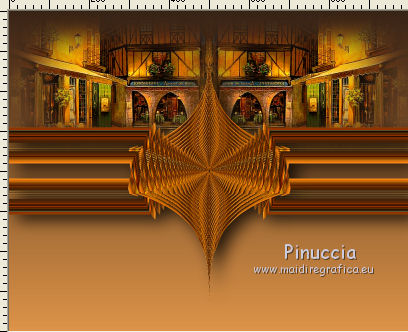
Layers>Merge>Merge Down.
29. Activate the layer Raster 1.
Layers>Duplicate.
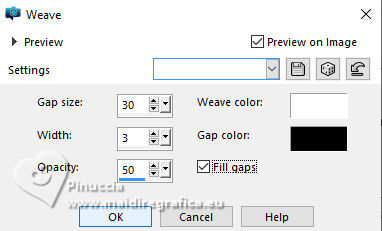
30. Effects>Texture Effects>Weave
weave color: white
gap color: black
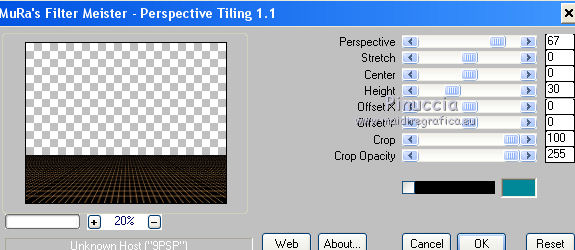
31. Effects>Plugins>Mura's Meister - Perspective Tiling.
32. Activate your top layer.
Open the tube Tocha23375 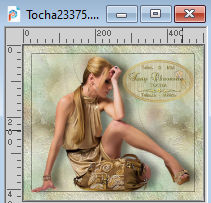
Edit>Copy.
Go back to your work and go to Edit>Paste as new layer.
Move  the tube at the bottom left, or to your liking. the tube at the bottom left, or to your liking.
Effects>3D Effects>Drop shadow, at your choice.
33. Open the tube rw-goldsnakeheels 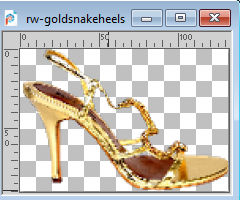
Edit>Copy.
Go back to your work and go to Edit>Paste as new layer.
Move  the tube at the bottom right, or to your liking. the tube at the bottom right, or to your liking.
Effects>3D Effects>Drop Shadow, at your choice.
34. Activate the layer of the landscape.
Layers>Duplicate.
Image>Mirror>Mirror Vertical (Image>Flip).
Reduce the opacity of this layer to 35%.
34. Layers>Merge>Merge visible.
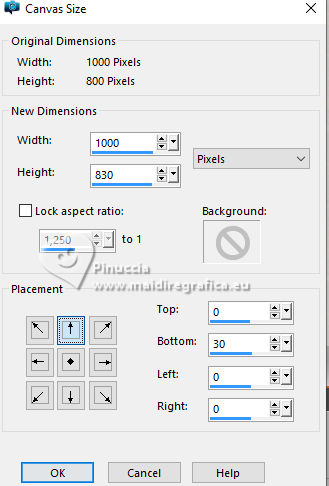
35. Image>Canvas Size - 1000 x 830 pixels.
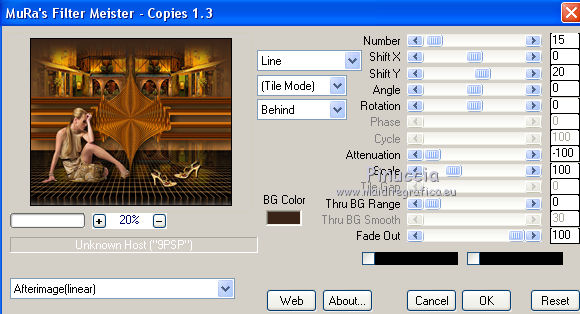
36. Effects>Plugins>Mura's Meister - Copies.
37. Sign your work and save as jpg.
For the tubes of this version thanks Wieske
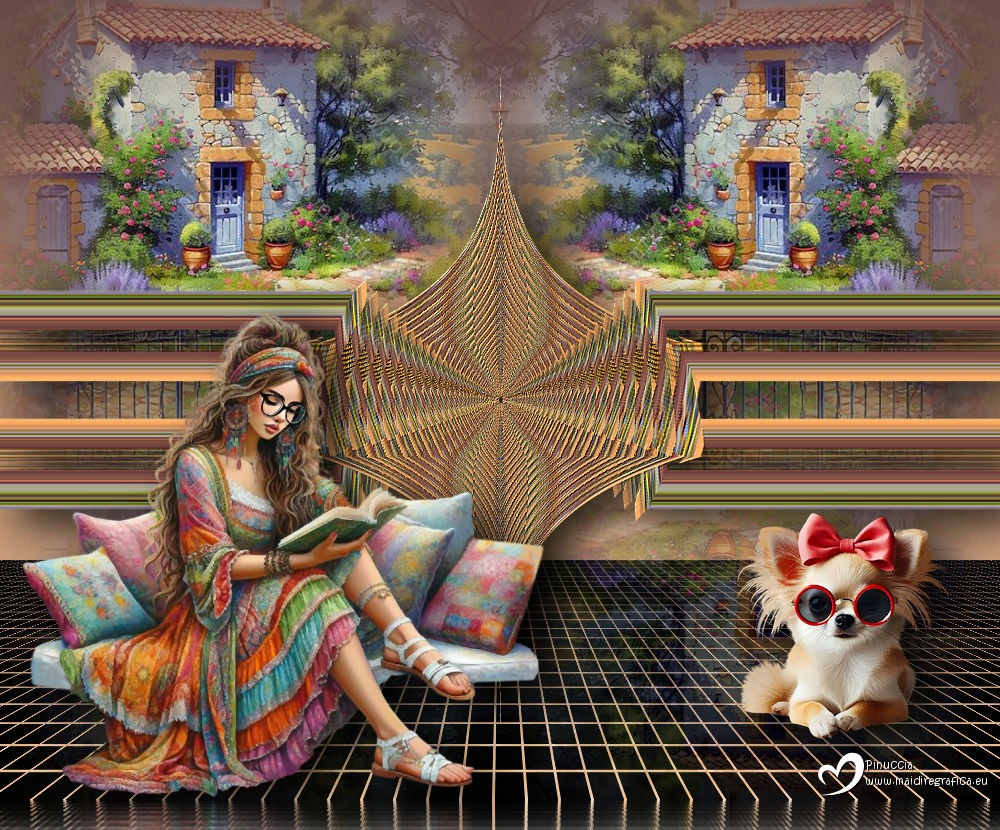


If you have problems or doubts, or you find a not worked link,
or only for tell me that you enjoyed this tutorial, write to me.
20 December 2025
|

