|
TOP ROCIO TORRES


Thanks Luz Cristina for your invitation to translate your tutorials into english
This tutorial, created with PSP9, was translated with PspX9 and PSP2020, but it can also be made using other versions of PSP.
Since version PSP X4, Image>Mirror was replaced with Image>Flip Horizontal,
and Image>Flip with Image>Flip Vertical, there are some variables.
In versions X5 and X6, the functions have been improved by making available the Objects menu.
In the latest version X7 command Image>Mirror and Image>Flip returned, but with new differences.
See my schedule here
 French Translation here French Translation here
 Your versions here Your versions here

For this tutorial, you will need:
Tubes de Luz Cristina
(you find here the links to the material authors' sites)
consult, if necessary, my filter section here
Mura's Meister - Perspective Tiling, Copies here
AAA Frames - Foto Frame here
Artistics - Rough Pastels here
FM Tile Tools - Saturation Emboss here

You can change Blend Modes according to your colors.
In the newest versions of PSP, you don't find the foreground/background gradient (Corel_06_029).
You can use the gradients of the older versions.
The Gradient of CorelX here
Open the mask in PSP and minimize it with the rest of the material.
1. Open a new transparent image 1000 x 800 pixels.
2. set your foreground color to #d7b367
and your background color to #4c2012.
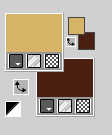
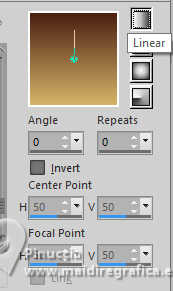
Set your foreground color to a Foreground/Background Gradient, style Linear.
Flood Fill  the transparent image with your Gradient. the transparent image with your Gradient.
3. Selections>Selecti All.
Open the misted 4392-luzcristina 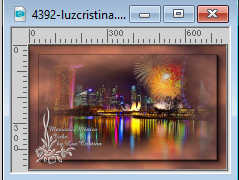
Edit>Copy.
Go back to your work and go to Edit>Paste into Selection.
Selections>Select None.
4. Adjust>Blur>Motion Blur
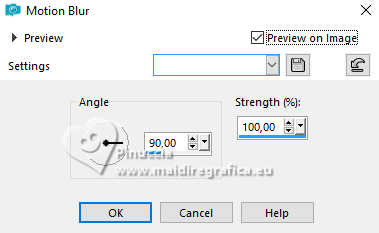
Edit>Repeat Motion Blur.
5. Activate your Brush Push  with these settings with these settings

Push the brush from left to right in a capricious way,
like when you're going to paint a wall

Change the Rotation to 90

and do the same thing, on the opposite side, across the canvas

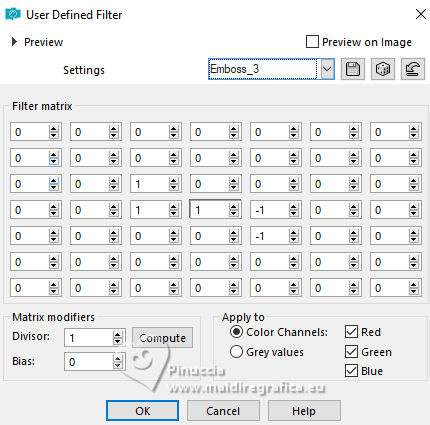
6. Effects>User Defined Filter - select the preset Emboss 3 and ok.
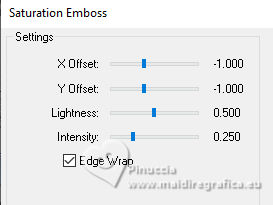
7. Effects>Plugins>FM Tile Tools - Saturation Emboss, default settings.
8. Effects>Plugins>AAA Frames - Foto Frame.

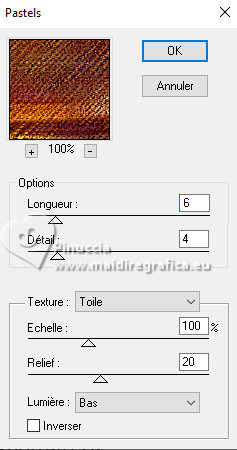
9. Effects>Plugins>Artistics - Rough Pastels
if you use the french version: Artistiques>Pastels
10. Edit>Paste as new layer (the misted is still in memory).
Effects>Geometric Effects>Perspective horizontal.
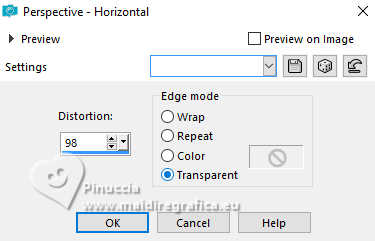
Result

Image>Mirror>Mirror horizontal.
Repeat Effects>Geometric Effects>Perspective horizontal, same settings.
Result

11. Effects>Reflection Effects>Feedback.
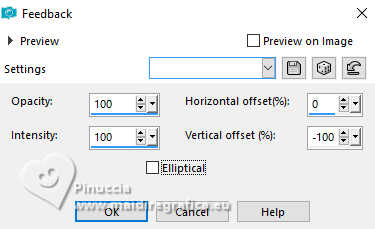
12. Effects>Geometric Effects>Circle.
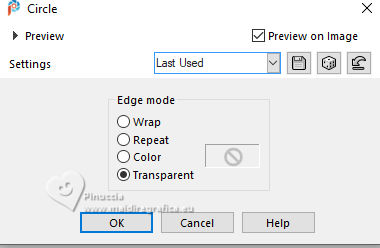
Edit>Repeat Circle.
13. Layers>Duplicate.
Result

Effects>Geometric Effects>Perspective vertical.
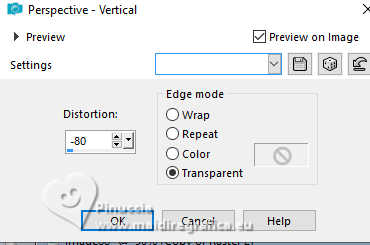
Layers>Duplicate.
Image>Mirror>Mirror Vertical (Image>Flip).
14. Effects>Image Effects>Offset.
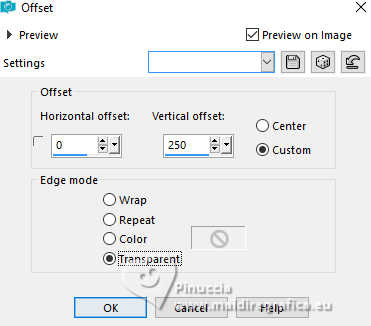
15. Layers>Merge>Merge Down.
16. Effects>Plugins>Mura's Meister - Copies.

17. Effects>Image Effects>Offset.
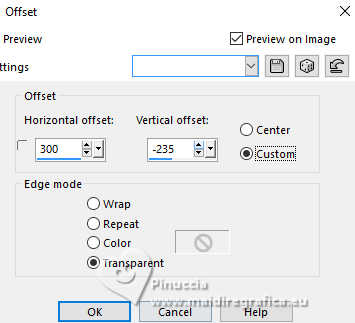
18. Effects>3D Effects>Drop Shadow.
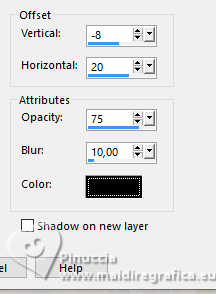
19. Layers>Duplicate.
Layers>Arrange>Move Down.
20. Effects>Distortion Effects>Twirl.
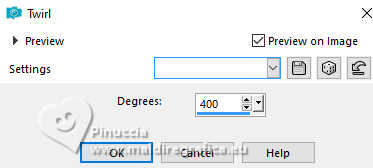
21. Effects>3D Effects>Drop Shadow.
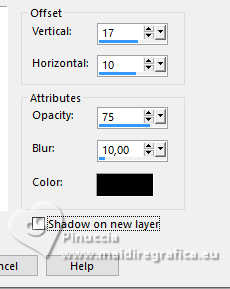
22. Layers>Duplicate.
Image>Mirror>Mirror vertical (Image>Flip).
Image>Mirror>Mirror horizontal.
On the two layers: Adjust>Sharpness>Sharpen.
23. Edit>Paste as new layer (the misted is always in memory)
Position  correctly the tube. correctly the tube.
Move this layer under the formes layers.

24. Activate your top layer.
Open your woman's tube 4319-luzcristina 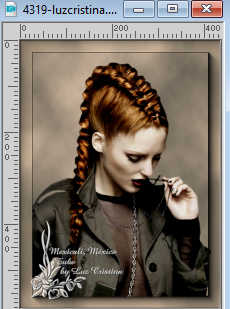
Edit>Copy.
Go back to your work and go to Edit>Paste as new layer.
Move the tube at the bottom left.
25. Effects>3D Effects>Drop Shadow.
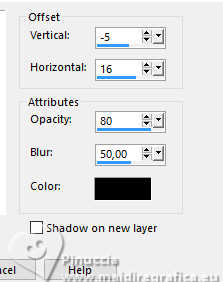
26. Sign your work.
Layers>Merge>Merge All and save as jpg.
Version with my tubes from Pinterest images
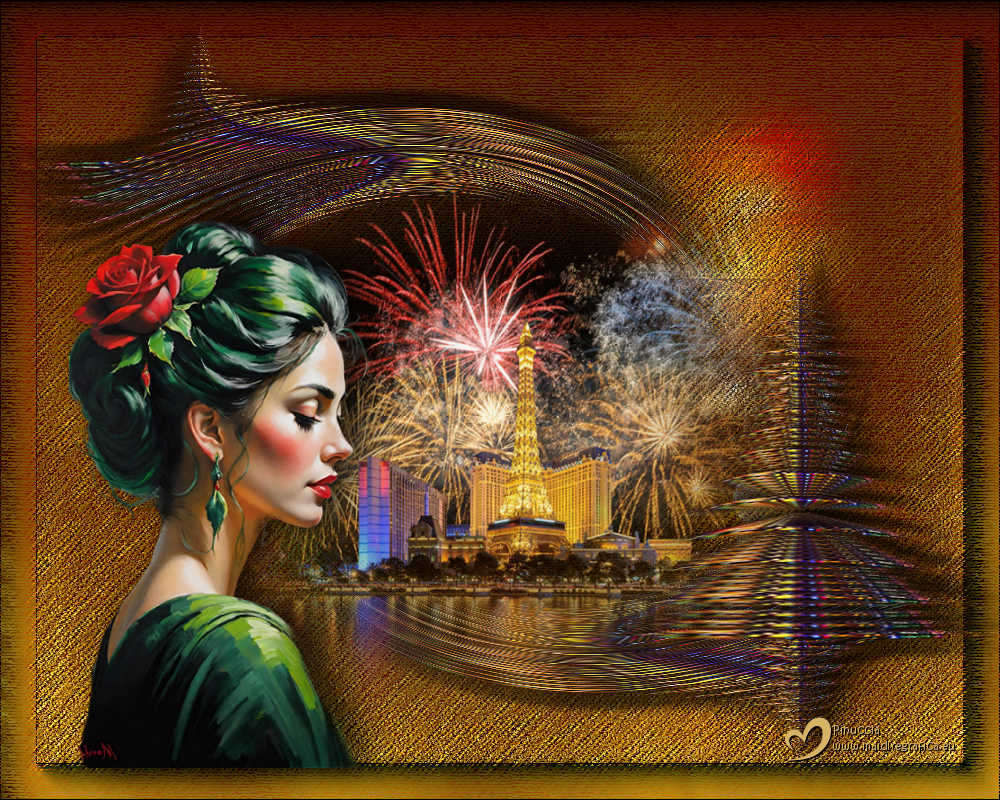
If you have problems or doubts, or you find a not worked link,
or only for tell me that you enjoyed this tutorial, write to me.
12 August 2026
|