|
TOP SHOCK


Thanks Luz Cristina for your invitation to translate your tutorials into english

This tutorial was translated with PSPX9 but it can also be made using other versions of PSP.
Since version PSP X4, Image>Mirror was replaced with Image>Flip Horizontal,
and Image>Flip with Image>Flip Vertical, there are some variables.
In versions X5 and X6, the functions have been improved by making available the Objects menu.
In the latest version X7 command Image>Mirror and Image>Flip returned, but with new differences.
See my schedule here
 French Translation here French Translation here
 Your versions here Your versions here

For this tutorial, you will need:

For the tube thanks Luz Cristina and Isa
(The links of the tubemakers here).

consult, if necessary, my filter section here
Filters Unlimited 2.0 here
Xero - Nostalgia here
AAA Frames - Foto Frame here
FM Tile Tools - Saturation Emboss here
Mura's Meister - Perspective Tiling here
Simple - Top Left Mirror here
L&K's - L&K Pia here
Filters Tramages can be used alone or imported into Filters Unlimited.
(How do, you see here)
If a plugin supplied appears with this icon  it must necessarily be imported into Unlimited it must necessarily be imported into Unlimited

You can change Blend Modes according to your colors.
In the newest versions of PSP, you don't find the foreground/background gradient (Corel_06_029).
You can use the gradients of the older versions.
The Gradient of CorelX here

1. Open a new transparent image 1000 x 800 pixels.
2. Placer en avant plan la couleur #c2bab2,
et en arrière plan la couleur #000000.
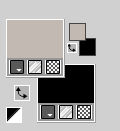
Set your foreground color to a Foreground/Background Gradient, style Linear.
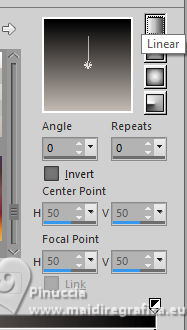
Flood Fill  the transparent image with your Gradient. the transparent image with your Gradient.
3. Effects>Plugins>L&K's - L&K Pia.

4. Layers>Duplicate.
Effects>Plugins>Mura's Meister - Perspective Tiling.

5. Close the layer Raster 1 to work better
6. Layers>Duplicate
7. Adjust>Blur>Motion Blur.
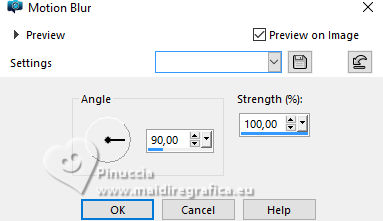
Edit>Repeat Motion Blur.
Change the Blend Mode of this layer to Hard Light.
8. Layers>Merge>Merge Down.
9. Activate your Magic Wand Tool  , feather 30, , feather 30,
and click in the transparent part to select it

Click several times CANC on the keyboard  to soften the borders. to soften the borders.

Selections>Select None.
don't forget to set again the feather of your Magic Wand Tool to 0
10. Layers>New Raster Layer.
Flood Fill  the layer with your Gradient. the layer with your Gradient.
Layers>Arrange>Move Down.
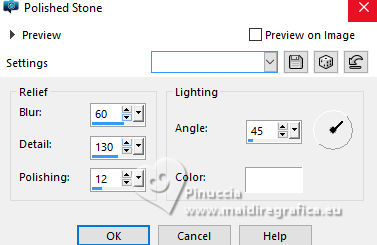
11. Effects>Texture Effects>Polished Stone
12. Effects>Edge Effects>Enhance.
13. Effects>Geometric Effects>Spherize.
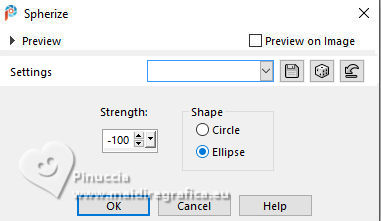
Edit>Repeat Spherize.
14. Adjust>Sharpness>Sharpen.
15. Open the misted 4700-luzcristina 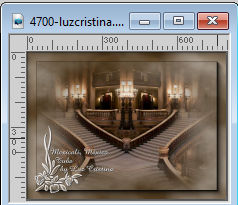
Edit>Copy.
Go back to your work and go to Edit>Paste as new layer.
16. Effects>Image Effects>Offset.
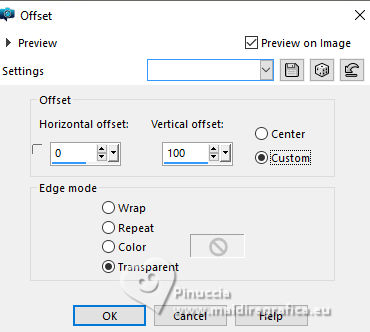
17. Effects>Plugins>FM Tile Tools - Saturation Emboss, default settings.

18. Open and activate the layer Raster 1.
Layers>Arrange>Bring to Top.
19. Effects>Geometric Effects>Perspective Horizontal.
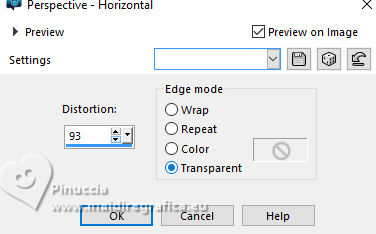
20. Image>Mirror>Mirror horizontal.
Repeat Effects>Geometric Effects>Perspective horizontal, same settings.

21. Image>Resize, to 90%, resize all layers not checked.
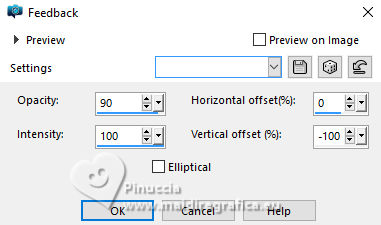
22. Effects>Reflection Effects>Feedback.
23. Effects>Distortion Effects>Pinch

24. Effects>Plugins>Simple - Top Left Mirror.

25. Image>Resize, to 50%, resize all layers not checked.
26. Layers>Duplicate.
27. Effects>Image Effects>Seamless Tiling.

28. Activate the layer above, Raster 1.

Effects>Image Effects>Seamless Tiling, default settings.

29. Activate the layer Copy of Raster 1.

Layers>Merge>Merge Down.
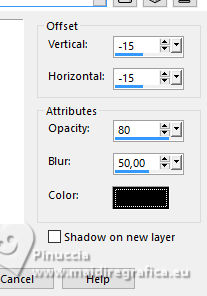
30. Effects>3D Effects>Drop Shadow.
31. Effects>3DEffects>Drop Shadow.
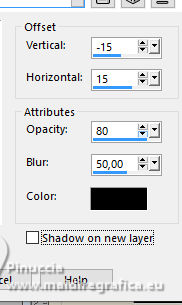
32. Image>Resize, to 92%, resize all layers not checked.
33. Layers>Merge>Merge visible.
34. Effects>Plugins>AAA Frames - Foto Frame.

35. Open the tube by Isa FA0008 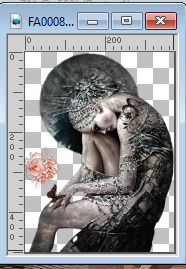
Erase the watermark and go to Edit>Copy.
Go back to your work and go to Edit>Paste as new layer.
Move  the tube at the bottom right. the tube at the bottom right.
36. Effects>3D Effects>Drop Shadow.

37. Layers>Merge>Merge visible.
38. Adjust>Brightness and Contrast>Clarify
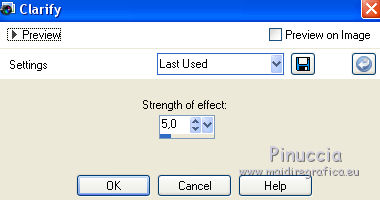
This function is available up to Corel version 12.
In Corel version 13, we find Adjust>Brightness and Contrast>Local Tone Mapping, with two values.
Starting with Corel version 14, the function is divided into two options:
Adjust>Brightness and Contrast>Fill Light/Clarity,
to brighten dark areas and adjust clarity
and
Adjust>Brightness and Contrast>Local Tone Mapping, to enhance depth and clarity.
The new names produce different results than the previous Clarity option.
Choose the settings according to your colors.
You can use the zoom in the dialog box to define the image display in the Before and After panes.
39. Effects>Plugins>Xero - Nostalgia.

The results of this filter depend on your colors and the tube colors.
If you're using different tubes and colors, consider playing with the settings or skipping this step.
40. Sign your work and save as jpg.
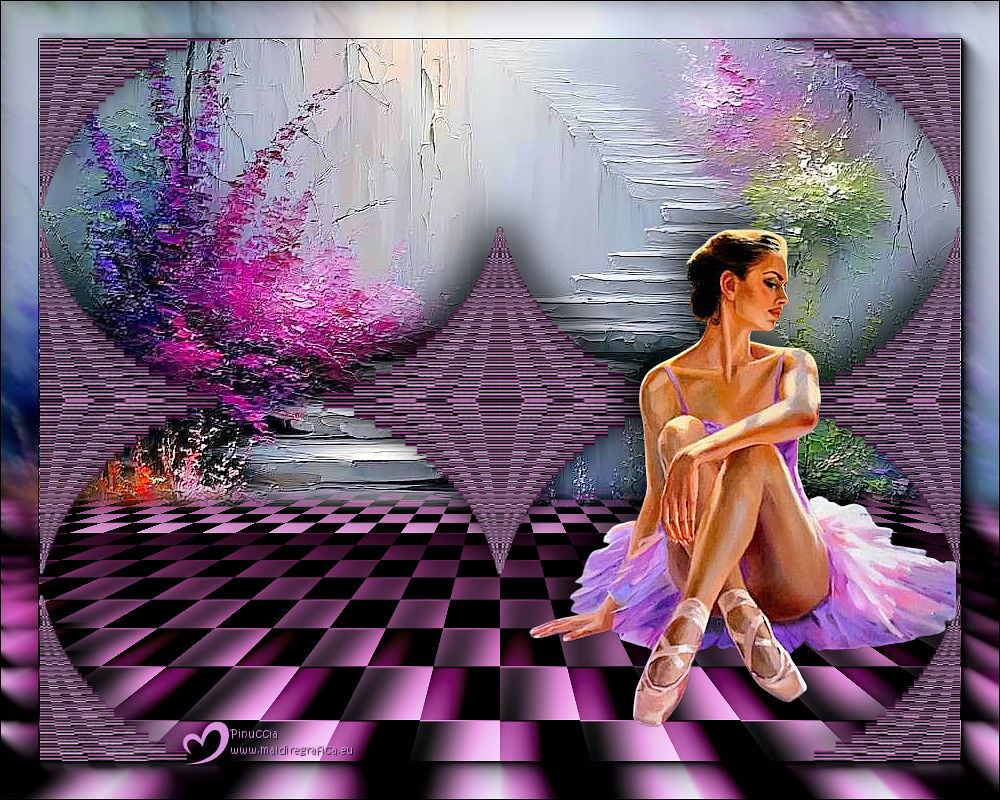
Version with my tubes from Pinterest images


If you have problems or doubts, or you find a not worked link,
or only for tell me that you enjoyed this tutorial, write to me.
20 December 2025
|


