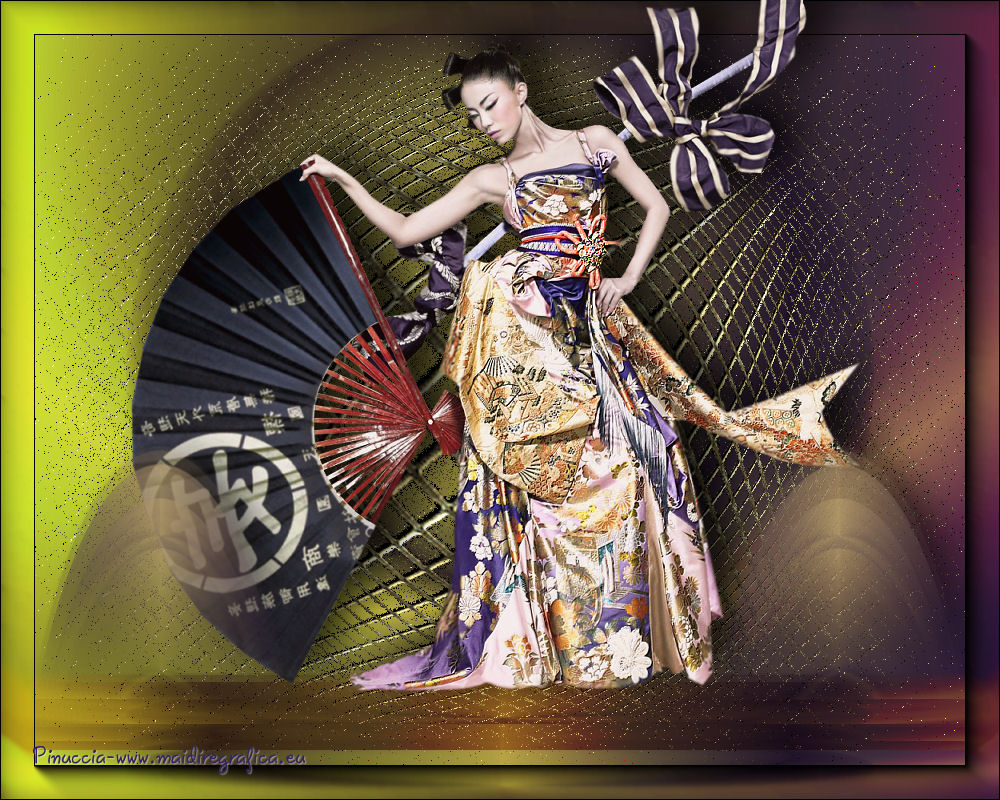
|
TOP TOCHA


Thanks Luz Cristina for your invitation to translate your tutorials into english

This tutorial was translated with PSPX9 but it can also be made using other versions of PSP.
Since version PSP X4, Image>Mirror was replaced with Image>Flip Horizontal,
and Image>Flip with Image>Flip Vertical, there are some variables.
In versions X5 and X6, the functions have been improved by making available the Objects menu.
In the latest version X7 command Image>Mirror and Image>Flip returned, but with new differences.
See my schedule here
 French Translation here French Translation here
 Your versions here Your versions here

For this tutorial, you will need:

For the tube thanks Tocha
(The links of the tubemakers here).

consult, if necessary, my filter section here
Filters Unlimited 2.0 here
AAA Frames - Foto Frame here
Transparency - Eliminate black here
Andromeda - Designs here
Mura's Meister - Copies, Pole Transform here
Filters Transparency can be used alone or imported into Filters Unlimited.
(How do, you see here)
If a plugin supplied appears with this icon  it must necessarily be imported into Unlimited it must necessarily be imported into Unlimited

You can change Blend Modes according to your colors.
In the newest versions of PSP, you don't find the foreground/background gradient (Corel_06_029).
You can use the gradients of the older versions.
The Gradient of CorelX here

Copy the mask !!!20-21 in the Masks Folder.
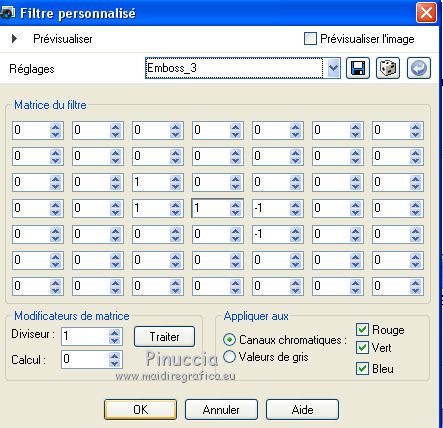
Copy the preset Emboss 3 in the Presets Folder.
Copy the golden pattern on the Patterns Folder
Open the mask fade-suave in PSP and minimize it with the rest of the material.
1. Open a new trasparent image 1000 x 750 pixels.
Set your foreground color to #bda370,
and your background color to #38253d.
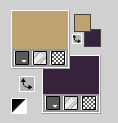
Set your foreground color to a Foreground/Background Gradient, style Linear.
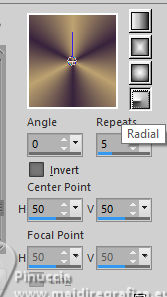
Flood Fill  the transparent image with your Gradient. the transparent image with your Gradient.
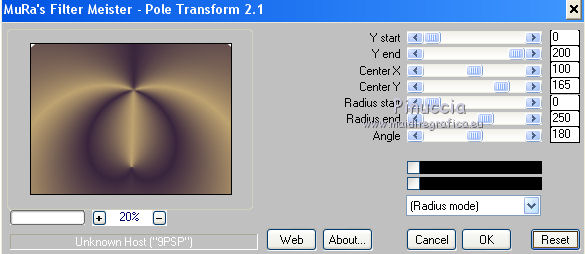
2. Effects>Plugins>Mura's Meister - Pole Transform.
3. Image>Mirror>Mirror vertical (Image>Flip).
Effects>User Defined Filter - select the preset Emboss 3 and ok.
(or, alternatively, you can use the filter FM Tile Tools-Blend Emboss).
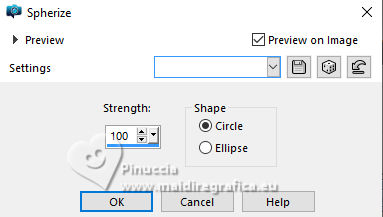
4. Effects>Geometric Effects>Spherize
5. Edit>Copy.
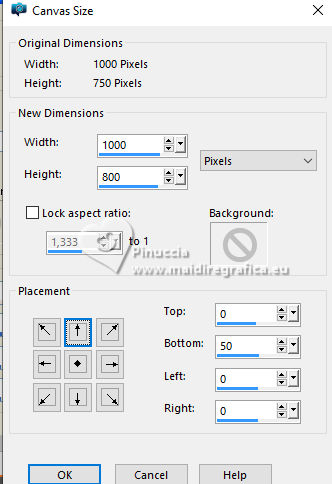
6. Image>Canvas Size - 1000 x 800 pixels.
7. Activate your Magic Wand Tool 
and click in the transparent part to select it.
Layers>New Raster Layer.
Edit>Paste into Selection.
Selections>Select None.
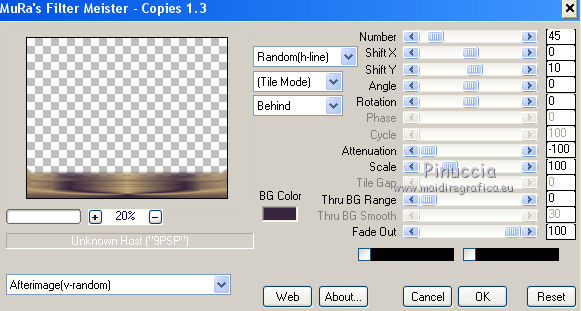
8. Effects>Plugins>Mura's Meister - Copies.
9. Layers>Duplicate.
Effects>Distortion Effcts>Polar Coordinates.
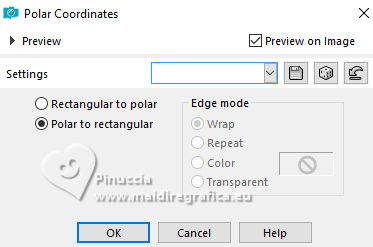
10. Layers>New Mask layer>From image
Open the menu under the source window and you'll see all the files open.
Select the mask mask_fadesuave.
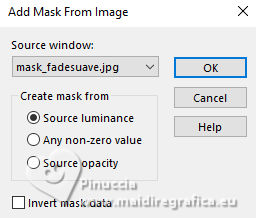
Layers>Merge>Merge Group.
11. Repeat the step 10.
Evaluate the necessity of this repetition, which may not be necessary.
It depends on the result of the Copies filter
12. Effects>Image Effects>Offset.
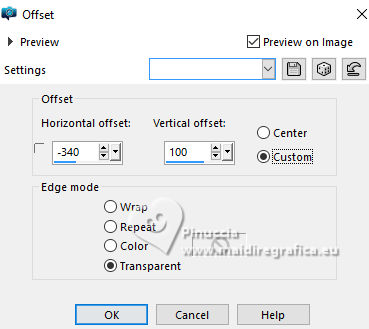
Layers>Duplicate.
Image>Mirror>Mirror horizontal.
Layers>Merge>Merge Down.
13. Effects>3D Effects>Drop Shadow, color black.
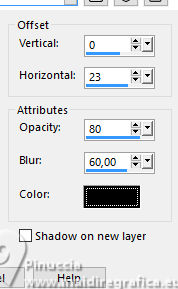
14. Activate your bottom layer - Raster 1.
Layers>Duplicate.
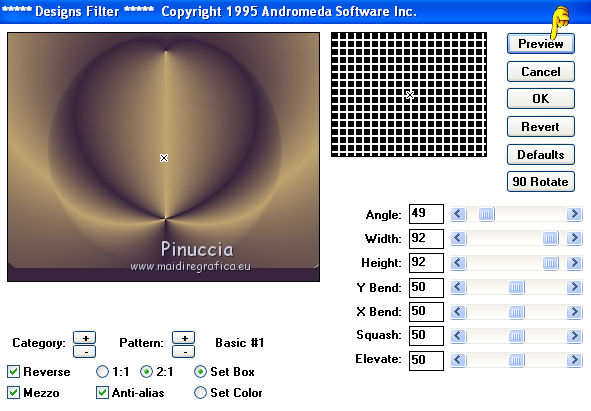
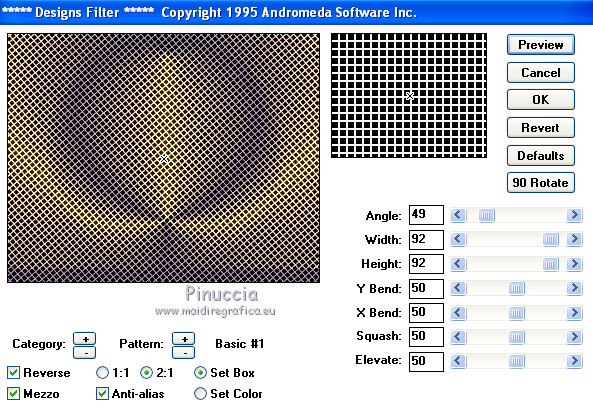
15. Effects>Plugins>Andromeda - Designs
To preview the result, click on Preview.
16. Effects>Plugins>Transparency - Eliminate black.
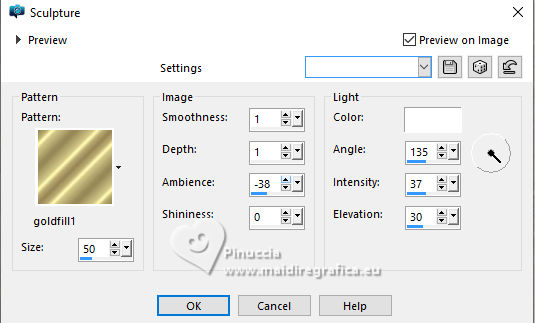
17. Effects>Texture Effects>Sculpture - select the golder pattern
Effects>Edge Effects>Enhance.
Adjust>Sharpness>Sharpen.
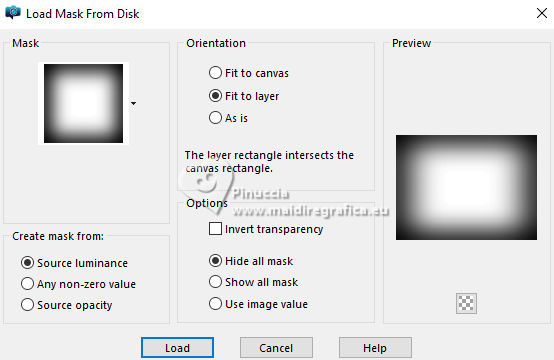
18. Layers>Load/Save Mask>Load Mask from Disk.
Look for and load the mask !!!20-21.
Layers>Merge>Merge Group.
19. Repeat 2 times the step 18.
20. Effects>Distortion Effects>Warp.
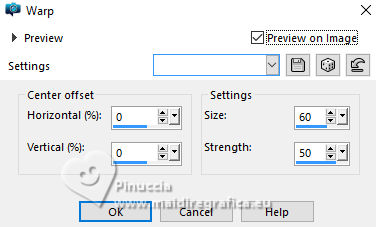
Change the Blend Mode of this layer to Dissolve (Optional)
21. Activate the layer Raster 1.
Change the Blend Mode of this layer to Hard light.
22. Layers>New Raster layer.
Layers>Arrange>Send to Bottom.
23. Set your foreground color to #abd73c,
and your background color to #332360.
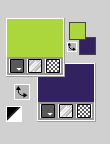
Set your foreground color to a Foreground/Background Gradient, style Linear.
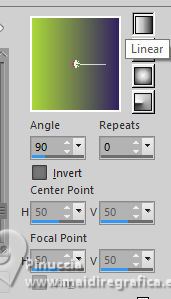
Flood Fill  the layer with your Gradient. the layer with your Gradient.
24. Activate the layer Raster 2,
and change the Blend Mode to Hard light.
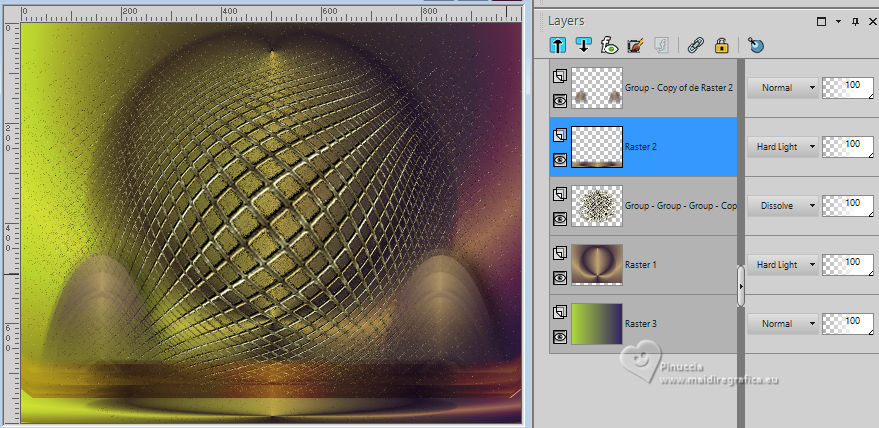
Open the tube Tocha23674 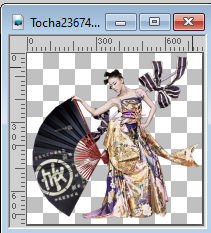
Edit>Copy.
Go back to your work and go to Edit>Paste as new layer.
Effects>3D Effects>Drop Shadow, color black.
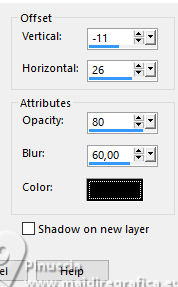
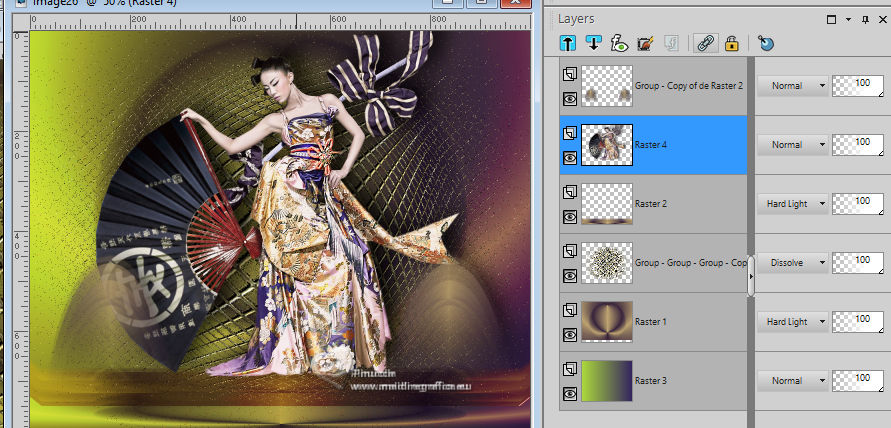
25. Place  correctly the tube. correctly the tube.
26. Close the layers of the tube and of the two lateral figures.
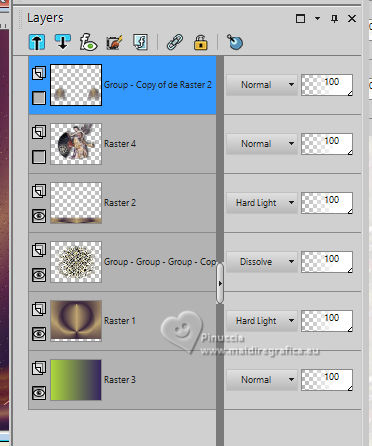
27. Layers>Merge>Merge visible.
On this layer:
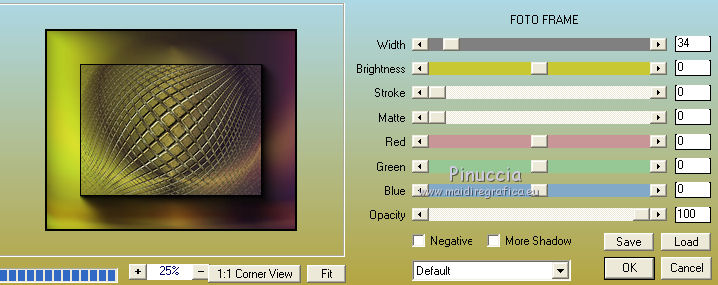
Effects>Plugins>AAA Frames - Foto Frame.
28. Open again the closed layers.
29. Activate your top layer.
Sign your work.
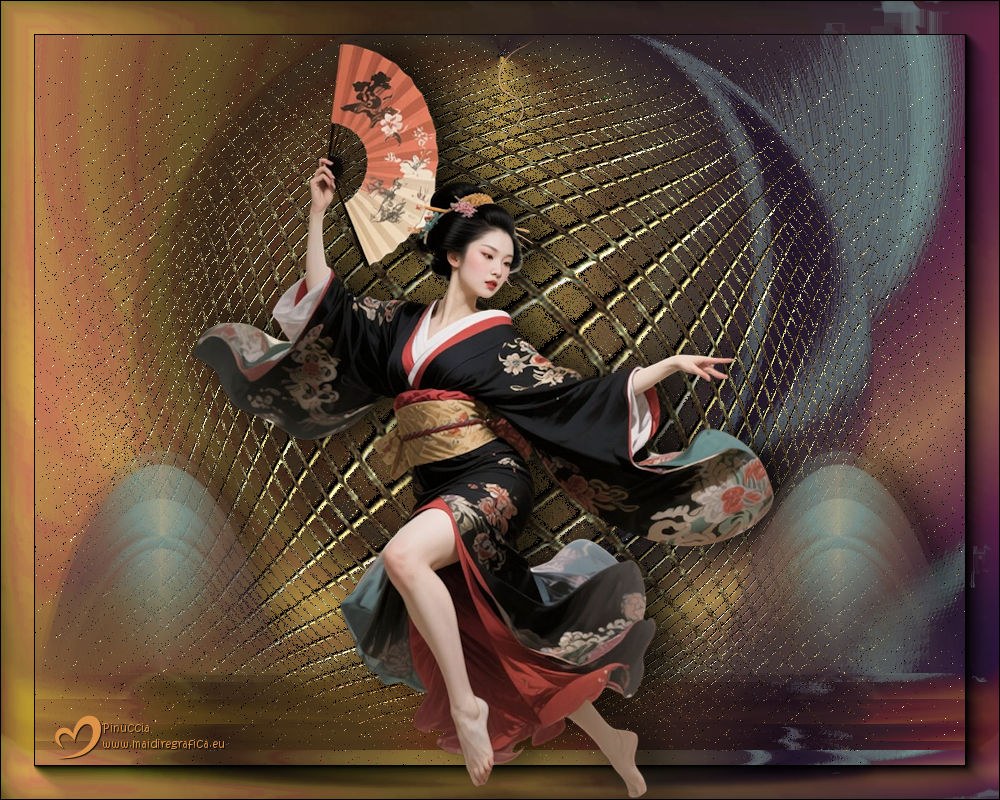
Layers>Merge>Merge All and save as jpg.


If you have problems or doubts, or you find a not worked link,
or only for tell me that you enjoyed this tutorial, write to me.
20 December 2025
|

