|
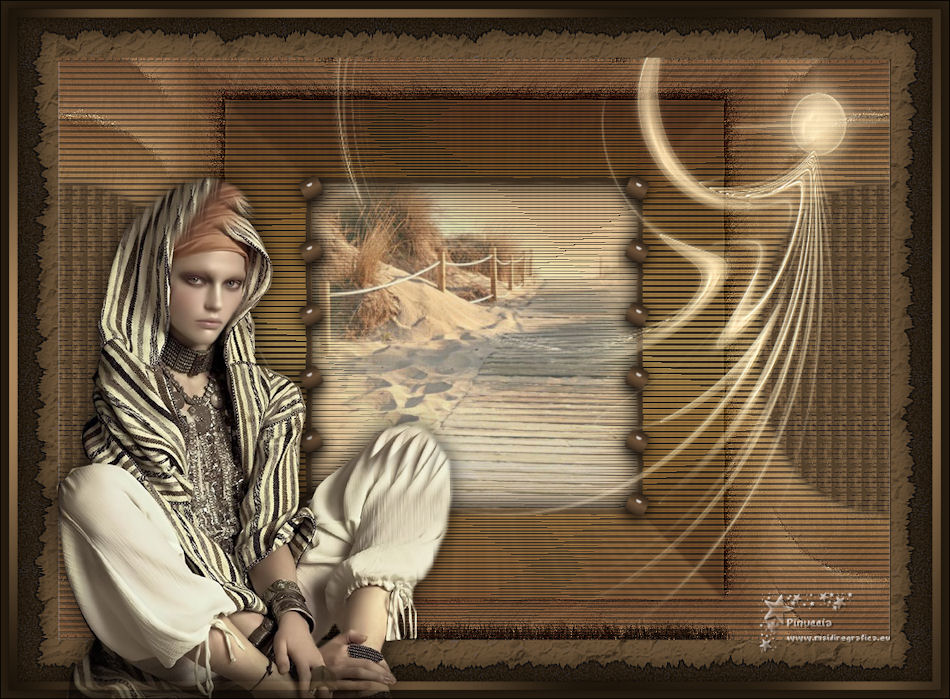
AVENTURE

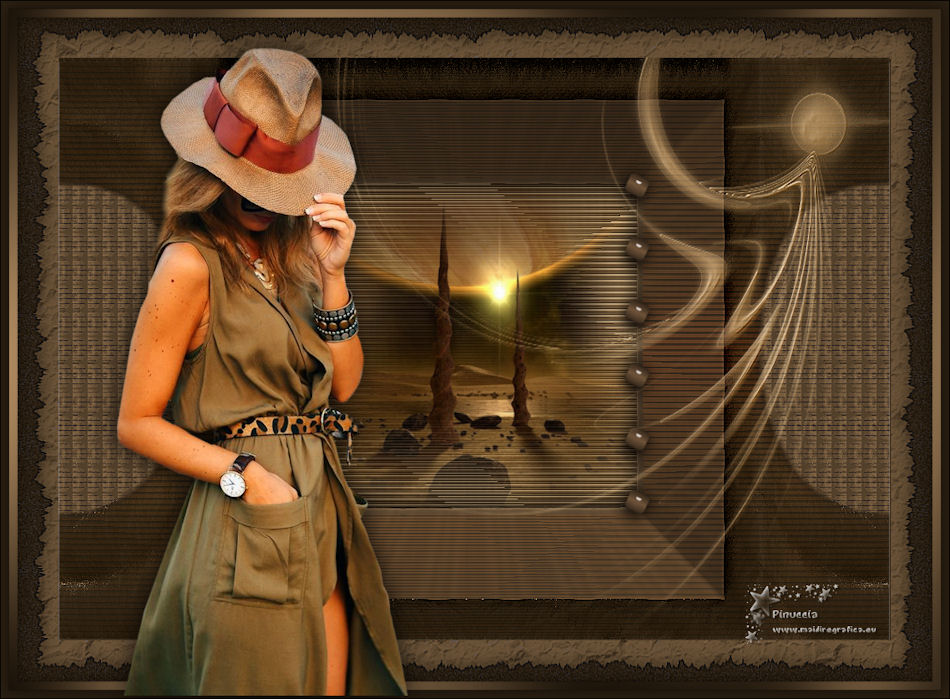
Thanks Maria José for your invitation to translate your tutorial

This tutorial has been translated with PSPX2 and PSPX3, but it can also be made using other versions of PSP.
Since version PSP X4, Image>Mirror was replaced with Image>Flip Horizontal,
and Image>Flip with Image>Flip Vertical, there are some variables.
In versions X5 and X6, the functions have been improved by making available the Objects menu.
In the latest version X7 command Image>Mirror and Image>Flip returned, but with new differences.
See my schedule here
 French translation here French translation here
 your versions ici your versions ici
For this tutorial, you will need:
Material here
For the tube thanks Guismo.
The rest of the material is by Maria José.
(you find here the links to the material authors' sites)
Plugins
consult, if necessary, my filter section here
Filters Unlimited 2.0 here
Mura's Seamless - Emboss at Alpha, Diagonal Mirror here
Mirror Rave - Quadrant Mirror here
Fantastic Machine - Paint engine here
Alien Skin Eye Candy 5 Impact - Extrude here
Mura's Meister - Copies here
Filters Mura's Seamless and Mirror Rave can be used alone or imported into Filters Unlimited.
(How do, you see here)
If a plugin supplied appears with this icon  it must necessarily be imported into Unlimited it must necessarily be imported into Unlimited

You can change Blend Modes according to your colors.
In the newest versions of PSP, you don't find the foreground/background gradient (Corel_06_029).
You can use the gradients of the older versions.
The Gradient of CorelX here
Copy the preset  in the folder of the plugin Alien Skin Eye Candy 5 Impact>Settings>Extrude. in the folder of the plugin Alien Skin Eye Candy 5 Impact>Settings>Extrude.
One or two clic on the file (it depends by your settings), automatically the preset will be copied in the right folder.
why one or two clic see here
Copy the Frame framemarron1_mj in the Picture Frames Folder.
Copy the selections in the Selection Folder.
Open the masks in PSP and minimize them with the rest of the material.
1. Set your foreground color to #8e6e48,
and your background color to #073e41.
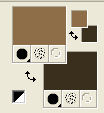
Set your foreground color to a Foreground/Background Gradient, style Linear.
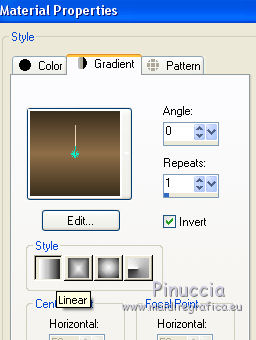
Open a new transparent image 1000 x 700 pixels.
Flood Fill  the transparent image with your Gradient. the transparent image with your Gradient.
2. Layers>New Mask layer>From image
Open the menu under the source window and you'll see all the files open.
Select the mask masksharp_mj.
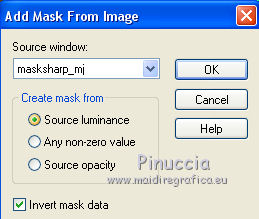
Layers>Merge>Merge Group.
3. Effects>Plugins>MuRa's Seamless - Emboss at Alpha, default settings.
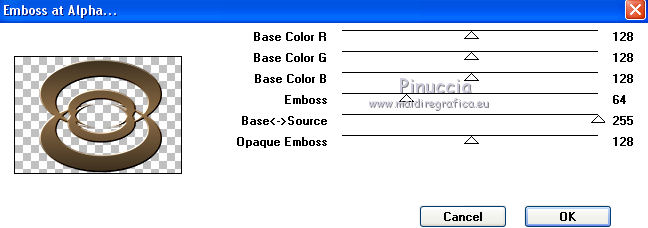
4. Effects>Plugins>MuRa's Seamless - Mirror Diagonal, default settings.
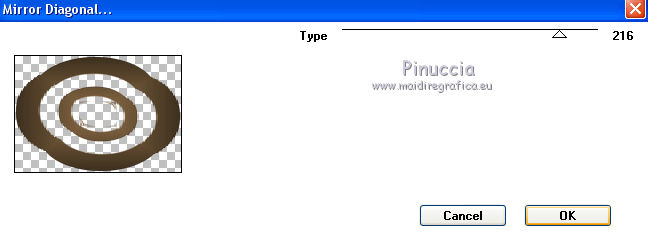
5. Effects>Plugins>Mirror Rave - Quadrant Flip, default settings.
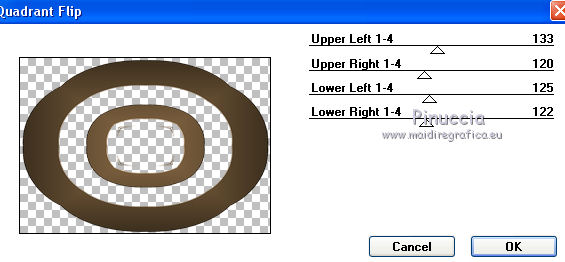
6. Image>Resize, to 80%, resize all layers not checked.
7. Effects>Plugins>MuRa's Meister - Copies.
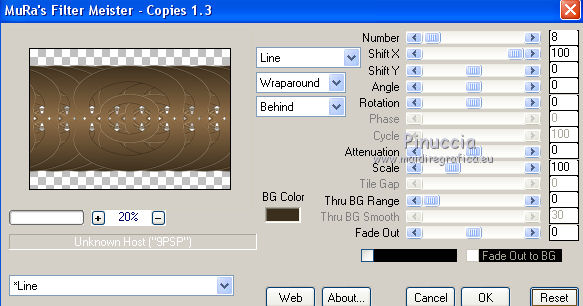
8. Effects>Reflection Effects>Rotating Mirror, default settings.

9. Effects>Reflection Effects>Kaleidoscope.
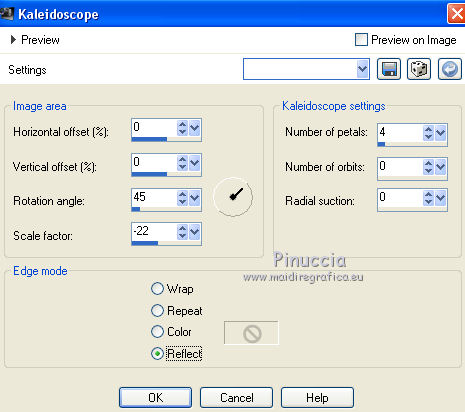
10. Selections>Load/Save Selection>Load Selection from Disk.
Look for and load the selection aventure_mj.
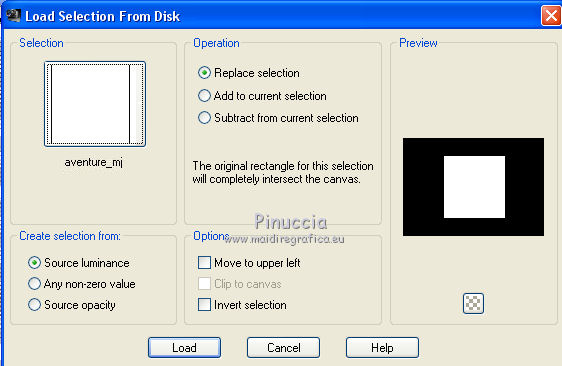
Press CANC on the keyboard 
Selections>Select None.
11. Effects>Plugins>Fantastique Machine - Paint Engine,
select the preset bad chalk and check Wrap Edges and Line
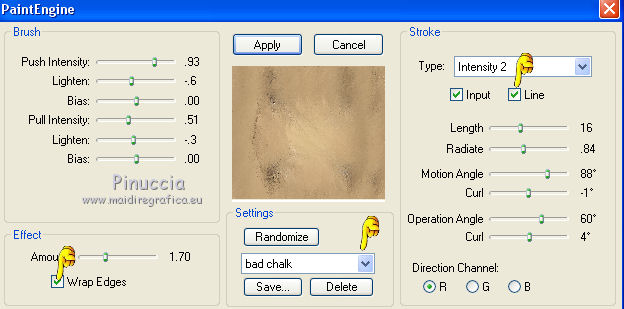
12. Effects>Plugins>Alien Skin Eye Candy 5 Impact - Extrude.
Select the preset extrudemarrom_mj and ok.
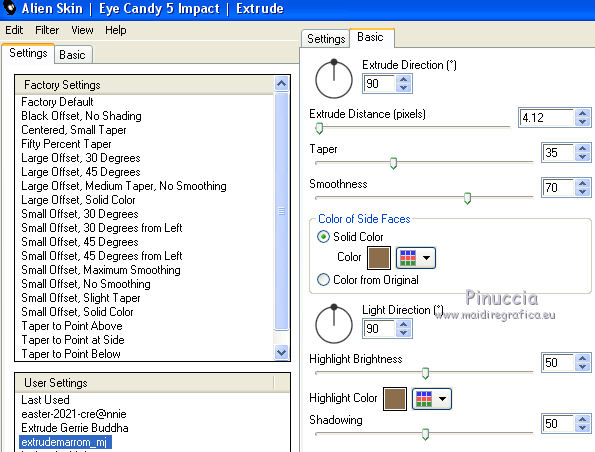
13. Adjust>Sharpness>Sharpen More.
14. Effects>Reflection Effects>Rotating Mirror, default settings.

15. Layers>New Raster Layer.
Flood Fill  the layer with your Gradient. the layer with your Gradient.
16. Effects>Distortion Effects>Wave
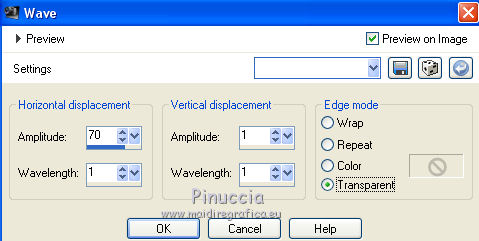
Change the Blend Mode of this layer to Hard Light and reduce the opacity to 50%.
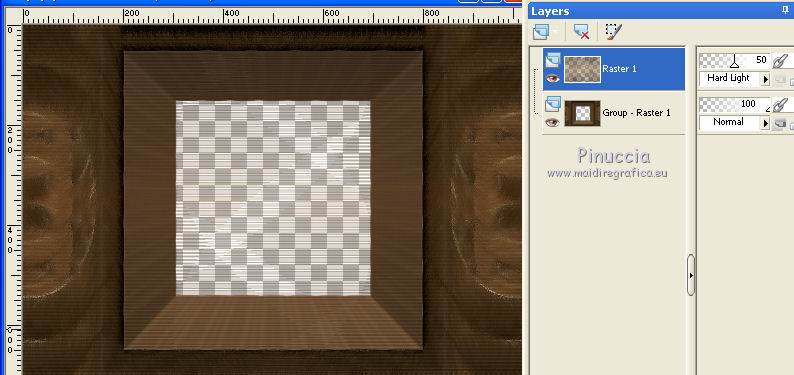
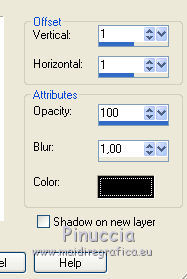
17. Effects>3D Effects>Drop Shadow, color black.
18. Adjust>Sharpness>Sharpen.
19. Selections>Load/Save Selection>Load Selection from Disk.
Look for and load the selection aventure_1_mj.
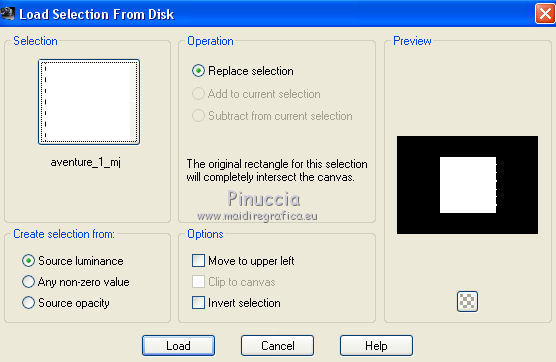
Press CANC on the keyboard.
Keep selected.
Layers>New Raster Layer.
Layers>Arrange>Send to Bottom.
20. Open the misted, keep the selection and go to Edit>Copy.
Go back to your work and go to Edit>Paste into Selection.
Selections>Select None.
21. Layers>New Raster Layer.
Layers>Arrange>Move Down.
Flood Fill  the layer with your Gradient. the layer with your Gradient.
22. Repeat the step from 16 to 18.
Effects>Distortion Effects>Wave

Effects>3D Effects>Drop Shadow, color black.

Adjust>Sharpness>Sharpen.
23. Activate the top layer, Raster 1.
Effects>3D Effects>Drop Shadow, color black.

Activate the layer below, Group-Raster 1.
Édition>Repeat Drop Shadow.
24. Open the tube decomarron_mj and go to Edit>Copy.
Go back to your work and go to Edit>Paste as new layer.
Layers>Arrange>Bring to Top.
25. Open the tube decocadre_mj and go to Edit>Copy.
Go back to your work and go to Edit>Paste as new layer.
Effects>3D Effects>Drop Shadow, color black.

26. Layers>New Raster Layer.
Set your foreground color to Color.
Flood Fill  the layer with your light foreground color. the layer with your light foreground color.
27. Layers>New Mask layer>From image
Open the menu under the source window
and select the mask evi_mask_mj.
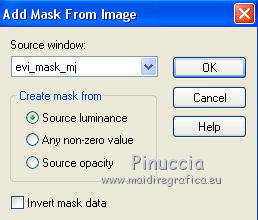
Layers>Merge>Merge Group.
28. Effects>Plugins>MuRa's Seamless - Emboss at Alpha, default settings.
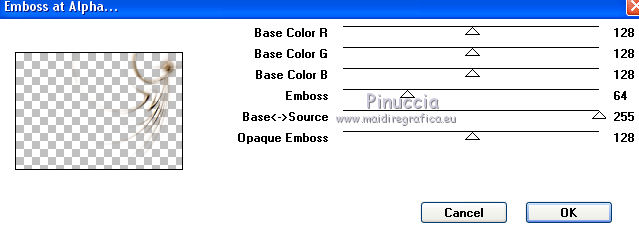
Change the Blend Mode of this layer to Screen.
The tag and the layers - adapt Blend Modes and opacities at your liking.
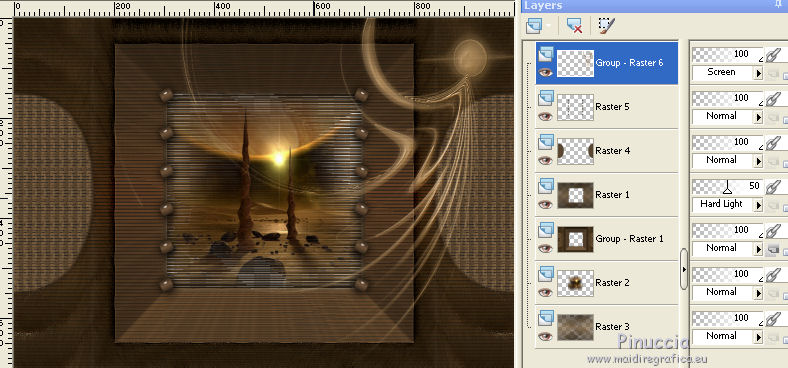
29. Layers>New Raster Layer.
Layers>arrange>Send to Bottom.
Flood Fill  the layer with your light foreground color. the layer with your light foreground color.
Layers>Merge>Merge visible.
30. Image>Picture Frame - select the frame framemarron1_mj
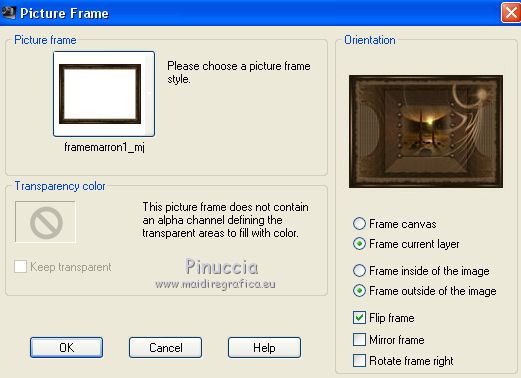
if you are problems with the picture frame,
go back to your work and go to Edit>Copy.
Open the tube framemarrom1_mj, which is already selected.
Edit>Paste into selection.
Selections>Select None.
31. Open the woman tube and go to Edit>Copy.
Go back to your work and go to Edit>Paste as new layer.
Image>Resize, to 95%, resize all layers not checked.
Move  the tube to the left side. the tube to the left side.
Effects>3D Effects>Drop Shadow, at your liking.
32. Sign your work on a new layer.
Image>Add borders, 1 pixel, symmetric, color black.
33. Image>Resize, 1000 pixels width, resize all layers checked.
Save as jpg.
Version with tubes by Luz Cristina and Jewel
 Your versions here Your versions here

If you have problems or doubts, or you find a not worked link, or only for tell me that you enjoyed this tutorial, write to me.
18 Août 2021

|


