|
CELESTE


Thanks Maria José for your invitation to translate your tutorial

This tutorial has been translated with PSPX2 and PSPX3, but it can also be made using other versions of PSP.
Since version PSP X4, Image>Mirror was replaced with Image>Flip Horizontal,
and Image>Flip with Image>Flip Vertical, there are some variables.
In versions X5 and X6, the functions have been improved by making available the Objects menu.
In the latest version X7 command Image>Mirror and Image>Flip returned, but with new differences.
See my schedule here
 French translation here French translation here
 your versions ici your versions ici
For this tutorial, you will need:

For the tube thanks AngelStar and Jewel.
The rest of the material is by Maria José.
(you find here the links to the material authors' sites)

consult, if necessary, my filter section here
Filters Unlimited 2.0 here
&<Bkg Designer sf10III> - VMT Lift the Cover (to import in Unlimited) here
Texturize - Raw Canvas (to import in Unlimited) here
Mehdi - Wavy Lab 1.1 here
DSB Flux - Linear Transmission here
Simple - Top Left Mirror here
Mura's Meister - Perspective Tiling here
Carolaine and Sensibility - CS-Linear-H here
Alien Skin Eye Candy 5 Impact here
Filters Simple can be used alone or imported into Filters Unlimited.
(How do, you see here)
If a plugin supplied appears with this icon  it must necessarily be imported into Unlimited it must necessarily be imported into Unlimited

You can change Blend Modes according to your colors.
Copy the preset  in the folder of the plugin Alien Skin Eye Candy 5 Impact>Settings>Glass. in the folder of the plugin Alien Skin Eye Candy 5 Impact>Settings>Glass.
One or two clic on the file (it depends by your settings), automatically the preset will be copied in the right folder.
why one or two clic see here

Open the mask in PSP and minimize it with the rest of the material.
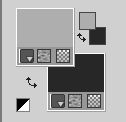
1. Set your foreground color to #aeaeae,
and your background color to #282828.
2. Open Alphaceleste
Window>Duplicate or, on the keyboard, shift+D to make a copy.

I created this gif in 2015, after weeks of searching for the right keyboard
and the "right" fingers to place on the keys.
I was very sorry to see it in a tutorial, manipulated to remove my signature
and add that of the person who took it from my site, without asking my permission.
If he had, I wouldn't have denied it.
I hope thes people realize the impropriety and remove the gif from their tutorials.
Close the original.
The copy, that will be the basis of your work, is not empty,
but contains the selections saved to alpha channel.
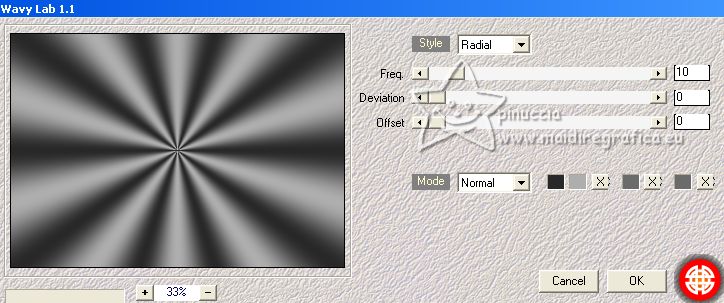
2. Effects>Plugins>Mehdi - Wavy Lab 1.1.
This filter creates gradients with the colors of your Materials palette.
The first is your background color, the second is your foreground color.
Keep the last two colors created by the filtre
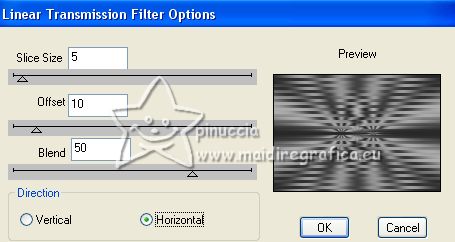
3. Effects>Plugins>Dsb Flux - Linear Transmission.
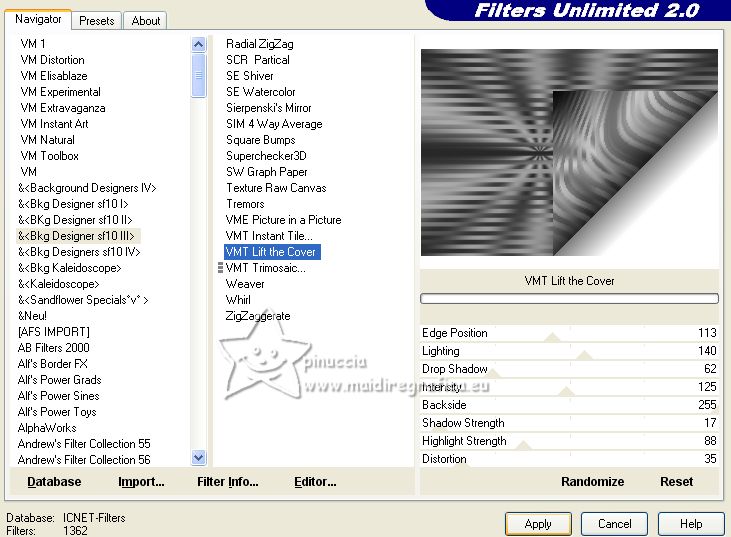
4. Effects>Plugins>Filters Unlimited 2.0 - &<Bkg Designer sf10III> - VMT Lift the Cover, default settings.
5. Selections>Load/Save Selection>Load Selection from Alpha Channel.
The selection selection #1 is immediately available. You just have to click Load.
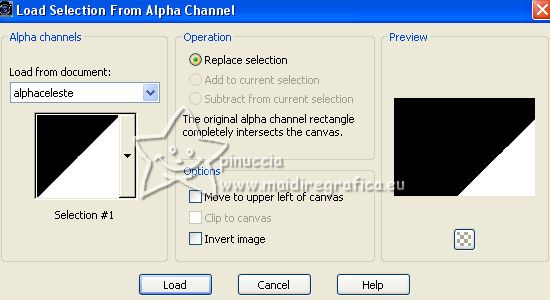
Selections>Modify>Expand - 1 pixel.
Flood Fill  with your dark color (click 2 times). with your dark color (click 2 times).
6. Effects>Plugins>Filters Unlimited 2.0 - Texturize - Raw Canvas.
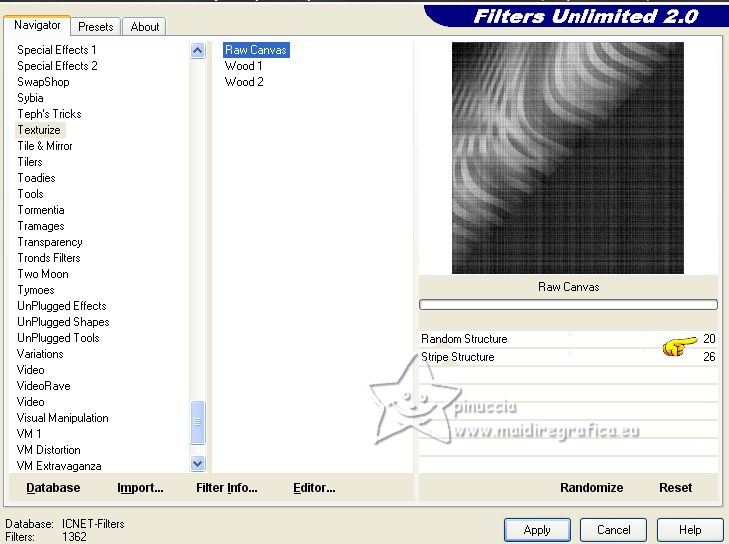
Selections>Select None.
7. Effects>Reflection Effects>Rotating Mirror, default settings.

8. Effects>Plugins>Simple - Top Left Mirror.
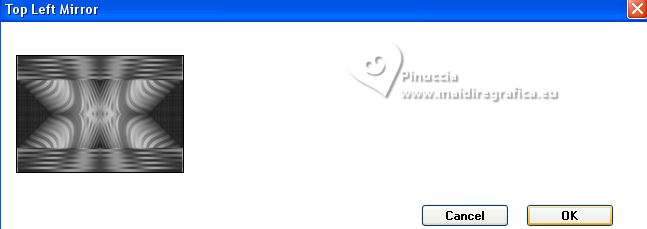
9. Effects>Plugins>Filters Unlimited 2.0 - Texturize - Raw Canvas, same settings.
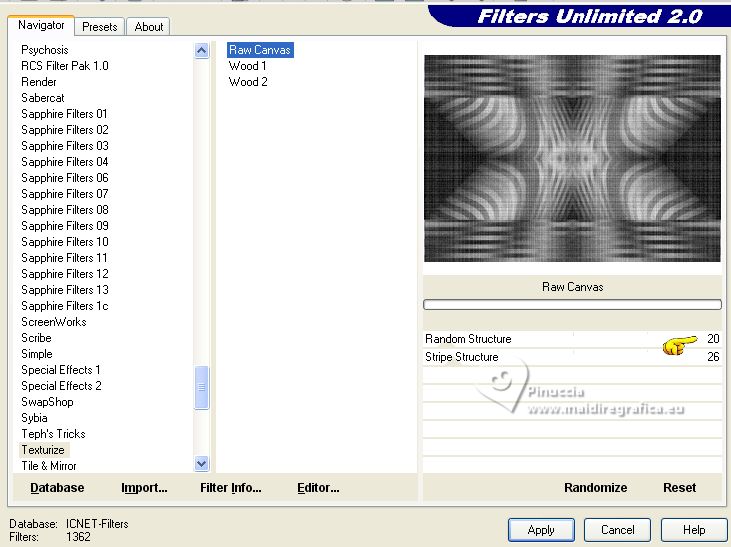
10. Adjust>Sharpness>Sharpen.
Layers>Duplicate.
11. Effects>Plugins>Mura's Meister - Perspective Tiling.
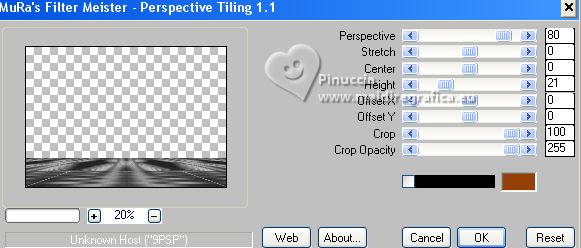
12. Activate your Magic Wand Tool  , tolerance 0 and feather 30, , tolerance 0 and feather 30,
and click in the transparent part to select it.
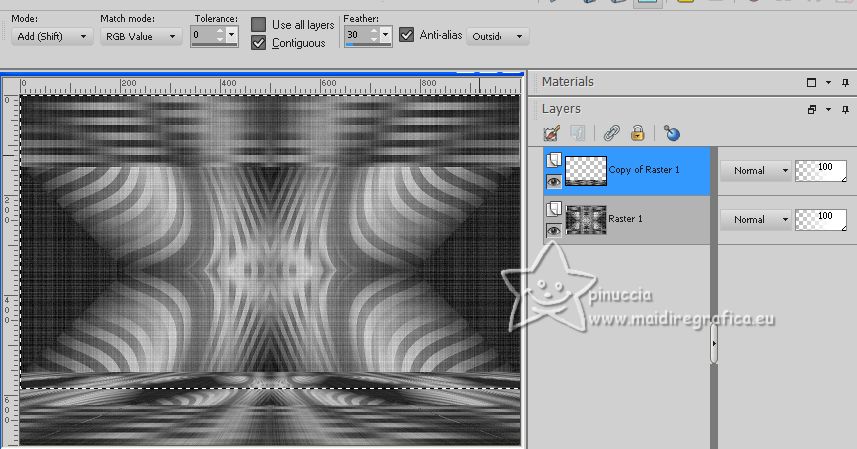
Press 5 times CANC on the keyboard 
Selections>Select None.
don't forget to set again the feather of your Magic Wand Tool to 100
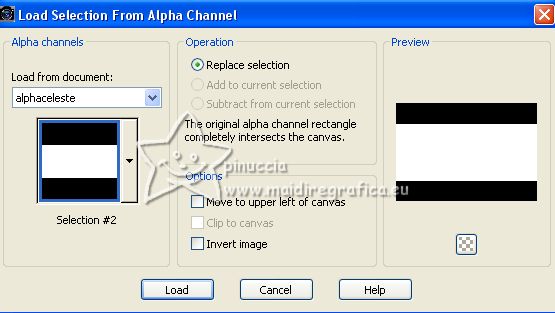
13. Selections>Load/Save Selection>Load Selection from Alpha Channel.
Open the selections menu and load the selection selection #2
14. Layers>New Raster Layer.
Flood Fill  with your light color. with your light color.
Keep selected.
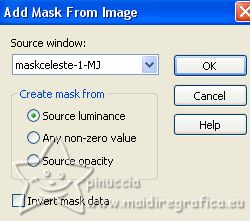
15. Layers>New Mask layer>From image
Open the menu under the source window and you'll see all the files open.
Select the mask maskceleste-1-MJ.
Layers>Merge>Merge Group.
Selections>Select None.
16. Effects>3D Effects>Drop Shadow, color black.

17. Selections>Load/Save Selection>Load Selection from Alpha Channel.
Open the selections menu and load the selection selection #3
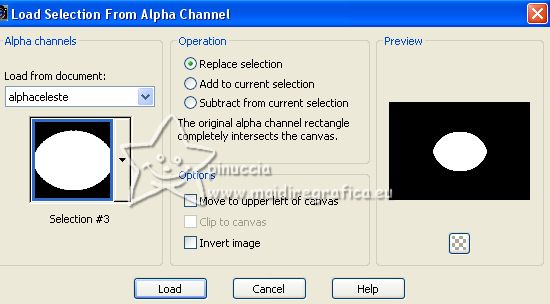
Selections>Promote Selection to layer.
18. Effects>Plugins>Carolaine and Sensibility - CS-Linear-H.
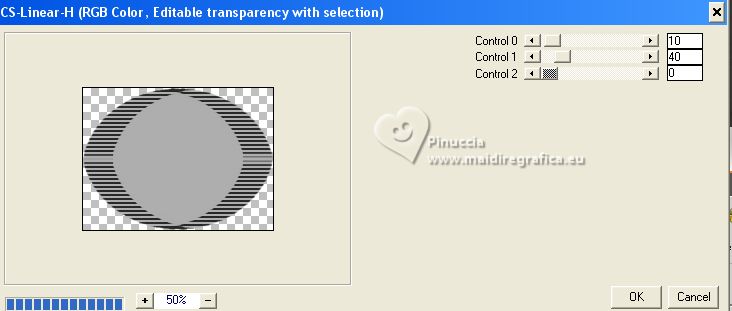
19. Selections>Modify>Contract - 25 pixels.
20. Layers>New Raster Layer.
Open the misted Paysage misted jewel 04 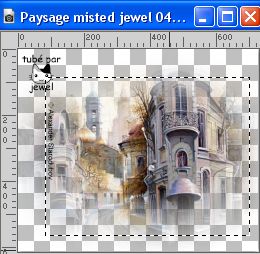
Keep selected and go to Edit>Copy.
Go back to your work and go to Edit>Paste into Selection.
Selections>Select None.
Layers>Merge>Merge Down.
21. Selections>Load/Save Selection>Load Selection from Alpha Channel.
Open the selections menu and load again the selection selection #3

22. Effects>Plugins>Alien Skin Eye Candy 5 Impact - Glass.
Select the preset glass-celeste-MJ and ok.
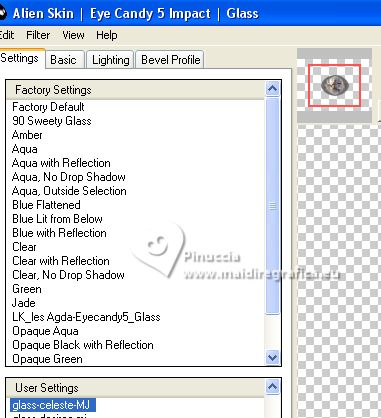
Here below the settings in cas of problems with the preset.
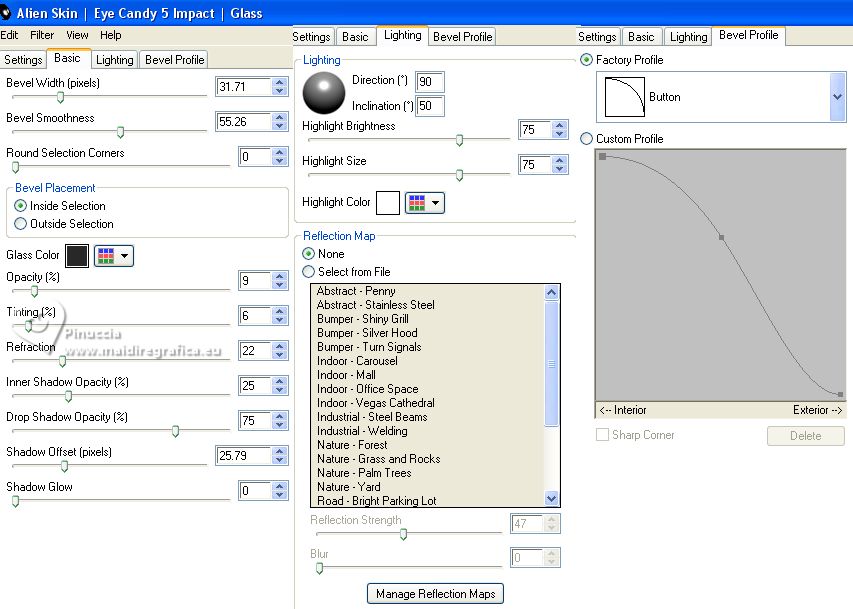
Selections>Select None.
Result
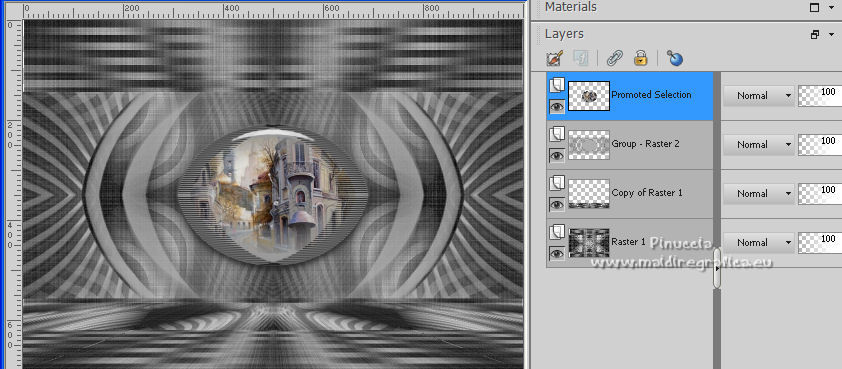
23. Open the tube decoceleste-1-MJ 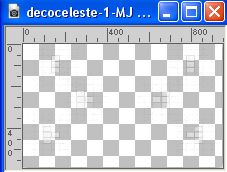
Edit>Copy.
Go back to your work and go to Edit>Paste as new layer.
Layers>Arrange>Move Down.
Activate the layer Raster 1.
24. Selections>Load/Save Selection>Load Selection from Alpha Channel.
Open the selections menu and load the selection selection #4
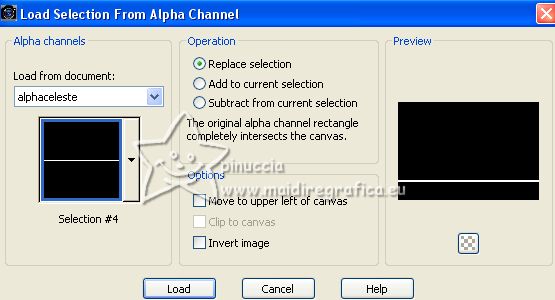
25. Selections>Promote Selection to layer.
Layers>Arrange>Bring to Top.
26. Effects>3D Effects>Inner Bevel.
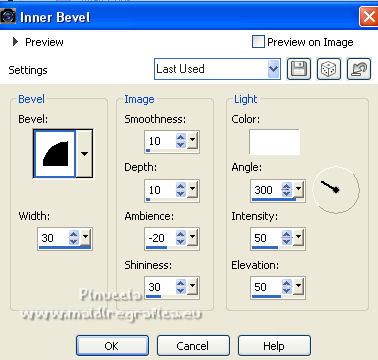
Selections>Select None.
27. Layers>Duplicate.
Image>Flip.
28. Layers>Merge>Merge Down.
Layers>Arrange>Move down - 3 times.
Change the Blend Mode of this layer to Multiply.
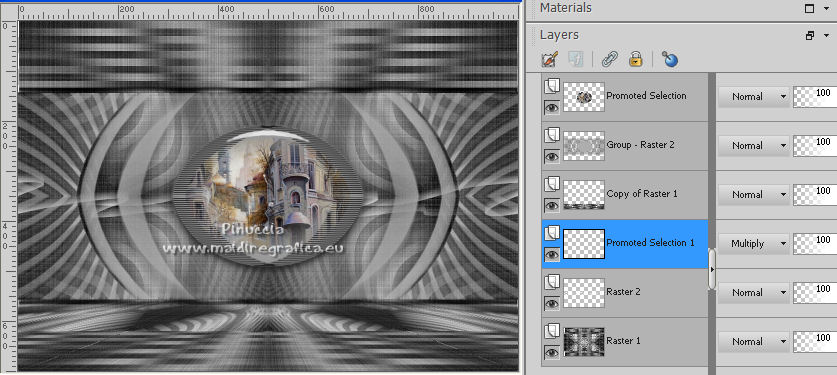
29. Open the tube decoceleste-MJ 
Edit>Copy.
Go back to your work and go to Edit>Paste as new layer.
Layers>Arrange>Bring to top.
30. K key on the keyboard to activate your Pick Tool 
keep Position X: 0,00 and set Position Y: 20,00.

Change the Blend Mode to Overlay.
31. Open decoceleste-2-MJ 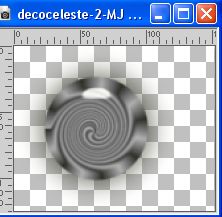
Edit>Copy.
Go back to your work and go to Edit>Paste as new layer.
Set Position X: 120,00 and Position Y: 290,00.

M key to deselect the Tool.
32. Layers>Duplicate.
Image>Mirror.
Your tag and the layer - adapt according to your colors
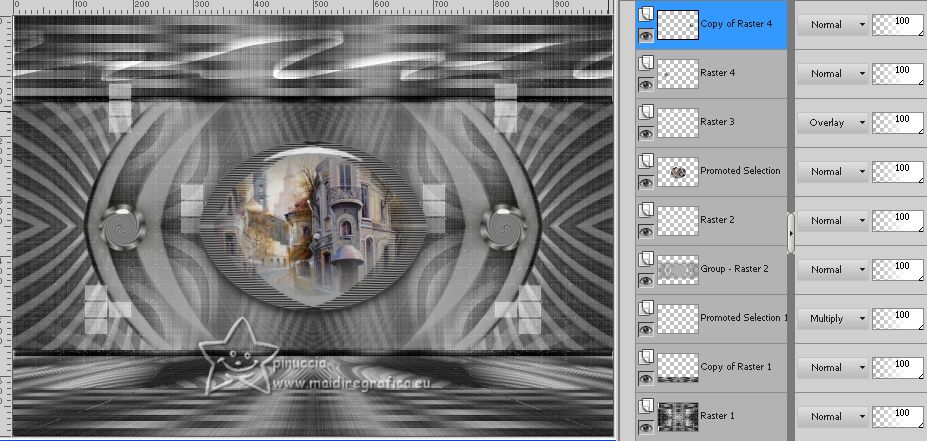
33. Open the woman's tube AS Tube 8hj6fd5 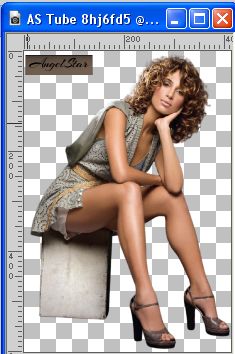
Erase the watermark and go to Edit>Copy.
Go back to your work and go to Edit>Paste as new layer.
Move  the tube to the left, or to your liking. the tube to the left, or to your liking.
Effects>3D Effects>Drop Shadow, at your choise.
34. Open the tube AS Tube 87sdx74 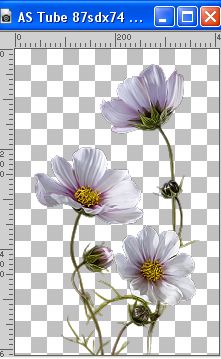
Edit>Copy.
Go back to your work and go to Edit>Paste as new layer.
Image>Resize, to 65%, resize all layers not checked.
Move  the tube at the bottom right. the tube at the bottom right.
Open the texte texto 
Edit>Copy.
Go back to your work and go to Edit>Paste as new layer.
Move  the tube at the upper right, or to your liking. the tube at the upper right, or to your liking.
35. Image>Add borders, 1 pixel, symmetric, color black.
36. Selections>Select All.
Image>Add borders, 20 pixels, symmetric, light color.
37. Selections>Invert.
Effects>3D Effects>Drop Shadow, color black.

38. Selections>Select All.
Edit>Copy
Image>Add borders, 30 pixels, symmetric, color white.
39. Selections>Invert.
Edit>Paste into Selection.
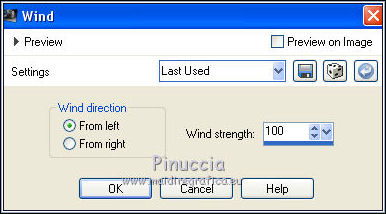
40. Effects>Distortion Effects>Wind - from left, strength 100.
41. Effects>Reflection Effects>Rotating Mirror, default settings.

42. Adjust>Sharpness>Sharpen More.
Effects>3D Effects>Drop Shadow, same settings.
Selections>Select None.
43. Sign your work.
Image>Add borders, 1 pixel, symmetric, dark color.
44. Image>Resize, 1000 pixels width, resize all layers checked.
Save as jpg.
For the tubes of this version thanks Luz Cristina; le misted Paysagesmist-Lamaison d'Evy23 n'est pas signé
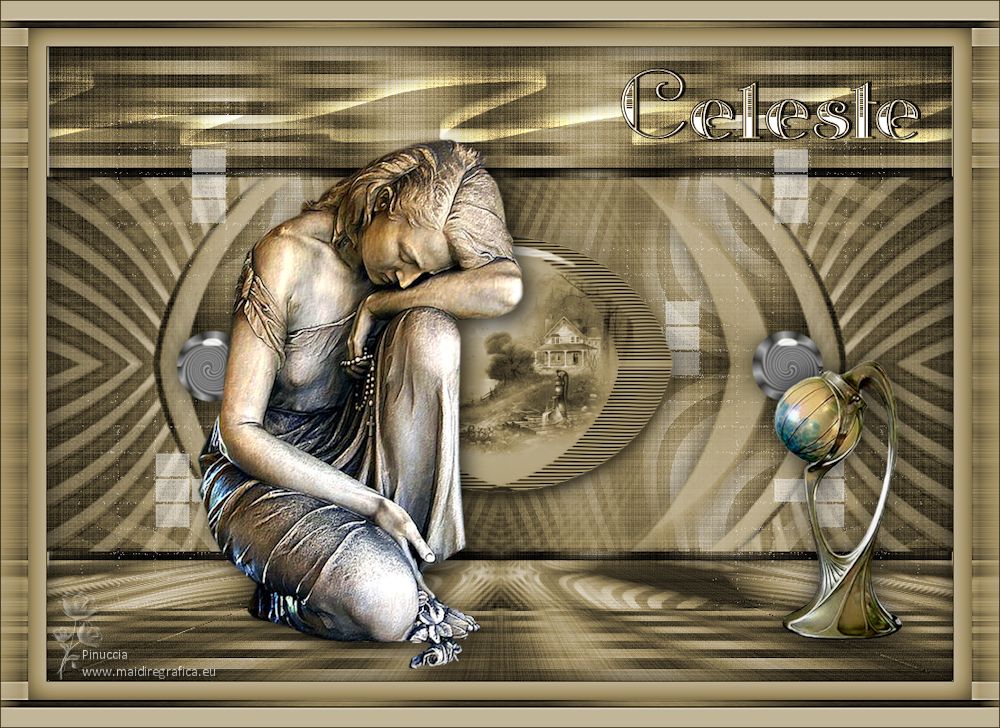

If you have problems or doubts, or you find a not worked link,
or only for tell me that you enjoyed this tutorial, write to me.
1 May 2023

|


