|
JEUNE ALICE

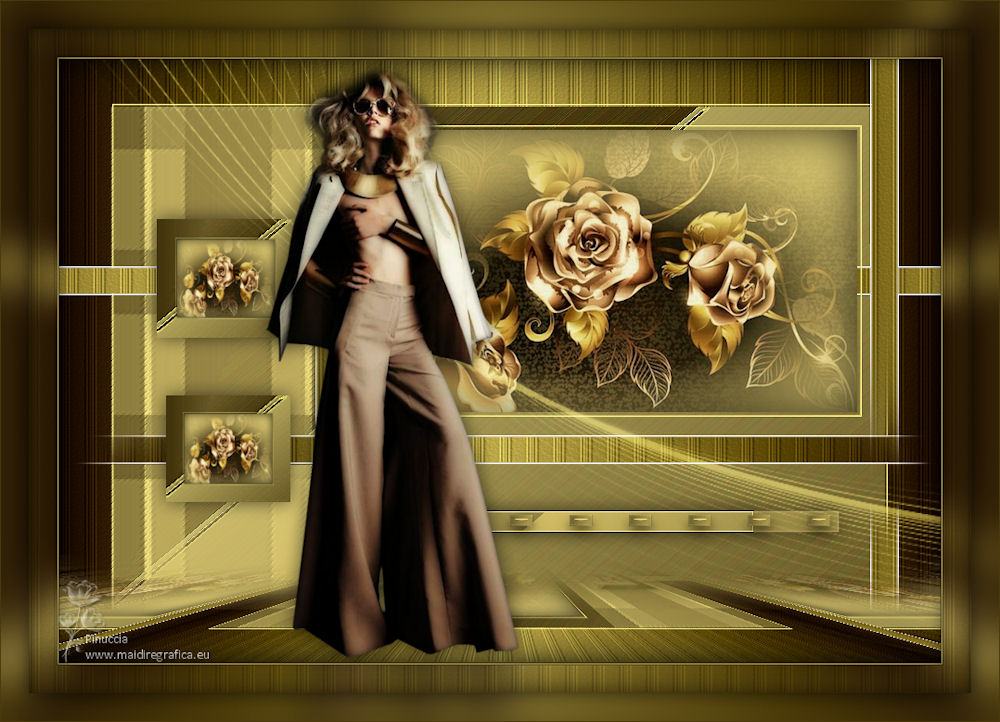
Thanks Maria José for your invitation to translate your tutorial

This tutorial has been translated with PSPX2 and PSPX3, but it can also be made using other versions of PSP.
Since version PSP X4, Image>Mirror was replaced with Image>Flip Horizontal,
and Image>Flip with Image>Flip Vertical, there are some variables.
In versions X5 and X6, the functions have been improved by making available the Objects menu.
In the latest version X7 command Image>Mirror and Image>Flip returned, but with new differences.
See my schedule here
 French translation here French translation here
 your versions ici your versions ici
For this tutorial, you will need:
Material here
The material is by Maria José.
(you find here the links to the material authors' sites)
Plugins
consult, if necessary, my filter section here
Filters Unlimited 2.0 here
Graphics Plus - Emboss here
Toadies - What are you here
Kiwi - Zig-Zack here
Mura's Meister - Perspective Tiling here
Filters Graphics Plus, Kiwi and Toadies can be used alone or imported into Filters Unlimited.
(How do, you see here)
If a plugin supplied appears with this icon  it must necessarily be imported into Unlimited it must necessarily be imported into Unlimited

You can change Blend Modes according to your colors.
In the newest versions of PSP, you don't find the foreground/background gradient (Corel_06_029).
You can use the gradients of the older versions.
The Gradient of CorelX here
Copy the texture wp_ivy_111 in the Textures Folder.
Open the mask in PSP and minimize it with the rest of the material.
1. Set your foreground color to #4c3a0c,
and your background color to #e5d277.
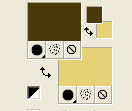
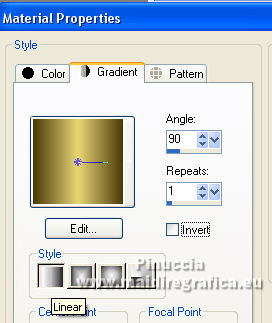
Set your foreground color to a Foreground/Background Gradient, style Linear.
2. Open alphachanneljeunealice.
Window>Duplicate or, on the keyboard, shift+D to make a copy.

Close the original.
The copy, that will be the basis of your work, is not empty,
but contains the selections saved to alpha channel.
Flood Fill  the transparent image with your gradient. the transparent image with your gradient.
3. Effects>Texture Effects>Texture - select the texture wp_ivi_111

4. Effects>Plugins>Graphics Plus - Emboss.
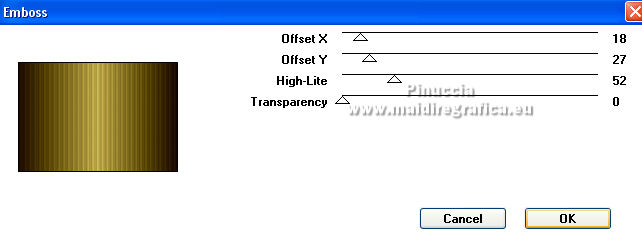
5. Layers>Duplicate.
Effects>3D Effects>Cutout.
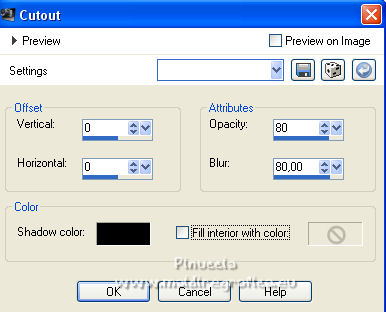
Layers>Merge>Merge Down.
6. Layers>New Raster Layer.
Flood Fill  the layer with your light background color #e5d277. the layer with your light background color #e5d277.
7. Selections>Load/Save Selection>Load Selection from Alpha Channel.
The selection #1 is immediately available. You just have to click Load.
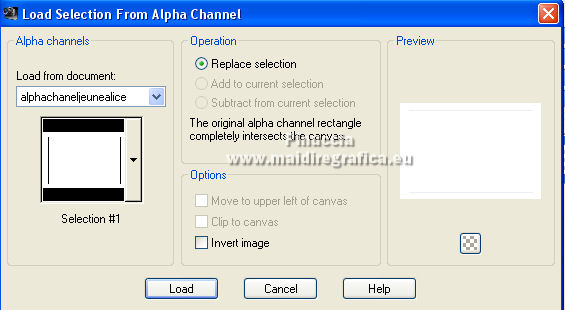
Press CANC on the keyboard 
Selections>Select None.
8. Adjust>Sharpness>Sharpen.
9. Change the settings of your gradient: angle 90, Repeats 0.
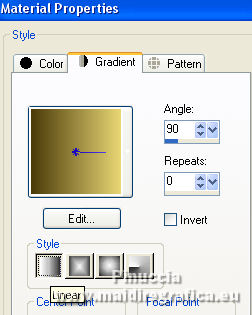
10. Selections>Load/Save Selection>Load Selection from Alpha Channel.
Open the selections menu and load the selection #2
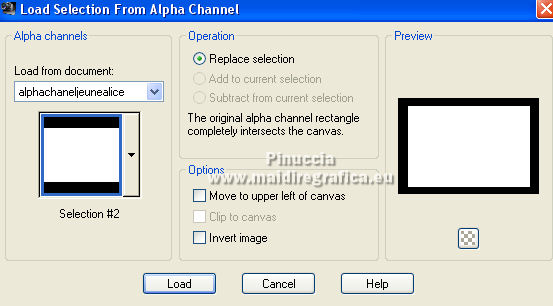
Selections>Modify>Expand - 1 pixels.
11. Layers>New Raster Layer.
Flood Fill  the selection with your Gradient. the selection with your Gradient.
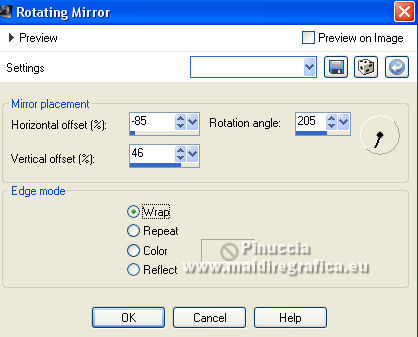
12. Effects>Reflection Effects>Rotating Mirror.
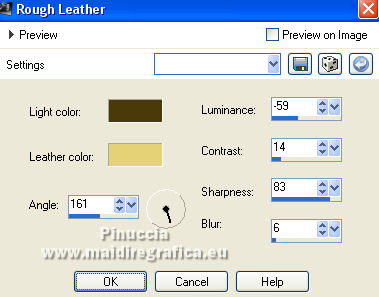
13. Effects>Texture Effects>Rough Leather.
14. Adjust>Sharpness>Sharpen.
Keep selected.
15. Layers>New Raster Layer.
Flood Fill  the layer with your light background color #e5d277. the layer with your light background color #e5d277.
16. Selections>Load/Save Selection>Load Selection from Alpha Channel.
Open the selections menu and load the selection #3
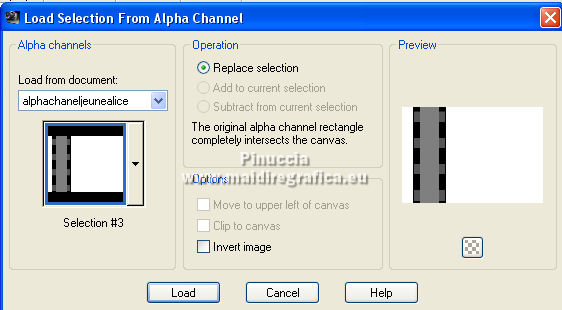
Pres CANC on the keyboard.
Selections>Select None.
17. Effects>Plugins>Toadies - What are you.
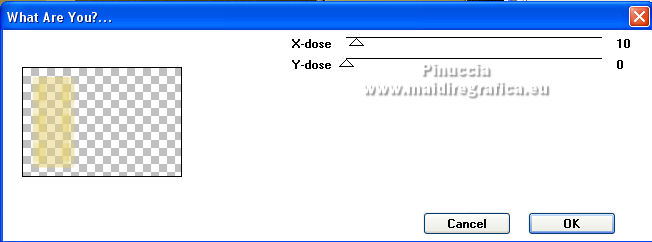
18. Adjust>Sharpness>Sharpen More.
19. Effects>Plugins>Kiwi - Zig-Zack, default settings.
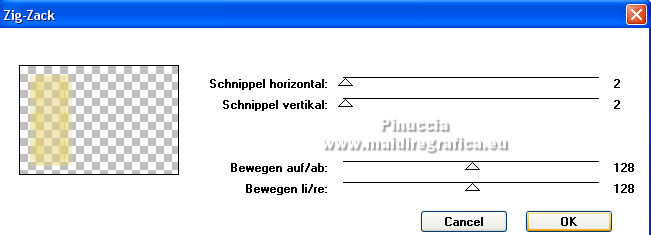
20. Open the tube barrinhas and go to Edit>Copy.
Go back to your work and go to Edit>Paste as new layer.
21. Selections>Load/Save Selection>Load Selection from Alpha Channel.
Open the selections menu and load the selection #4

22. Change again the gradient Repeats 1

Layers>New Raster Layer.
Flood Fill  the layer with your Gradient. the layer with your Gradient.
23. Effects>Texture Effects>Texture - wp_ivi_111, same settings.

24. Effects>Plugins>Graphics Plus - Emboss, same settings.
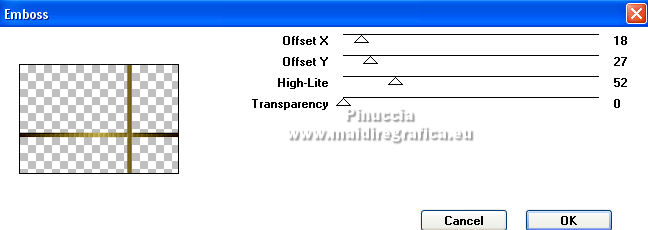
25. Layers>Arrange>Move Down.
Activate the top layer.
Layers>Merge>Merge Down.
Selections>Select None.
26. Image>Mirror.
27. Effects>Image Effects>Seamless Tiling.
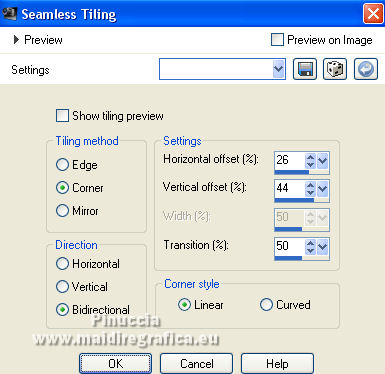
28. Layers>New Raster Layer.
Flood Fill  the layer with your light background color #e5d277. the layer with your light background color #e5d277.
29. Selections>Load/Save Selection>Load Selection from Alpha Channel.
Open the selections menu and load the selection #5
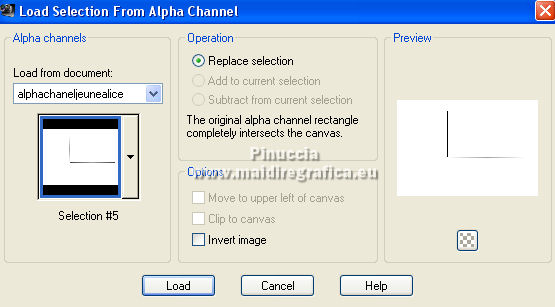
Press CANC on the keyboard.
Selections>Select None.
30. Adjust>Sharpness>Sharpen.
31. Selections>Load/Save Selection>Load Selection from Alpha Channel.
Open the selections menu and load the selection #6
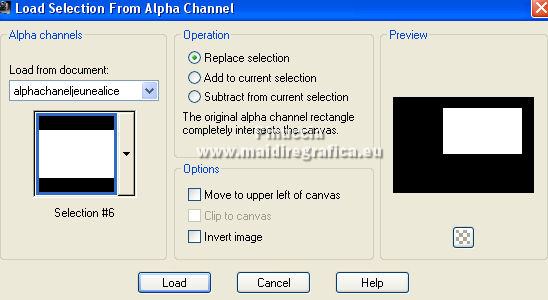
Selections>Modify>Contract - 5 pixels.
32. Layers>New Raster Layer.
Flood Fill  the layer with your light color #e5d277. the layer with your light color #e5d277.
Layers>New Raster Layer.
33. Effects>3D Effects>Cutout, same settings.

34. Layers>Merge>Merge Down.
Keep selected.
35. Open the misted and go to Edit>Copy.
Go back to your work and go to Edit>Paste as new layer.
Place  the tube to your liking on the selection. the tube to your liking on the selection.
(I resized the tube to 80%, resize all layers not checked)
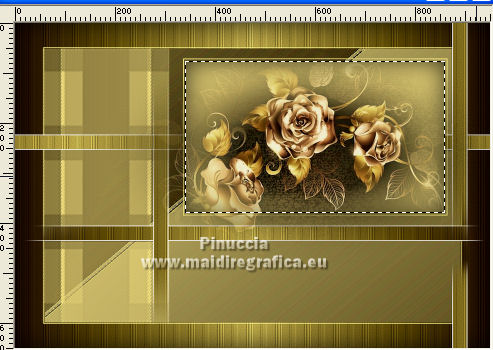
36. Selections>Invert.
Press CANC on the keyboard.
Selections>Select None.
Layers>Merge>Merge Down - 2 times.
Edit>Copy (the layer Raster 5).
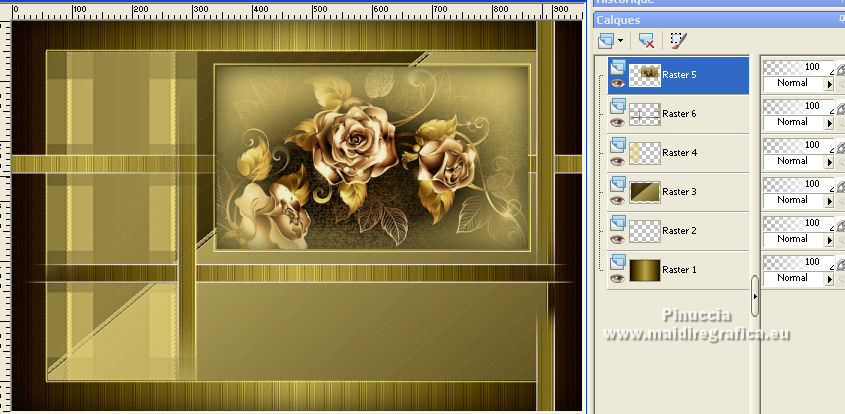
37. Selections>Load/Save Selection>Load Selection from Alpha Channel.
Open the selections menu and load the selection #7
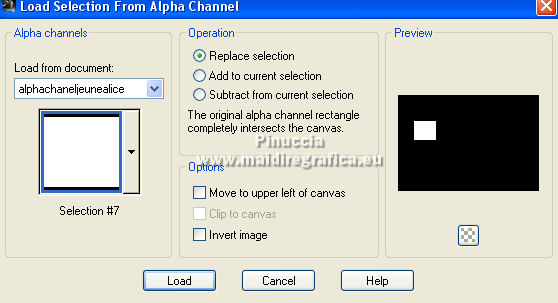
38. Layers>New Raster Layer.
Change again the gradient, Repeats 0

Flood Fill  the layer with your gradient. the layer with your gradient.
39. Effects>Reflection Effects>Rotating Mirror, same settings.

40. Effects>Texture Effects>Rough Leather, same settings

41. Selections>Modify>Contract - 20 pixels.
42. Edit>Paste into Selection (the image copied at step 36).
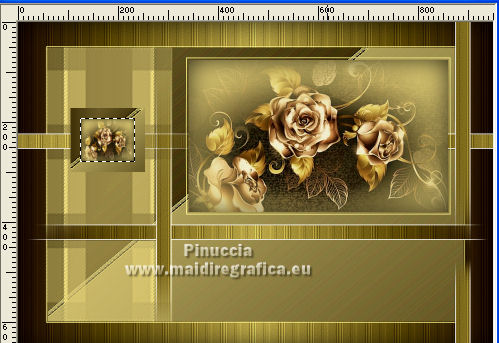
Selections>Select None.
43. Layers>Duplicate.
Image>Resize, to 90%, resize all layers not checked.
44. Move  the image as below. the image as below.
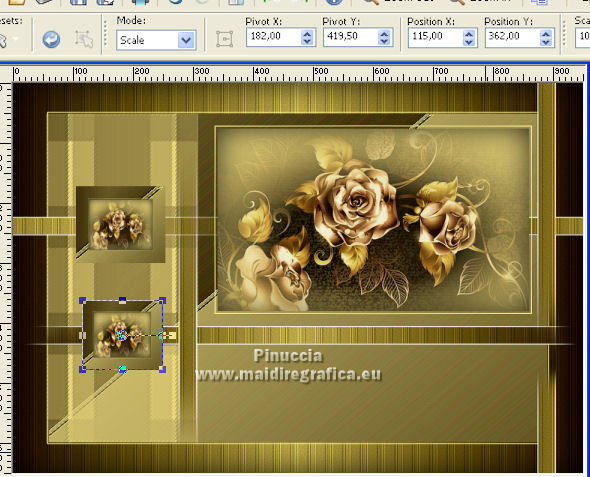
Layers>Merge>Merge Down.
45. Effects>3D Effects>Drop Shadow, color black.

46. Edit>Copy Special>Copy Merged.
47. Edit>Paste as new layer.
Image>Flip.
48. Effects>Plugins>Mura's Meister - Perspective Tiling.
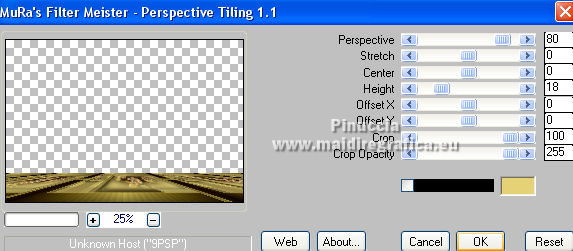
49. Effects>Reflection Effects>Rotating Mirror.

50. Activate your Magic Want Tool  , tolerance and feather 0, , tolerance and feather 0,
and click in the transparent part to select it.
51. Selections>Modify>Inside/Outside Feather.
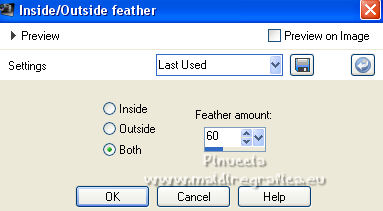
Press +/- 10 times CANC on the keyboard.
52. Layers>New Raster Layer.
Flood Fill  the layer with your light color #e5d277. the layer with your light color #e5d277.
53. Layers>New Mask layer>From image
Open the menu under the source window and you'll see all the files open.
Select the mask mask2
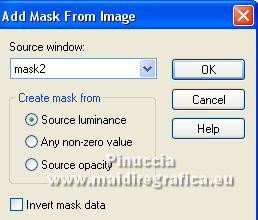
Layers>Merge>Merge Group.
54. Effects>Plugins>Graphics Plus - Emboss, same settings.
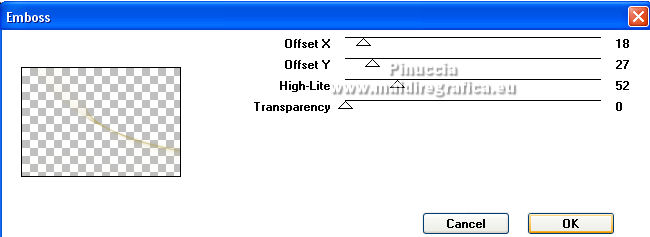
Change the Blend Mode of this layer to Screen.

55. Open the tube deco1a_mj and go to Edit>Copy.
Go back to your work and go to Edit>Paste as new layer.
56. K key on the keyboard to activate your Pick Tool 
and set Position X: 339,00 and Position Y.: 480,00.

M key to deselect the tool.
57. Effects>3D Effects>Drop Shadow, same settings.

58. Open the tube of the woman and go to Edit>Copy.
Go back to your work and go to Edit>Paste as new layer.
Image>Resize, to 90%, resize all layers not checked.
Move  the tube to the left, or to your liking. the tube to the left, or to your liking.
Effects>3D Effects>Drop Shadow, at your choice.
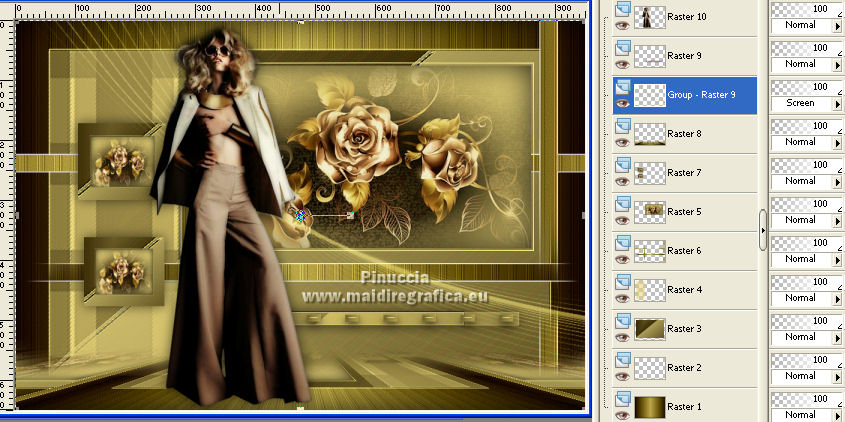
Your tag and the layers - adapt according to your colors.
59. Image>Add borders, 1 pixel, symmetric, dark color #4c3a0c.
Image>Add borders, 1 pixel, symmetric, light color #e5d277.
Image>Add borders, 1 pixel, symmetric, dark color #4c3a0c.
60. Selections>Select All.
Edit>Copy.
Image>Add borders, 30 pixels, symmetric, color white.
61. Selections>Invert.
Edit>Paste into Selection.
62. Adjust>Blur>Gaussian Blur - radius 20

63. Effects>Texture Effects>Texture - wp_ivy_111, same settings.

64. Adjust>Sharpness>Sharpen.
65. Effects>3D Effects>Drop Shadow, same settings.

66. Selections>Select All.
Image>Add borders, 30 pixels, symmetric, color white.
Selections>Invert.
Edit>Paste into Selection, the image of step 60 is still in memory.
67. Adjust>Blur>Gaussian Blur - radius 20.

68. Effects>3D Effects>Drop Shadow, same settings.

69. Selections>Invert.
Effects>3D Effects>Drop Shadow, same settings.
Selections>Select None.
70. Sign your work on a new layer.
Image>Add borders, 1 pixel, symmetric, dark color #4c3a0c.
71. Image>Resize, 1000 pixels width, resize all layers not checked.
Save as jpg.
For the tube2 of this version thanks Lana and Cal

 Your versions here Your versions here

If you have problems or doubts, or you find a not worked link,
or only for tell me that you enjoyed this tutorial, write to me.
14 Juin 2022

|


