|
STONE ART

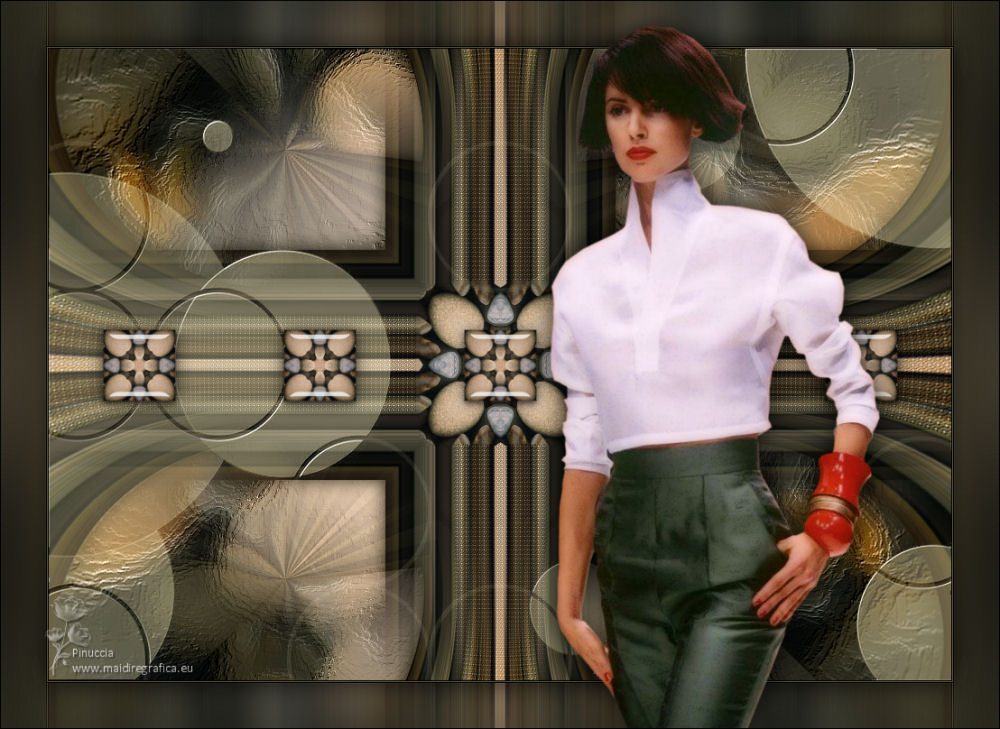
Thanks Maria José for your invitation to translate your tutorial

This tutorial has been translated with PSPX2 and PSPX3, but it can also be made using other versions of PSP.
Since version PSP X4, Image>Mirror was replaced with Image>Flip Horizontal,
and Image>Flip with Image>Flip Vertical, there are some variables.
In versions X5 and X6, the functions have been improved by making available the Objects menu.
In the latest version X7 command Image>Mirror and Image>Flip returned, but with new differences.
See my schedule here
 French translation here French translation here
 your versions ici your versions ici
For this tutorial, you will need:
Material here
The background image from the net.
The rest of the material is by Maria José.
(you find here the links to the material authors' sites)
Plugins
consult, if necessary, my filter section here
Filters Unlimited 2.0 here
VM Natural - Cross Weave here
Alien Skin Eye Candy 5 Impact - Glass here
Simple - Top Left Mirror here
Flaming Pear - Flexify 2 here
Mura's Meister - Copies here
FM Tile Tools - Saturation Emboss here
Mura's Seamless - Emboss at Alpha here
Mehdi 2 - Flat Median here
Filters VM Natural, Simple and Mura's Seamless can be used alone or imported into Filters Unlimited.
(How do, you see here)
If a plugin supplied appears with this icon  it must necessarily be imported into Unlimited it must necessarily be imported into Unlimited

You can change Blend Modes according to your colors.
Copy the preset  in the folder of the plugin Alien Skin Eye Candy 5 Impact>Settings>Glass. in the folder of the plugin Alien Skin Eye Candy 5 Impact>Settings>Glass.
One or two clic on the file (it depends by your settings), automatically the preset will be copied in the right folder.
why one or two clic see here
Copy the preset for Flexify in a folder at your choice.
You can import it from this folder, when you'll need it.
Copy the mask 20-20 in the Masks Folder.
Open the second mask in PSP and minimize it with the rest of the material.
1. Open Alphachannel_MJ.
Window>Duplicate or, on the keyboard, shift+D to make a copy.

Close the original.
The copy, that will be the basis of your work, is not empty,
but contains the selections saved to alpha channel.
2. Selections>Select All.
Open the background image Pedras and go to Edit>Copy.
Go back to your work and go to Edit>Paste into Selection.
Selections>Select None.
3. Effects>Reflection Effects>Kaleidoscope.
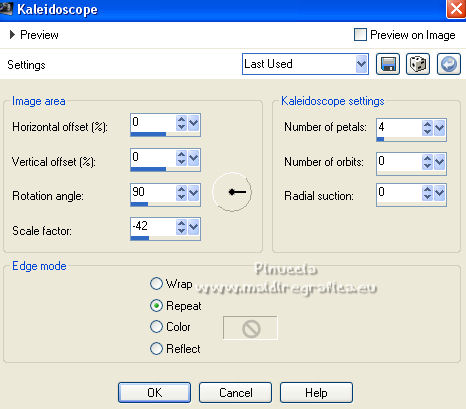
Edit>Repeat Kaleidoscope.
4. Selections>Load/Save Selection>Load Selection from Alpha Channel.
The selection #1 is immediately available. You just have to click Load.
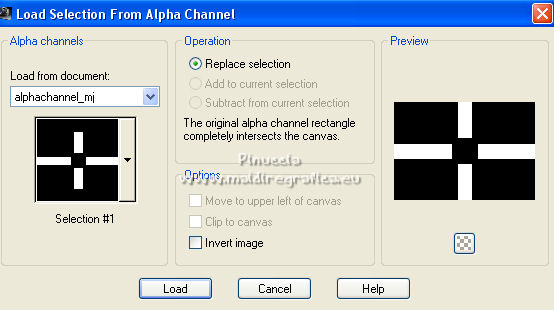
Selections>Promote Selection to Layer.
5. Effects>Plugins>VM Natural - Cross Weave.
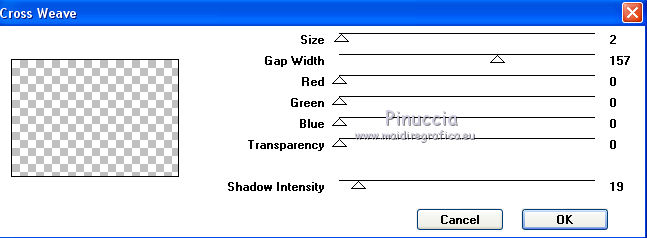
6. Change the Blend Mode of this layer to Hard Light.
Selections>Select None.
Layers>Merge>Merge Down.
7. Selections>Load/Save Selection>Load Selection from Alpha Channel.
Open the selections menu and load the selection #2.
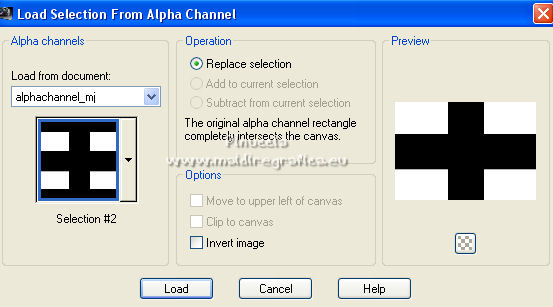
8. Layers>New Raster Layer.
Edit>Paste into Selection (the image pedras is still in memory).
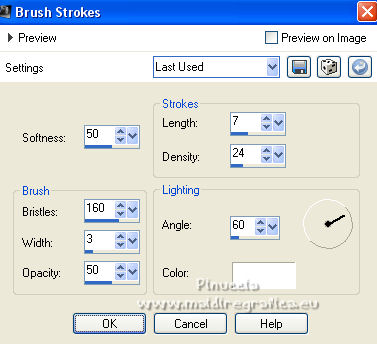
9. Effects>Art Media Effects>Brush Strokes.
10. Effects>3D Effects>Drop Shadow, color black.

Selections>Select None.
Layers>Merge>Merge Down.
11. Selections>Load/Save Selection>Load Selection from Alpha Channel.
Open the selections menu and load the selection #3.
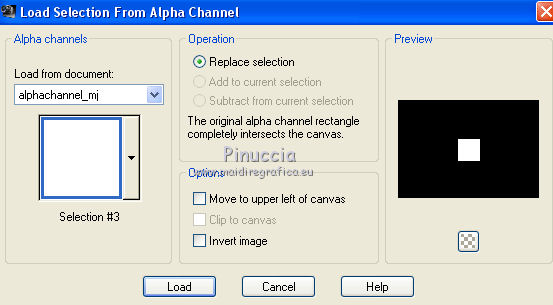
Selections>Promote Selection to Layer.
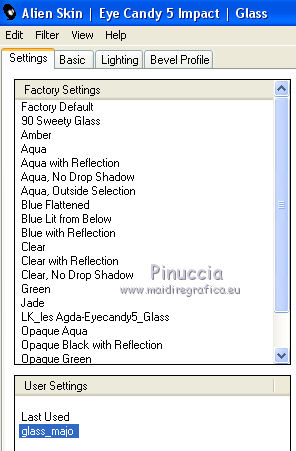
12. Effects>Plugins>Alien Skin Eye Candy 5 Impact - Glass.
Select the preset majo_glass and ok.
Keep selected.
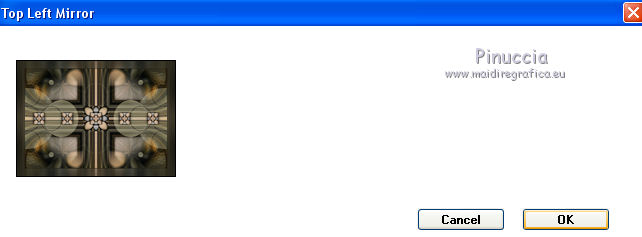
13. Effects>Plugins>Simple - Top Left Mirror.

Selections>Select None.
14. Image>Resize, to 50%, resize all layers not checked.
15. Effects>Plugins>Mura's Meister - Copies.
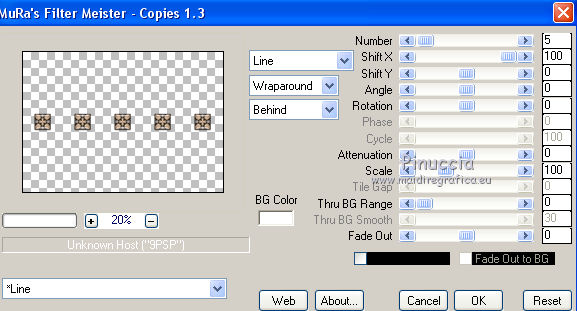
Effects>3D Effects>Drop Shadow, same settings.
16. Activate the layer Raster 1.
Layers>Duplicate.
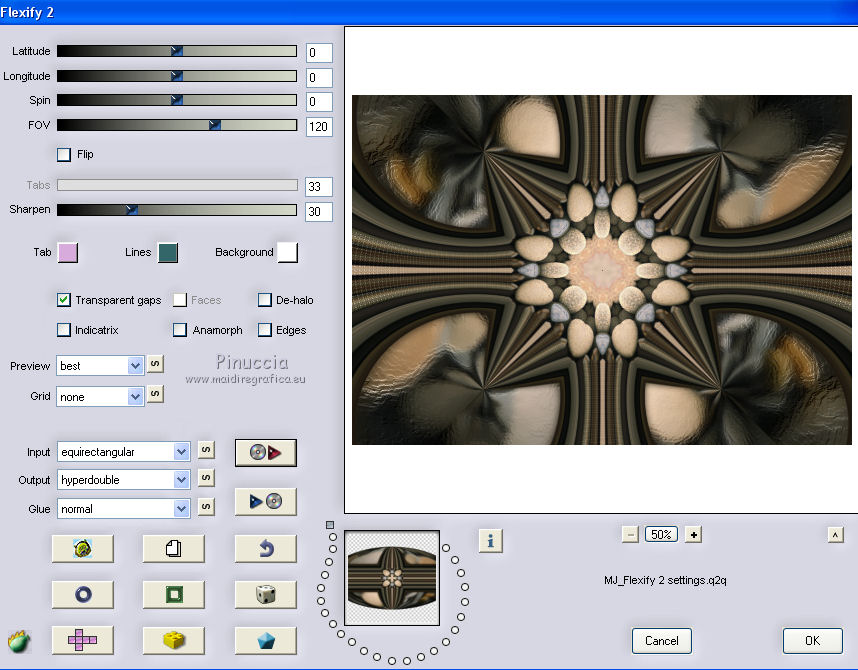
17. Effects>Plugins>Flaming Pear - Flexify 2.
Click on the red button and look for the preset in the folder where you saved it.
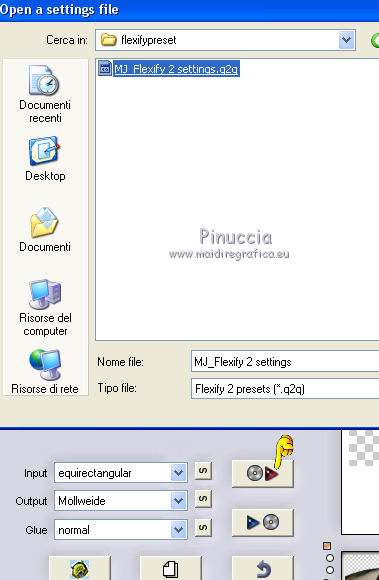
Here below the settings
18. Layers>Load/Save Mask>Load Mask from Disk.
Look for and load the mask 20-20.
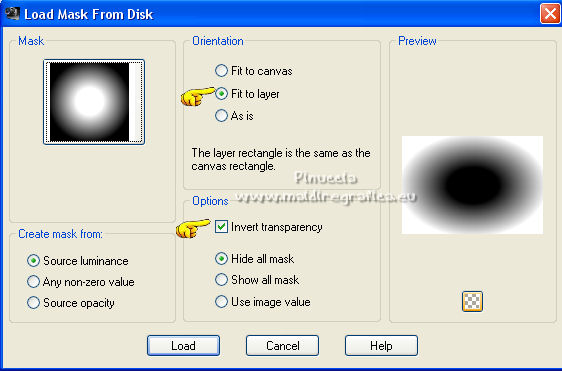
Layers>Duplicate.
Layers>Merge>Merge Group.
19. Effects>Plugins>FM Tile Tools - Saturation Emboss, default settings.

20. Effects>Plugins>Mura's Seamless - Emboss at Alpha, default settings.
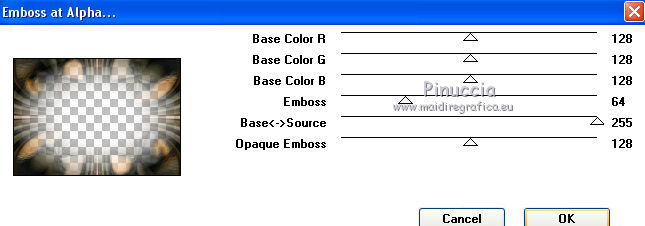
21. Set your foreground color to #5d5945.
Layers>New Raster Layer.
Flood Fill  the layer with your foreground color. the layer with your foreground color.
22. Layers>New Mask layer>From image
Open the menu under the source window and you'll see all the files open.
Select the mask mask_411MJ.
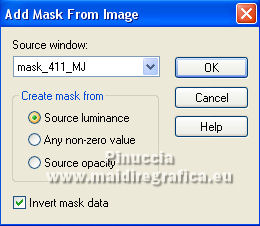
Layers>Merge>Merge Group.
23. Effects>Plugins>Mura's Seamless - Emboss at Alpha, same settings.

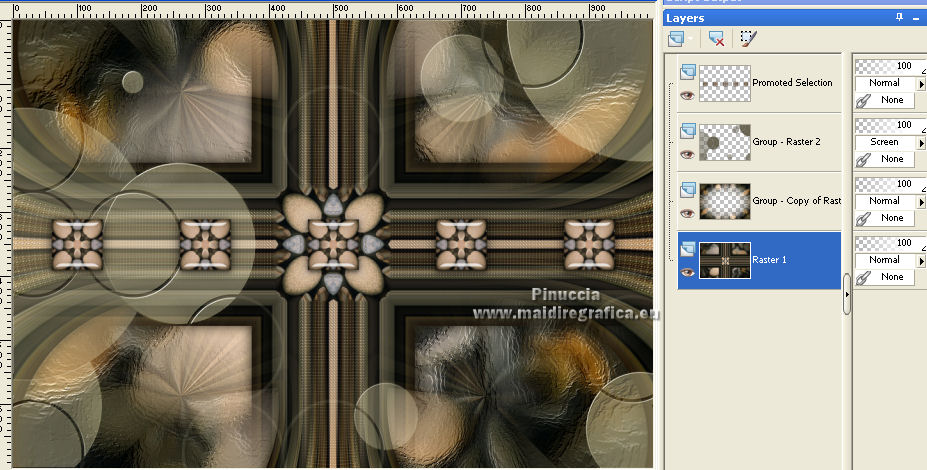
Change the Blend Mode of this layer to Screen.
24. Activate the layer Raster 1.
Edit>Copy.
If you want, for caution: Edit>Paste as new image and minimize this image.
Go back to your work.
The tag and the layers, adapt Blend Modes and opacities to your liking.
25. Image>Add borders, 1 pixel, symmetric, color black.
Image>Add borders, 1 pixel, symmetric, foreground color #5d5945.
Image>Add borderss, 1 pixel, symmetric, color black.
Selections>Select All.
Image>Add borders, 50 pixels, symmetric, color white.
Selections>Invert.
26. Edit>Paste into Selection (the minimized image is in memory).
27. Adjust>Blur>Gaussian Blur, radius 15.

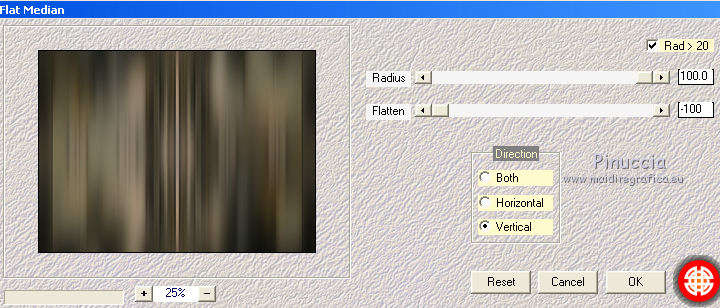
28. Effects>Plugins>Mehdi 2 - Flat Median.
29. Effects>Plugins>Simple - Top Left Mirror.
Adjust>Sharpness>Sharpen.
30. Selections>Invert.
Effects>3D Effects>Drop Shadow, couleur noire.

Selections>Select None.
31. Open the woman tube and go to Edit>Copy.
Go back to your work and go to Edit>Paste as new layer.
Image>Resize, to 92%, resize all layers not checked.
Image>Mirror.
Move  the tube to the right side. the tube to the right side.
Effects>3D Effects>Drop Shadow, to your liking.
32. Sign your work on a new layer.
Image>Add borders, 1 pixel, symmetric, color black.
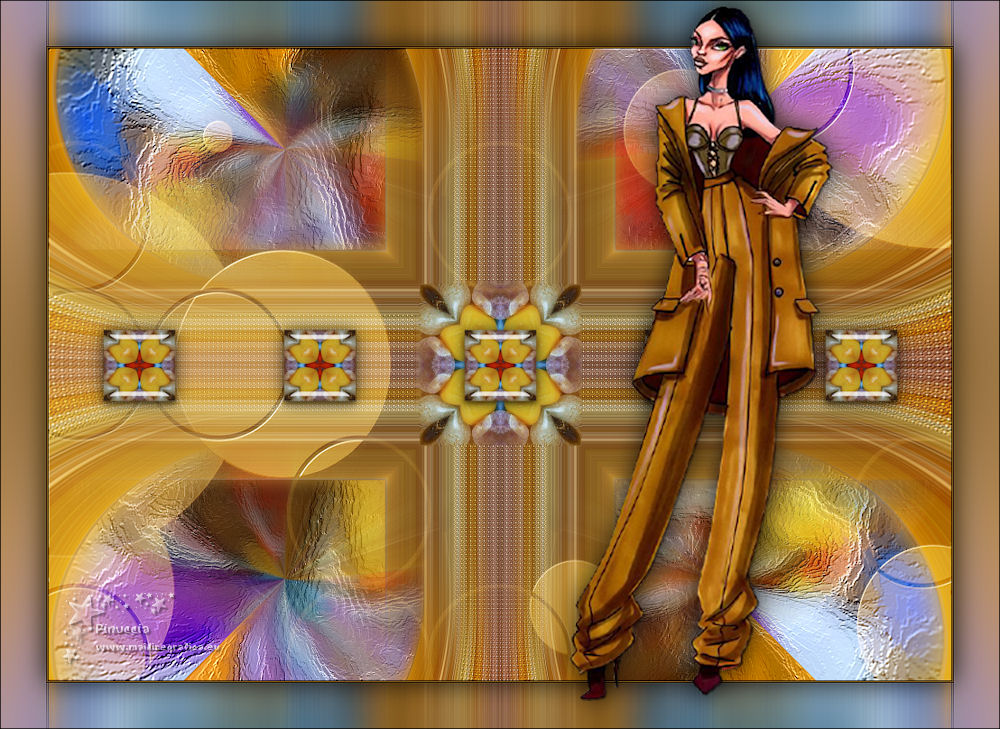
33. Image>Resize, 1000 pixels width, resize all layers checked.
Save as jpg.
Version with tube by Luz Cristina
 Your versions here Your versions here

If you have problems or doubts, or you find a not worked link,
or only for tell me that you enjoyed this tutorial, write to me.
9 November 2021

|


