|
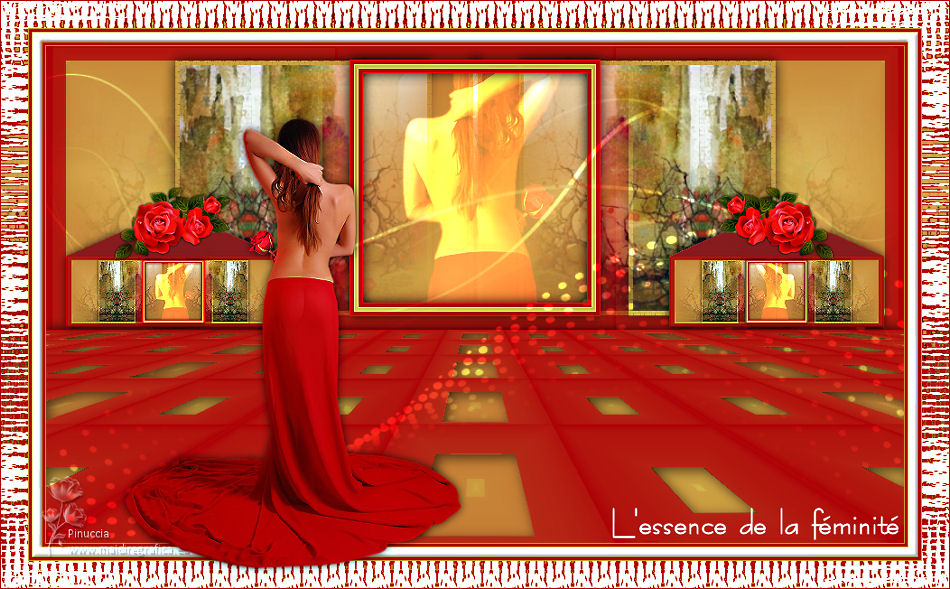
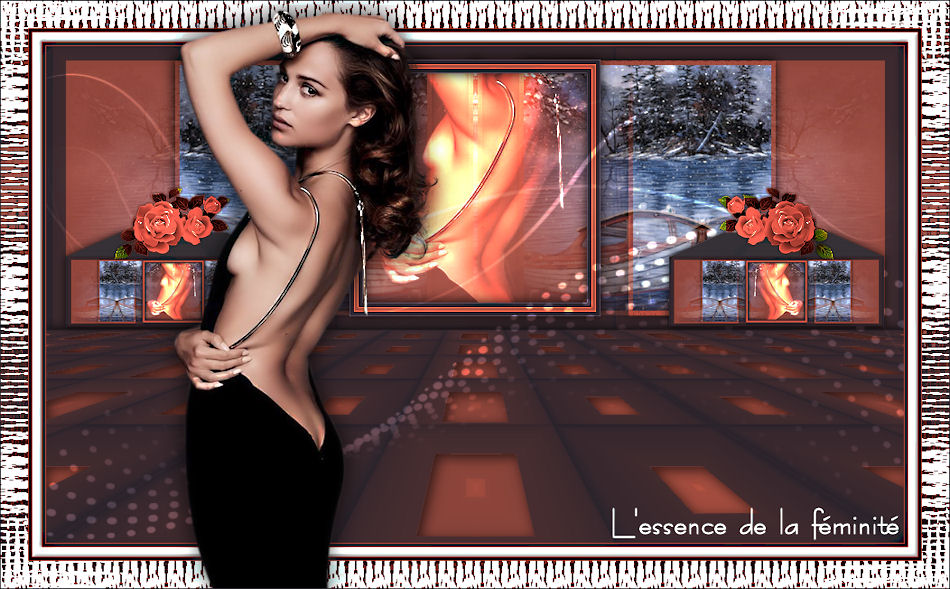
FEMINITÉ


Thanks Irene for the invitation to translate your tutorials

This tutorial was written with PSPX8 and translated with PSPX7 and PSPX3, but it can also be made using other versions of PSP.
Since version PSP X4, Image>Mirror was replaced with Image>Flip Horizontal,
and Image>Flip with Image>Flip Vertical, there are some variables.
In versions X5 and X6, the functions have been improved by making available the Objects menu.
In the latest version X7 command Image>Mirror and Image>Flip returned, but with new differences.
See my schedule here
 italian translation here italian translation here
 your versions here your versions here
For this tutorial, you will need:

Thanks for the tubes and the mask Nara Pamplona, NH and FranieMargot.
The rest of the material is by Moi-Même.
(The links of material creators here).

consult, if necessary, my filter section here
Filters Unlimited 2.0 here
Variations - Flutter (to import in Unlimited) here
Mehdi - Sorting Tiles here
Mura's Meister - Perspective Tiling here
Alien Skin Eye Candy 5 Impact - Glass here

You can change Blend Modes according to your colors.
In the newest versions of PSP, you don't find the foreground/background gradient (Corel_06_029).
You can use the gradients of the older versions.
The Gradient of CorelX here

Open the mask in PSP and minimize it with the rest of the material.
1. Choose a color from your tube and a color from your landscape.
For the example:
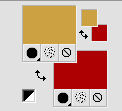
Set your foreground color to #cca142,
and your background color to #ad0006.
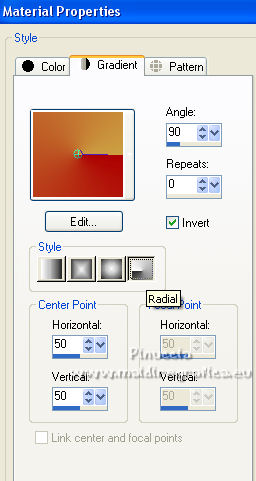
Set your foreground color to a Foreground/Background Gradient, style Radial.
If you have problems with alpha channel,
open a new transparent image 950 x 550 pixels,
and use the selections from disk.
2. Open canal alpha feminite
This image, that will be the basis of your work, is not empty,
but contains the selections saved to alpha channel.
Flood Fill  the transparent image with your Gradient. the transparent image with your Gradient.
Effects>Reflection Effects>Rotating Mirror, default settings.

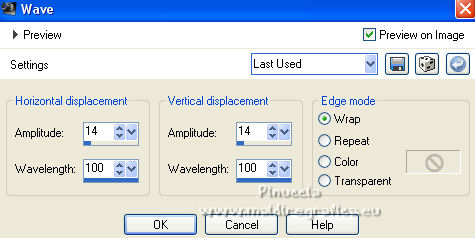
Effects>Distortion Effects>Wave.
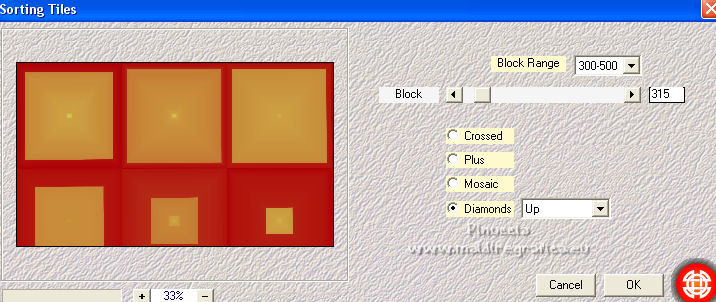
Effects>Plugins>Mehdi - Sorting Tiles.
Effects>Reflection Effects>Rotating Mirror, same settings.

3. Selections>Load/Save Selection>Load Selection from Alpha Channel.
The selection sélection #1 is immediately available. You just have to click Load.
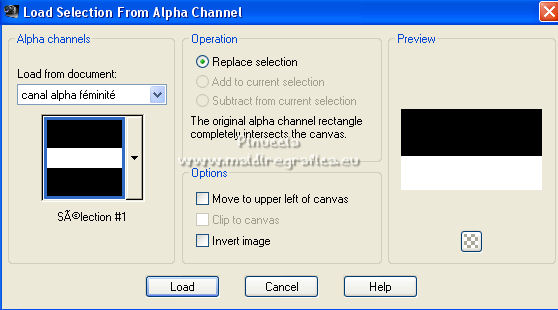
Selections>Promote Selection to Layer.
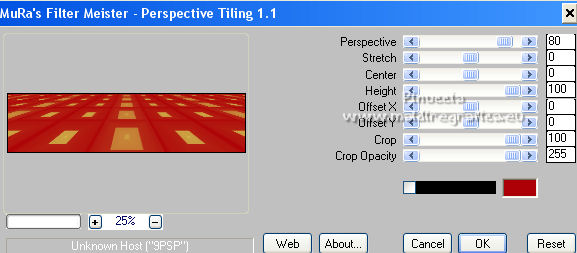
Effects>Plugins>Mura's Meister - Perspective Tiling, default settings.
Selections>Select None.
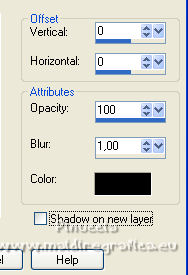
Effects>3D Effects>Drop Shadow, color black.
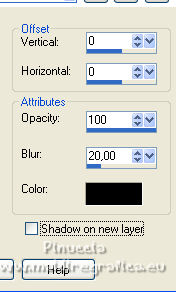
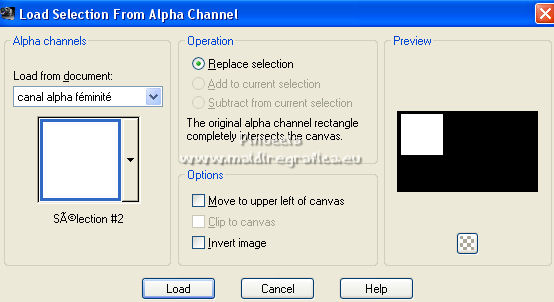
4. Selections>Load/Save Selection>Load Selection from Alpha Channel.
Open the Selections menu and load the selection sélection #2.
Apri il tube del paesaggio NHD Mists-Arts_Acuarelas(9) and go to Edit>Copy.
Go back to your work and go to Edit>Paste as new layer.
Place  the tube over the selection to your liking. the tube over the selection to your liking.
Selections>Invert.
Press CANC on the keyboard 
Selections>Invert.
Layers>New Raster Layer.
Set your foreground color to Color.
Flood Fill  the layer with your foreground color. the layer with your foreground color.
Selections>Modify>Contract - 5 pixels.
Press CANC on the keyboard.
Selections>Invert.
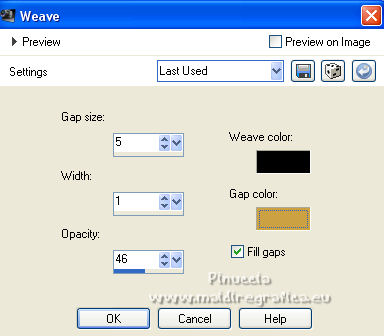
Effects>Texture Effects>Weave
weave color: black
gap color: foreground color
5. Layers>Merge>Merge Down.
Selections>Select None.
Effects>3D Effects>Drop Shadow, same settings.

6. Layers>Duplicate.
Image>Mirror.
Layers>Merge>Merge Down.
Effects>Image Effects>Seamless Tiling, Side by Side

Effects>Reflection Effects>Rotating Mirror, same settings.
7. Layers>New Raster Layer.
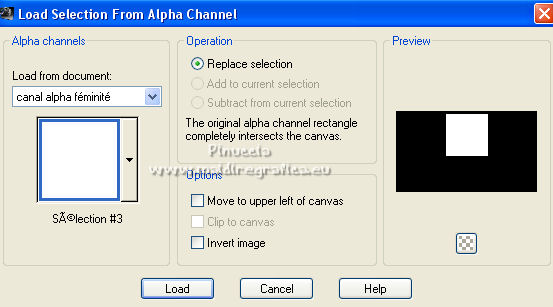
Selections>Load/Save Selection>Load Selection from Alpha Channel.
Open the Selections menu and load the selection sélection #3.
Flood Fill  the selection with your background color. the selection with your background color.
Selections>Modify>Contract - 5 pixels.
Flood Fill  the selection with your foreground color. the selection with your foreground color.
Selections>Modify>Contract - 5 pixels.
Flood Fill  the selection with your background color. the selection with your background color.
Selections>Modify>Contract - 5 pixels.
Press CANC on the keyboard.
Selections>Select None.
Effects>Edge Effects>Enhance.
Effects>3D Effects>Drop Shadow, same settings.
8. Activate the layer below.
Open the woman tube TubeNP_Sensual2 and go to Edit>Copy.
Minimize the tube.
Go back to your work and go to Edit>Paste as new layer.
Place  the desired part under the frame. the desired part under the frame.
Selections>Load/Save Selection>Load Selection from Alpha Channel.
Open the Selections menu and load the selection sélection #4.
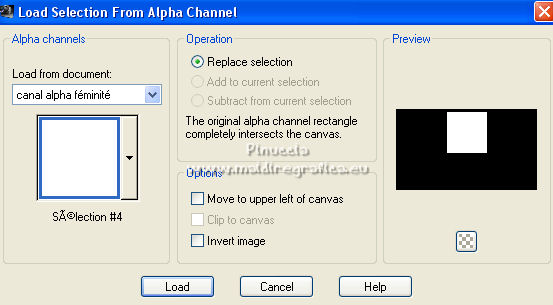
Selections>Invert.
Press CANC on the keyboard.
Selections>Select None.
Change the Blend Mode of this layer to Dodge.
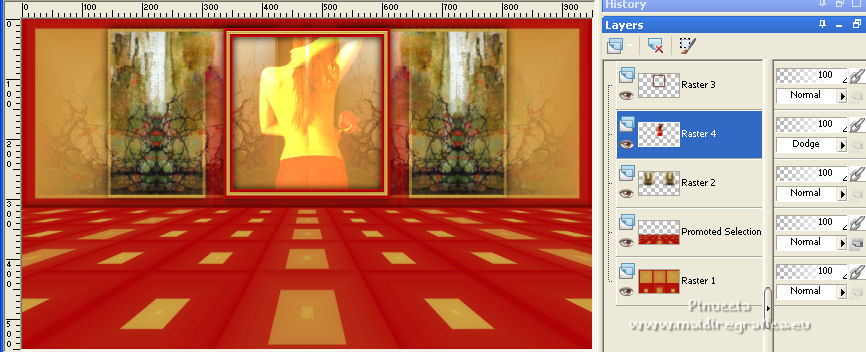
9. Layers>Merge>Merge visible.
10. Selections>Load/Save Selection>Load Selection from Alpha Channel.
Open the Selections menu and load the selection sélection #5.
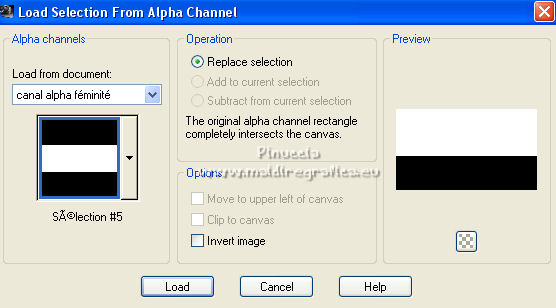
Selections>Promote Selection to Layer.
Selections>Select None.
11. Image>Resize, to 50%, resize all layers not checked.
Effects>Plugins>Alien Skin Eye Candy 5 Impact - Extrude.
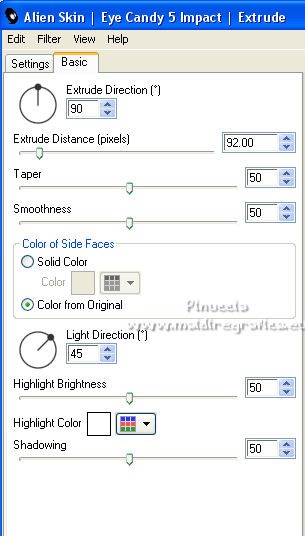
Again Image>Resize, to 50%, resize all layers not checked.
K key to activate your Pick Tool 
and set Position X: 22,00 and Position Y: 206,00.

M key to deselect the Tool.
12. Layers>Duplicate.
Image>Mirror.
Layers>Merge>Merge Down.
Adjust>Sharpness>Sharpen.
Effects>3D Effects>Drop Shadow, color black.
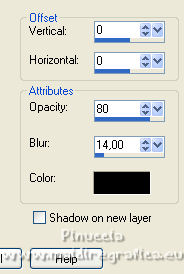
13. Set your foreground color to white #ffffff.
Activate your background layer, Merged.
Layers>New Raster Layer.
Flood Fill  the layer with color white. the layer with color white.
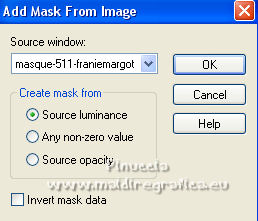
Layers>New Mask layer>From image
Open the menu under the source window and you'll see all the files open.
Select the mask masque-511-franiemargot
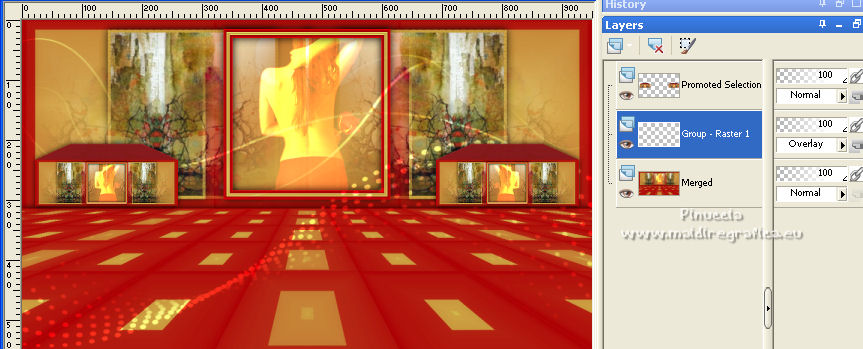
Layers>Merge>Merge Group.
Change the Blend Mode of this layer to Overlay.
14. Again activate your background layer.
Layers>New Raster Layer.
Selections>Load/Save Selection>Load Selection from Alpha Channel.
Open the Selections menu and load the selection sélection #6
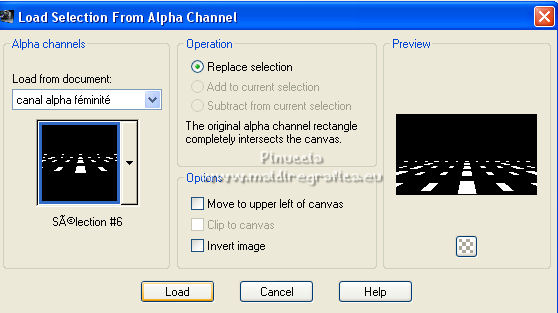
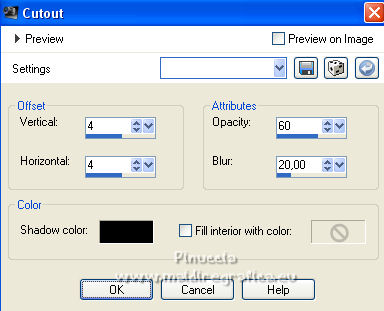
Effects>3D Effects>Cutout.
Selections>Select None.
15. For the borders, set again your foreground color to #cca142

Image>Add borders, 1 pixel, symmetric, foreground color.
Image>Add borders, 3 pixels, symmetric, background color.
Image>Add borders, 1 pixel, symmetric, foreground color.
Image>Add borders, 10 pixels, symmetric, color white.
Image>Add borders, 1 pixel, symmetric, foreground color.
Image>Add borders, 3 pixels, symmetric, background color.
Image>Add borders, 1 pixel, symmetric, foreground color.
Selections>Select All.
Image>Add borders, 30 pixels, symmetric, color white.
Selections>Invert.
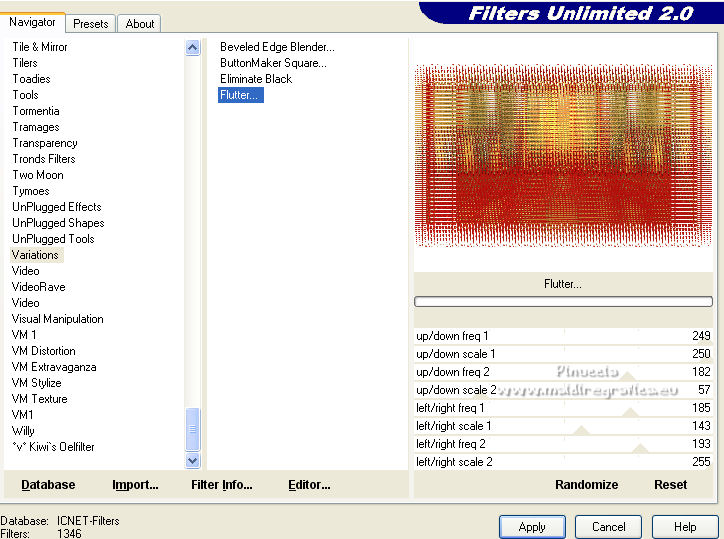
Effects>Plugins>Filters Unlimited 2.0 - Variations - Flutter.
Selections>Select None.
16. Activate your Magic Wand Tool  , tolerance and feather 0, , tolerance and feather 0,
and click in the 10 pixels white border to select it.
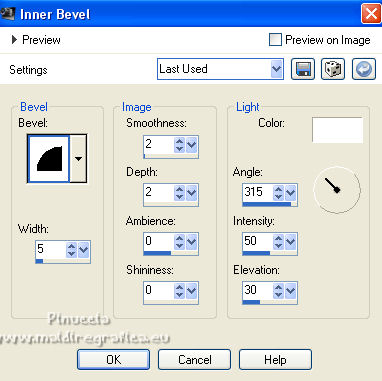
Effects>3D Effects>Inner Bevel.
Selections>Select None.
17. Activate again the woman tube TubeNP_Sensual2 and go to Edit>Copy.
Go back to your work and go to Edit>Paste as new layer.
Image>Resize, to 70%, resize all layers not checked.
Image>Mirror.
Adjust>Sharpness>Sharpen.
For the supplied tube: K key to activate your Pick Tool 
and set Position X: 135,00 and Position Y: 128,00.

Effects>3D Effects>Drop Shadow, same settings, or to your liking.
18. Activate the layer below.
Open the tube dêco fleurs and go to Edit>Copy.
Go back to your work and go to Edit>Paste as new layer.
Pick Tool 
and set Position X: 124,00 and Position Y: 204,00.

If necessary, you can colorize the tube,
with your Trasforma in destinazione Tool 
Effects>3D Effects>Drop Shadow, color black, or to your liking.
19. Open the text texte and go to Edit>Copy.
Go back to your work and go to Edit>Paste as new layer.
Set Position X: 677,00 and Position Y: 561,00.

M key to deselect the Tool.
20. Sign your work on a new layer.
Add the author and translator's watermarks.
Image>Add borders, 1 pixel, symmetric, background color.
Image>Resize, 950 pixels width, resize all layers checked.
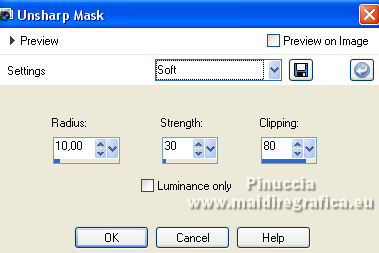
Adjust>Sharpness>Unsharp Mask - Soft
Save as jpg.
For the tubes of this version thanks Gabry

If you have problems or doubts, or you find a not worked link,
or only for tell me that you enjoyed this tutorial, write to me.
21 Octobre 2022

|

