|
TOP 31 DE OCTUBRE
 ENGLISH VERSION ENGLISH VERSION
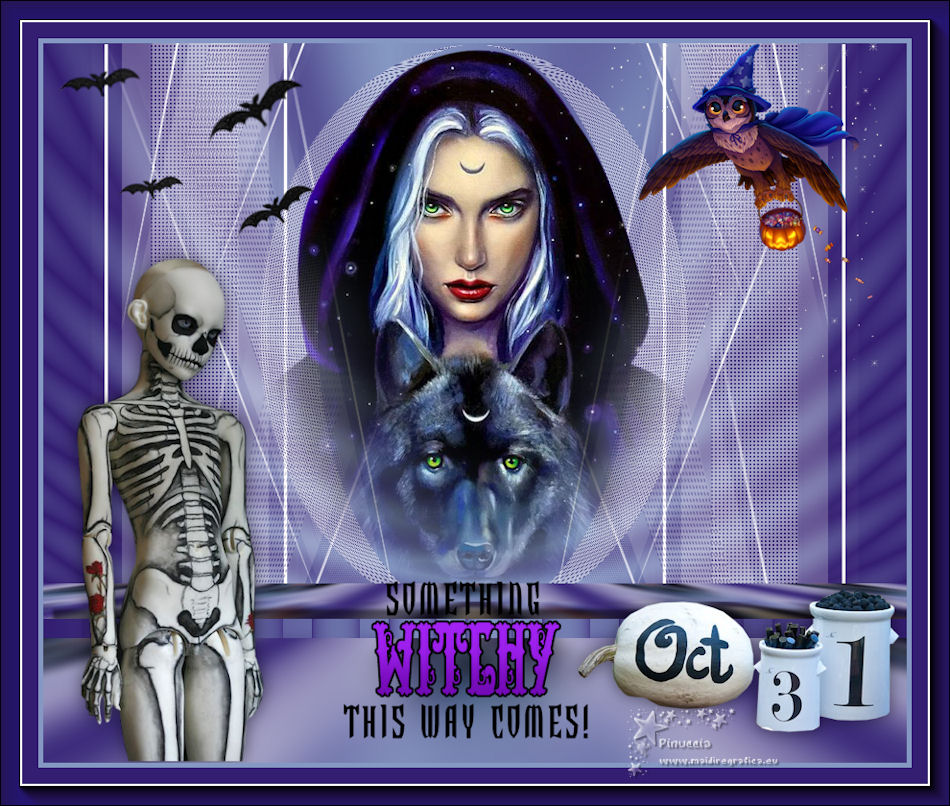
Here you find the original of this tutorial:

This tutorial was translated with PSPX7 but it can also be made using other versions of PSP.
Since version PSP X4, Image>Mirror was replaced with Image>Flip Horizontal,
and Image>Flip with Image>Flip Vertical, there are some variables.
In versions X5 and X6, the functions have been improved by making available the Objects menu.
In the latest version X7 command Image>Mirror and Image>Flip returned, but with new differences.
See my schedule here
French translation here
Your versions ici
For this tutorial, you will need:
Material
here
Tube Criss 3295 by Linda Gatita
Tube Criss 3277 by Linda Gatita
Zona-Halloween0wl4-10-17
Tube calguis31octobre26102014 by Guismo
Tube_murcielagos_nines
HalloweenWordArt10-7-14-LM
Narah_Mask_1486
seleccion sel.hallowee.nines
(you find here the links to the material authors' sites)
Plugins
consult, if necessary, my filter section here
Mehdi - Wavy Lab here
Mura's Meister - Perspective Tiling here
AAA Frames - Foto Frame here

You can change Blend Modes according to your colors.
In the newest versions of PSP, you don't find the foreground/background gradient (Corel_06_029).
You can use the gradients of the older versions.
The Gradient of CorelX here
Copy the Selection in the Selections Folder.
Open the mask in PSP and minimize it with the rest of the material.
1. Open a new transparent image 900 x 600 pixels.
2. Set your foreground color to #331e71,
and your background color to #8598c3.
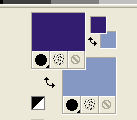
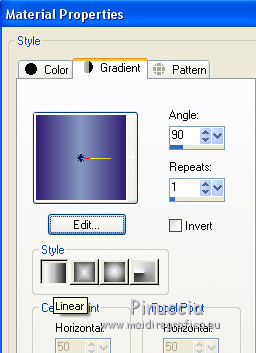
Set your foreground color to a Foreground/Background Gradient, style Linear.
Flood Fill  the transparent image with your Gradient. the transparent image with your Gradient.
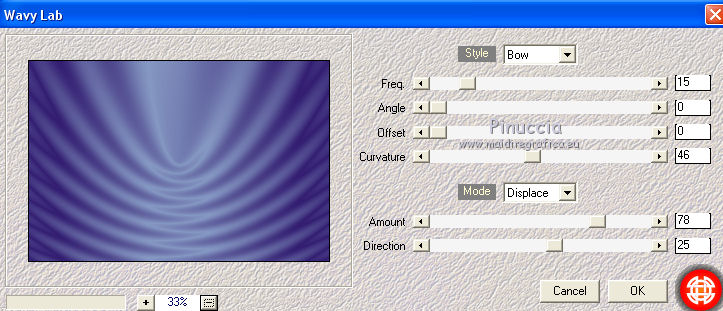
3. Effects>Plugins>Mehdi - Wavy Lab
4. Layers>New Raster Layer.
Set your background color to white #ffffff.
Flood Fill  the layer with color white. the layer with color white.
5. Layers>New Mask layer>From image
Open the menu under the source window and you'll see all the files open.
Select the mask Narah_Mask_1486.
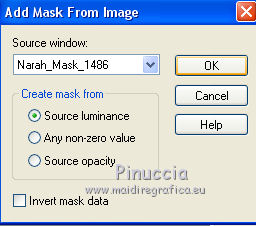
Layers>Merge>Merge Group.
6. Selections>Load/Save Selection>Load Selection from Disk.
Look for and load the selection sel.hallowee.nines.
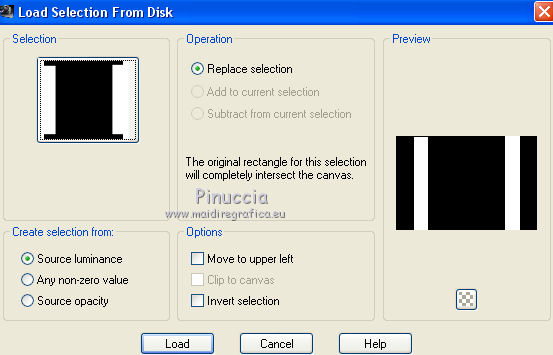
7. Effects>Texture Effects>Weave.
Weave color: #ffffff
Gap Color: foreground color #331e71.
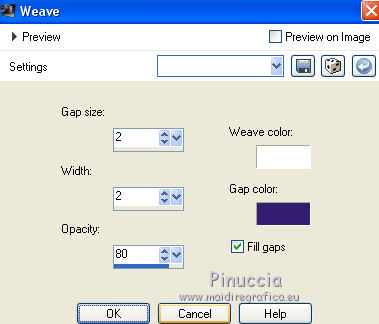
8. Selections>Promote Selection to Layer.
Selections>Select None.
9. Effects>Geometric Effects>Circle.

10. Activate the layer of the mask.
Layers>Duplicate.
11. Effects>Geometric Effects>Perspective Vertical.
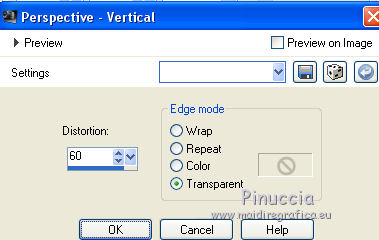
for my example, I added this step; to you to decide.
Effects>Image Effects>Seamless Tiling.

12. Activate the top layer.
Open the tube Criss 3295 and go to Edit>Copy.
Go back to your work and go to Edit>Paste as new layer.
Image>Resize, to 80%, resize all layers not checked.
Move  the tube in the circle. the tube in the circle.
13. Open the tube Zona-Halloween0wl4-10-17, erase the watermark and go to Edit>Copy.
Go back to your work and go to Edit>Paste as new layer.
Image>Resize, to 60%, resize all layers not checked.
Move  the tube at the upper right. the tube at the upper right.
14. Open the tube_murcielagos_nines and go to Edit>Copy.
Go back to your work and go to Edit>Paste as new layer.
Move  the tube at the upper left. the tube at the upper left.
15. Layers>Merge>Merge visible.
16. Layers>Duplicate.
Adjust>Blur>Gaussian Blur - radius 30.

17. Image>Canvas Size - 900 x 750 pixels.
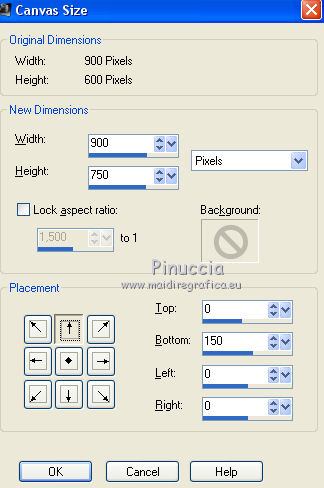
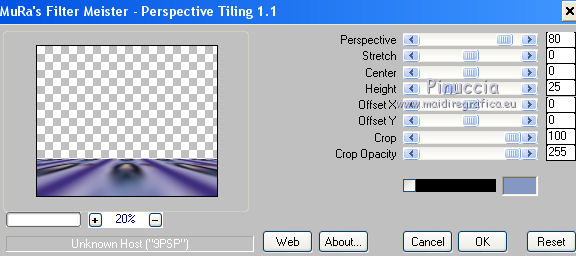
18. Effects>Plugins>Mura's Meister - Perspective Tiling.
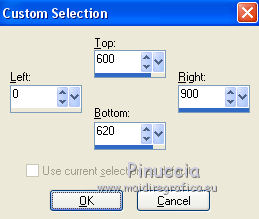
19. Selection Tool 
(no matter the type of selection, because with the custom selection your always get a rectangle)
clic on the Custom Selection 
and set the following settings.
20. Layers>New Raster Layer.
Set again your background color to #8598c3.
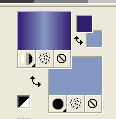
Flood Fill  the layer with your gradient. the layer with your gradient.
21. Effects>Texture Effects>Weave
Weave color: foreground color #331e71,
Gap color: background color #8598c3.
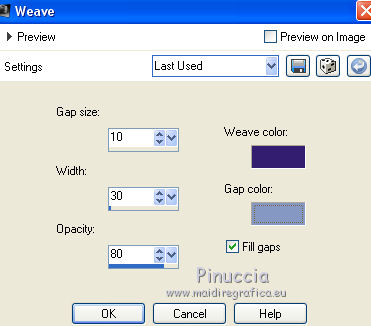
22. Effects>3D Effects>Drop Shadow, color black.
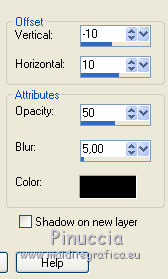
23. Open the tube Criss 3277 and go to Edit>Copy.
Go back to your work and go to Edit>Paste as new layer.
Image>Resize, to 80%, resize all layers not checked.
Move  the tube at the bottom left. the tube at the bottom left.
24. Effects>3D Effects>Drop Shadow, color #000000.
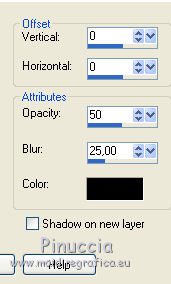
25. Open the tube calguis31octobre26102014 and go to Edit>Copy.
Go back to your work and go to Edit>Paste as new layer.
Image>Resize, to 70%, resize all layers not checked.
Move  the tube at the bottom right. the tube at the bottom right.
26. Effects>3D Effects>Drop Shadow, color black #000000.

27. Open the wordart HalloweenWordArt10-7-14-LM and go to Edit>Copy.
Go back to your work and go to Edit>Paste as new layer.
Place  rightly the wordart. rightly the wordart.
28. Layers>Merge>Merge visible.
29. Effects>Plugins>AAA Frames - Foto Frame.
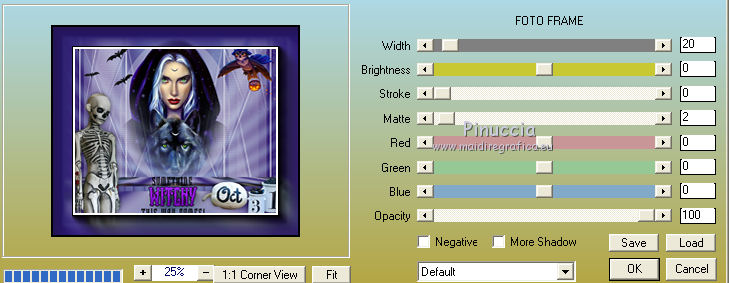
30. Image>Resize, to 95%, resize all layers checked.
31. Sign your work and save as jpg.
Your versions here

If you have problems or doubts, or you find a not worked link, or only for tell me that you enjoyed this tutorial, write to me.
31 October 2019
|
 ENGLISH VERSION

 ENGLISH VERSION
