|
TOP ANIVERSARIO
 ENGLISH VERSION ENGLISH VERSION
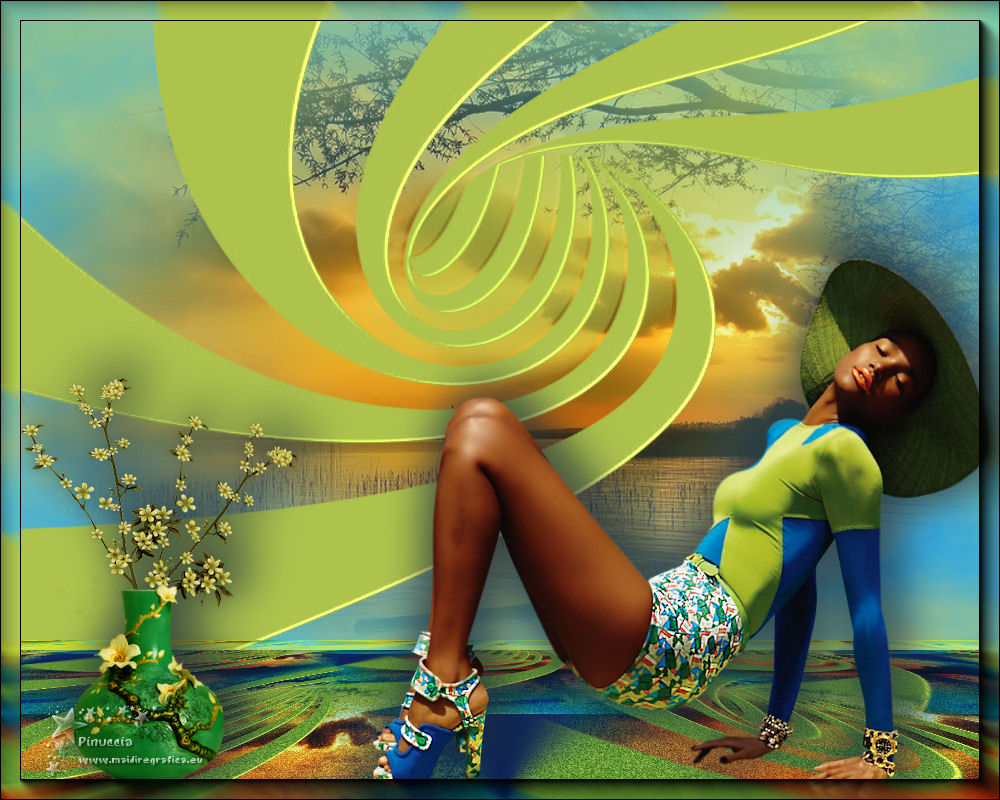
Here you find the original of this tutorial:

This tutorial was translated with PSPX7 but it can also be made using other versions of PSP.
Since version PSP X4, Image>Mirror was replaced with Image>Flip Horizontal,
and Image>Flip with Image>Flip Vertical, there are some variables.
In versions X5 and X6, the functions have been improved by making available the Objects menu.
In the latest version X7 command Image>Mirror and Image>Flip returned, but with new differences.
See my schedule here
 French translation here French translation here
 Your versions ici Your versions ici
For this tutorial, you will need:
Material
here
Tube Tocha23673 by Tony Chavarria
Tube lunapaisagem1708
Tube flowers_70_ bycrealine
Narah_mask_Abstract199
(you find here the links to the material authors' sites)
Plugins
consult, if necessary, my filter section here
Andromeda - Perspective here
AAA Frames - Foto Frame here
AP Lines - Lines SilverLining here

You can change Blend Modes according to your colors.
Copy the preset Emboss 3 in the Presets Folder
Open the mask in PSP and minimize it with the rest of the material.
1. Open a new transparent image 1000 x 650 pixels.
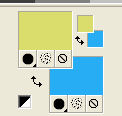
2. Set your foreground color to #d4dc6b,
and your background color to #27adf2.
3. Effects>Plugins>Mura's Meister - Cloud.
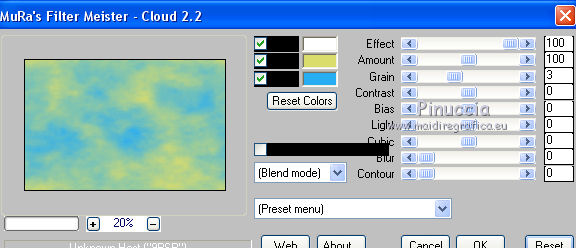
remember that this plugin works with the colors of your Materials,
but keeps in memory the first settings used after the opening of PSP.
So, if you have already used the plugin, press Reset to be sure to have your colors.
To change the appearance of the clouds, which is random, click on the window preview,
until you'll see the result you like better
(for that, your result will be always different).
4. Selections>Select All.
Layers>New Raster Layer.
5. Open the tube lunapaisagem1708 and go to Edit>Copy.
Go back to your work and go to Edit>Paste into Selection.
Selections>Select None.
6. Layers>New Raster Layer.
Flood Fill  with your foreground color. with your foreground color.
7. Layers>New Mask layer>From image
Open the menu under the source window and you'll see all the files open.
Select the mask Narah_mask_Abstract 199.
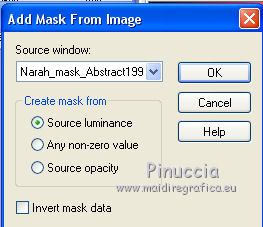
Layers>Merge>Merge Group.
8. Effects>User Defined Filter - select the preset Emboss 3 and ok.

9. Layers>Merge>Merge visible.
10. Image>Canvas Size - 1000 x 800 pixels.
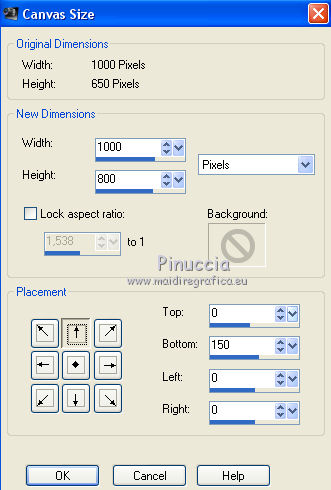
11. Layers>Duplicate.
Effects>Image Effects>Seamless Tiling, default settings.

12. Adjust>Add/Remove Noise>Add Noise.
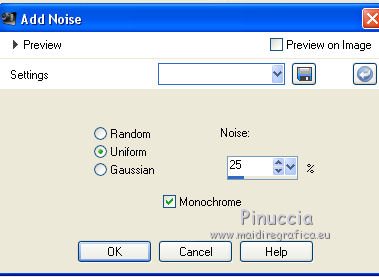
13. Effects>Plugins>Mura's Meister - Perspective Tiling.
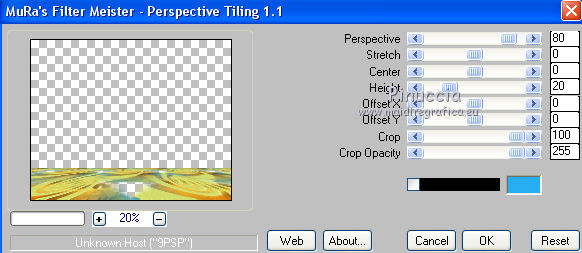
Change the Blend Mode of this layer to Hard Light.
14. Set your foreground color to #0c225a.
Layers>New Raster Layer.
Layers>Arrange>Send to Bottom.
Flood Fill  the layer with your foreground color. the layer with your foreground color.
15. Activate your top layer.
Open the tube Tocha23673 and go to Edit>Copy.
Go back to your work and go to Edit>Paste as new layer.
Image>Resize, to 80%, resize all layers not checked.
Move  the tube at the bottom right. the tube at the bottom right.
16. Effects>3D Effects>Drop Shadow, color black.
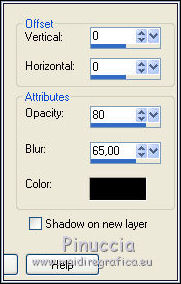
17. Repeat Effects>3D Effects>Drop Shadow, color black.
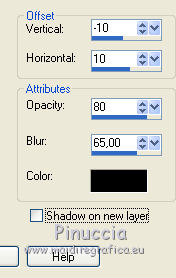
18. Open the tube flowers70 and go to Edit>Copy.
Go back to your work and go to Edit>Paste as new layer.
Image>Resize, to 60%, resize all layers not checked.
Move  the tube at the bottom left. the tube at the bottom left.
19. Effects>3D Effects>Drop Shadow, color black.

Edit>Repeat Drop shadow.
20. Layers>Merge>Merge visible.
21. Effects>Plugins>AAA Frames - Foto Frame.
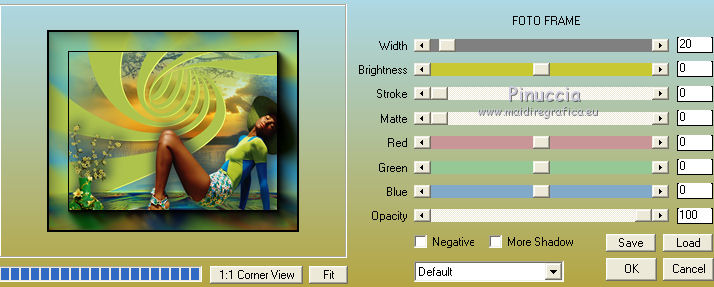
22. Sign your work and save as jpg.
Version with tubes by Maryse, Irene and Sdt
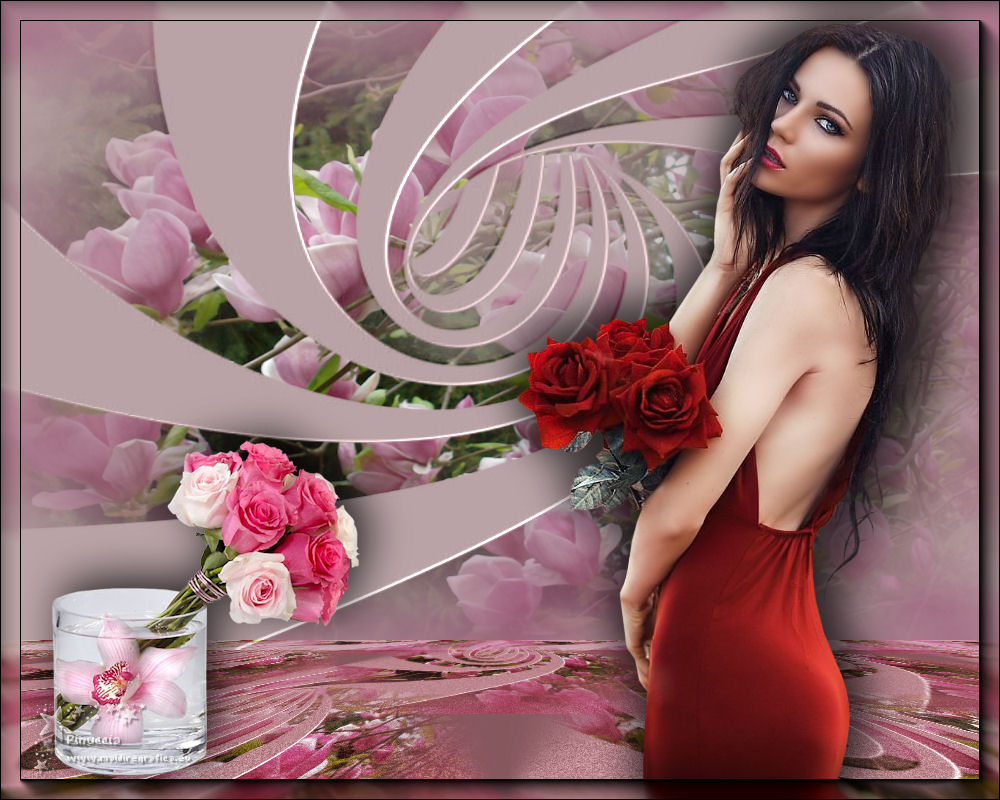
 Your versions here Your versions here

If you have problems or doubts, or you find a not worked link, or only for tell me that you enjoyed this tutorial, write to me.
2 May 2020
|
 ENGLISH VERSION

 ENGLISH VERSION
