|
TOP BLACK AND GOLD
 ENGLISH VERSION ENGLISH VERSION

Here you find the original of this tutorial:

This tutorial was translated with PSPX7 but it can also be made using other versions of PSP.
Since version PSP X4, Image>Mirror was replaced with Image>Flip Horizontal,
and Image>Flip with Image>Flip Vertical, there are some variables.
In versions X5 and X6, the functions have been improved by making available the Objects menu.
In the latest version X7 command Image>Mirror and Image>Flip returned, but with new differences.
See my schedule here
 French translation here French translation here
 Your versions ici Your versions ici
For this tutorial, you will need:
Material
here
Tube ketwomen20140149 by Ket-Mexico
Tube ketlandscape212 by Ket-Mexico
(you find here the links to the material authors' sites)
Plugins
consult, if necessary, my filter section here
Filters Unlimited 2.0 here
Mura's Meister - Copies here
Mura's Meister - Perspective Tiling here
Sandflower Special "v" - Color Atmospherizer (to import in Unlimited) here

You can change Blend Modes according to your colors.
In the newest versions of PSP, you don't find the foreground/background gradient (Corel_06_029).
You can use the gradients of the older versions.
The Gradient of CorelX here
Open the mask in PSP and minimize it with the rest of the material.
1. Open a new transparent image 1000 x 700 pixels.
2. Set your foreground color to #c69e35,
and your background color to black #000000.
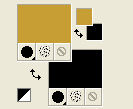
Set your foreground color to a Foreground/Background Gradient, style Linear.

Flood Fill  the transparent image with your gradient. the transparent image with your gradient.
3. Layers>New Raster Layer.
Flood Fill  the layer with color black. the layer with color black.
4. Selections>Select All.
Selections>Modify>Contract - 15 pixels.
Press CANC on the keyboard 
5. Selections>Invert.
Effects>3D Effects>Buttonize
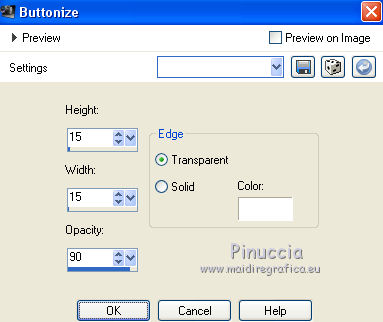
6. Selections>Invert.
Flood Fill  the selection with your Gradient. the selection with your Gradient.
7. Adjust>Add/Remove Noise>Add Noise.
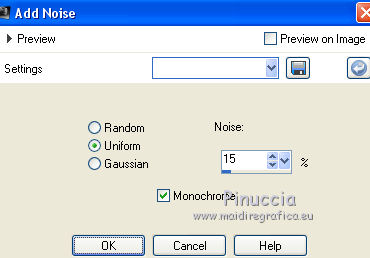
Selections>Select None.
8. Effects>Plugins>Mura's Meister - Perspective Tiling.
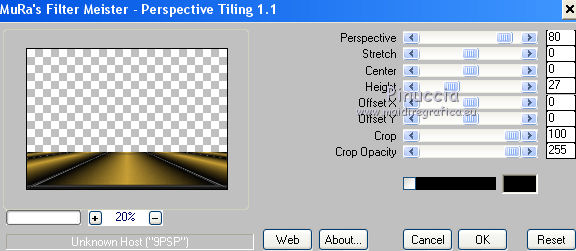
9. Layers>Duplicate.
Image>Resize, to 90%, resize all layers not checked.
10. Effects>Image Effects>Offset.
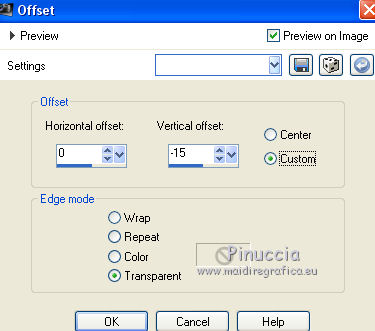
11. Layers>Duplicate.
Image>Resize, to 90%, resize all layers not checked.
Effects>Image Effects>Offset, same settings.

12. Open the tube ketlandescape212 and go to Edit>Copy.
Go back to your work and go to Edit>Paste as new layer.
13. Effects>Image Effects>Offset.
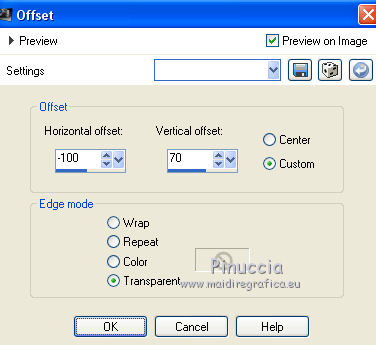
14. Effects>Reflection Effects>Rotating Mirror.
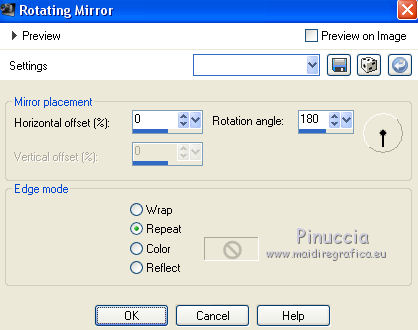
16. Selection Tool 
(no matter the type of selection, because with the custom selection your always get a rectangle)
clic on the Custom Selection 
and set the following settings.
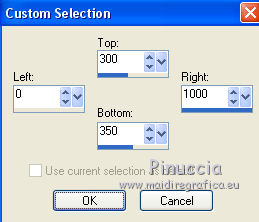
15. Layers>New Raster Layer.
Set your foreground color to Color.
Reduce the opacity of your Flood Fill Tool to 50%.
Fllod Fill  the layer with your foreground color #c69e35. the layer with your foreground color #c69e35.
Don't forget to set again the opacity to 100.
16. Effects>Artistic Effects>Halftone.
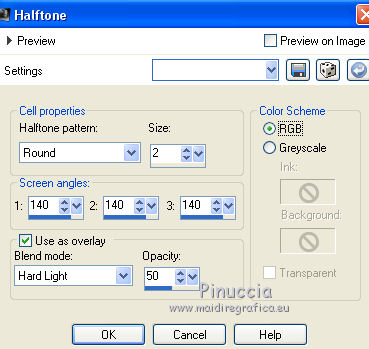
Selections>Select None.
17. Effects>Geometric Effects>Skew.
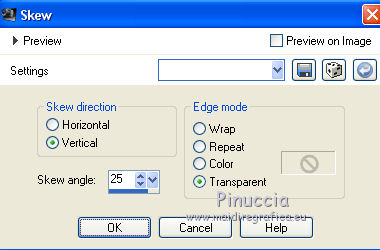
18. Effects>Plugins>Mura's Meister - Copies.
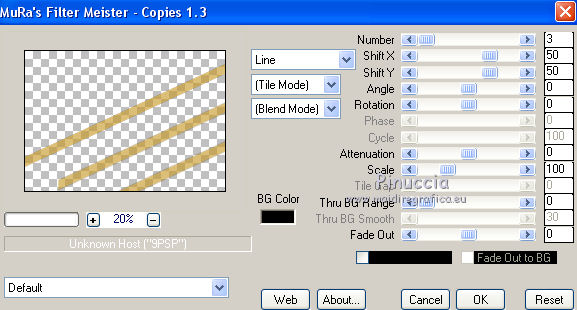
19. Effects>3D Effects>Drop Shadow, color black.
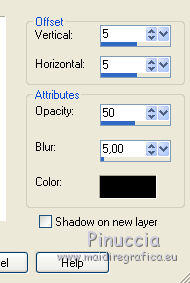
20. Layers>Duplicate.
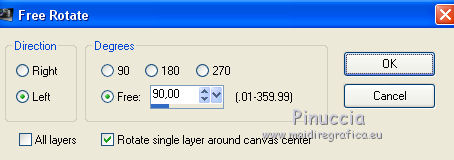
Image>Free Rotate - 90 degrees to left.
21. Layers>Merge>Merge Down.
22. Layers>New Mask layer>From image
Open the menu under the source window and you'll see all the files open.
Select the mask mask-Fade-suave .
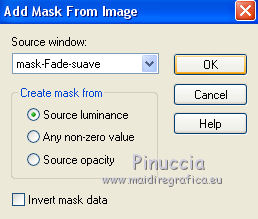
Layers>Duplicate (to apply the mask 2 times)
Layers>Merge>Merge Group.
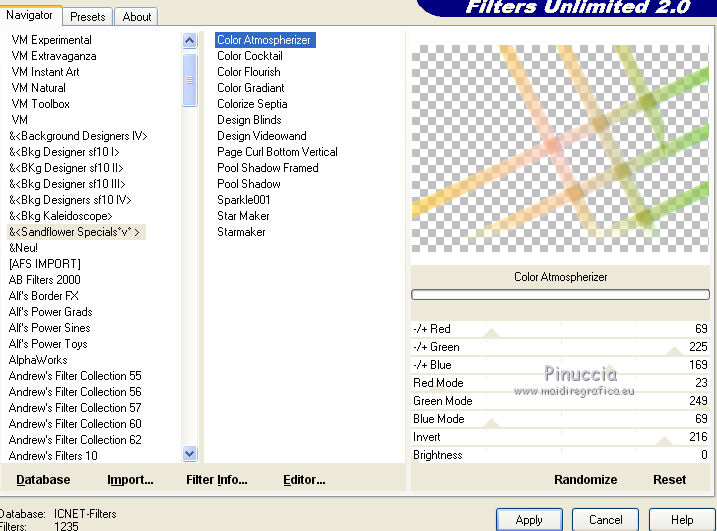
23. Effects>Plugins>Filters Unlimited 2.0 - Sandflower Specials "v" - Color Atmospherizer.
24. Open the tube ketwomen20140149 and go to Edit>Copy.
Go back to your work and go to Edit>Paste as new layer.
Image>Resize, 2 times to 80%, resize all layers not checked.
Move  the tube to the left side. the tube to the left side.
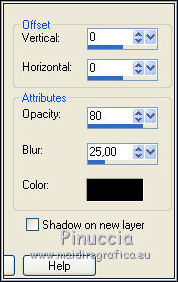
25. Effects>3D Effects>Drop Shadow, color black.
26. Layers>Merge>Merge All.
27. Image>Add borders, 2 pixels, symmetric, color black.
28. Sign your work and save as jpg.
 Your versions here Your versions here

If you have problems or doubts, or you find a not worked link, or only for tell me that you enjoyed this tutorial, write to me.
2 May 2020
|
 ENGLISH VERSION

 ENGLISH VERSION
