|
TOP CASIA


This tutorial was translated with PSPX7 but it can also be made using other versions of PSP.
Since version PSP X4, Image>Mirror was replaced with Image>Flip Horizontal,
and Image>Flip with Image>Flip Vertical, there are some variables.
In versions X5 and X6, the functions have been improved by making available the Objects menu.
In the latest version X7 command Image>Mirror and Image>Flip returned, but with new differences.
See my schedule here
 French translation here French translation here
 Your versions ici Your versions ici
For this tutorial, you will need:
Material
here
Tube 0108_CasiaFairy_2013
Tube WDD0017
Tube calguisdecoautome by Guismo
Textura Tex-3LC
(you find here the links to the material authors' sites)
Plugins
consult, if necessary, my filter section here
Alien Skin Eye Candy 5 Impact - Extrude here

You can change Blend Modes according to your colors.
Copy the texture Tex-3LC in the Patterns Folder.
Open the mask in PSP and minimize it with the rest of the material.
1. Open a new transparent image 1000 x 650.
Set your foreground color to #582919,
and your background color to #b67653.
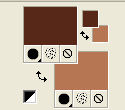
2. Open the foreground color palette and check Pattern.
Select the texture Tex-3LC
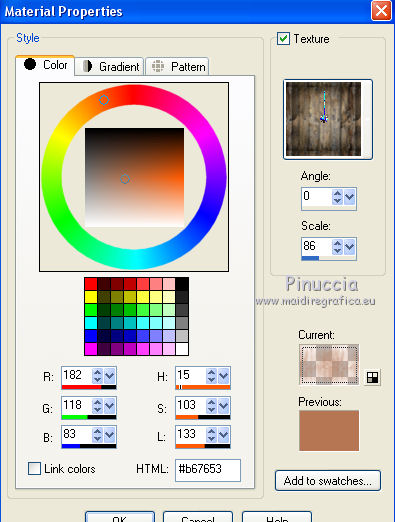
Flood Fill  the transparent image with the textured color, the transparent image with the textured color,
click 2 times.
3. Layers>New Raster Layer.
Layers>Arrange>Send to Bottom.
Flood Fill  the layer with your background color #b67653. the layer with your background color #b67653.
4. Layers>Merge>Merge visible.
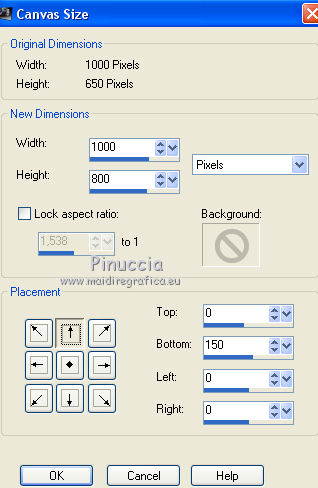
5. Image>Canvas Size - 1000 x 800 pixels.
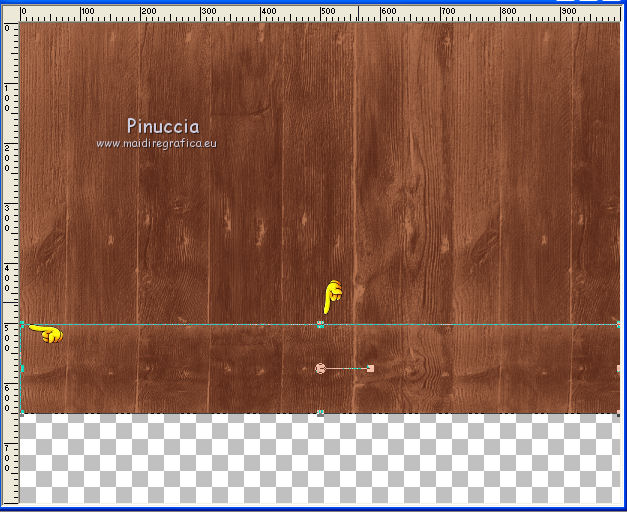
6. Layers>Duplicate.
Activate your Pick Tool 
mode Scale 
pull the top central node down until 500 pixels.
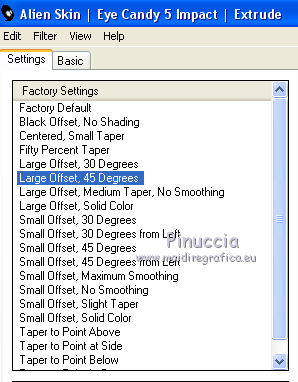
7. Effects>Plugins>Alien Skin Eye Candy 5 Impact - Extrude.
Select the preset Large 0ffset 45 Degrees and ok.
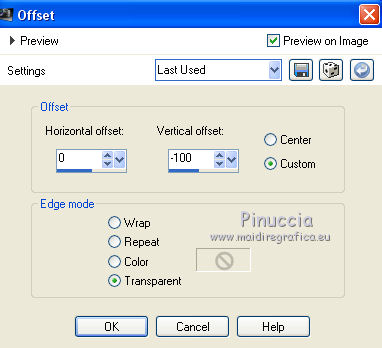
8. Effects>Image Effects>Offset.
9. Apply the mask to soften the background, 2 or 3 times, according to your colors:
Layers>New Mask layer>From image
Open the menu under the source window and you'll see all the files open.
Select the mask !!!Marge_Top Fade.
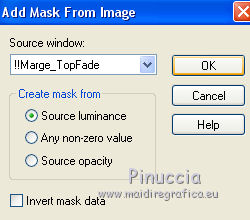
Layers>Merge>Merge Group.
10. Change the Blend Mode of this layer to Hard Light.
11. Layers>Duplicate.
Effects>Geometric Effects>Skew.
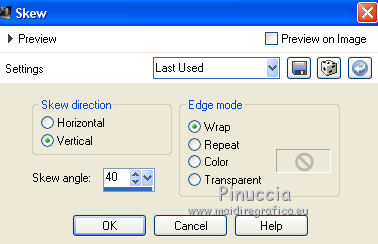
12. Layers>Duplicate.
Image>Mirror.
Layers>Merge>Merge Down.
13. Effects>Distortion Effects>Pinch

14. Again apply the mask !!!Marge_TopFade to soften the background, 2 times.
15. Layers>New Raster Layer.
Layers>Arrange>Send to Bottom.
Deselect the Pattern of your foreground color.
Flood Fill  the layer with your foreground color #582919. the layer with your foreground color #582919.
16. Activate the top layer.
Open the tube 0108_CasiaFairy and go to Edit>Copy.
Go back to your work and go to Edit>Paste as new layer.
Image>Resize, 2 times to 80%, resize all layers not checked.
Place  correctly the tube. correctly the tube.
17. Open the tube WDD0017 and go to Edit>Copy.
Go back to your work and go to Edit>Paste as new layer.
Image>Resize, 4 times to 80% and 1 time to 90%, resize all layers not checked.
Mve  the tube at the bottom left. the tube at the bottom left.
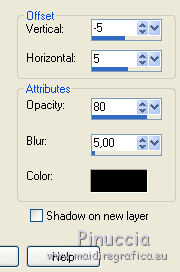
18. Effects>3D Effects>Drop Shadow, color black.
19. Open the tube calguisdecoautome and go to Edit>Copy.
Go back to your work and go to Edit>Paste as new layer.
Image>Resize, to 80%, resize all layers not checked.
Move  the tube at the bottom right. the tube at the bottom right.
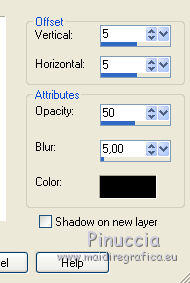
20. Effects>3D Effects>Drop Shadow, color black.
21. Layers>Merge>Merge visible.
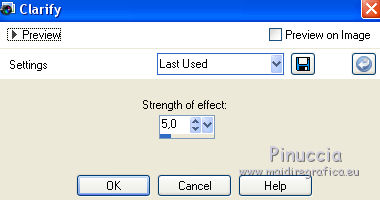
22. Adjust>Brightness and Contrast>Clarify
23. Sign your work on a new layer.
Layers>Merge>Merge All and save as jpg.
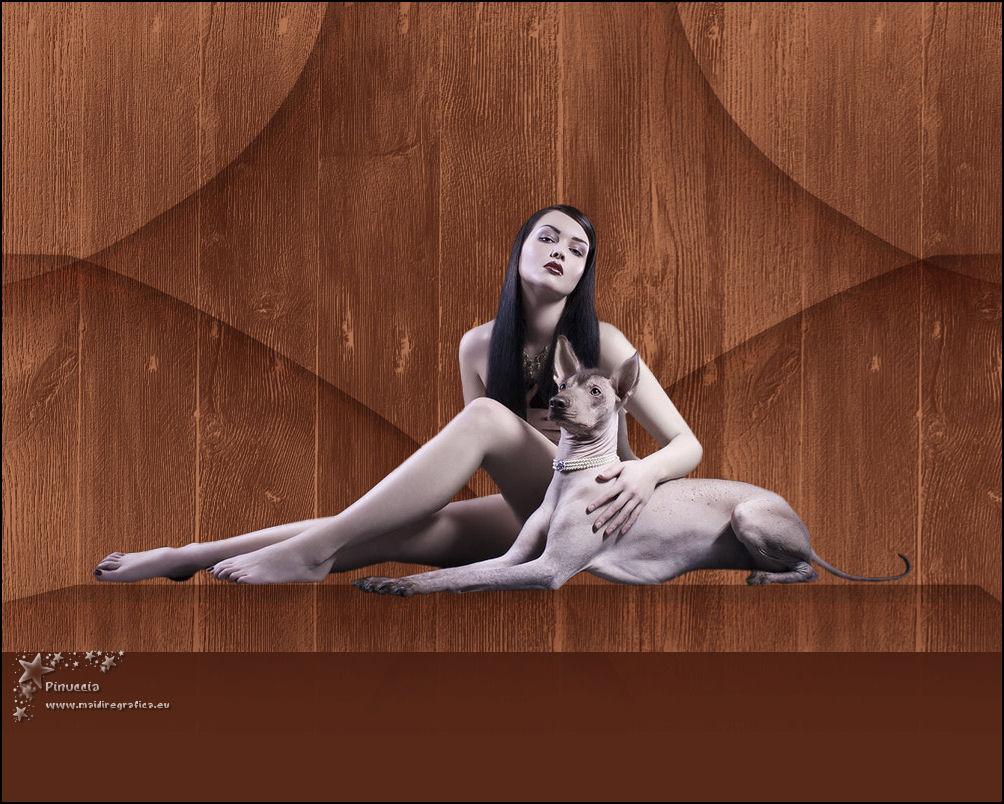
Version with tube by Nena
 Your versions here Your versions here

If you have problems or doubts, or you find a not worked link, or only for tell me that you enjoyed this tutorial, write to me.
16 Avril 2021
|

