|
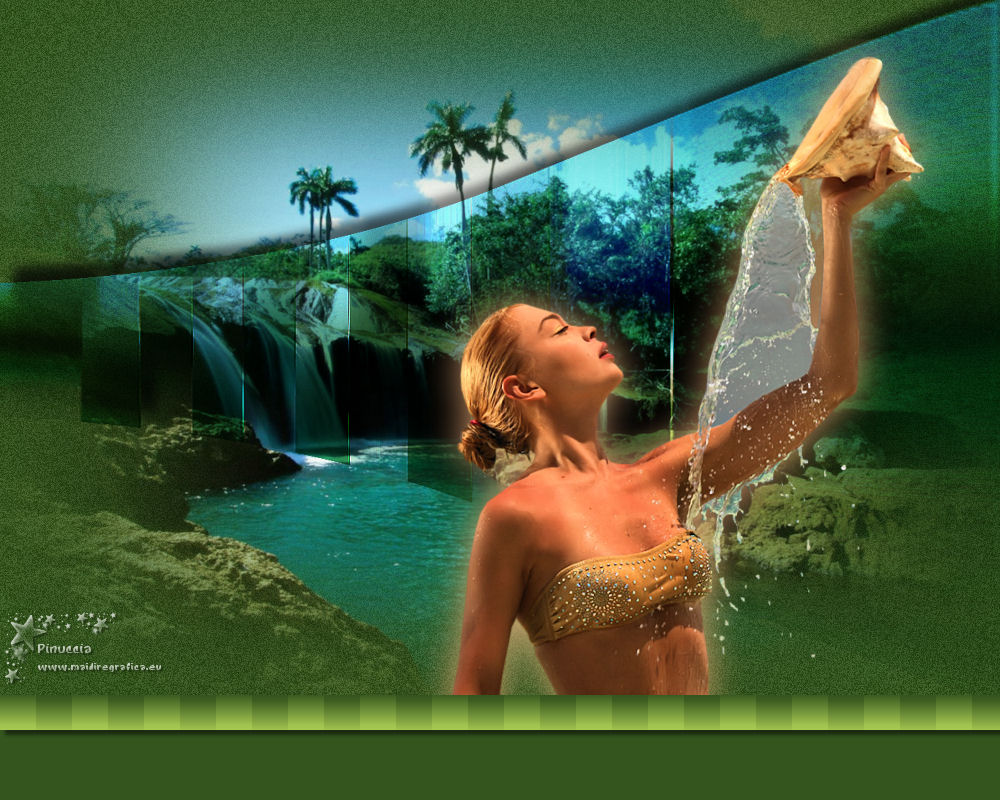
TOP CATARATAS


This tutorial was translated with PSPX7 but it can also be made using other versions of PSP.
Since version PSP X4, Image>Mirror was replaced with Image>Flip Horizontal,
and Image>Flip with Image>Flip Vertical, there are some variables.
In versions X5 and X6, the functions have been improved by making available the Objects menu.
In the latest version X7 command Image>Mirror and Image>Flip returned, but with new differences.
See my schedule here
 French translation here French translation here
 Your versions ici Your versions ici
For this tutorial, you will need:
Material
here
Tube calguisnayade26012012 by Guismo
Tube paisaje AR-49 by Ana Ridzi
(you find here the links to the material authors' sites)
Plugins
consult, if necessary, my filter section here
DSB Flux - Linear Transmission here

You can change Blend Modes according to your colors.
In the newest versions of PSP, you don't find the foreground/background gradient (Corel_06_029).
You can use the gradients of the older versions.
The Gradient of CorelX here
Copy the preset in the Presets Folder.
1. Open a new transparent image 1000 x 700 pixels.
Set your foreground color to #34551e.
Flood Fill  the transparent image with your foreground color. the transparent image with your foreground color.
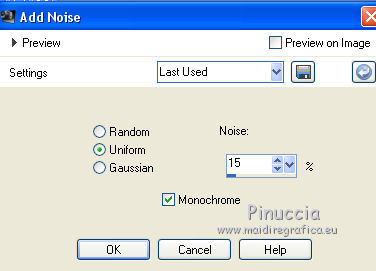
2. Adjust>Add/Remove Noise>Add Nose.
3. Layers>New Raster Layer.
Selections>Select All.
Open the tube AR-49 and go to Edit>Copy.
Go back to your work and go to Edit>Paste as new layer.
Selections>Select None.
4. Layers>Duplicate.
Effects>Image Effects>Seamless Tiling, Side by Side

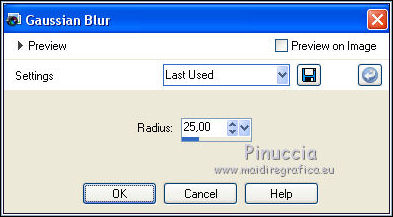
5. Adjust>Blur>Gaussian Blur, radius 25.
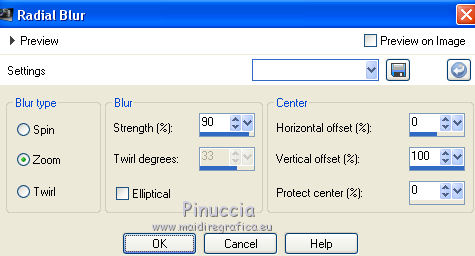
6. Adjust>Blur>Radial Blur.
7. Effects>Plugins>DSB Flux - Linear Transmission.
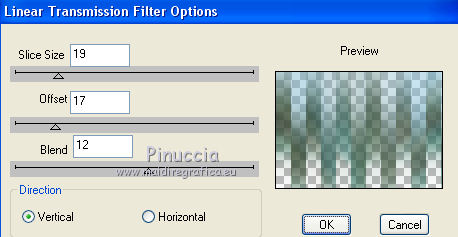
8. Effects>User Defined Filter, select the preset Emboss 3 and ok.

9. Effects>Geometric Effects>Perspective Horizontal.
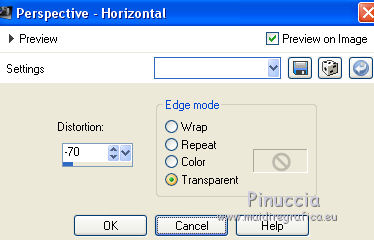
10. Effects>Distortion Effects>Pinch

11. Effects>3D Effects>Drop Shadow, color black.
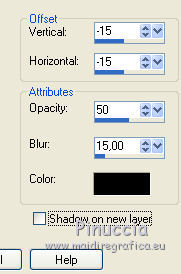
12. Change the Blend Mode of this layer to Hard Light.
13. Layers>Duplicate.
14. Open the tube calguisnayade26012012 and go to Edit>Copy.
Go back to your work and go to Edit>Paste as new layer.
Image>Resize, to 90%, resize all layers not checked.
Move  the tube to the right side. the tube to the right side.
15. Effects>3D Effects>Drop Shadow, color #feb47b.
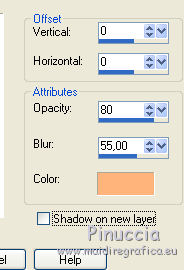
16. Adjust>Brightness and Contrast>Clarify.
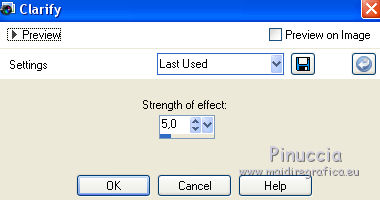
17. Layers>Merge>Merge visible.
18. Image>Canvas Size - 1000 x 800 pixels.
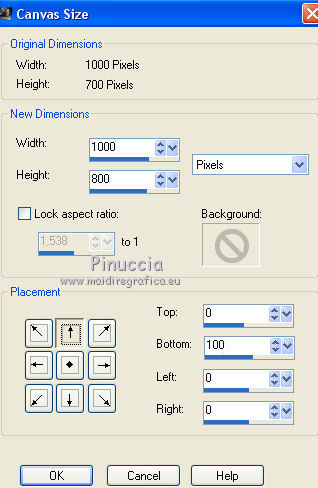
19. Selection Tool 
(no matter the type of selection, because with the custom selection your always get a rectangle)
clic on the Custom Selection 
and set the following settings.
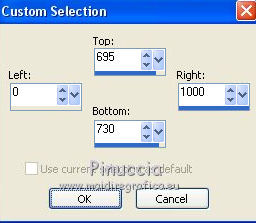
20. Set your foreground color to #18ca52,
and your background color to #34551e.

Set your foreground color to a Foreground/Background Gradient, style Linear.
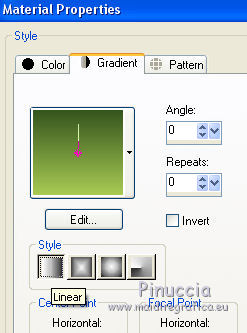
Layers>New Raster Layer.
Flood Fill  the layer with your Gradient. the layer with your Gradient.
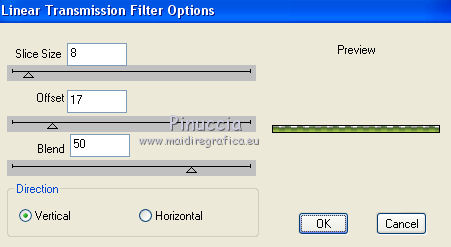
21. Effects>Plugins>DSB Flux - Linear Transmission.
Selections>Select None.
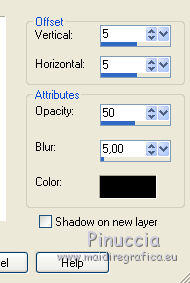
22. Effects>3D Effects>Drop Shadow, color black.
23. Layers>New Raster Layer.
Layers>Arrange>Send to Bottom.
Flood Fill  the layer with your background color #34551E. the layer with your background color #34551E.
24. Layers>Merge>Merge All.
Sign your work and save as jpg.
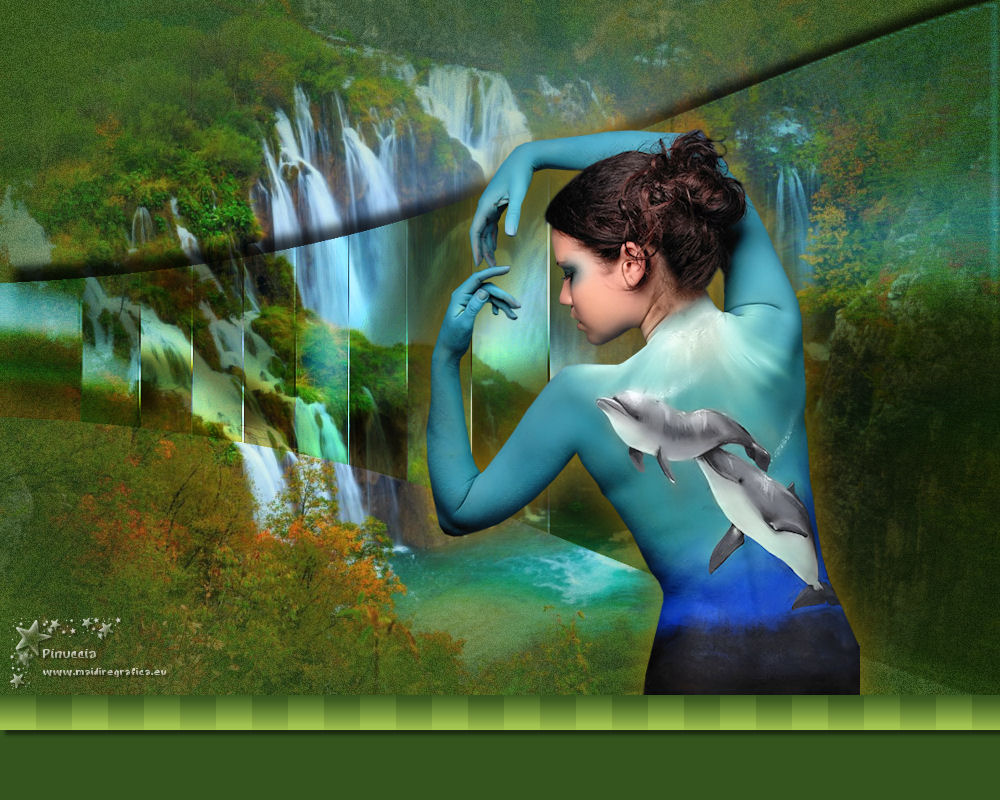
Version with tube by Guismo (the landscape is mine)
 Your versions here Your versions here

If you have problems or doubts, or you find a not worked link, or only for tell me that you enjoyed this tutorial, write to me.
16 April 2021
|

