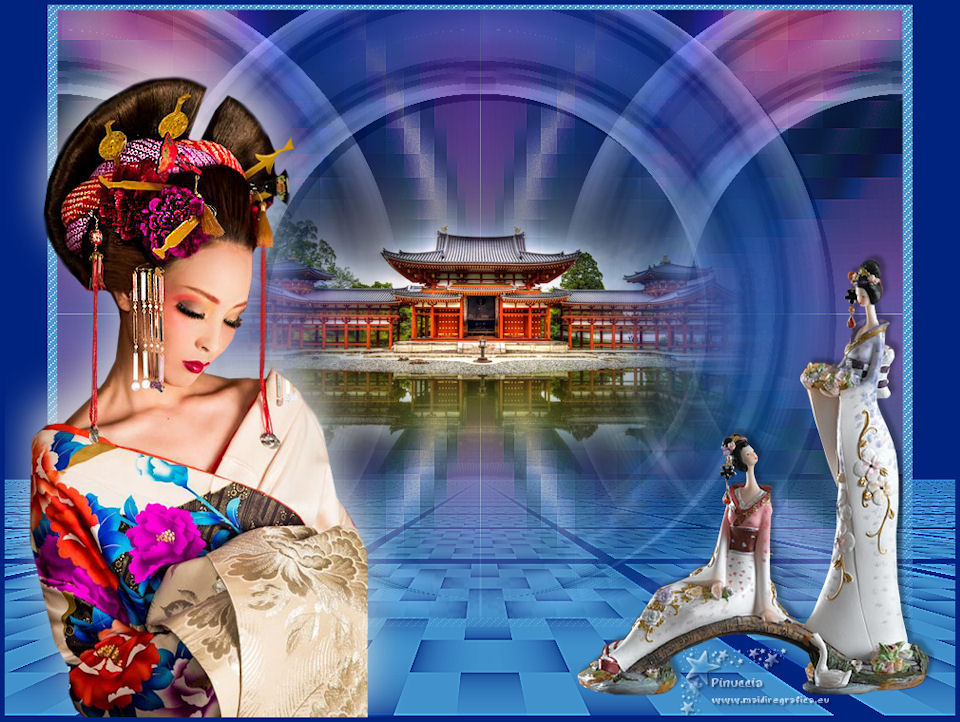
|
TOP TOKYO


This tutorial was translated with PSPX7 but it can also be made using other versions of PSP.
Since version PSP X4, Image>Mirror was replaced with Image>Flip Horizontal,
and Image>Flip with Image>Flip Vertical, there are some variables.
In versions X5 and X6, the functions have been improved by making available the Objects menu.
In the latest version X7 command Image>Mirror and Image>Flip returned, but with new differences.
See my schedule here
 French translation here French translation here
 Your versions ici Your versions ici
For this tutorial, you will need:
Material
here
Tube 4715-luzcristina
Mist_Kamil-134
Tube Asia Lizzy
mascara Marge_TopFade
(you find here the links to the material authors' sites)
Plugins
consult, if necessary, my filter section here
Filters Unlimited 2.0 here
Funhouse - Emission Mirror here
Mura's Meister - Perspective Tiling here
Mura's Meister - Pole Transform here
Filters Funhouse can be used alone or imported into Filters Unlimited.
(How do, you see here)
If a plugin supplied appears with this icon  it must necessarily be imported into Unlimited it must necessarily be imported into Unlimited

You can change Blend Modes according to your colors.
In the newest versions of PSP, you don't find the foreground/background gradient (Corel_06_029).
You can use the gradients of the older versions.
The Gradient of CorelX here
Note, especially for those who have a habit of comparing translations to original tutorials.
To translate this tutorial, I made some changes and added steps,
to make the result similar to the original tutorial.
Open the mask in PSP and minimize it with the rest of the material.
1. Open a new transparent image 900 x 650 pixels.
2. Set your foreground color to #4191cc,
and your background color to #00237f.
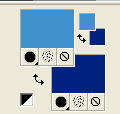
Set your foreground color to a Foreground/Background Gradient, style Linear.
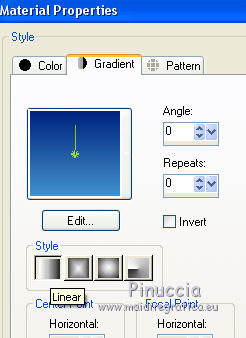
Flood Fill  the transparent image with your Gradient the transparent image with your Gradient
3. Open the tube 4715-luzcristina and go to Edit>Copy.
Go back to your work and go to Edit>Paste as new layer.
4. Effects>Image Effects>Seamless Tiling, default settings.

5. Adjust>Blur>Gaussian Blur - radius 15.

6. Adjust>Blur>Radial Blur.
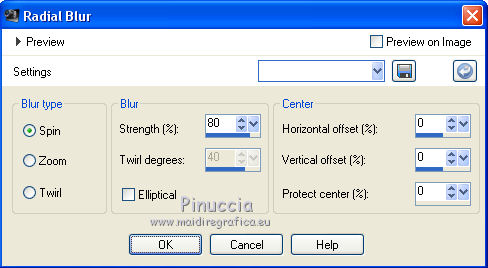
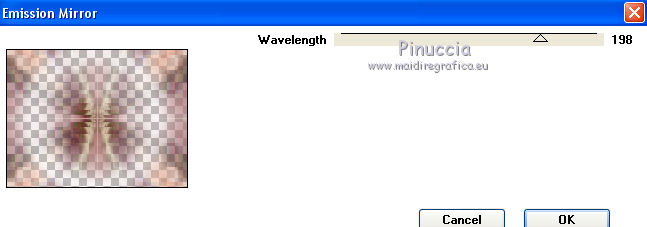
7. Effects>Plugins>Funhouse - Emission Mirror
8. Adjust>Sharpness>Sharpen More.
Change the Blend Mode of this layer to Hard Light.
9. Layers>Duplicate - 2 times.
Close che top layer
and activate the layer below of the first copy.
10. Effects>Plugins>Mura's Meister - Pole Transform.
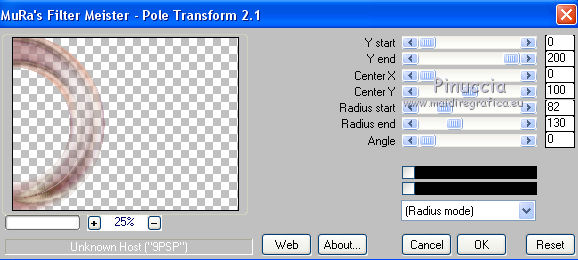
Change the Blend Mode of this layer to Luminance (legacy).
11. Layers>Duplicate.
Image>Mirror.
12. Open and activate the top layer of the second copy.
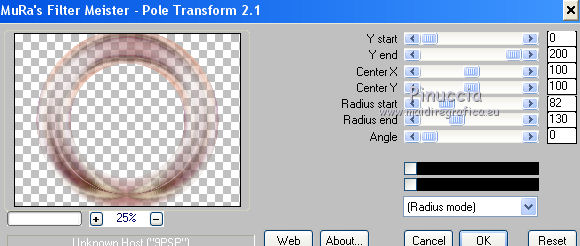
Effects>Plugins>Mura's Meister - Pole Transform.
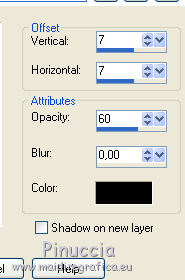
13. Effects>3D Effects>Drop Shadow, color black.
14. Change the Blend Mode of this layer to Luminance (legacy).
15. Open the tube Kamil-134 and go to Edit>Copy.
Go back to your work and go to Edit>Paste as new layer.
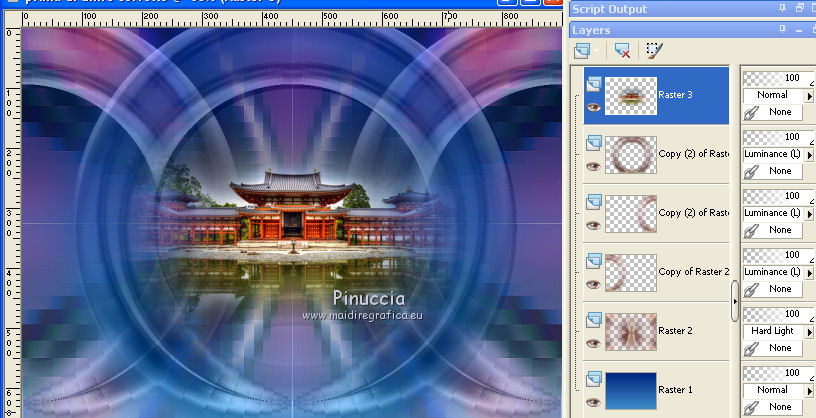
16. Layers>Merge>Merge visible.
17. Layers>New Raster Layer.
Set your foreground color to Color.
Flood Fill  the layer with your foreground color #4191cc. the layer with your foreground color #4191cc.
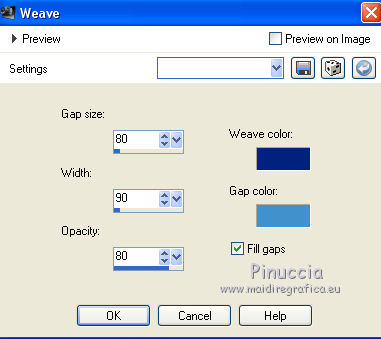
18. Effects>Texture Effects>Weave
weave color: background color #00237f
gap color: foreground color #4191cc.
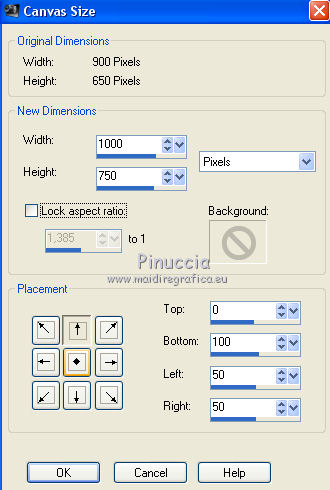
19. Image>Canvas Size - 1000 x 750 pixels.
20. Effects>Plugins>Mura's Meister - Perspective Tiling.

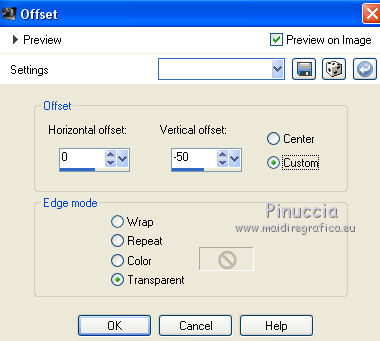
21. Effects>Image Effects>Offset.
Adjust>Sharpness>Sharpen More.
22. Layers>New Raster Layer.
Layers>Arrange>Send to Bottom.
Flood Fill  with your background color #00237f. with your background color #00237f.
23. Activate the layer Merged.
Selections>Select All.
Selections>Float.
Selections>Defloat.
24. Selections>Modify>Select Selection Borders.
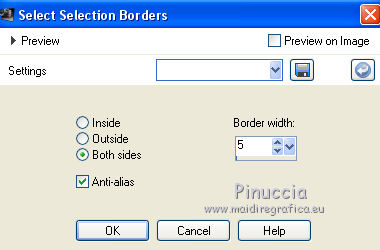
Layers>New Raster Layer.
Flood Fill  the layer with your foreground color #4191cc. the layer with your foreground color #4191cc.
25. Effects>Texture Effects>Weave
Weave color: #ffffff.
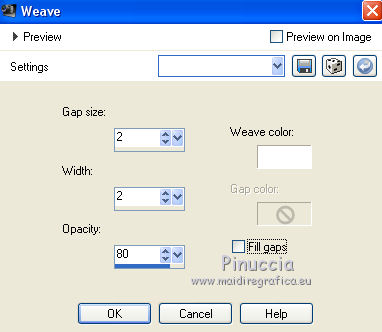
Selections>Select None.
Layers>Merge>Merge Down.
Calques>Fusionner>Fusionner le calque de dessous.
26. Layers>New Mask layer>From image
Open the menu under the source window and you'll see all the files open.
Select the mask Marge_Top Fade.
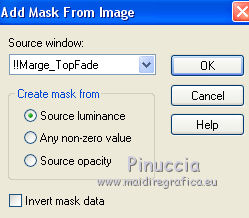
Layers>Merge>Merge Group.
27. Layers>Arrange>Bring to Top.
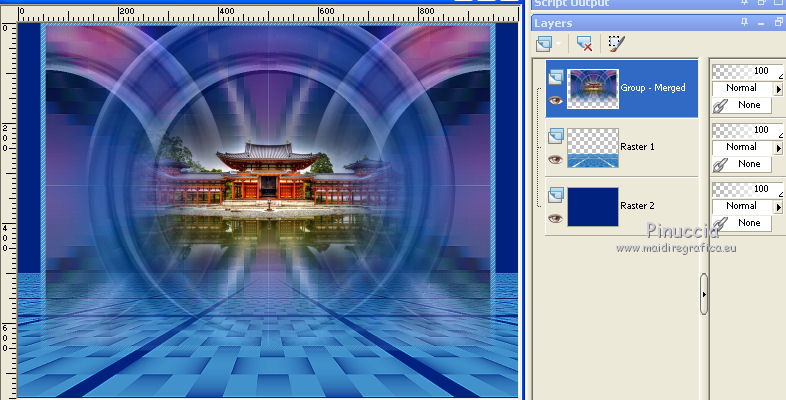
28. Activate again the tube 4715-luzcristina and go to Edit>Copy.
Go back to your work and go to Edit>Paste as new layer.
Move  the tube to the left side. the tube to the left side.
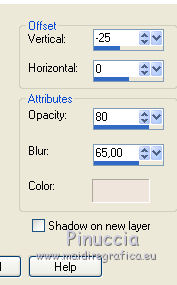
29. Effects>3D Effects>Drop Shadow, color #efe5dc.
30. Open the tube Asia Lizzy 14042010 and go to Edit>Copy.
Go back to your work and go to Edit>Paste as new layer.
Move  the tube to the right side. the tube to the right side.
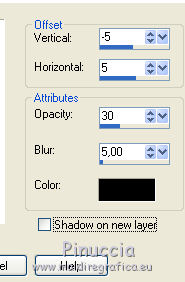
31. Effects>3D Effects>Drop Shadow, color black.
32. Layers>Merge>Merge All.
33. Image>Add borders, 5 pixels, symmetric, background color #00237f.
34. Image>Resize, to 95%, resize all layers checked.
35. Sign your work and save as jpg.
Version with tubes by Colybrix
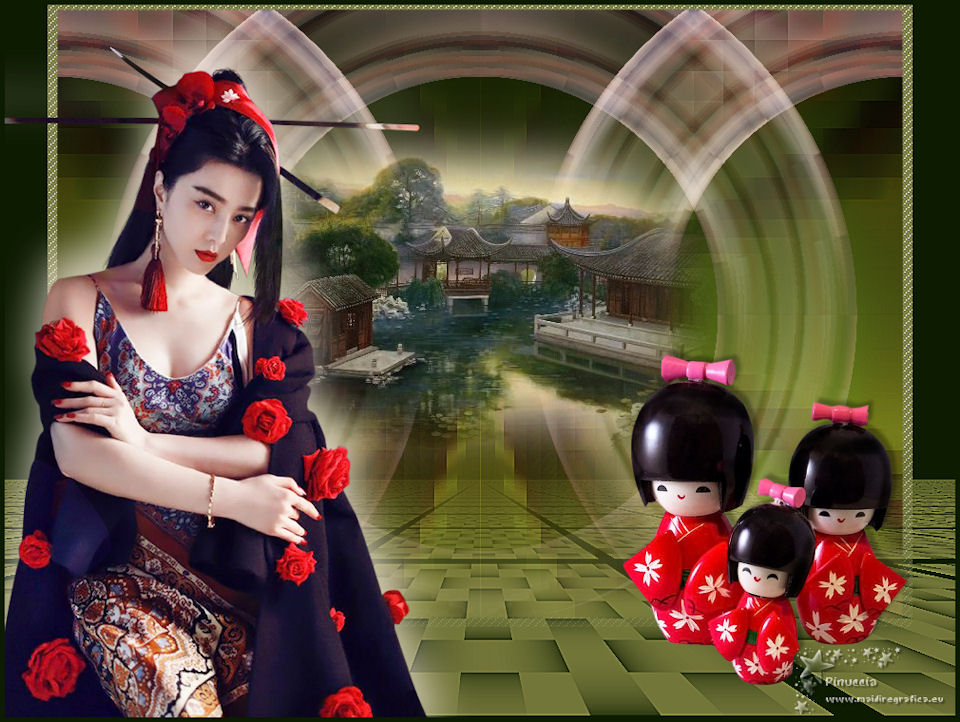
 Your versions here Your versions here

If you have problems or doubts, or you find a not worked link, or only for tell me that you enjoyed this tutorial, write to me.
24 May 2021
|

