|
TOP WINTERTIME
 ENGLISH VERSION ENGLISH VERSION
Here you find the original of this tutorial:

This tutorial was translated with PSPX7 but it can also be made using other versions of PSP.
Since version PSP X4, Image>Mirror was replaced with Image>Flip Horizontal,
and Image>Flip with Image>Flip Vertical, there are some variables.
In versions X5 and X6, the functions have been improved by making available the Objects menu.
In the latest version X7 command Image>Mirror and Image>Flip returned, but with new differences.
See my schedule here
 French translation here French translation here
Your versions ici
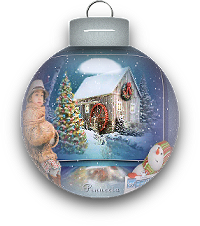
Una pallina-souvenir per il vostro Albero di Natale
Une boule-souvenir pour votre Arbre de Noël
For this tutorial, you will need:
Material
here
Tube Winter_Girl1 by Silvie
Misted Christmas1_28.11.2015 by Silvie
wiesken tube 946
WinterWord_Laufey
(you find here the links to the material authors' sites)
Plugins
consult, if necessary, my filter section here
AAA Frames - Foto Frame here
Mura's Meister - Perspective Tiling here
VDL Adrenaline - Snowflakes here
Animation Shop here
You can change Blend Modes according to your colors.
In the newest versions of PSP, you don't find the foreground/background gradient (Corel_06_029).
You can use the gradients of the older versions.
The Gradient of CorelX here
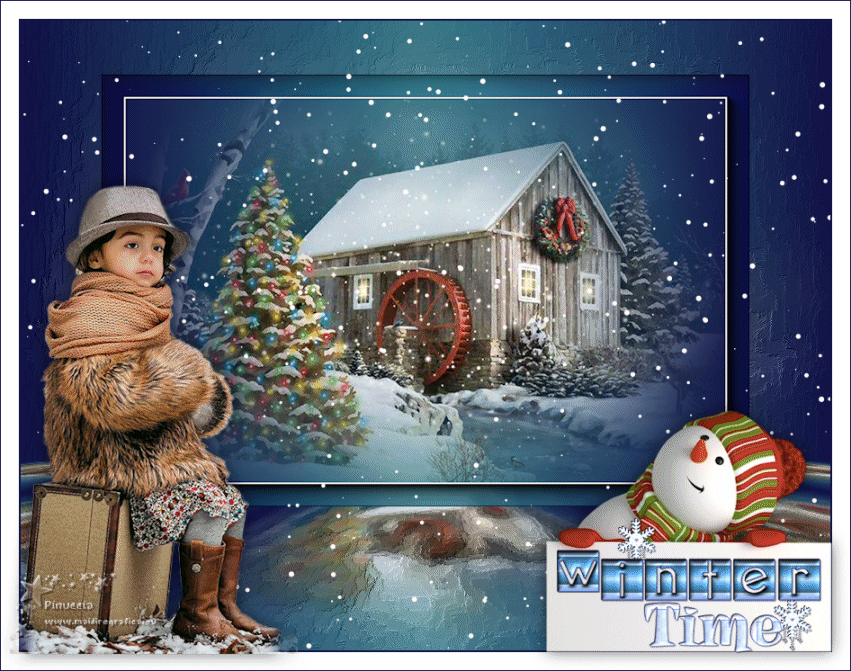
1. Open a new transparent image 900 x 600 pixels.
2. Set your foreground color to #131347,
and your background color to #337b8a.
Set your foreground color to a Foreground/Background Gradient, style Linear.
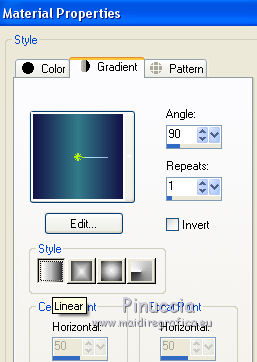
Flood Fill  the transparent image with your Gradient. the transparent image with your Gradient.
3. Open the tube Christmas1_28.11.2015 by Silvie and go to Edit>Copy.
Go back to your work and go to Edit>Paste as new layer.
4. Layers>Mege>Merge visible.
5. Layers>Duplicate, and close this layer for the moment.
Activate the layer below.
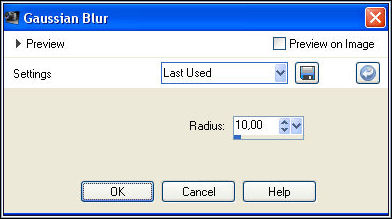
6. Adjust>Blur>Gaussian Blur - radius 10
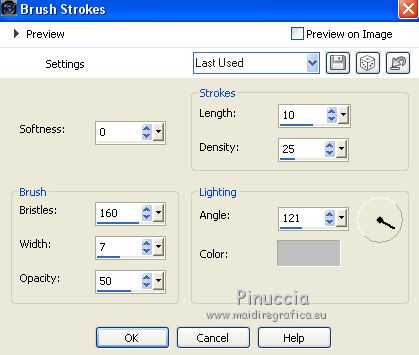
7. Effects>Art Media Effects>Brush Strokes, color #c0c0c0.
8. Open and activate the layer above of the copy.
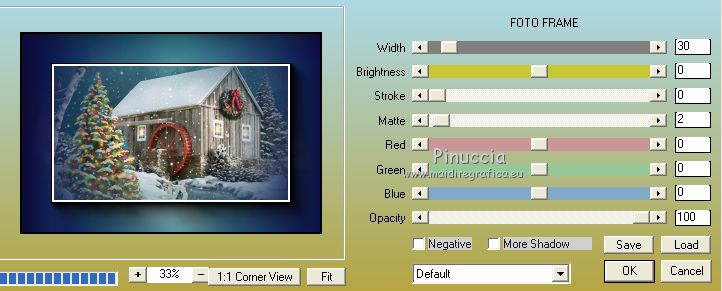
Effects>Plugins>AAA Frames - Foto Frame.
9. Image>Resize, to 80%, resize all layers not checked.
10. Activate again the bottom layer.
Layers>Duplicate.
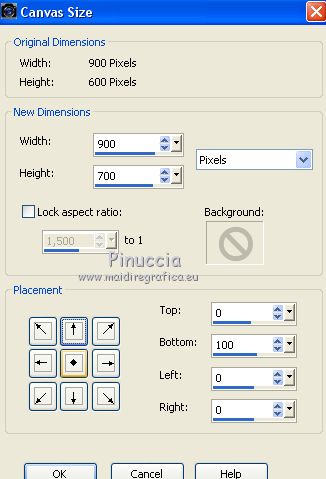
11. Image>Canvas Size - 900 x 700 pixels.
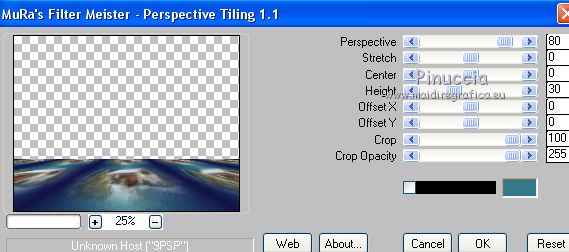
12. Effects>Plugins>Mura's Meister - Perspective Tiling.
13. Layers>Merge>Merge All.
14. Image>Add borders, 2 pixels, symmetric, foreground color #131347.
Image>Add borders, 20 pixels, symmetric, color #ffffff.
Image>Add borders, 1 pixel, symmetric, foreground color #131347.
15. Layers>Promote Background Layer.
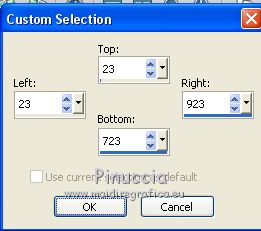
16. Selection Tool 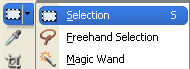
(no matter the type of selection, because with the custom selection your always get a rectangle)
clic on the Custom Selection 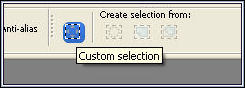
and set the following settings.
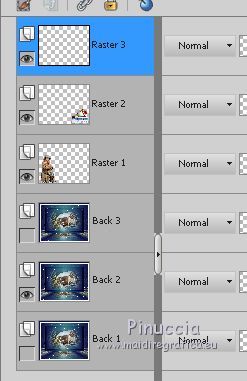
17. Layers>Duplicate (and you'll get 3 layers)
Rename the layers from the bottom back 1/ back 2 /back 3.
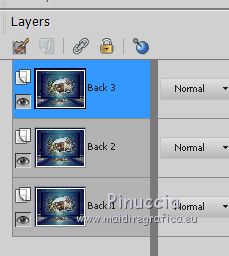
Keep selected.
18. Activate the layer Back 1.
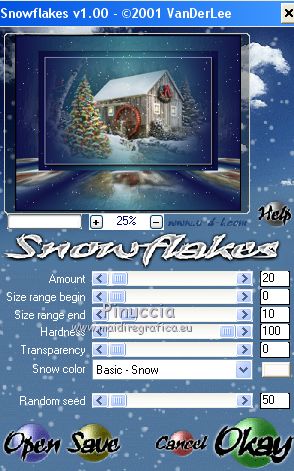
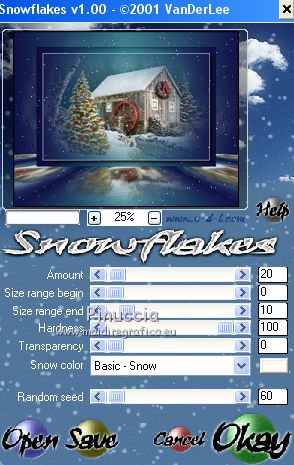
Effects>Plugins>VDL Adrenaline - Snowflakes
if you use the new version of the plugin, the result doesn't change:
Effects>Plugins>VanDerLee - Snowflakes.
19. Activate the layer back 2.
Effects>Plugins>VDL Adrenaline - Snowflakes, Random Seed 60 and ok
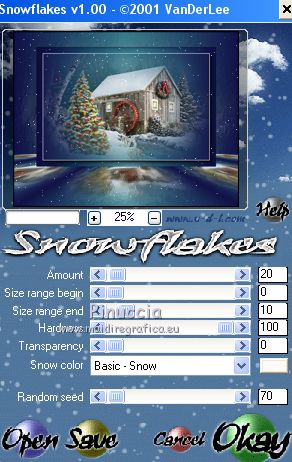
Close this layer and activate the layer Back 3.
20. Effects>Plugins>VDL Adrenaline - Snowflakes, Random Seed 70 and ok.
Selections>Select None.
21. Open Winter_Girl1 by Silvie and go to Edit>Copy.
Go back to your work and go to Edit>Paste as new layer.
Image>Resize, 2 times to 80%, resize all layers not checked.
Move  the tube at the bottom left. the tube at the bottom left.
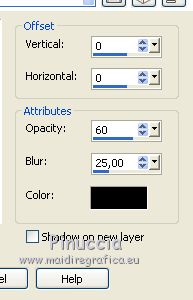
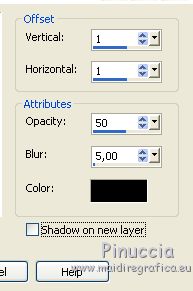
22. Effects>3D Effects>Drop Shadow, color #000000.
23. Activate your Erase Tool 
and soften a bit the snow to the right and the left sides
24. Open wiesken tube 946 and go to Edit>Copy.
Go back to your work and go to Edit>Paste as new layer.
Image>Resize, 2 times to 80%, resize all layers not checked.
Move the tube at the bottom right.
Effects>3D Effects>Drop Shadow, same settings.
25. Open WinterWord_Laufey and go to Edit>Copy.
Go back to your work and go to Edit>Paste as new layer.
Place the wordart on the white zone of the previous tube.

26. Effects>3D Effects>Drop Shadow, color #000000.
27. Layers>Merge>Merge Down.
Sign your work on a new layer.

Animation
1. Edit>Copy Special>Copy Merged.
Open Animation Shop and go to Edit>Paste>Paste as new animation.
2. Go back to PSP.
Close the layer Back 1 and open the layer Back 2.
Edit>Copy Special>Copy Merged.
Go back to Animation Shop and go to Edit>Paste>Paste after the current frame.
3. Again go back to PSP.
Close the layer Back 2 and open the layer Back 3.

Edit>Copy Special>Copy Merged.
Go back to Animation Shop and go to Edit>Paste>Paste after the current frame.
4. Selections>Select All.
Image>Resize, 90%.
5. Check the result clicking on View  and save as gif. and save as gif.
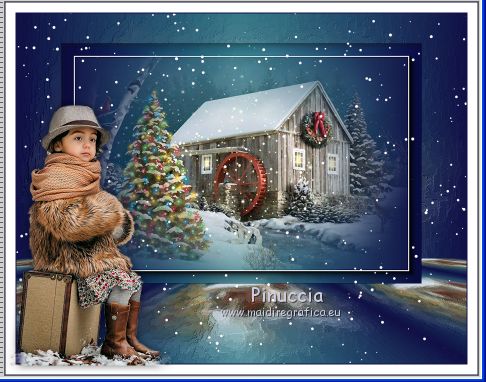
Version with tubes by Wieske and Luz Cristina

Your versions here

If you have problems or doubts, or you find a not worked link, or only for tell me that you enjoyed this tutorial, write to me.
18 November 2019
|