|
TOP ALYCIANE
 ENGLISH VERSION ENGLISH VERSION
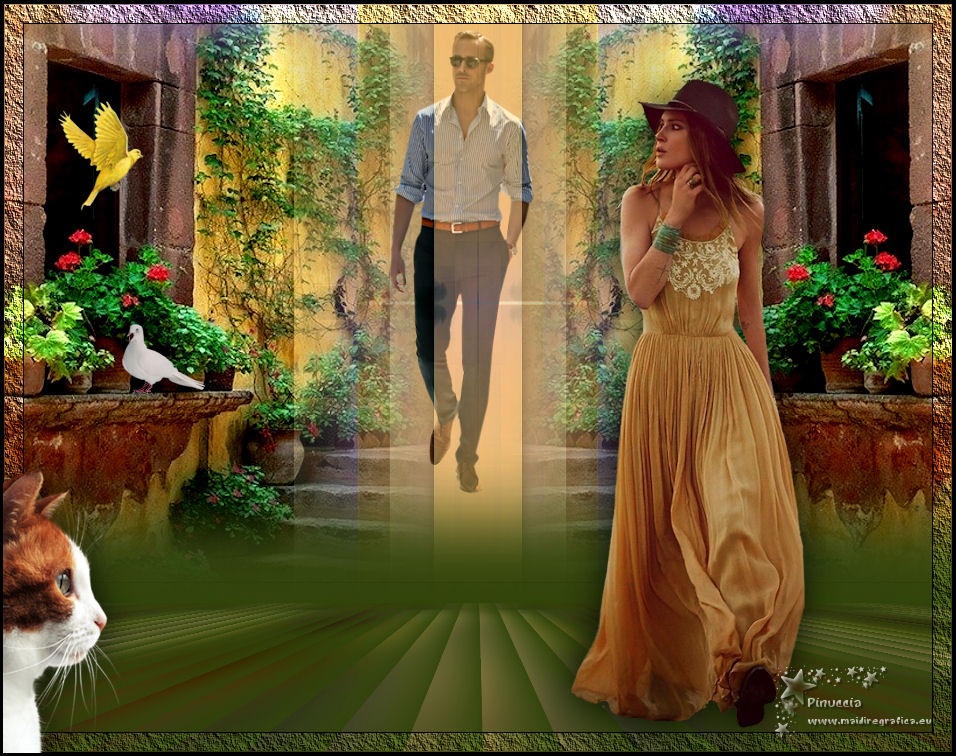
Here you find the original of this tutorial:

This tutorial was translated with PSPX7 but it can also be made using other versions of PSP.
Since version PSP X4, Image>Mirror was replaced with Image>Flip Horizontal,
and Image>Flip with Image>Flip Vertical, there are some variables.
In versions X5 and X6, the functions have been improved by making available the Objects menu.
In the latest version X7 command Image>Mirror and Image>Flip returned, but with new differences.
See my schedule here
French translation here
Your versions ici
For this tutorial, you will need:
Material here
Tube 3150_mulher_mara_pontes
Tube ryan-gosling-tubed-by-thafs
Min@.mist.esterno
Tube 1951-cat-LB TUBES
Tube 105-27-12-16
Narah_Mask_1035
mask.ket-fadesuave
(you find here the links to the material authors' sites)
Plugins
consult, if necessary, my filter section here
Filters Unlimited 2.0 here
VM Toolbox - Seamless Tile here
Simple - Top Left Mirror here
Sandflower Special "v" - Color Atmospherizer (to import in Unlimited) here
AAA Frames - Texture Frame here
Mura's Meister - Perspective Tiling here
Filters VM Toolbox and Simple can be used alone or imported into Filters Unlimited.
(How do, you see here)
If a plugin supplied appears with this icon  it must necessarily be imported into Unlimited it must necessarily be imported into Unlimited

You can change Blend Modes according to your colors.
In the newest versions of PSP, you don't find the foreground/background gradient (Corel_06_029).
You can use the gradients of the older versions.
The Gradient of CorelX here
Open the mask in PSP and minimize it with the rest of the material.
1. Open a new transparent image 950 x 600 pixels.
Set your foreground color to #ad844f,
and your background color to #dbaf77.
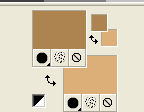
Flood Fill  the transparent image with your foreground color #ad844f. the transparent image with your foreground color #ad844f.
2. Layers>New Raster Layer.
Flood Fill  with your background color #dbaf77. with your background color #dbaf77.
3. Layers>New Mask layer>From image
Open the menu under the source window and you'll see all the files open.
Select the mask Narah_Mask_1035.
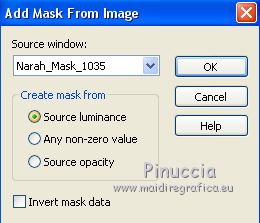
Layers>Merge>Merge Group.
4. Adjust>Sharpness>Sharpen More.
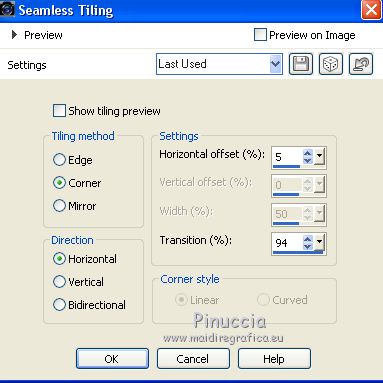
5. Effects>Image Effects>Seamless Tiling
6. Effects>Plugins>Filters unlimited 2.0 - Simple - Top Left Mirror.
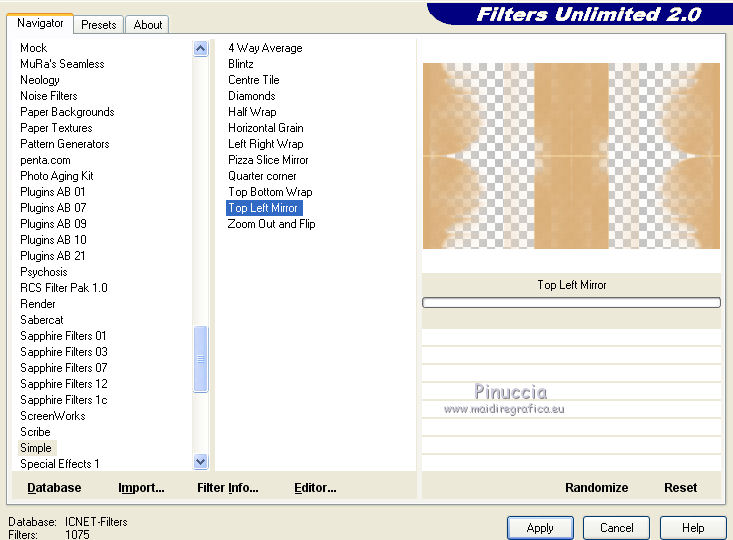
6. Layers>Duplicate, and close this layer for a moment.
7. Open the tube Min@.mist.esterno - Edit>Copy.
Go back to your work and go to Edit>Paste as new layer.
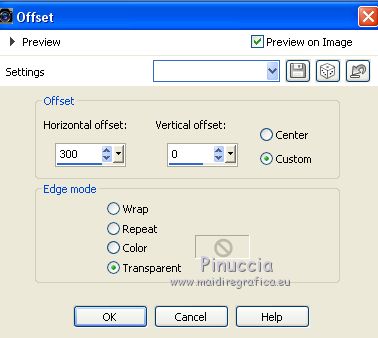
8. Effects>Image Effects>Offset.
9. Layers>Duplicate.
Image>Mirror.
10. Open and activate the closed layer.
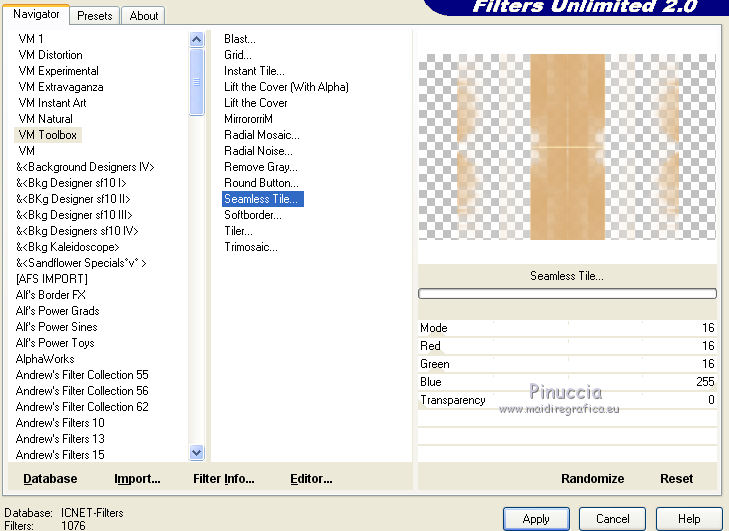
11. Effects>Plugins>Filters Unlimited 2.0 - VM Toolbox - Seamless Tile.
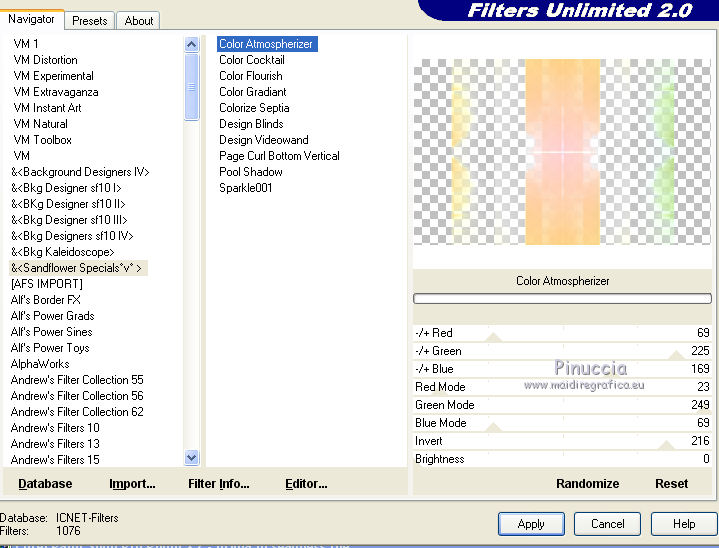
12. Effects>Plugins>Filters Unlimited 2.0 - Sandflower Special "v" - color Atmospherizer
13. Effects>Distortion Effects>Pinch

Edit>Repeat Pinch.
14. Effects>3D Effects>Drop Shadow, color black.
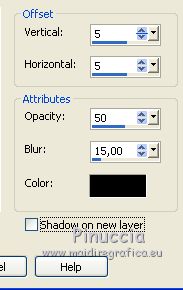
Repeat Drop Shadow, but vertical and horizontal -5.
15. Reduce the opacity of this layer to 50%.
16. Open ryan-gosling-tubed-by-thafs and go to Edit>Copy.
Go back to your work and go to Edit>Paste as new layer.
Image>Resize, 2 times to 80%, resize all layers not checked.
Place  rightly the tube. rightly the tube.
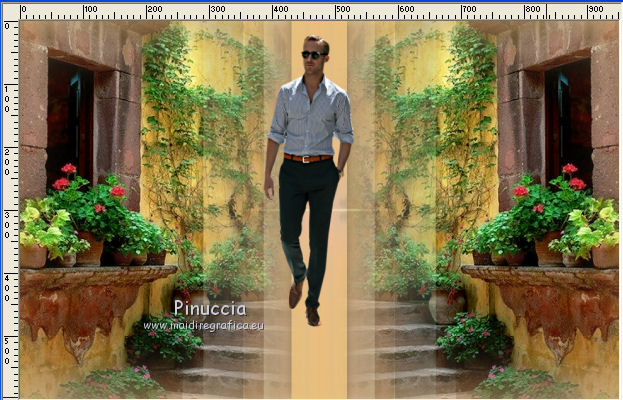
17. Layers>Arrange>Move Down.
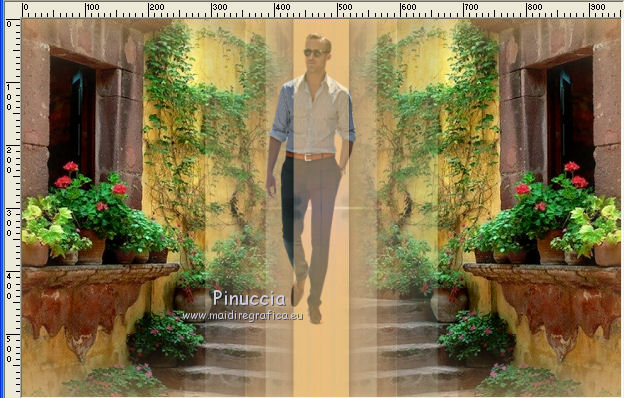
18. Layers>Merge>Merge visible.
19. Effects>Plugins>AAA Frames - Foto Frame.
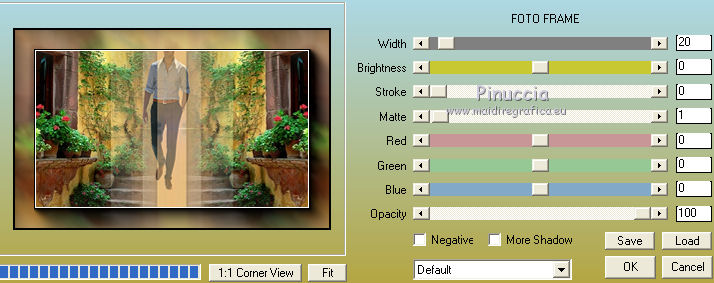
Repeat the plugin another time.
20. Edit>Copy.
21. Layers>New Mask layer>From image
Open the menu under the source window
and select the mask mask.ket-fadesuave.
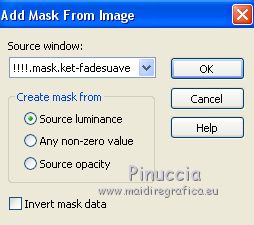
Layers>Duplicate, to apply the mask 2 times.
Layers>Merge>Merge Group.
22. Layers>New Raster Layer.
Selections>Select All.
Edit>Paste into Selection.
23. Selections>Select None.
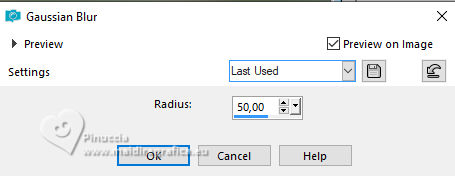
24. Adjust>Blur>Gaussian Blur - radius 50.
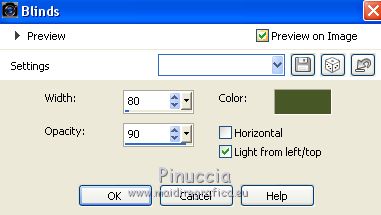
25. Effects>Texture Effects>Blinds, color #475726.
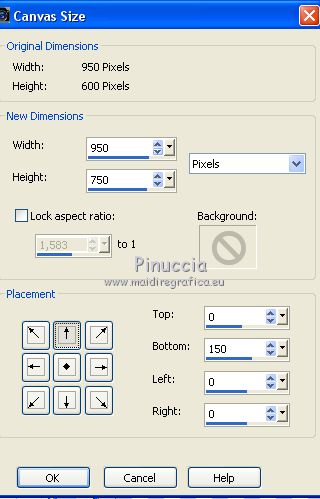
26. Image>Canvas Size - 950 x 750 pixels.
27. Effects>Plugins>Mura's Meister - Perspective Tiling.
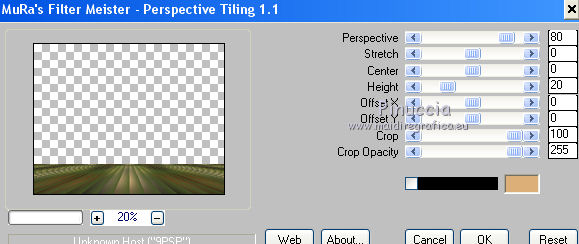
28. Activate the Magic Wand Tool 

and click on the transparent zone to select it.
Click 2 times CANC on the keyboard 
Selections>Select None.
29. Layers>New Raster Layer.
Layers>Arrange>Send to Bottom.
Set your foreground color to #475726.
Flood Fill  the layer with your foreground color #475726. the layer with your foreground color #475726.
30. Layers>Merge>Merge visible.
31. Effects>Plugins>AAA Frames - Texture Frame.
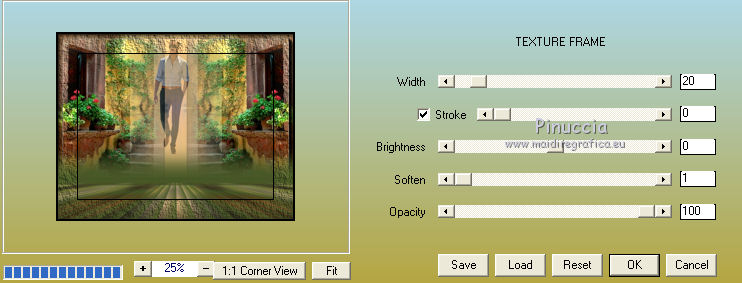
Repeat the plugin another time.
32. Adjust>Brightness and Contrast>Brightness and Contrast.
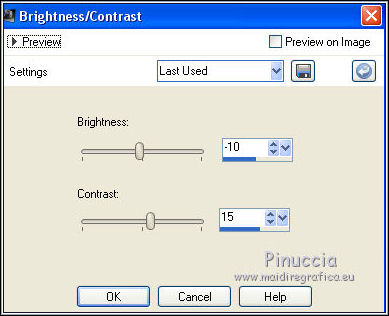
33. Open the tube 3150_mulher_mara_pontes - Edit>Copy.
Go back to your work and go to Edit>Paste as new layer.
Image>Resize, 1 time to 80% and 1 time to 90%, resize all layers not checked.
34. Effects>3D Effects>Drop Shadow, color black.
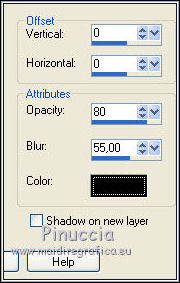
35. Open the tube 105-27-12-16 - Edit>Copy.
Go back to your work and go to Edit>Paste as new layer.
Move  the tube on the window. the tube on the window.
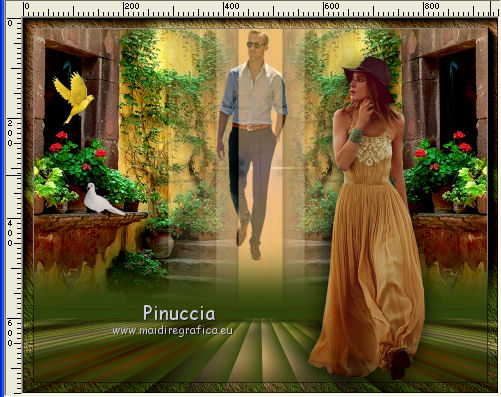
36. Open the tube 1951-cat-LB TUBES - Edit>Copy.
Go back to your work and go to Edit>Paste as new layer.
Image>Resize, 3 times to 80%, resize all layers not checked.
Image>Mirror.
Move  the tube at the bottom left. the tube at the bottom left.
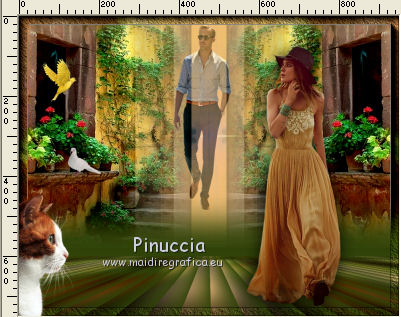
37. Effects>3D Effects>Drop Shadow, same settings.

38. Layers>Merge>Merge All.
39. Image>Add borders, 3 pixels, symmetric, color black.
40. Sign your work and save as jpg.
Vos versions here

If you have problems or doubts, or you find a not worked link, or only for tell me that you enjoyed this tutorial, write to me.
14 Octobre 2018
|
 ENGLISH VERSION

 ENGLISH VERSION
