|
TOP BLACK MAN
 ENGLISH VERSION ENGLISH VERSION

Here you find the original of this tutorial:

This tutorial was translated with PSPX7 but it can also be made using other versions of PSP.
Since version PSP X4, Image>Mirror was replaced with Image>Flip Horizontal,
and Image>Flip with Image>Flip Vertical, there are some variables.
In versions X5 and X6, the functions have been improved by making available the Objects menu.
In the latest version X7 command Image>Mirror and Image>Flip returned, but with new differences.
See my schedule here
French translation here
Your versions ici
For this tutorial, you will need:
Material here
Tube Mina@.5082 Black Man 02.18
Misted vvs.paisagem0306 by Nena Silva
Tube L33ACN404022017 by Lecture33
(you find here the links to the material authors' sites)
Plugins
consult, if necessary, my filter section here
Filters Unlimited 2.0 here
Mura's Meister - Perspective Tiling here
Simple - Top Left Mirror here
FM Tile Tools - Blend Emboss here
Andromeda - Perspective here
Filters Simple can be used alone or imported into Filters Unlimited.
(How do, you see here)
If a plugin supplied appears with this icon  it must necessarily be imported into Unlimited it must necessarily be imported into Unlimited

You can change Blend Modes according to your colors.
In the newest versions of PSP, you don't find the foreground/background gradient (Corel_06_029).
You can use the gradients of the older versions.
The Gradient of CorelX here
Copy the preset Emboss 3 in the Presets Folder.
Open the mask in PSP and minimize it with the rest of the material.
1. Open a new transparent image 950 x 700 pixels.
2. Set your foreground color to #231211,
and your background color to #82685f.
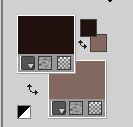
Set your foreground color to a Foreground/Background Gradient, style Sunburst.
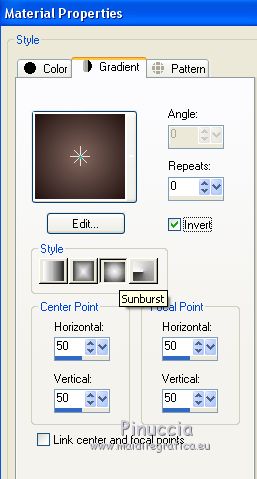
Flood Fill  the transparent image with your Gradient. the transparent image with your Gradient.
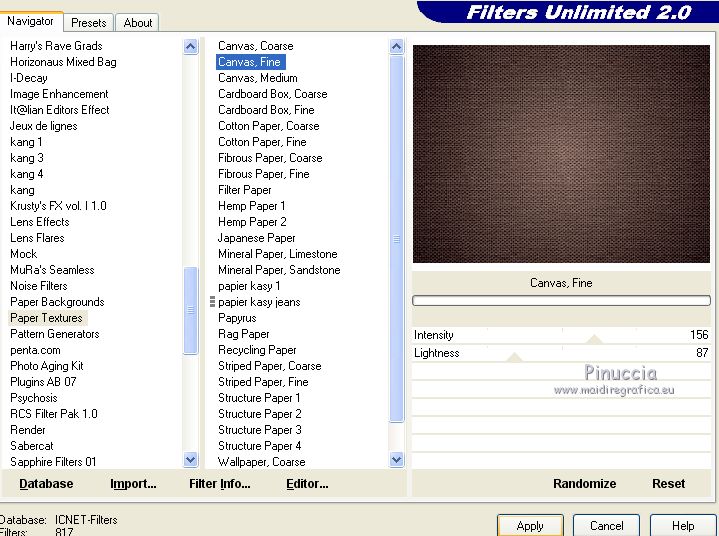
3. Effects>Plugins>Filters Unlimited 2.0 - Paper Texture - Canvas Fine, default settings.
4. Layers>Duplicate.
5. Effects>Plugins>Mura's Meister - Perspective Tiling.
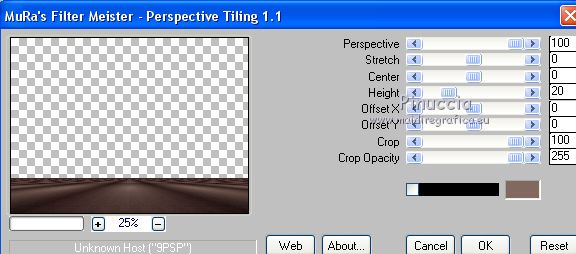
6. Activate the Magic Wand Tool 

and click on the transparent part to select it.
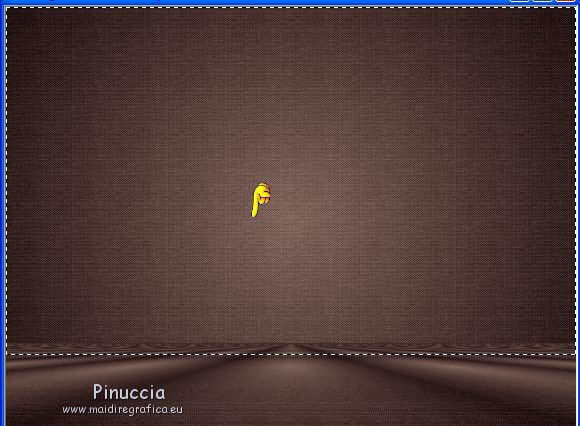
Press 3 times CANC on the keyboard 
Selections>Select None.
7. Open the tube Misted vvs.paisagem0306 by Nena Silva - Edit>Copy.
Go back to your work and go to Edit>Paste as new layer.
8. Adjust>Blur>Gaussian Blur - radius 30.

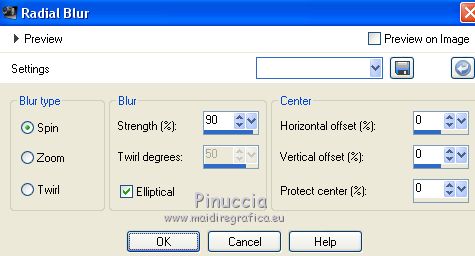
9. Adjust>Blur>Radial Blur.
10.
Layers>New Mask layer>From image
Open the menu under the source window and you'll see all the files open.
Select the mask 2020.
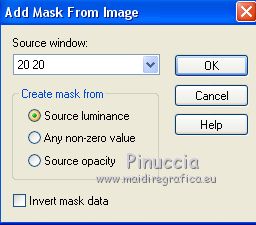
Layers>Duplicate, to apply the mask 2 times.
Layers>Merge>Merge group.
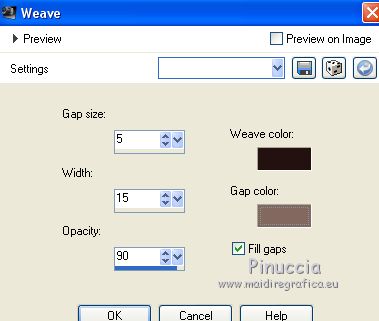
11. Effects>Texture Effects>Weave
weave color: foreground color #231211
gap color: background color #82685f
12. Effects>Image Effects>Offset.
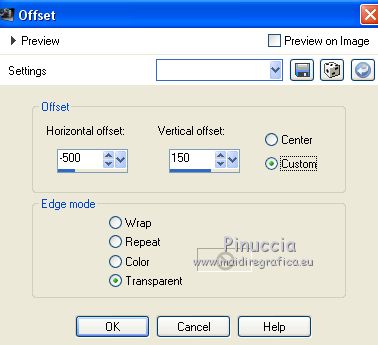
13. Effects>Plugins>Simple - Top Left Mirror
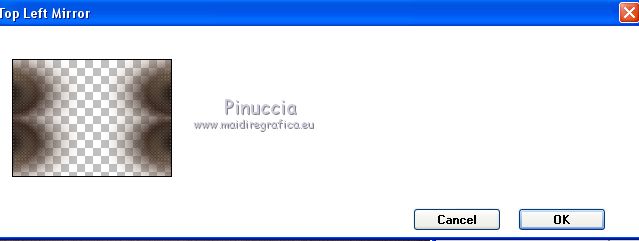
14. Effects>Image Effects>Seamless Tiling, default settings.

15. Effects>User Defined Filter - select the preset Emboss 3 and ok.

16. Layers>Duplicate.
Layers>Merge>Merge Down.
17. Effects>Plugins>FM Tile Tools - Blend Emboss, default settings.

Layers>Arrange>Move Down (under the layer Perspective Tiling.

18. Edit>Paste as new layer (the tube by Nena Silva is still in memory).
19. Effects>Image Effects>Offset.
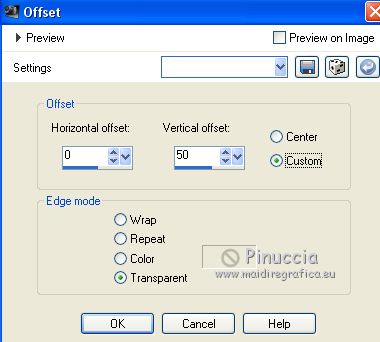
Layers>Arrange>Move Down.
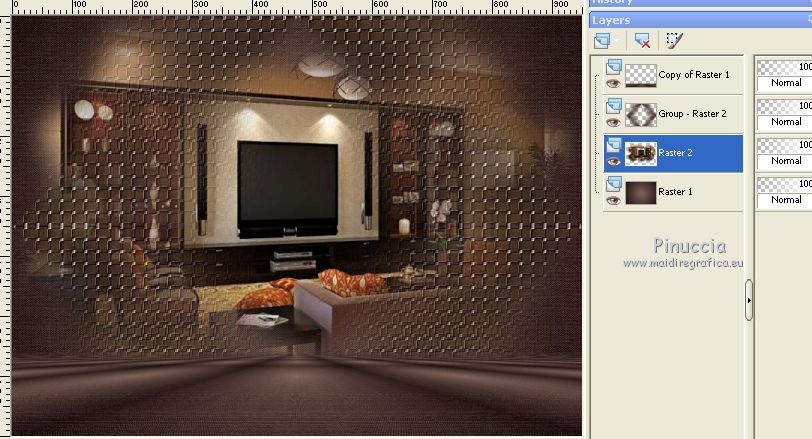
20. Layers>Merge>Merge visible.
21. Layers>Duplicate.
22. Effects>Plugins>Filters Unlimited 2.0 - Button & Frames - 3D Glass Frame2.
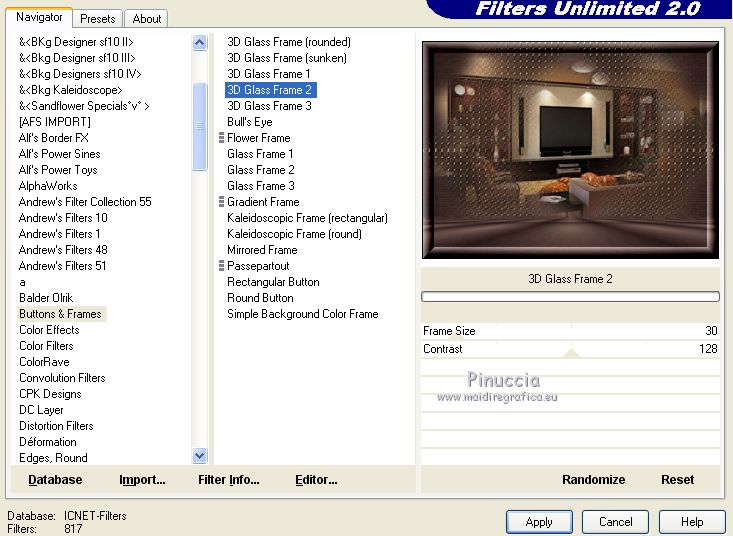
23. Image>Resize, to 50%, resize all layers not checked.
24. Layers>Duplicate.
Close this layer for a moment, and activate the layer below of the original.
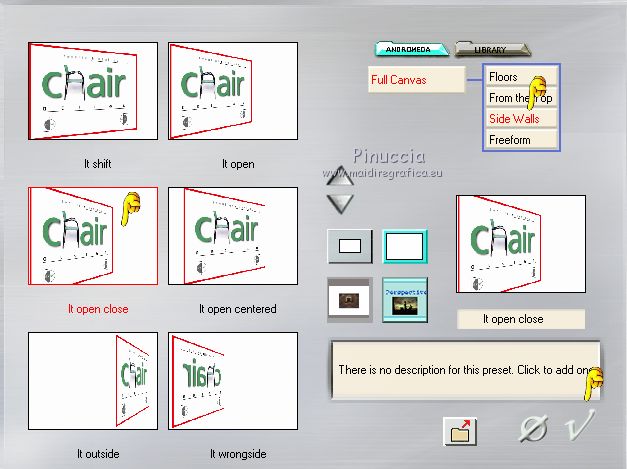
Effects>Plugins>Andromeda - Perspective
Click on the button Presets
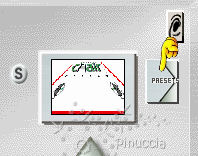
set the settings and click on the sign at the bottom right to apply
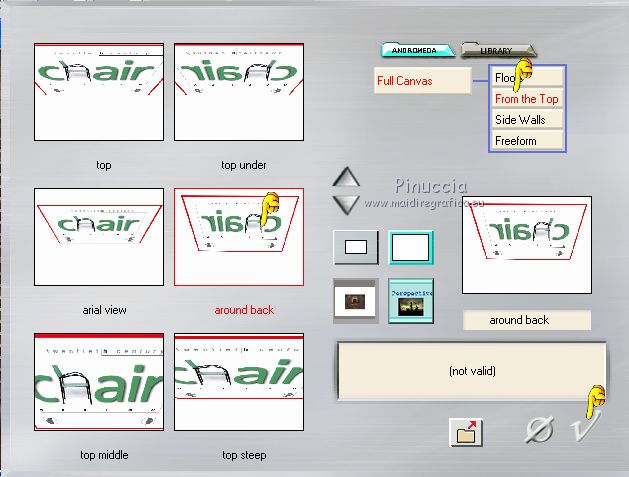
again click on the sign at the bottom right to close.
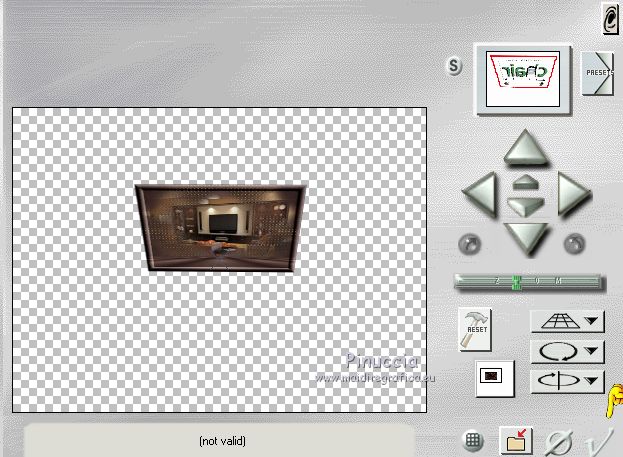
25. Effects>Image Effects>Offset.
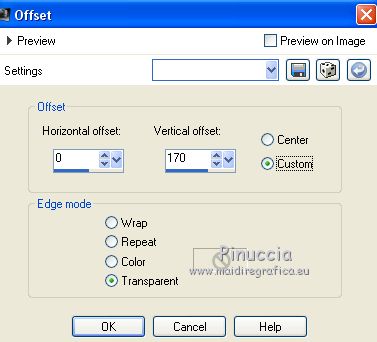
26. Open and activate the closed layer.
Effects>Plugins>Andromeda - Perspective.
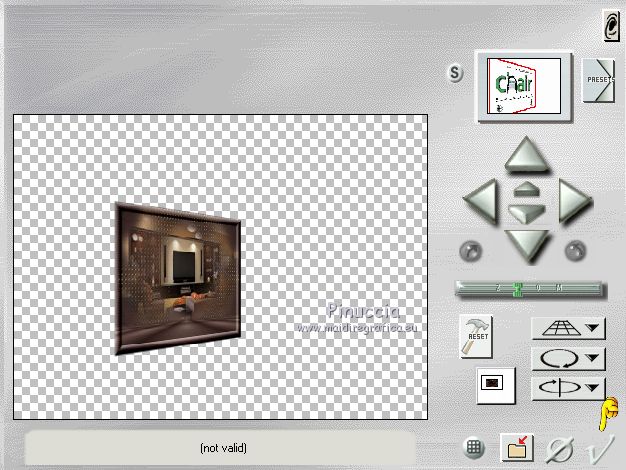
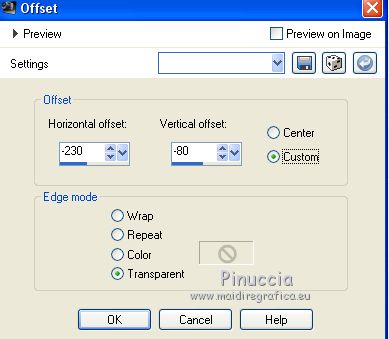
27. Effects>Image Effects>Offset.
for those with problems with the filter Andromeda,
I joined in the material these two layers
28. Open the tube L33ACN404022017 by Lecture33 - Edit>Copy.
Go back to your work and go to Edit>Paste as new layer.
Image>Resize, to 50%, resize all layers not checked.
Erase the watermark.
Move  the tube at the bottom left. the tube at the bottom left.
29. Effects>3D Effects>Drop shadow, color black.

30. Adjust>Sharpness>Sharpen.
31. Layers>Merge>Merge All.
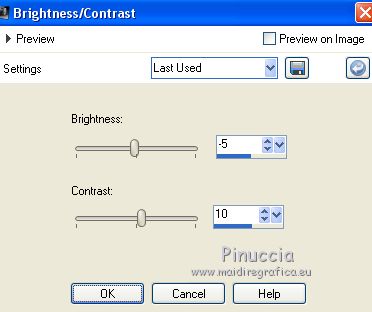
32. Adjust>Brightness and Contrast>Brightness and Contrast.
33. Image>Add borders, 2 pixels, symmetric, foreground color #231211.
Image>Add borders, 30 pixels, symmetric, color #ffffff.
34. Activate the Magic Wand Tool 
Don't forget to set again the Feather to 0
and click on the white bord to select it.
Flood Fill  the selection with your Gradient. the selection with your Gradient.
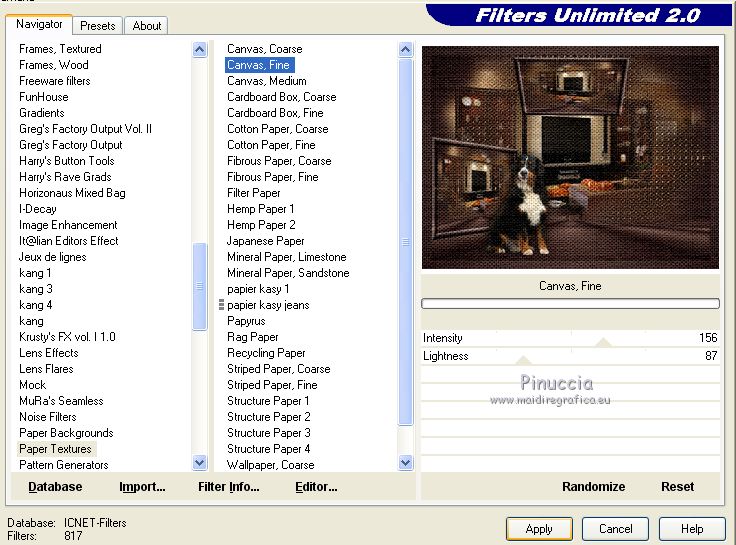
35. Effects>Plugins>Filters Unlimited 2.0 - Paper Texture - Canvas Fine, default settings.
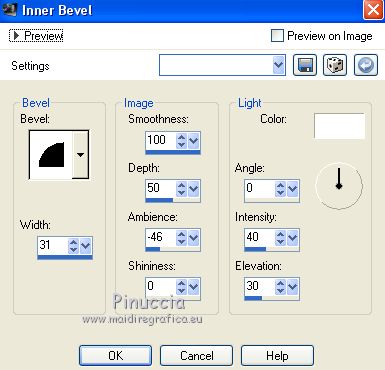
36. Effects>3D Effects>Inner Bevel.
37. Selections>Invert.
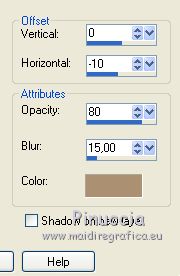
Effects>3D Effects>Drop shadow, color #ab9171.
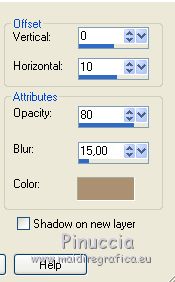
Repeat Drop Shadow horizontal -10.
Selections>Select None.
38. Open the tube Mina@.5082 Black Man 02.18 - Edit>Copy.
Go back to your work and go to Edit>Paste as new layer.
Image>Resize, 2 times to 80%, resize all layers not checked.
Erase the watermark.
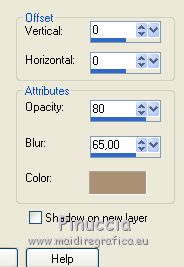
39. Effects>3D Effects>Drop shadow, color #ab9171.
Move  the tube at the bottom right. the tube at the bottom right.
40. Layers>Merge>Merge All.
Image>Add borders, 5 pixels, symmetric, foreground color #231211.
41. Sign your work and save as jpg.
Your versions here

If you have problems or doubts, or you find a not worked link, or only for tell me that you enjoyed this tutorial, write to me.
27 January 2018
|
 ENGLISH VERSION

 ENGLISH VERSION
