|
TOP CAFÉ SAMBAL
ENGLISH VERSION

Here you find the original of this tutorial:

This tutorial was translated with PSPX3 but it can also be made using other versions of PSP.
Since version PSP X4, Image>Mirror was replaced with Image>Flip Horizontal,
and Image>Flip with Image>Flip Vertical, there are some variables.
In versions X5 and X6, the functions have been improved by making available the Objects menu.
In the latest version X7 command Image>Mirror and Image>Flip returned, but with new differences.
See my schedule here
French translation here
Your versions here
For this tutorial, you will need:
Material here
Tube JCi-0U2t7CljUq0xstlfJrPJr9AY by Lily
Mist MR_Miami Cafe Sambal by Maryse
Tube H@nne_Fabrice3DeVilleneuve-CachePot
Mask_DC6B0NUS4
Patron Black-White_nines
Texto_Cafe-Sambal-nines
Plugins
consult, if necessary, my filter section here
Mura's Meister - Perspective Tiling here
Xero XL - Porcelain here

You can change Blend Modes according to your colors.
In the newest versions of PSP, you don't find the foreground/background gradient (Corel_06_029).
You can use the gradients of the older versions.
The Gradient of CorelX here
Copy the preset Emboss 3 in the Presets Folder.
Open the mask and the pattern Black_White_Nines in PSP and minimize them with the rest of the material.
1. Open a new transparent image 1000 x 450 pixels.
2. Set your foreground color to Pattern,
look for - under Open images - and select the pattern Black_White_Nines.
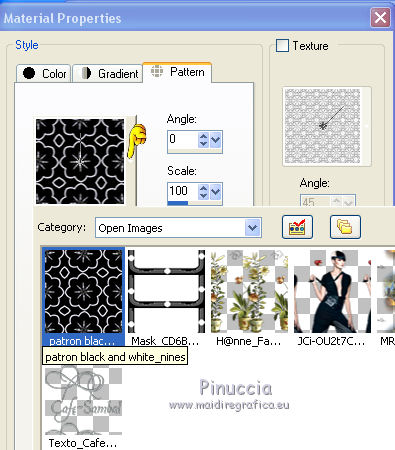
Flood Fill  the transparent image with your Pattern. the transparent image with your Pattern.
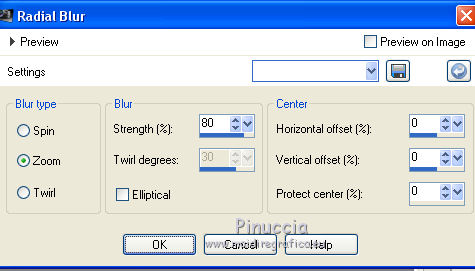
3. Adjust>Blur>Radial Blur.
4. Effects>User Defined Filter - select the preset Emboss 3 and ok - 2 times.

5. Open MR_Miami Cafe Sambal - Edit>Copy.
Go back to your work and go to Edit>Paste as new layer.
Image>Resize, 2 times to 80%, resize all layers not checked.>br>
6. Layers>New Raster Layer.
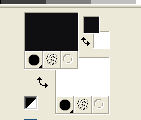
Set your foreground color to #101012
and your background color to #ffffff.
Set your Foreground color to a Foreground/Background Gradient, style Rectangular.
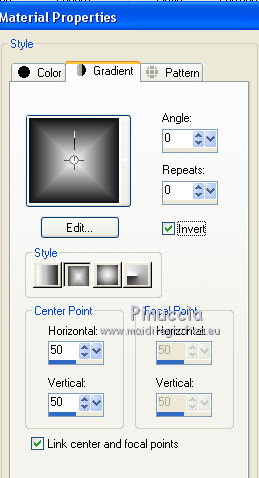
Flood Fill  the layer with your Gradient. the layer with your Gradient.
7. Layers>New Mask layer>From image
Open the menu under the source window and you'll see all the files open.
Select the mask Mask_DC6BONUS4:

Layers>Merge>Merge group.
8. Effects>3D Effects>Drop Shadow, color black.
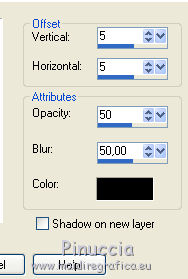
Repeat Drop Shadow, but vertical and horizontal -5.
9. Layers>Merge>Merge visible.
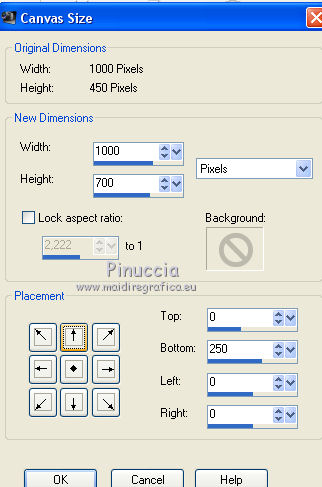
10. Image>Canvas Size - 1000 x 700 pixels.
11. Layers>New Raster Layer.
Set again your foreground color to Pattern
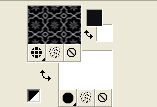
Flood Fill  the layer with the pattern Black-White_nines. the layer with the pattern Black-White_nines.
12. Adjust>Blur>Radial Blur, same settings.

14. Effects>User Defined Filter - Emboss 3 - 2 times.
15. Effects>Plugins>Mura's Meister - Perspective Tiling
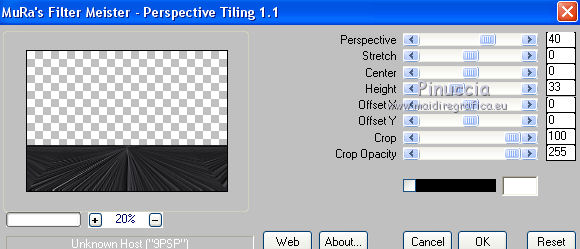
if you get a little transparent space,
activate the Pick Tool 
mode Scale 
pull the central bottom node to the top
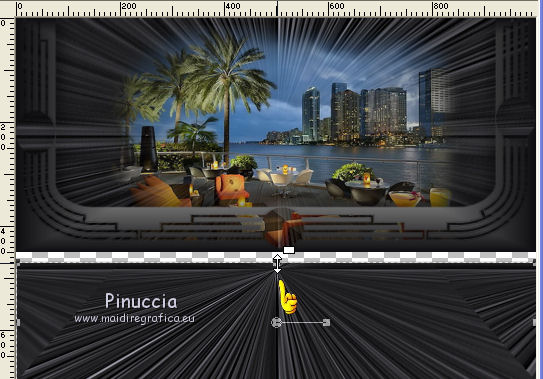
until the bord of the top image
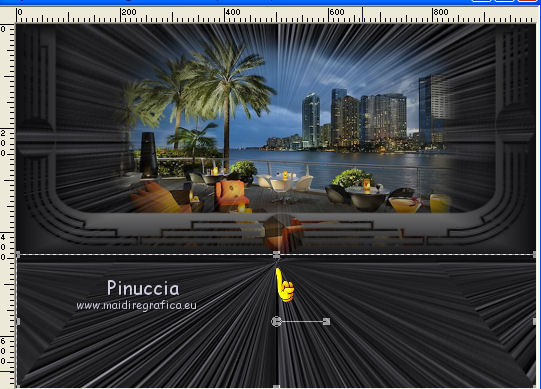
16. Activate the top layer.
Open the tube by Lily - Edit>Copy.
Go back to your work and go to Edit>Paste as new layer.
Image>Resize, 1 time to 80% and 1 time to 90%, resize all layers not checked.
Move  the tube to the left side. the tube to the left side.
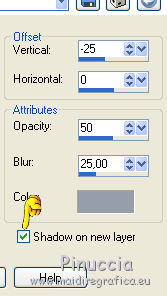
17. Effects>3D Effects>Drop Shadow, color #969ea9
shadow on the new layer checked
18. Keep the shadow layer selected.
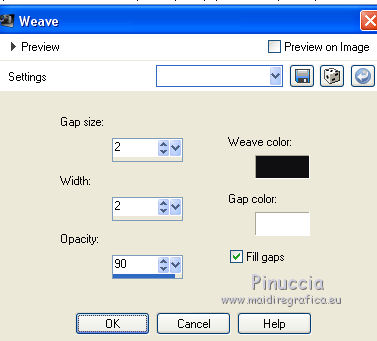
Effects>Texture Effects>Weave
weave color #101012,
gap color #ffffff
19. Activate the top layer.
Open the tube H@nne_Fabrice3DeVilleneuve-CachePot - Edit>Copy.
Go back to your work and go to Edit>Paste as new layer.
Image>Resize, 2 time to 80%, resize all layers not checked.
20. Effects>Plugins>Xero XL - Porcelain, par défaut.
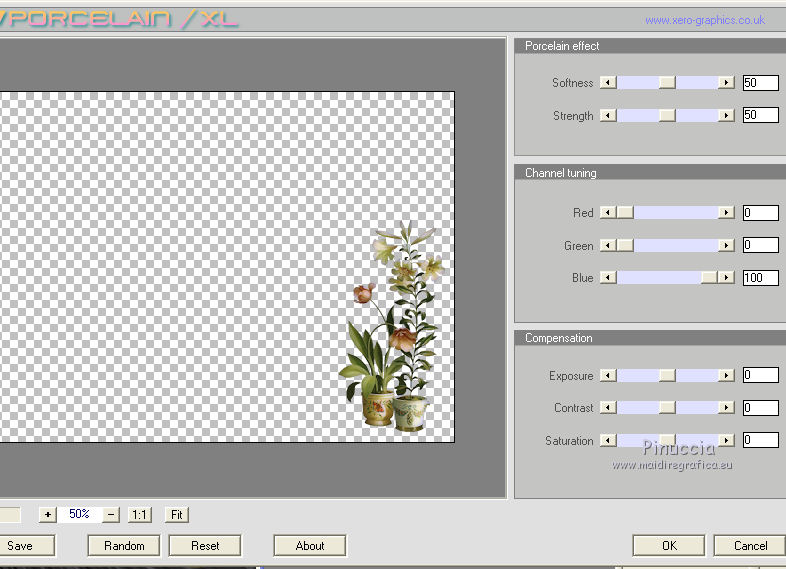
21. Effects>3D Effects>Drop Shadow, color black.
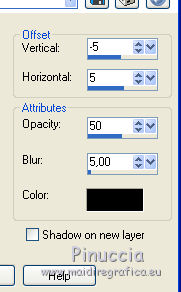
22. Open the texte Texto_Cafe-Sambal-nines - Edit>Copy.
Go back to your work and go to Edit>Paste as new layer.
I have resized to 90%.
Move  the text at the bottom. the text at the bottom.
23. Layers>Merge>Merge All.
24. Image>Add borders, 2 pixels, symmetric, color black #000000.
Image>Add borders, 30 pixels, symmetric, color #8e9ea6.
25. Activate the Magic Wand Tool 
and click on the 30 pixels border to select it.
26. Effects>Textures Effects>Weave, same settings.

27. Selections>Invert.
Keep selected.
28. Layers>New Raster Layer.
Effects>3D Effects>Cutout, color white.
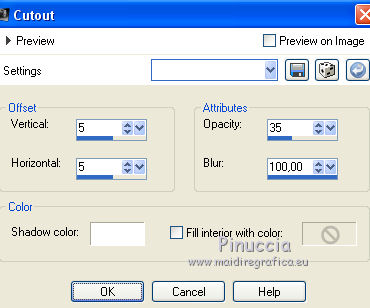
29. Layers>New Raster Layer.
Effects>3D Effects>Cutout, color white.
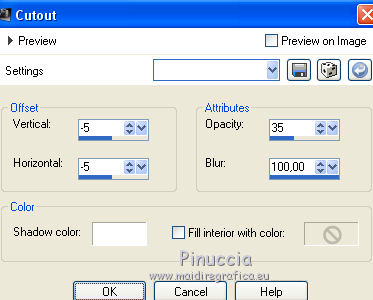
Selections>Select None.
30. Layers>Merge>Merge All.
31. Image>Add borders, 2 pixels, symmetric, color black.
32. Sign your work and save as jpg.
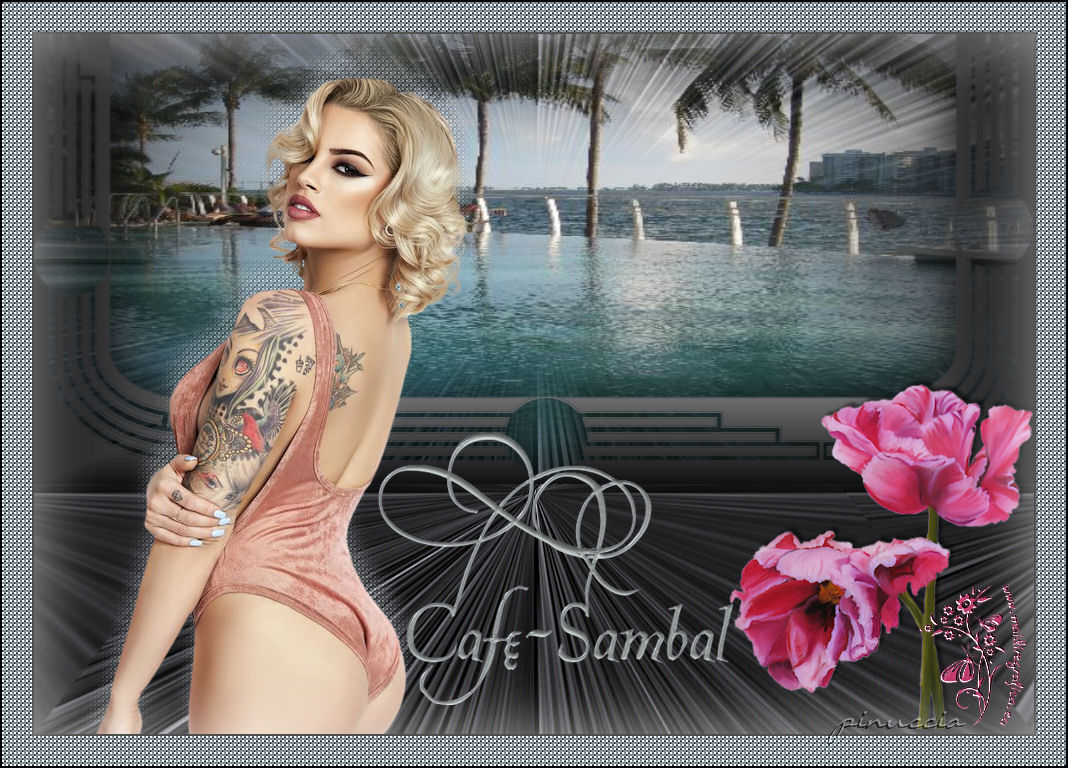
The tubes of this version are by Isa and Beatrice (The Café Sambal image found on the web)

If you have problems or doubts, or you find a not worked link, or only for tell me that you enjoyed this tutorial, write to me.
20 May 2017
|

