|
TOP CAMPESTRE

Thanks Nines for your invitation to translate your tutorials

This tutorial was translated with PSPX3 but it can also be made using other versions of PSP.
Since version PSP X4, Image>Mirror was replaced with Image>Flip Horizontal,
and Image>Flip with Image>Flip Vertical, there are some variables.
In versions X5 and X6, the functions have been improved by making available the Objects menu.
In the latest version X7 command Image>Mirror and Image>Flip returned, but with new differences.
See my schedule here
 French translation here French translation here
 Your versions here Your versions here
For this tutorial, you will need:
Material here
tubtatie_30-3d-cartoon-girl-character
Mist_C-Josy514
Mist_Gabry.paesaggio 79
Grisi_Tube_Decoration_368
TubeLF-Girl_27072015
Tube 5-2013 baby by Roby2765
Nene con perrito_EMILSE
Tube cesped_niña_nines
Tube cesped2_niña_nines
Tube recodo_rio_nines
Tube cesped_nene_perro_nines
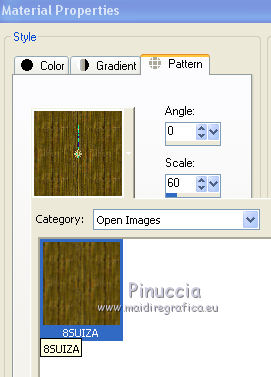
patron 8SUIZA
Plugins
consult, if necessary, my filter section here
Andromeda - Perspective here

You can change Blend Modes according to your colors.
Copy the Selection in the Selections Folder.
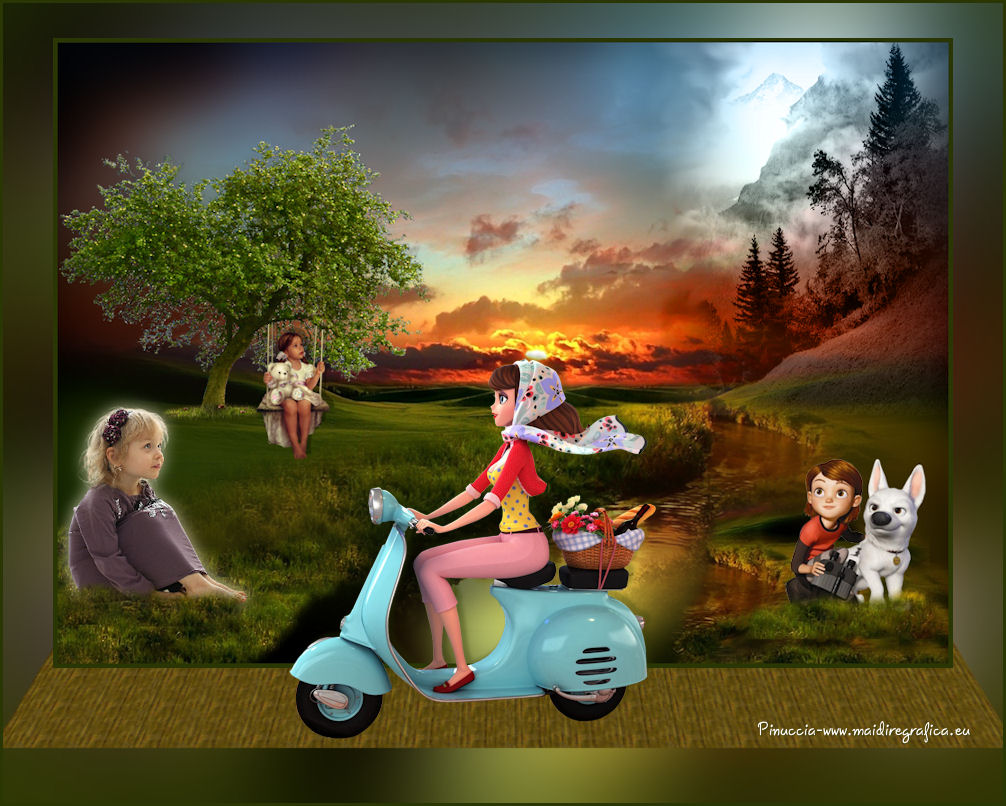
1. Open a new transparent image 1000 x 700 pixels.
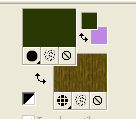
2. Set your foreground color to #2a3704.
Open the pattern 8Suiza and minimize it.
Set your background color to Pattern, and select the pattern 8Suiza.
3. Selections>Select All.
Open the tube C-Josy514.
Activate the background layer - Edit>Copy.
Go back to your work and go to Edit>Paste into Selection.
Selections>Select None.
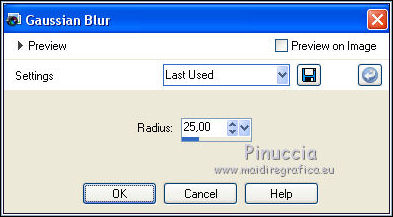
4. Adjust>Blur>Gaussian Blur - radius 25.
5. Activate again the tube C-Josy514.
Activate the layer of the landscape - Edit>Copy.
Go back to your work and go to Edit>Paste as new layer.
Image>Resize, 3 times to 80%, resize all layers not checked.
6. Open the tube Gabry.paesaggio 79 - Edit>Copy.
Go back to your work and go to Edit>Paste as new layer.
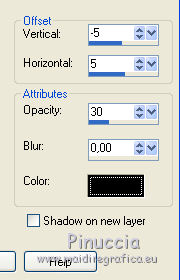
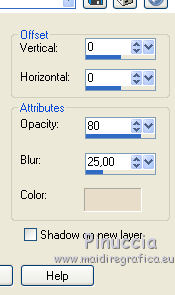
7. Effects>Image Effects>Offset.

Keep the Blend Mode of this layer to Luminance (Legacy).
8. Open the tube Grisi_Tube_Decoration_368 - Edit>Copy.
Go back to your work and go to Edit>Paste as new layer.
Image>Resize, 2 times to 80%, resize all layers not checked.
Move  the tube to the left side. the tube to the left side.
9. Open the tube LF-Girl_27072015 - Edit>Copy.
Go back to your work and go to Edit>Paste as new layer.
Image>Resize, 1 time to 50% and 2 times to 80%, resize all layers not checked.
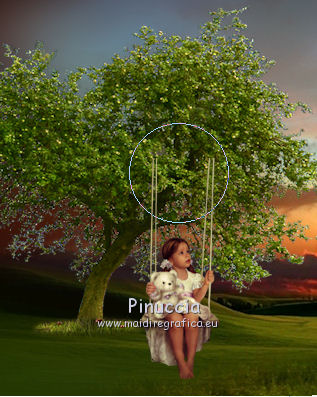
10. Placer the tube on the tree.
Activate the Gomme Tool 
and erase a little peace of the cords.
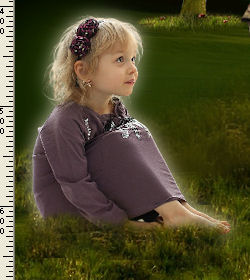
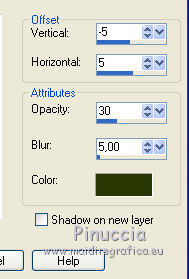
11. Effects>3D Effects>Drop Shadow, color black.
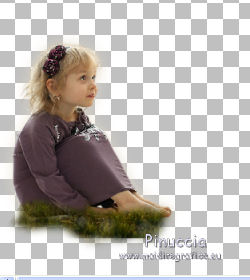
12. Open cesped_niña_nines - Edit>Copy.
Go back to your work and go to Edit>Paste as new layer.
13. Effects>Image Effects>Offset.

14. Open the tube 5-2013 baby by Roby2765 - Edit>Copy.
Go back to your work and go to Edit>Paste as new layer.
Image>Resize, to 80%, resize all layers not checked.
Image>Mirror.
Move the tube at the bottom left.
15. Effects>3D Effects>Drop Shadow, color #e7ddc9.
16. Open cesped2_niña_nines - Edit>Copy.
Go back to your work and go to Edit>Paste as new layer.
Place the tube under the little girl.
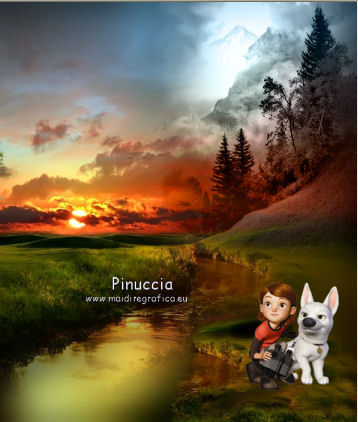
17. Open recodo_rio_nines - Edit>Copy.
Go back to your work and go to Edit>Paste as new layer.
18. Effects>Image Effects>Offset.

19. Open the tube Nene con perrito - Edit>Copy.
Go back to your work and go to Edit>Paste as new layer.
Image>Mirror.
Image>Resize, to 80%, resize all layers not checked.
Move the tube at the bottom right under the previous tube.
20. Effects>3D Effects>Drop Shadow, color black.
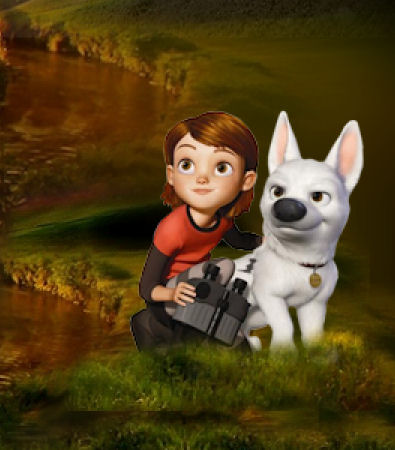
21. Ouvrir cesped_nene_perro_nines - Edit>Copy.
Go back to your work and go to Edit>Paste as new layer.
Move the tube under the little boy.
22. Layers>New Raster Layer.
Flood Fill  the layer with your foreground color #2a3704. the layer with your foreground color #2a3704.
Selections>Select All.
Selections>Modify>Contract - 5 pixels.
Press CANC on the keyboard 
Selections>Select None.
23. Layers>Merge>Merge visible.
24. Edit>Copy.
Image>Resize, to 90%, resize all layers not checked.
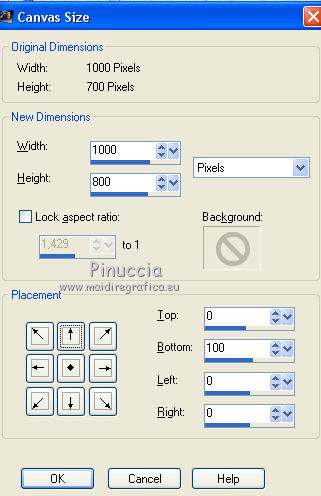
25. Image>Canvas Size - 1000 x 800 pixels.
26. Layers>New Raster Layer.
Layers>Arrange>Send to Bottom.
Selections>Select All.
Edit>Paste into Selection.
Selections>Select None.
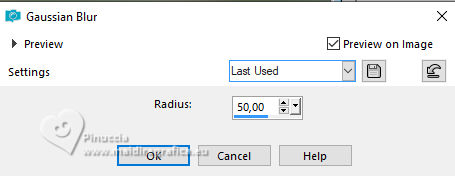
27. Adjust>Blur>Gaussian Blur - radius 50.
28. Selection Tool 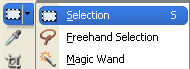
(no matter the type of selection, because with the custom selection your always get a rectangle)
clic on the Custom Selection 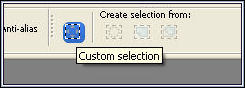
and set the following settings.

Layers>New Raster Layer.
Flood Fill the layer with your background pattern 8Suiza.
Selections>Select None.
29. Effects>Plugins>Andromeda - Perspective.
Clic on Presets
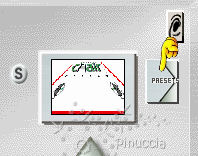
set the plugin and clic on the sign at the bottom right to apply.
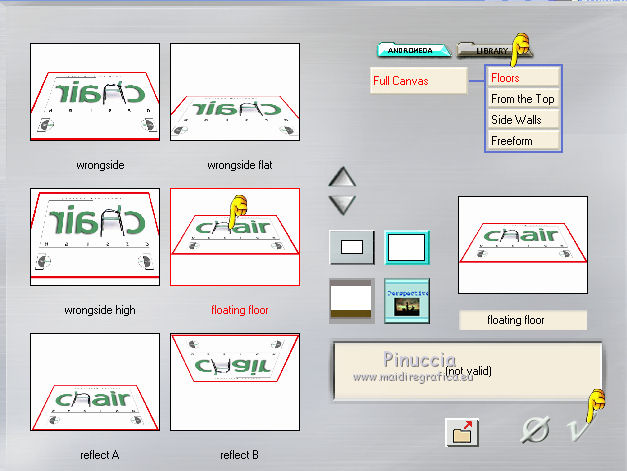
Again clic on the sign at the bottom right to close.

30. Effects>Image Effects>Offset.

31. Activate the top layer.
Open tubtatie_30-3d-cartoon-girl-character - Edit>Copy.
Go back to your work and go to Edit>Paste as new layer.
Image>Resize, to 50%, resize all layers not checked.
32. Effects>3D Effects>Drop Shadow, color black.
33. Layers>Merge>Merge All.
Image>Add borders, 3 pixels, symmetric, foreground color #2a3704.
34. Sign your work and save as jpg.

If you have problems or doubt, or you find a not worked link, or only for tell me that you enjoyed this tutorial, write to me.
10 March 2017
|