|
TOP CARNAVAL
 ENGLISH VERSION ENGLISH VERSION
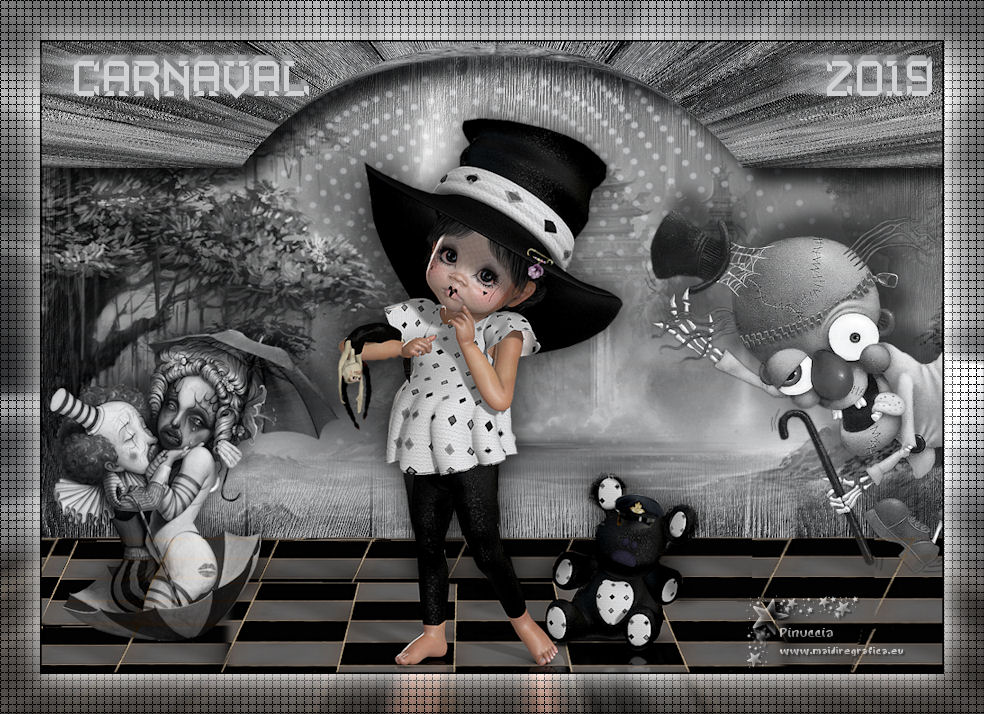
Here you find the original of this tutorial:

This tutorial was translated with PSPX7 but it can also be made using other versions of PSP.
Since version PSP X4, Image>Mirror was replaced with Image>Flip Horizontal,
and Image>Flip with Image>Flip Vertical, there are some variables.
In versions X5 and X6, the functions have been improved by making available the Objects menu.
In the latest version X7 command Image>Mirror and Image>Flip returned, but with new differences.
See my schedule here
French translation here
Your versions ici
For this tutorial, you will need:
Material here
Renee_TUBECarnaval_2_2018
Misted-CAL-1978-061517
Tube Here's_Frankie_KeithGraves_LCT
Tube Lize-HH-AO-68
Narah_Mask_1351
Tube suelocarnaval_nines
Texto_Carnaval_nines
patron madera2
(here the links of the authors' sites)
Plugins
consult, if necessary, my filter section here
Filters Unlimited 2.0 here
Mura's Meister - Perspective Tiling here
Screenworks - Grid Layout here
Filters Screenworks can be used alone or imported into Filters Unlimited.
(How do, you see here)
If a plugin supplied appears with this icon  it must necessarily be imported into Unlimited it must necessarily be imported into Unlimited

You can change Blend Modes according to your colors.
In the newest versions of PSP, you don't find the foreground/background gradient (Corel_06_029).
You can use the gradients of the older versions.
The Gradient of CorelX here
Open the mask and the pattern in PSP and minimize them with the rest of the material.
1. Open a new transparent image 1000 x 700 pixels.
2. Set your foreground color to #020202,
and your background color to #d1d2d4.
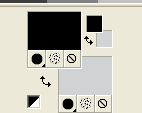
Set your foreground color to a Foreground/Background Gradient, style Linear.
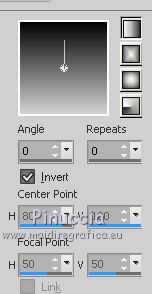
Flood Fill  the transparent image with your Gradient. the transparent image with your Gradient.
3. Set your foreground color to Pattern and select the pattern Madera 2.

Layers>New Raster Layer.
Flood Fill  the layer with the pattern Madera 2. the layer with the pattern Madera 2.
Change the Blend Mode of this layer to Luminance (legacy).
4. Layers>Duplicate and close this layer for a moment.
5. Open the tube CAL-1978-061517, erase the watermark and go to Edit>Copy.
Go back to your work and go to Edit>Paste as new layer.
Change the Blend Mode of this layer to Luminance (legacy).
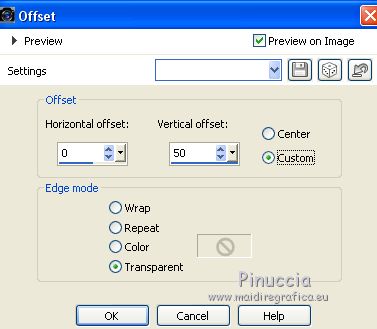
6. Effects>Image Effects>Offset.
7. Layers>New Raster Layer.
Flood Fill  with your background color #d1d2d4. with your background color #d1d2d4.
8. Layers>New Mask layer>From image
Open the menu under the source window and you'll see all the files open.
Select the mask Narah_Mask_1351.
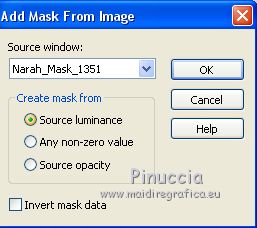
Layers>Merge>Merge Group.
9. Change the Blend Mode of this layer to Hard Light.
10. Open and activate the closed layer.
Layers>Arrange>Bring to Top.
11. Effects>Plugins>Mura's Meister - Perspective Tiling.
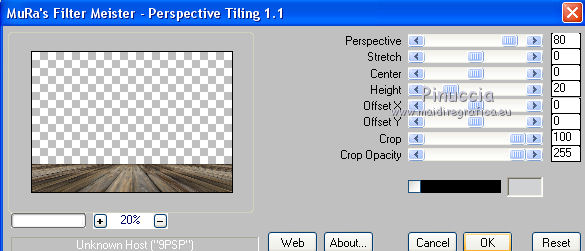
12. Image>Flip.
13. Effects>Geometric Effects>Spherize
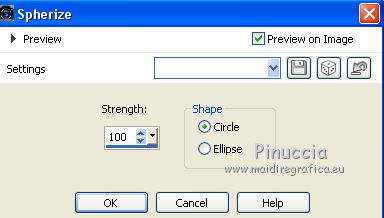
Edit>Repeat Spherize.
14. Effects>3D Effects>Drop Shadow, color black.
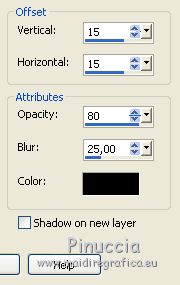
15. Open the tube suelocarnaval_nines and go to Edit>Copy.
Go back to your work and go to Edit>Paste as new layer.
16. Effects>Image Effects>Offset.

17. Open the tube Here's_Frankie_KeithGraves_LCT, erase the watermark and go to Edit>Copy.
Go back to your work and go to Edit>Paste as new layer.
Image>Resize, to 80%, resize all layers not checked.
Image>Mirror.
Move  the tube to the right side. the tube to the right side.
Change the Blend Mode of this layer to Luminance (legacy).
18. Effects>3D Effects>Drop Shadow, color black.
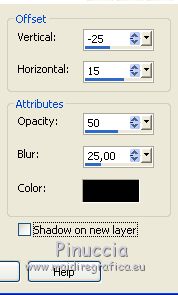
19. Open the tube Renee_TUBECarnaval_2_2018 and go to Edit>Copy.
Go back to your work and go to Edit>Paste as new layer.
Image>Resize, to 80%, resize all layers not checked.
Place  rightly the tube. rightly the tube.
20. Effects>3D Effects>Drop Shadow, color black.

21. Open the tube Lize-HH-AO-68, erase the watermark and go to Edit>Copy.
Go back to your work and go to Edit>Paste as new layer.
Image>Resize, to 50%, resize all layers not checked.
Change the Blend Mode of this layer to Luminance (héritée).
22. Effects>3D Effects>Drop Shadow, color black.
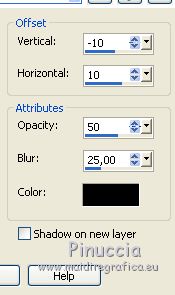
23. Layers>Merge>Merge All.
24. Image>Add borders, 2 pixels, symmetric, foreground color #020202.
25. Image>Resize, to 90%, resize all layers checked.
26. Edit>Copy.
27. Image>Add borders, 40 pixels, symmetric, background color #d3d4d6.
28. Activate the Magic Wand Tool 
and click on the border to select it.
29. Edit>Paste into selection.
30. Adjust>Blur>Radial Blur.
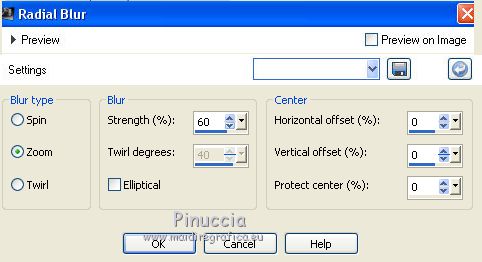
31. Effects>Plugins>Filters Unlimited 2.0 - Screenworks - Grid Layout.
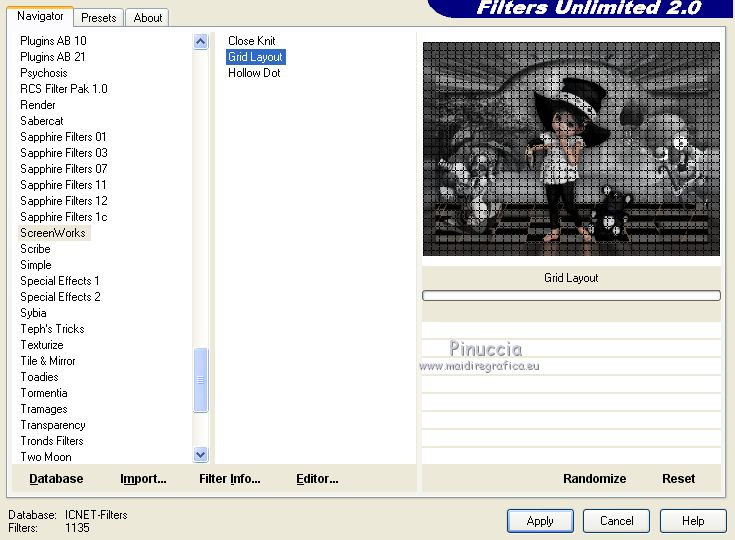
32. Selections>Invert.
Effets>Effets 3D>Ombre portée, color #dcdcdc.
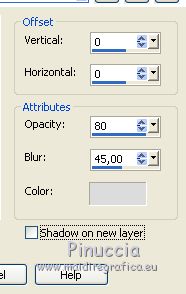
33. Selections>Invert.
Effects>3D Effects>Inner Bevel.
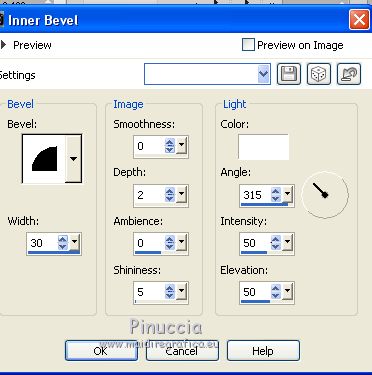
Selections>Select None.
45. Open Texto_Carnaval_nines and go to Edit>Copy.
Go back to your work and go to Edit>Paste as new layer.
Move  the text up. the text up.
46. Sign your work.
Layers>Merge>Merge All and save as jpg.
Your versions here

If you have problems or doubts, or you find a not worked link, or only for tell me that you enjoyed this tutorial, write to me.
25 February 2019
|
 ENGLISH VERSION

 ENGLISH VERSION
