|
TOP CHEVELAND
 ENGLISH VERSION ENGLISH VERSION
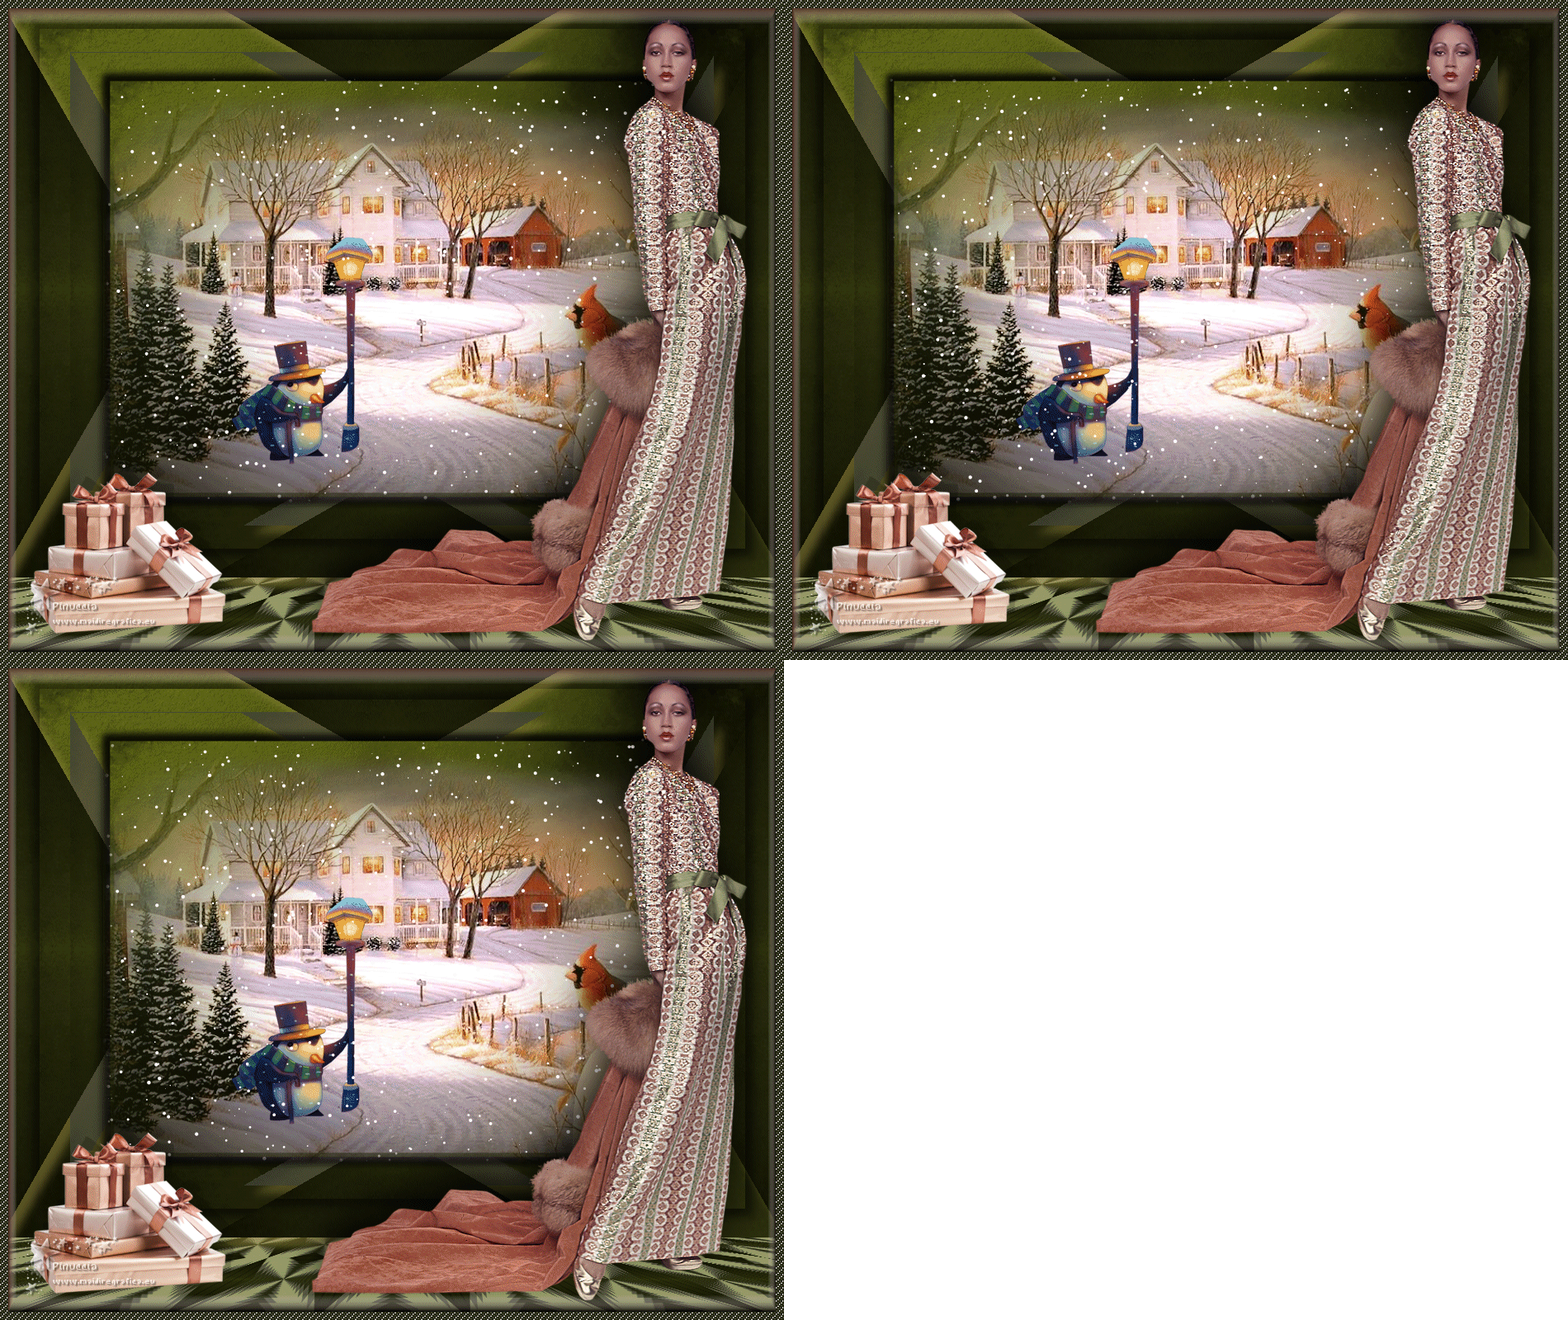
Here you find the original of this tutorial:

This tutorial was translated with PSPX7 but it can also be made using other versions of PSP.
Since version PSP X4, Image>Mirror was replaced with Image>Flip Horizontal,
and Image>Flip with Image>Flip Vertical, there are some variables.
In versions X5 and X6, the functions have been improved by making available the Objects menu.
In the latest version X7 command Image>Mirror and Image>Flip returned, but with new differences.
See my schedule here
French translation here
Your versions ici
For this tutorial, you will need:
Material here
Tube Min@.4254.PatCleveland1972.10.16
K@rine_dream_Misted_Landscape_1337_Novembre_2010
Tube calguisillustrationhiver29122015 by Guismo
Tube KRYSNOEL115
Imagen Textura-relieft-by-helenem
(here the links of the authors' sites)
Plugins
consult, if necessary, my filter section here
Filters Unlimited 2.0 here
VanDerLee - Snowflakes here
Mura's Meister - Perspective Tiling here
Simple - Pizza Slice Mirror here
Filters Simple can be used alone or imported into Filters Unlimited.
(How do, you see here)
If a plugin supplied appears with this icon  it must necessarily be imported into Unlimited it must necessarily be imported into Unlimited
Animation Shop here

You can change Blend Modes according to your colors.
Copy the selection in the Selection Folder.
1. Open a new transparent image 950 X 700 pixels.
2. Selections>Select All.
Open the image texture-relief-by-helenem - Edit>Copy.
Go back to your work and go to Edit>Paste into Selection.
Selections>Select None.
3. Layers>Duplicate.
Image>Resize, to 90%, resize all layers not checked.
4. Effects>3D Effects>Drop Shadow, color black.
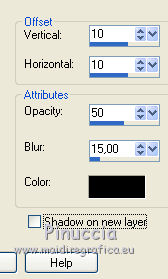
Repeat Drop Shadow, but vertical and horizontal -10.
5. Layers>Duplicate.
Image>Resize, to 80%, resize all layers not checked.
6. Layers>Duplicate.
Close this layer and activate the layer below.
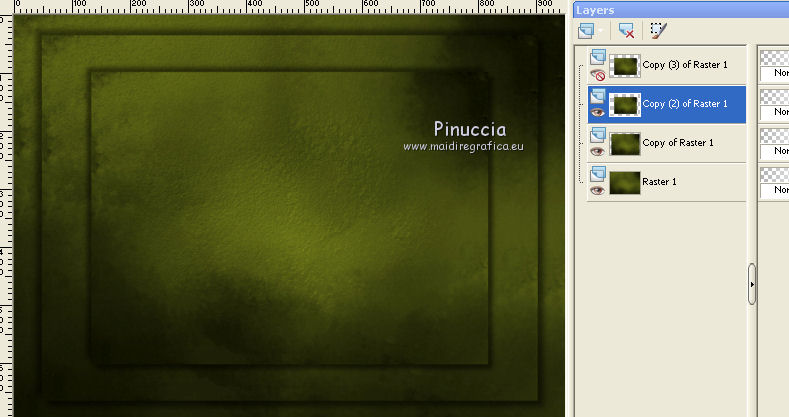
7. Layers>Merge>Merge visible.
8. Selections>Load/Save Selection>Load Selection from Disk.
Look for and load the selection sel_nav_nines.
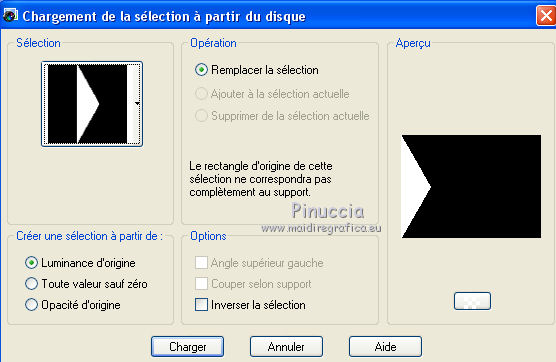
Selections>Promote Selection to Layer.
Selections>Select None.
9. Effects>Plugins>Filters Unlimited 2.0 - Simple - Pizza Slice Mirror.
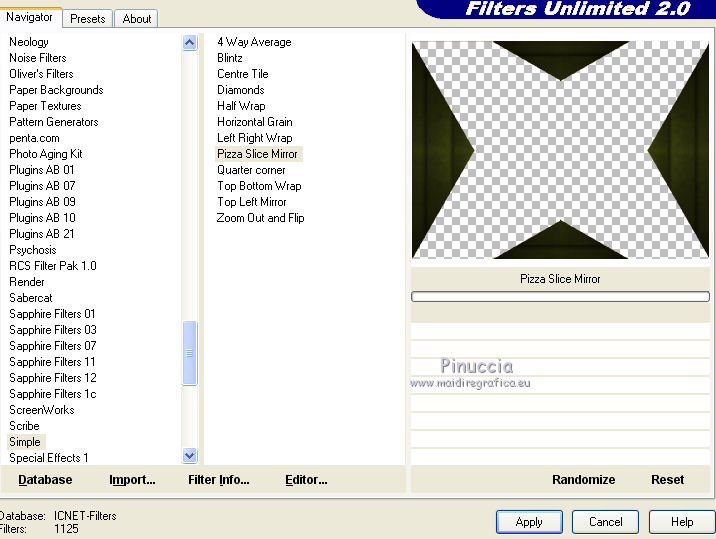
10. Effects>Reflection Effects>Feedback
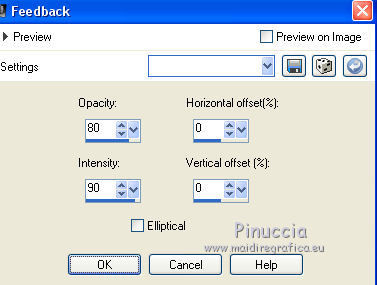
11. Layers>Duplicate.
12. Image>Canvas Size - 950 x 800 pixels.
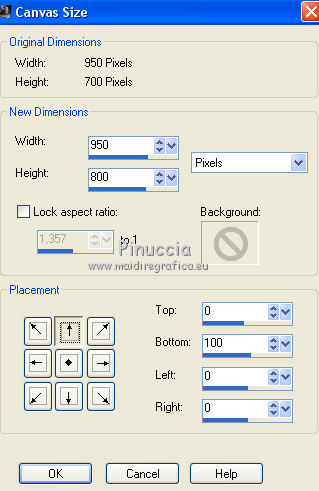
13. Effets>Plugins>Mura's Meister - Perspective Tiling.
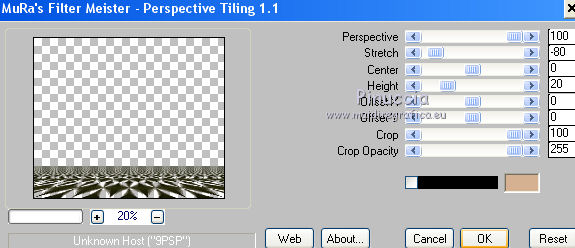
Layers>Arrange>Send to bottom.
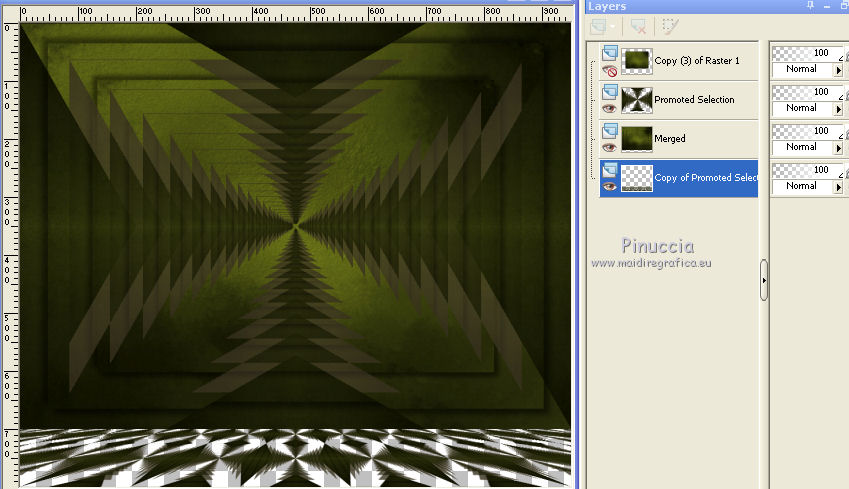
14. Activate the layer original Feedback layer.
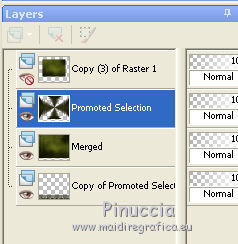
Effects>3D Effects>Drop Shadow, color #a19244.
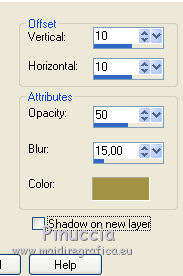
Repeat Drop Shadow, vertical and horizontal -10.
15. Layers>New Raster Layer.
Layers>Arrange>Send to Bottom.
Set your foreground color to #979e67,
Flood Fill  the layer with your foreground color. the layer with your foreground color.
16. Open and activate the closed layer.
Selections>Select All.
Selections>Fload
Selections>Defloat.
Selections>Modify>Contract - 5 pixels.
17. Open the tube Karine_dreams_Misted_Landscape_1337_Noviembre_2010 - Edit>Copy.
Go back to your work and go to Edit>Paste as new layer.
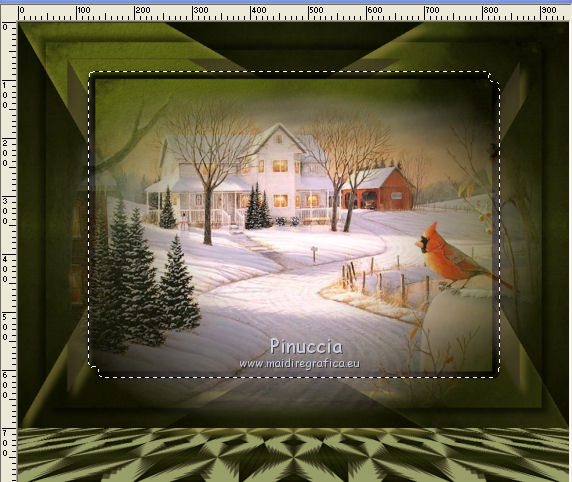
18. Selections>Invert.
Press CANC on the keyboard 
Selections>Invert.
19. Adjust>Brightness and Contrast>Brightness and Contrast.
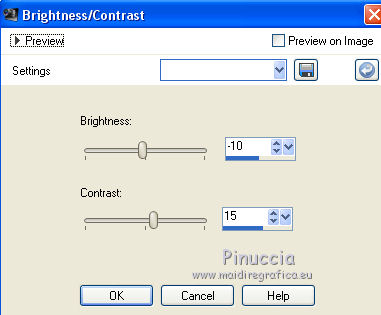
Keep selected.
20. Open the tube calguisillustrationhiver29122015 - Edit>Copy.
Go back to your work and go to Edit>Paste as new layer.
Image>Resize, 2 times to 70%, resize all layers not checked.
Place  the tube in the landscape. the tube in the landscape.
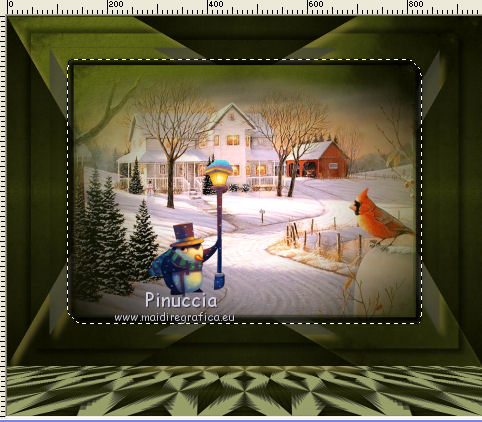
21. Layers>Merge>Merge down- 2 times
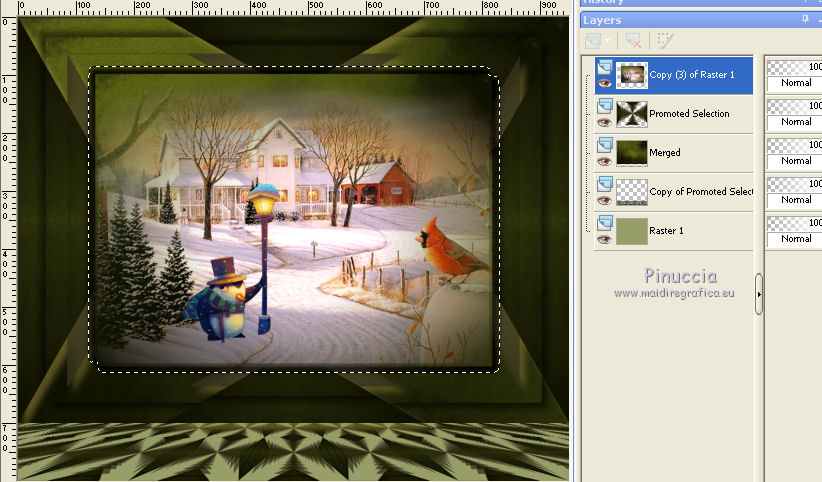
22. Layers>Duplicate and rename the layers paysage 1/ paysage 2/ paysage 3.
23. Activate the layer paysage 1.
Effects>Plugins>VDL Adrenaline - Snowflakes
if you are using the new version (the result doesn't change):
Effects>Plugins>VanDerLee - Snowflakes
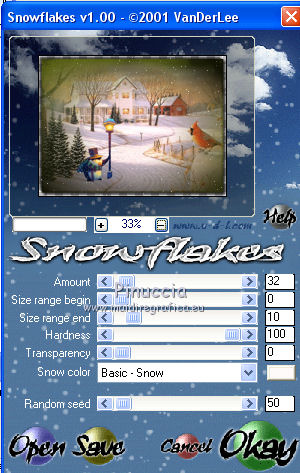
24. Activate the layer paysage 2.
Effects>Plugins>VDL Adrenaline - Snowflakes
Random Seed to 75 and ok.
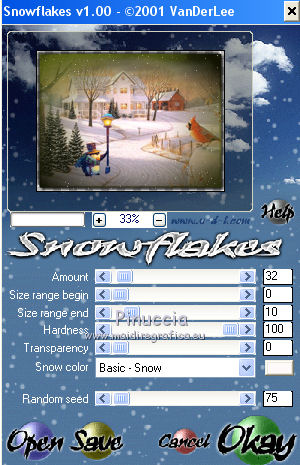
Close this layer and activate the layer paysage 3.
Effects>Plugins>VDL Adrenaline - Snowflakes, Random Seed to 95 and ok.
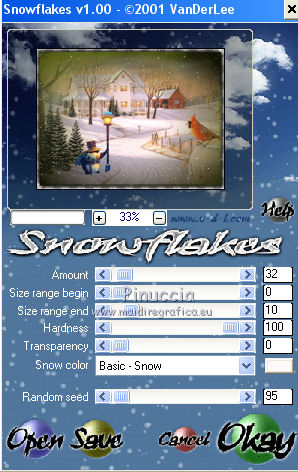
Selections>Select None.
25. Close and stay on this layer
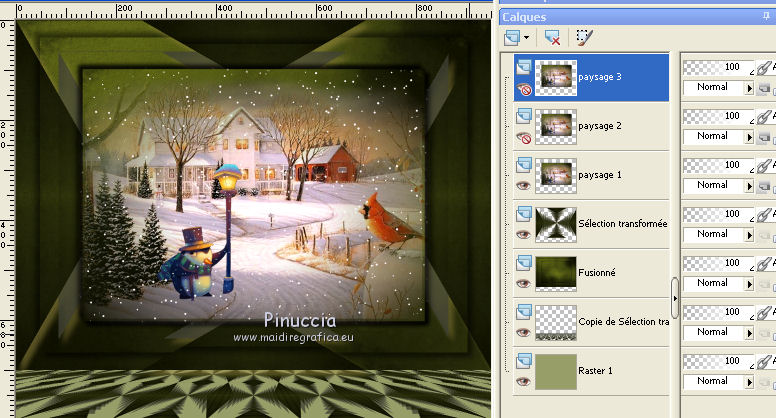
26. Open the tube Min@.4254.PatCleveland1972.10.16, erase the watermark and go to Edit>Copy.
Go back to your work and go to Edit>Paste as new layer.
Image>Resize, to 80%, resize all layers not checked.
Move  the tube to the right side. the tube to the right side.
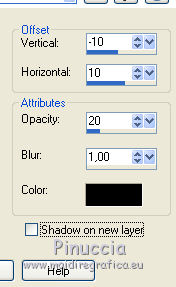
27. Effects>3D Effects>Drop Shadow, color black.
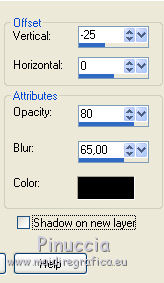
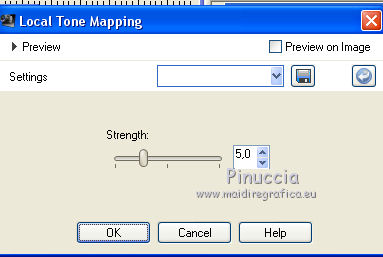
28. Adjust>Brightness and Contrast>Local Tone Mapping.
29. Open the tube KRYSNOEL115, erase the watermark and go to Edit>Copy.
Go back to your work and go to Edit>Paste as new layer.
Image>Resize, 2 times to 70% and 1 time to 90%, resize all layers not checked.
Move  the tube at the bottom left. the tube at the bottom left.
30. Effects>3D Effects>Drop Shadow, color black.
31. Keep the top layer selected.
Layers>New Raster Layer.
Set your foreground color to #1f210c,
Flood Fill  the layer with your foreground color. the layer with your foreground color.
32. Selections>Select All.
Selections>Modify>Contract - 10 pixels.
Press CANC on the keyboard.
Selections>Invert.
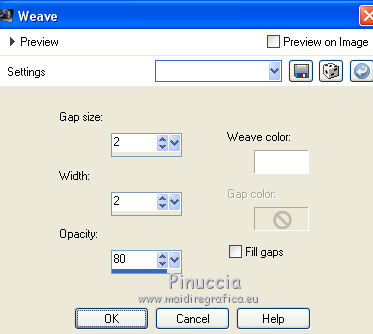
33. Effects>Texture Effects>Weave
Weave color #ffffff
34. Selections>Invert.
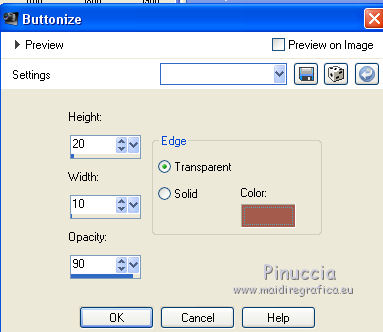
35. Effects>3D Effects>Buttonize - color #a55b4b.
Selections>Select None.
36. Sign your work on a new layer.
Animation
Your layers plaette:
the layer paysage 1 is open; the layers paysage 2/3 are closed.
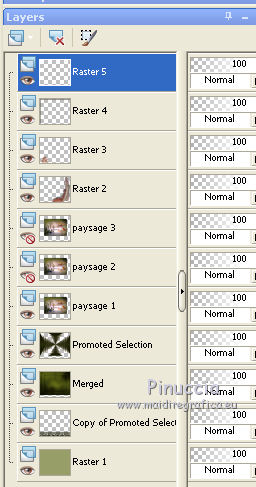
1. Edit>Copy Special>Copy Merged.
Open Animation Shop and go to Edit>Paste>Paste as new animation.
2. Go back to PSP.
Close the layer paysage 1 and open the layer paysage 2.
Edit>Copy Special>Copy Merged.
Go back to Animation Shop and go to Edit>Paste>Paste after current frame.
3. Go back to PSP.
Close the layer paysage 2 and open the layer paysage3.
Edit>Copy Special>Copy Merged.
Go to Animation Shop and Edit>Paste>Paste after current frame.
4. Check your animation clicking on View Animation 
and save as gif.
Vos versions ici

If you have problems or doubts, or you find a not worked link, or only for tell me that you enjoyed this tutorial, write to me.
15 November 2018
|
 ENGLISH VERSION

 ENGLISH VERSION
