|
TOP ELISE
 ENGLISH VERSION ENGLISH VERSION
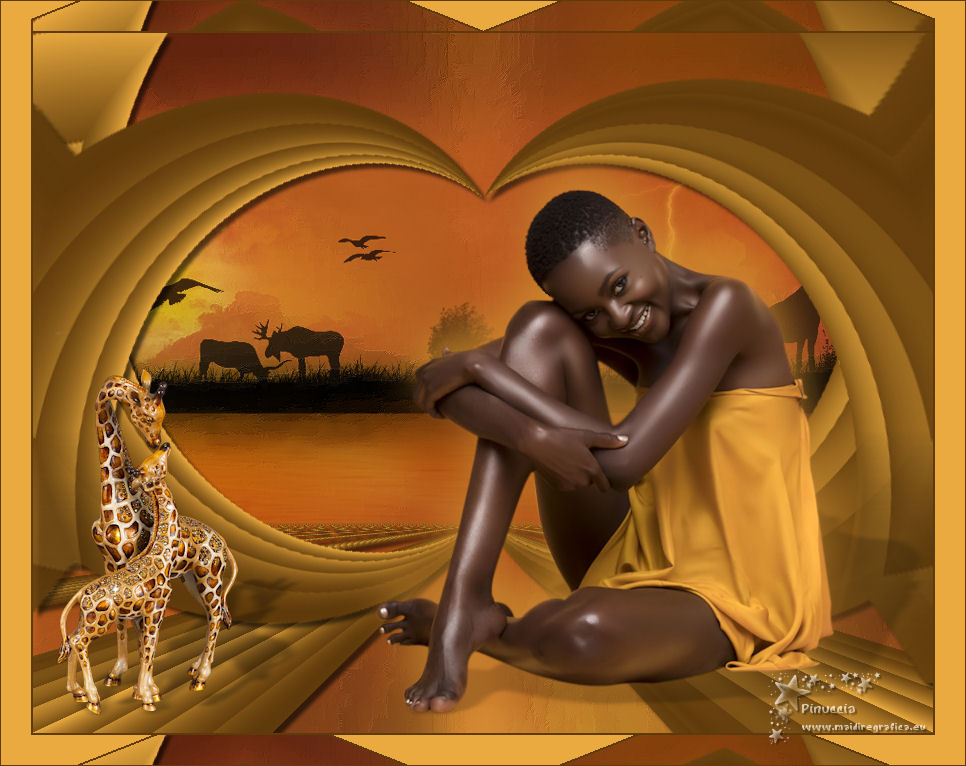
Here you find the original of this tutorial:

This tutorial was translated with PSPX7 but it can also be made using other versions of PSP.
Since version PSP X4, Image>Mirror was replaced with Image>Flip Horizontal,
and Image>Flip with Image>Flip Vertical, there are some variables.
In versions X5 and X6, the functions have been improved by making available the Objects menu.
In the latest version X7 command Image>Mirror and Image>Flip returned, but with new differences.
See my schedule here
French translation here
Your versions ici
For this tutorial, you will need:
Material here
Tube 2620-woman-LB TUBES
DBK BG MIST-033 by Katrine
Tube yp_figurine_jaystrongwater_giraffe
(you find here the links to the material authors' sites)
Plugins
consult, if necessary, my filter section here
Filters Unlimited 2.0 here
Mura's Seamless - Shift at Zig Zag here
Eye Candy 3.1 - Perspective Shadow here
Mura's Meister - Perspective Tiling here
Mura's Meister - Pole Transform here
Filters Mura's Seamless can be used alone or imported into Filters Unlimited.
(How do, you see here)
If a plugin supplied appears with this icon  it must necessarily be imported into Unlimited it must necessarily be imported into Unlimited

In the newest versions of PSP, you don't find the foreground/background gradient (Corel_06_029).
You can use the gradients of the older versions.
The Gradient of CorelX here
Open the mask in PSP and minimize it with the rest of the material.
1. Open a new transparent image 900 x 650 pixels.
2. Set your foreground color to #5f3a0b,
and your background color to #eaaa3f.
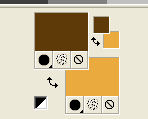
Set your foreground color to a Foreground/Background Gradient, style Linear.
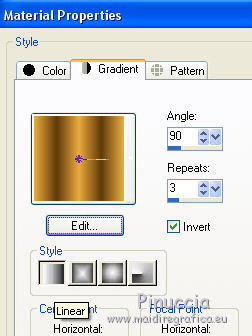
Flood Fill  the transparent image with your gradient. the transparent image with your gradient.
3. Selection Tool 
(no matter the type of selection, because with the custom selection your always get a rectangle)
clic on the Custom Selection 
and set the following settings.
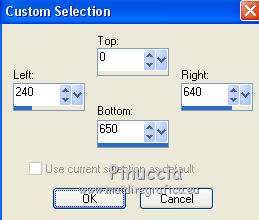
Press CANC on the keyboard 
Selections>Select None.
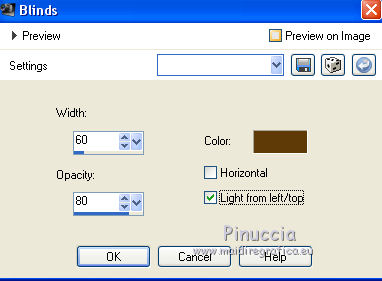
4. Effects>Texture Effects>Blinds, foreground color #5f3a0b.
5. Layers>Duplicate.
Close this layer and activate the layer below of the original.
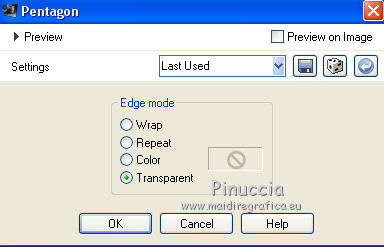
Effects>Geometric Effects>Pentagon.
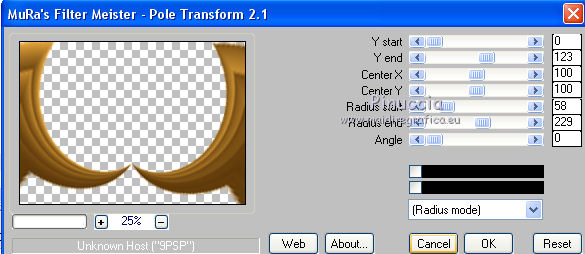
6. Effects>Plugins>Mura's Meister - Pole Transform.
7. Layers>Duplicate.
Image>Flip.
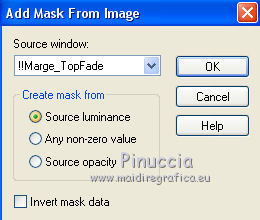
8. Layers>New Mask layer>From image
Open the menu under the source window and you'll see all the files open.
Select the mask Marge_TopFade.
Layers>Merge>Merge Group.
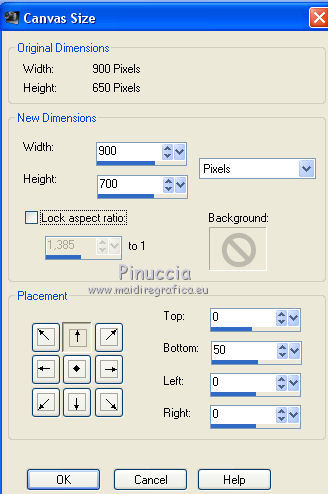
9. Image>Canvas Size - 900 x 700 pixels.
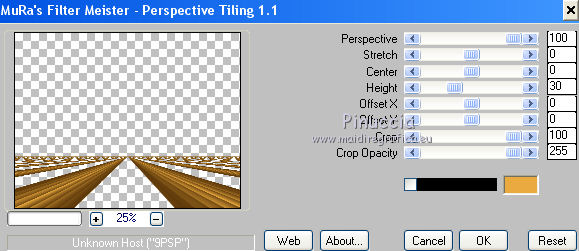
10. Re-open and activate the top layer.
Effects>Plugins>Mura's Meister - Perspective Tiling.
Layers>Arrange>Send to Bottom.
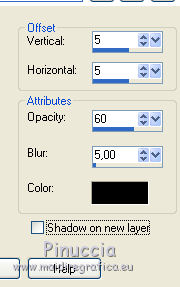
11. On the 3 layers: Effects>3D Effects>Drop Shadow, color black.
12. Layers>New Raster Layer.
Layers>Arrange>Send to Bottom.
13. Set your foreground color to #eaaa3f,
and your background color to #5f3a0b

Set your foreground color to a Foreground/Background Gradient, style Linear.
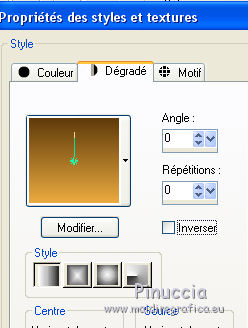
Flood Fill  the layer with your gradient. the layer with your gradient.
14. Open the tube DBK BG MIST-033 -Edit>Copy.
Go back to your work and go to Edit>Paste as new layer.
15. Effects>Image Effects>Seamless Tiling, default settings.

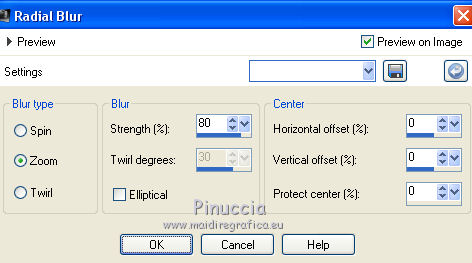
16. Adjust>Blur>Radial Blur.
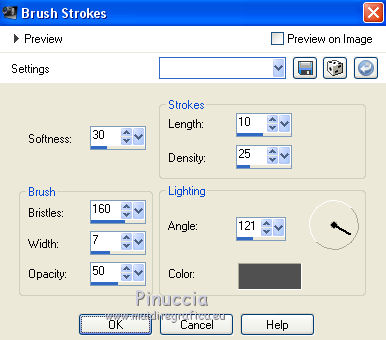
17. Effects>Art Media Effects>Brush Strokes, color #505050.
18. Edit>Paste as new layer (the tube DBK BG MIST-033 is still in memory).
Reduce the opacity of this layer to 62%.
19. Activate the top layer.
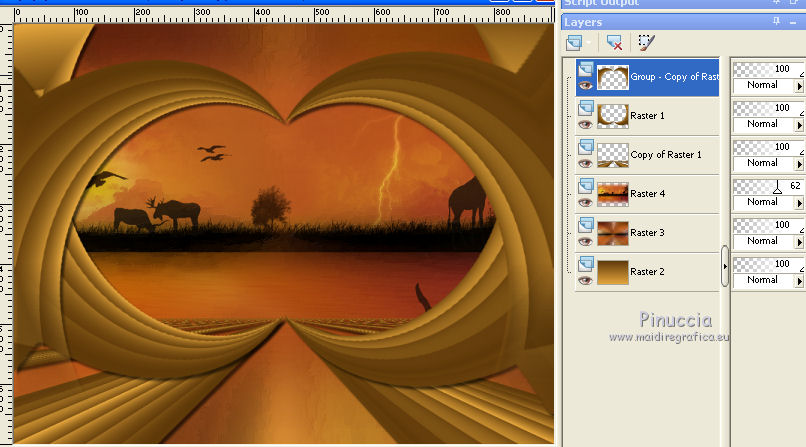
Open the tube 2620-woman-LB TUBES - Edit>Copy.
Go back to your work and go to Edit>Paste as new layer.
Image>Resize, to 80%, resize all layers not checked.
Move  to the right side. to the right side.
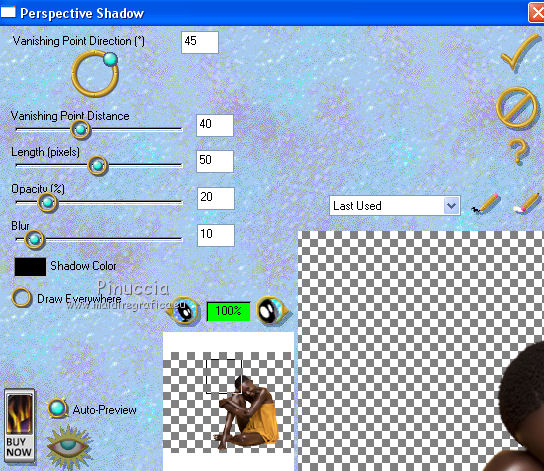
20. Effects>Plugins>Eye Candy 3.1 - Perspective Shadow.
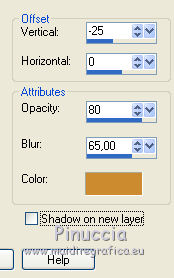
21. Effects>3D Effects>Drop Shadow, color #cc8b2f.
22. Open the tube yp_figurine_jaystrongwater_giraffe - Edit>Copy.
Go back to your work and go to Edit>Paste as new layer.
Image>Resize, to 50%, resize all layers not checked.
Move  the tube at the bottom left. the tube at the bottom left.
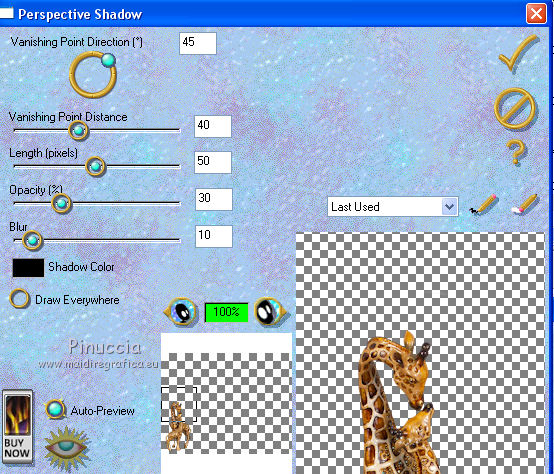
23. Effects>Plugins>Eye Candy 3.1 - Perspective Shadow.
24. Layers>Merge>Merge All.
25. Image>Add borders, 2 pixels, symmetric, color #5f3a0b.
Image>Add borders, 30 pixels, symmetric, color #eaaa3f.
26. Activate the Magic Wand Tool 
and click on the 30 pixels border to select it.
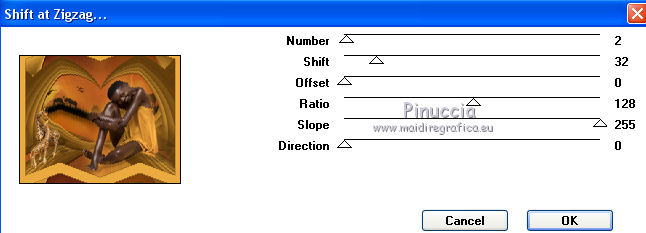
26. Effects>Plugins>Mura's Seamless - Shift at Zigzag.
Selections>Select None.
27. Image>Add borders, 1 pixel, symmetric, color #5f3a0b.
28. Sign your work and save as.
Vos versions here

If you have problems or doubts, or you find a not worked link, or only for tell me that you enjoyed this tutorial, write to me.
1 September 2018
|
 ENGLISH VERSION

 ENGLISH VERSION
