|
TOP ESTRELLA
 ENGLISH VERSION ENGLISH VERSION
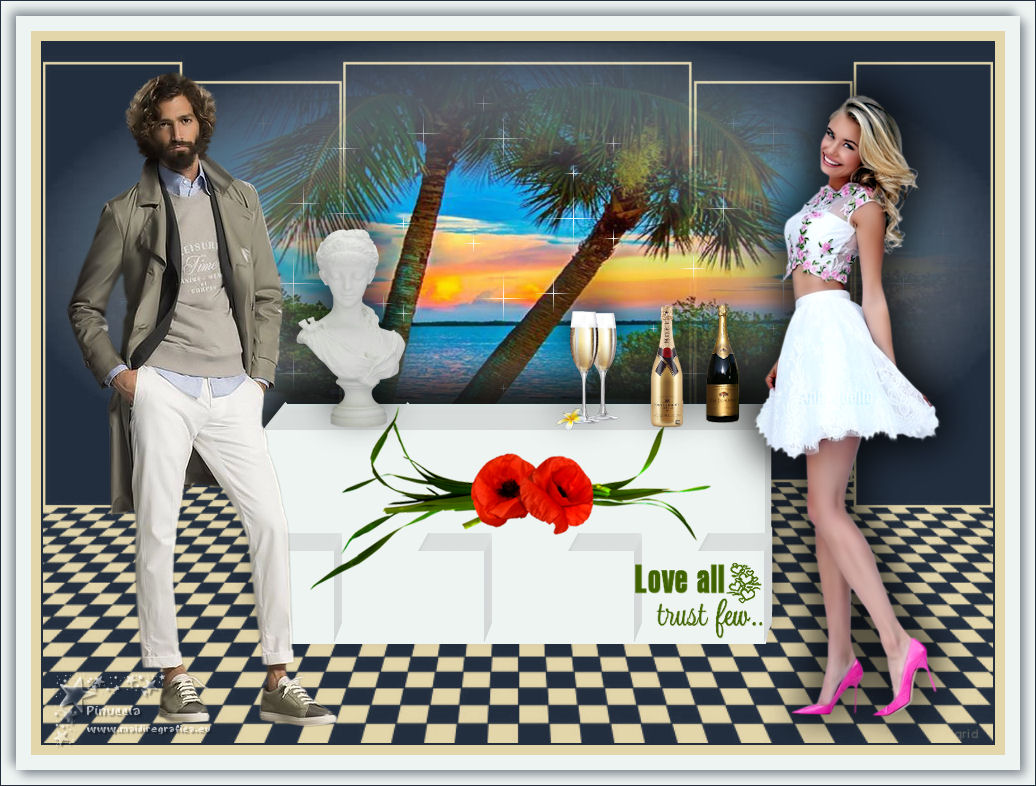
Here you find the original of this tutorial:

This tutorial was translated with PSPX7 but it can also be made using other versions of PSP.
Since version PSP X4, Image>Mirror was replaced with Image>Flip Horizontal,
and Image>Flip with Image>Flip Vertical, there are some variables.
In versions X5 and X6, the functions have been improved by making available the Objects menu.
In the latest version X7 command Image>Mirror and Image>Flip returned, but with new differences.
See my schedule here
French translation here
Your versions ici
For this tutorial, you will need:
Material here
Tube 24_Femme_Page6_Animabelle
Tube 2772-man-LB TUBES
Mist_paisagem_luna166
Tube 0-133dd3-49efd8c4-orig_orig
Tube Mary 0912-26
ny-champagne
champagne1_Azalee
Zona-Champaign2-12-17
WordArt_SJH_033007
maske_231_sigrid
(you find here the links to the material authors' sites)
Plugins
consult, if necessary, my filter section here
Filters Unlimited 2.0 here
VM Natural - Sparkle here
Alien Skin Eye Candy 5 Impact - Extrude here
Filters VM Natural can be used alone or imported into Filters Unlimited.
(How do, you see here)
If a plugin supplied appears with this icon  it must necessarily be imported into Unlimited it must necessarily be imported into Unlimited

Copy the Selections in the Selections Folder.
Open the mask in PSP and minimize it with the rest of the material.
1. Open a new transparent image 950 x 700 pixels.
2. Set your foreground color to #222e3e,
and your background color to #e4d6ab.
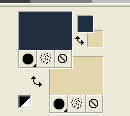
Flood Fill  the transparent image with your foreground color #222e3e. the transparent image with your foreground color #222e3e.
3. Layers>New Raster Layer.
Flood Fill  with your background color #e4d6ab. with your background color #e4d6ab.
4. Layers>New Mask layer>From image
Open the menu under the source window and you'll see all the files open.
Select the mask maske_231_sigrid.
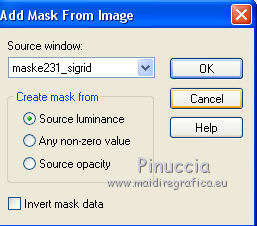
Layers>Merge>Merge Group.
5. Selection Tool 
(no matter the type of selection, because with the custom selection your always get a rectangle)
clic on the Custom Selection 
and set the following settings.

6. Layers>New Raster Layer.
Open the tube luna166 - Edit>Copy.
Go back to your work and go to Edit>Paste into Selection.
Selections>Select None.
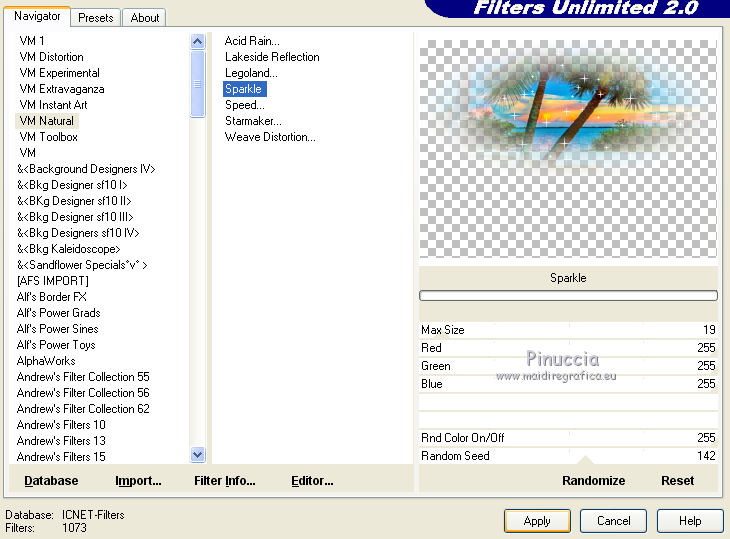
7. Effects>Plugins>VM Natural - Sparkle.
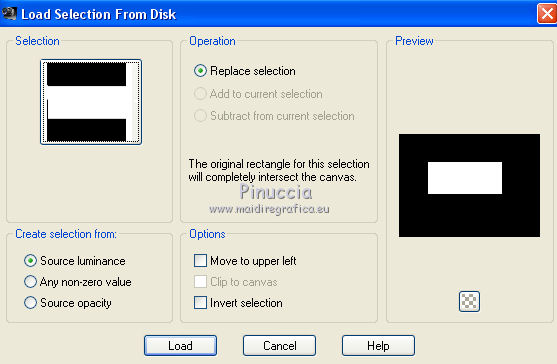
8. Selections>Load/Save Selection>Load Selection from Disk.
Look for and load the selection sel.295.nines
9. Layers>New Raster Layer.
Set your foreground color to #eef4f2.
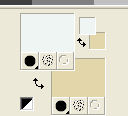
Flood Fill  the layer with this color. the layer with this color.
Selections>Select None.
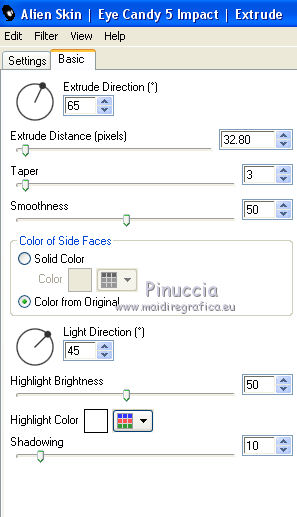
10. Effects>Plugins>Alien Skin Eye Candy 5 Impact - Extrude.
11. Effects>Image Effects>Offset

12. Selections>Load/Save Selection>Load Selection from Disk.
Look for and load the selection sel.295.1nines

13. Layers>New Raster Layer.
Flood Fill  with your foreground color #eef4f2. with your foreground color #eef4f2.
Selections>Select None.
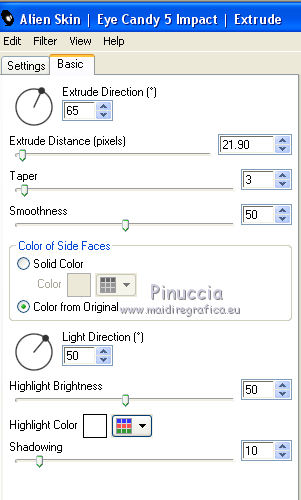
14. Effects>Plugins>Alien Skin Eye Candy 5 Impact - Extrude.
14. Effects>Image Effects>Offset.
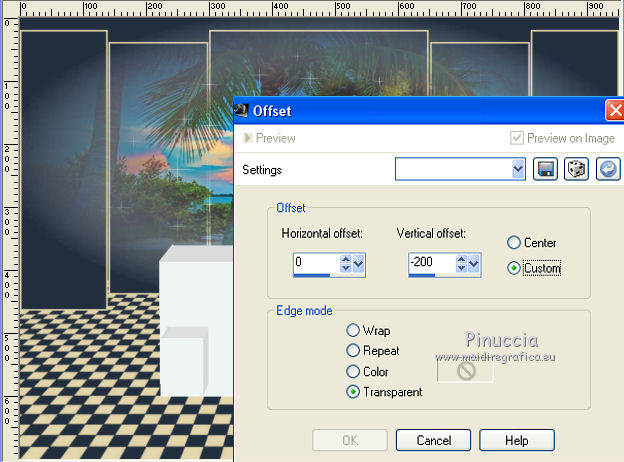
15. Layers>Duplicate.
Effects>Image Effects>Offset.

16. Layers>Duplicate.
Effects>Image Effects>Offset, same settings.

17. Layers>Duplicate.
Effects>Image Effects>Offset.
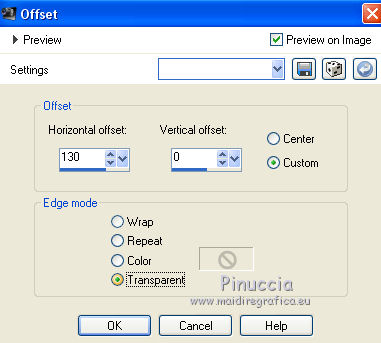
18. Close the 3 bottom layers.
Layers>Merge>Merge visible.
19. Open again the 3 layers closed and stay on the layer Merged.
Effects>3D Effects>Drop Shadow, color black.
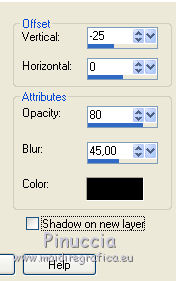
20. Open the tube 0-133dd3-49efd8c4-orig_orig - Edit>Copy.
Go back to your work and go to Edit>Paste as new layer.
Image>Resize, 2 times to 80% and 1 time to 90%, resize all layers not checked.
Place  rightly the tube. rightly the tube.
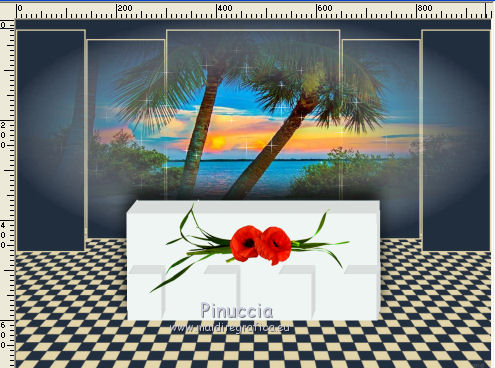
21. Open the tube 24_Femme_Page6_Animabelle - Edit>Copy.
Go back to your work and go to Edit>Paste as new layer.
Image>Resize, 2 times to 90%, resize all layers not checked.
Erase the watermark.
Move  the tube to the right side. the tube to the right side.
22. Effects>3D Effects>Drop Shadow, color black.
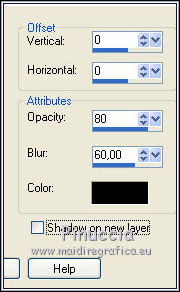
23. Open the tube 2772-man-LB TUBES - Edit>Copy.
Go back to your work and go to Edit>Paste as new layer.
Erase the watermark.
Move  the tube to the left side. the tube to the left side.
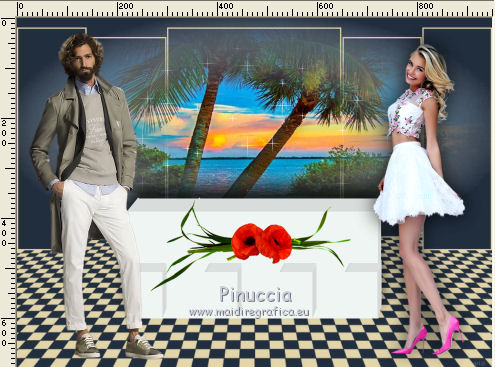
24. Effects>3D Effects>Drop Shadow, color black.

25. Open the tube ny-champagne - Edit>Copy.
Go back to your work and go to Edit>Paste as new layer.
Image>Resize, to 70%, resize all layers not checked.
Place  rightly the tube, see my example. rightly the tube, see my example.
26. Open the tube champagne1_Azalee - Edit>Copy.
Go back to your work and go to Edit>Paste as new layer.
Image>Resize, to 80%, resize all layers not checked.
Place  rightly the tube. rightly the tube.
27. Open the tube Zona-Champaign2-12-17 - Edit>Copy.
Go back to your work and go to Edit>Paste as new layer.
Image>Resize, to 50%, resize all layers not checked.
Erase the watermark.
Place  rightly the tube. rightly the tube.
28. Open the tube Mary 0912-26 - Edit>Copy.
Go back to your work and go to Edit>Paste as new layer.
Image>Resize, 2 times to 50%, resize all layers not checked.
Erase the watermark.
Place  rightly the tube. rightly the tube.
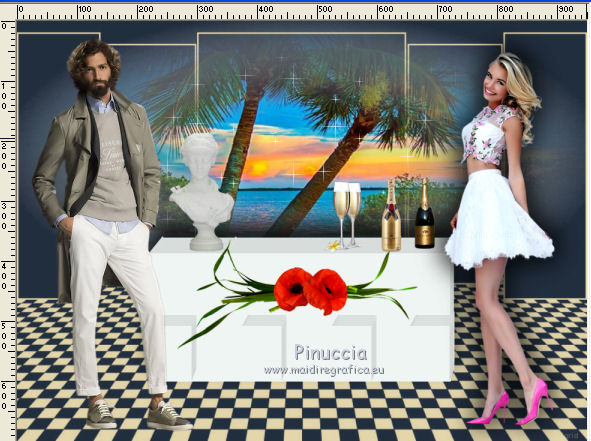
29. On these 4 tubes: Effects>3D Effects>Drop Shadow, color black.
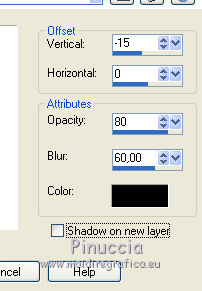
30. Open WordArt_SJH_033007 - Edit>Copy.
Go back to your work and go to Edit>Paste as new layer.
Place  the tube as below. the tube as below.
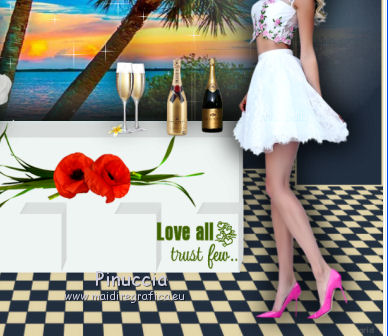
31. Layers>Merge>Merge All.
32. Image>Add borders, 2 pixels, symmetric, #222e3e.
Image>Add borders, 10 pixels, symmetric, #e4d6ab.
Image>Add borders, 30 pixels, symmetric, #eef4f2.
33. Selections>Select All.
Selections>Modify>Contract - 15 pixels.
34. Effects>3D Effects>Drop Shadow, color #222e3e.
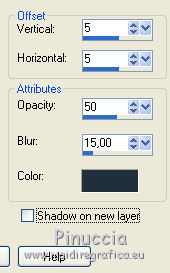
Repeat Drop Shadow, but vertical and horizontal -5.
35. Selections>Select None.
36. Image>Add borders, 1 pixel, symmetric, color #222e3e.
37. Sign your work and save as jpg.
Vos versions here

If you have problems or doubts, or you find a not worked link, or only for tell me that you enjoyed this tutorial, write to me.
10 Octobre 2018
|
 ENGLISH VERSION

 ENGLISH VERSION
