|
TOP INEMARI


Here you find the original of this tutorial:

This tutorial was translated with PSPX3 but it can also be made using other versions of PSP.
Since version PSP X4, Image>Mirror was replaced with Image>Flip Horizontal,
and Image>Flip with Image>Flip Vertical, there are some variables.
In versions X5 and X6, the functions have been improved by making available the Objects menu.
In the latest version X7 command Image>Mirror and Image>Flip returned, but with new differences.
See my schedule here
French translation here
Your versions here
For this tutorial, you will need:
Material here
Tube 2603 - aidem brady-LB TUBES
Tube 2600-Emily-Ratajkwski-LB TUBES
Mist 4690-luzcristina
Plugins
consult, if necessary, my filter section here
Filters Unlimited 2 here
Simple - Pizza Slice Mirror here
Tramages - Tow the line here
MV's Plugins - Panowarp here
Filters Simple and Tramages can be used alone or imported into Filters Unlimited.
(How do, you see here)
If a plugin supplied appears with this icon  it must necessarily be imported into Unlimited it must necessarily be imported into Unlimited

You can change Blend Modes according to your colors.
In the newest versions of PSP, you don't find the foreground/background gradient (Corel_06_029).
You can use the gradients of the older versions.
The Gradient of CorelX here
Copy the Selections in the Selections Folder.
Open the masks in PSP and minimize them with the rest of the material.
1. Open a new transparent image 900 x 600 pixels.
2. Set your foreground color to #515a24,
and your background color to #c2b06f.
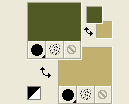
Set your foreground color to a Foreground/Background Gradient, style Sunburst.
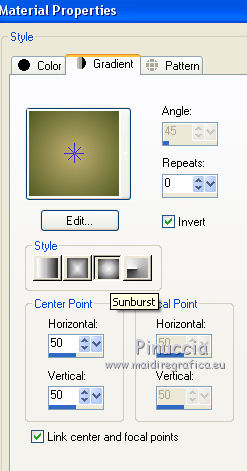
Flood Fill  the transparent image with your Gradient. the transparent image with your Gradient.
3. Layers>New Raster Layer.
Flood Fill  the layer with your background color #c2b06f. the layer with your background color #c2b06f.
4. Layers>New Mask layer>From image
Open the menu under the source window and you'll see all the files open.
Select the mask 99.
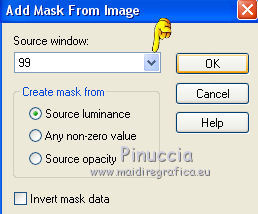
Layers>Merge>Merge Group.
Adjust>Sharpness>Sharpen More.
5. Effects>Plugins>Filters Unlimited 2.0 - Simple - Pizza Slice Mirror.
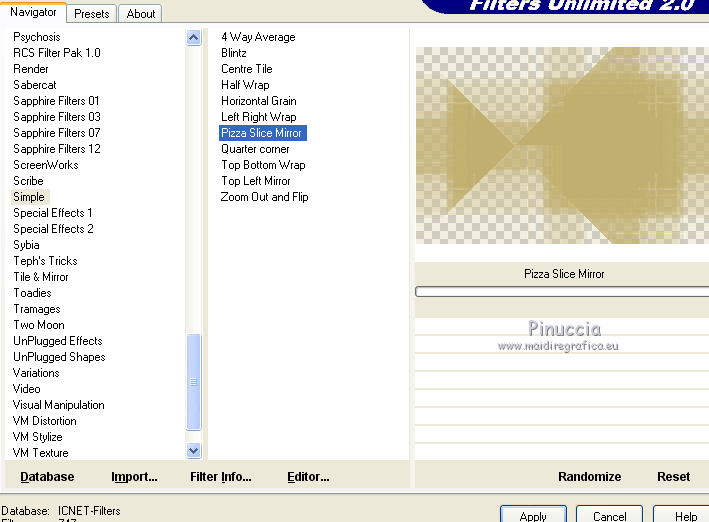
6. Layers>Duplicate and close this layer for a moment.
Activate the layer below of the original mask.
7. Selections>Load/Save Selection>Load Selection from Disk.
Look for and load the selection sel_inemari_nines.
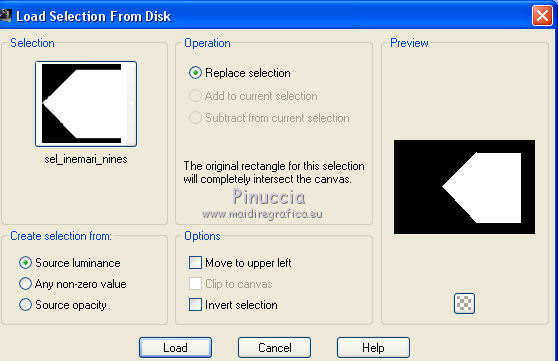
8. Open the tube 4690.luzcristina - Edit>Copy.
Go back to your work and go to Edit>Paste as new layer.
Image>Resize, 90%, resize all layers not checked.
Place  the tube on the selection. the tube on the selection.
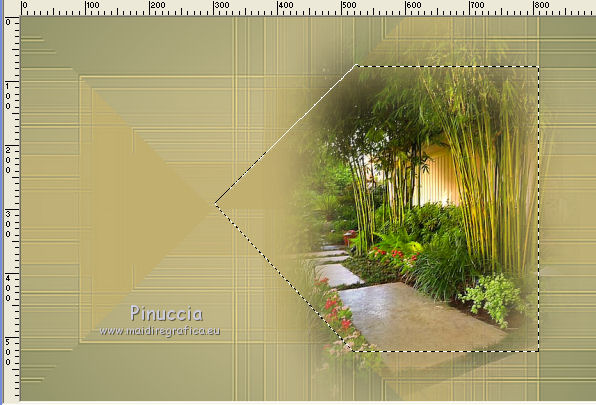
Selections>Invert.
Press CANC on the keyboard 
Selections>Select None.
9. Reduce the opacity of this layer to 80%.
10. Layers>Duplicate.
Image>Resize, 90%, resize all layers not checked.
Image>Mirror.
11. Selections>Load/Save Selection>Load Selection from Disk.
Look for and load the selection sel_inemari2_nines.
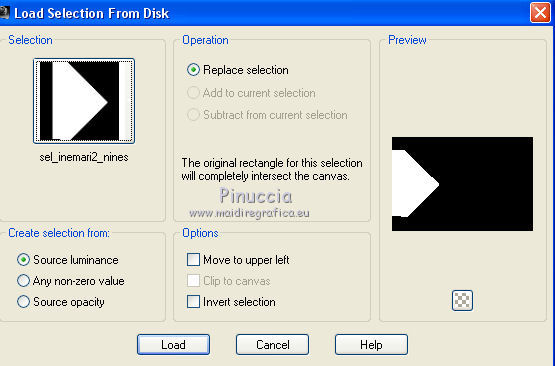
Place  rightly the image on the selection. rightly the image on the selection.
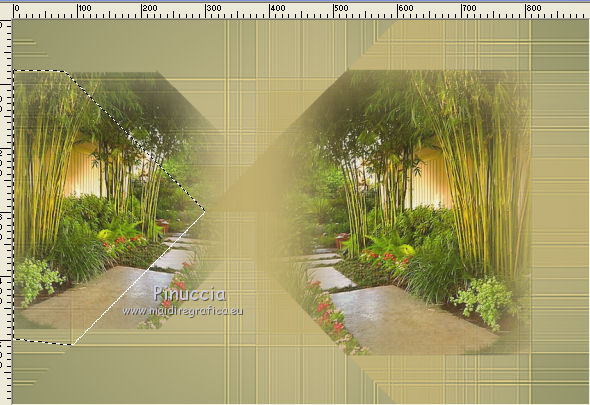
Selections>Invert.
Press CANC on the keyboard.
Selections>Select None.
12. Open the tube 2600-Emily-Ratajkwski-LB TUBES - Edit>Copy.
Go back to your work and go to Edit>Paste as new layer.
Image>Resize, 2 times to 80%, resize all layers not checked.
Move  the tube at the bottom, over the bord. the tube at the bottom, over the bord.
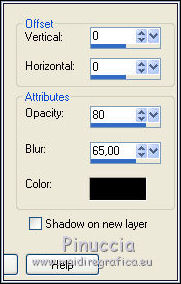
13. Effects>3D Effects>Drop Shadow, color black.
14. Re-open and activate the layer above of the copy of the mask.
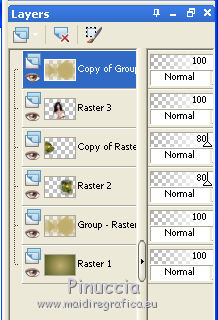
15. Effects>Geometric Effects>Skew.

16. Effects>Plugins>Tramages - Tow the line.
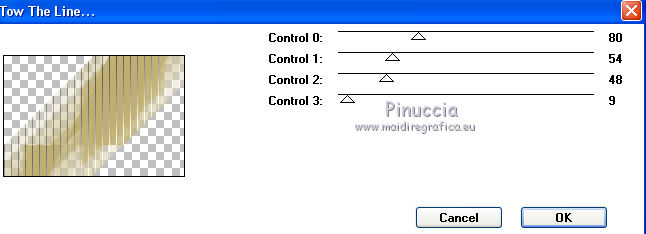
Reduce the opacity of this layer to 60%.
17. Set your foreground to Color.
Layers>New Raster Layer.
Flood Fill  the layer with your foreground color #515a24. the layer with your foreground color #515a24.
18. Selections>Select All.
Selections>Modify>Contract - 3 pixels.
Press CANC on the keyboard.
Selections>Select None.
19. Layers>Merge>Merge visible.
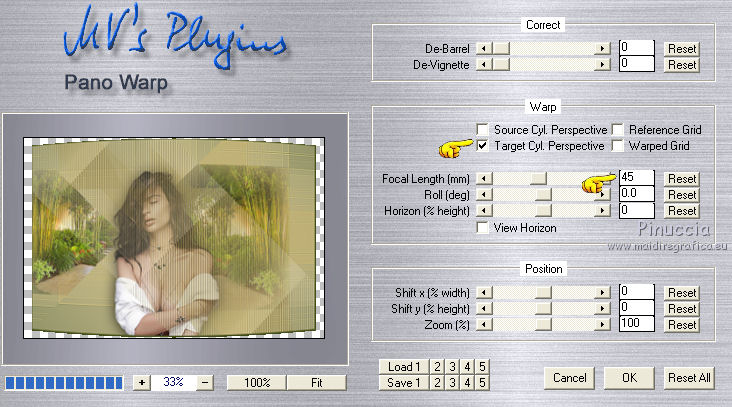
20. Effects>Plugins>MV's Plugins - Panowarp.
21. Image>Canvas Size - 900 x 700 pixels.
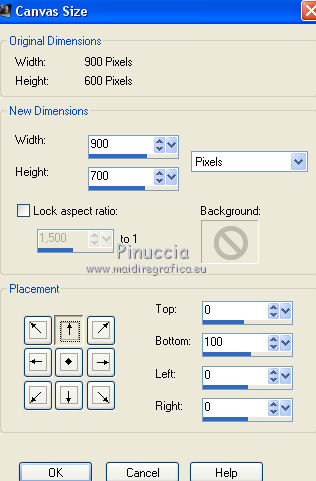
22. Effects>3D Effects>Drop Shadow, color black.
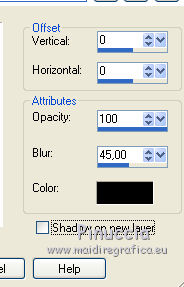
23. Layers>New Raster Layer.
Layers>Arrange>Send to Bottom.
Set your foreground color again with the Gradient.
Flood Fill  the layer with your Gradient. the layer with your Gradient.
24. Layers>New Mask layer>From image
Open the menu under the source window and select the mask VSP195.
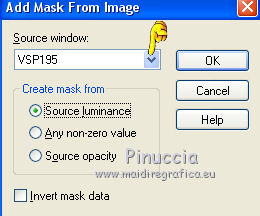
Layers>Merge>Merge Group.
Effects>Edge Effects>Enhance More.
25. Layers>New Raster Layer.
Layers>Arrange>Send to Bottom.
Flood Fill  the layer with your Gradient. the layer with your Gradient.
26. Activate the top layer.
Open the tube 2603-aidem brady-LB TUBES - Edit>Copy.
Go back to your work and go to Edit>Paste as new layer.
Image>Resize, 80%, resize all layers not checked.
Move  the tube at the bottom right. the tube at the bottom right.
27. Effects>3D Effects>Drop Shadow, color black.

28. Open the text Texto_ you © me_nines - Edit>Copy.
Go back to your work and go to Edit>Paste as new layer.
Move  the text at the bottom left. the text at the bottom left.
29. Layers>Merge>Merge All.
30. Image>Add borders, 2 pixels, symmetric, foreground color #515a24.
Image>Add borders, 20 pixels, symmetric, background color #c2b06f.
Image>Add borders, 1 pixel, symmetric, foreground color #515a24.
31. Sign your work and save as jpg.

If you have problems or doubts, or you find a not worked link, or only for tell me that you enjoyed this tutorial, write to me.
16 October 2017
|


