|
TOP LANA
 ENGLISH VERSION ENGLISH VERSION
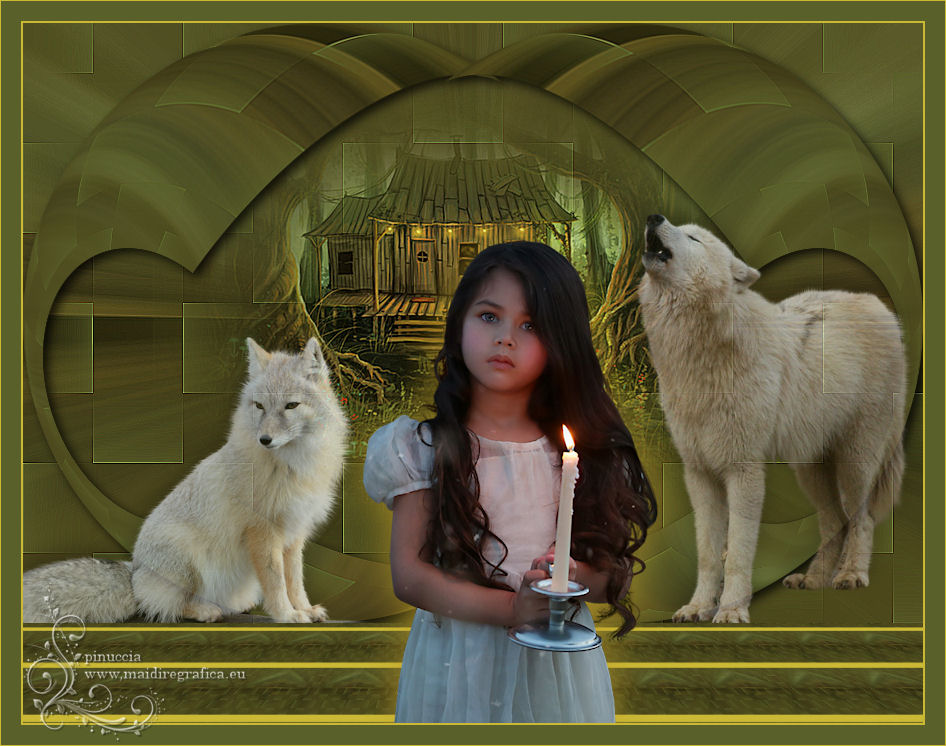
Here you find the original of this tutorial:

This tutorial was translated with PSPX7 but it can also be made using other versions of PSP.
Since version PSP X4, Image>Mirror was replaced with Image>Flip Horizontal,
and Image>Flip with Image>Flip Vertical, there are some variables.
In versions X5 and X6, the functions have been improved by making available the Objects menu.
In the latest version X7 command Image>Mirror and Image>Flip returned, but with new differences.
See my schedule here
French translation here
Your versions ici
For this tutorial, you will need:
Material here
Tube little girl-033 by Lana
Tube KRYSHIVER2016-029
Tube tumblr_static_d2y0gukyac8
Imagen 6928539_orig
Mask 20/20
(here the links of the authors' sites)
Plugins
consult, if necessary, my filter section here
Flaming Pear - Flexify 2 here
Mura's Meister - Perspective Tiling here

You can change Blend Modes according to your colors.
Copy the mask in the Masks Folder.
1. Open a new transparent image 900 x 600 pixels.
2. Selections>Select All.
Open the image 6928539_orig and go to Edit>Copy.
Go back to your work and go to Edit>Paste into Selection.
Selections>Select None.
4. Effects>Image Effects>Seamless Tiling - Side by side

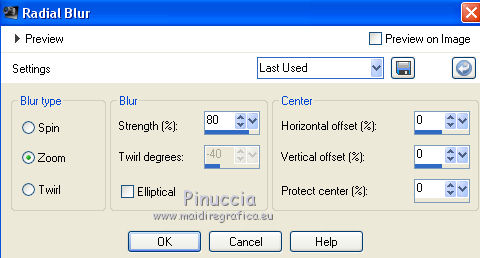
5. Adjust>Blur>Radial Blur.
6. Layers>Duplicate.
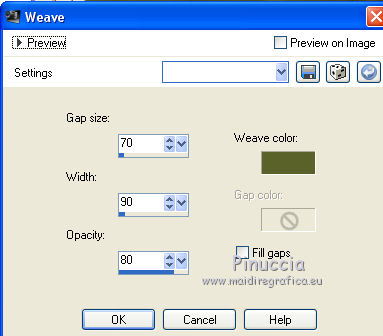
7. Effects>Texture Effects>Weave
Weave color: #5a612a
8. Effects>Edge Effects>Enhance More.
9. Layers>Duplicate - 2 times.
Close the layer of the first copy and stay on the top layer.
10. Image>Resize, to 70%, resize all layers not checked.
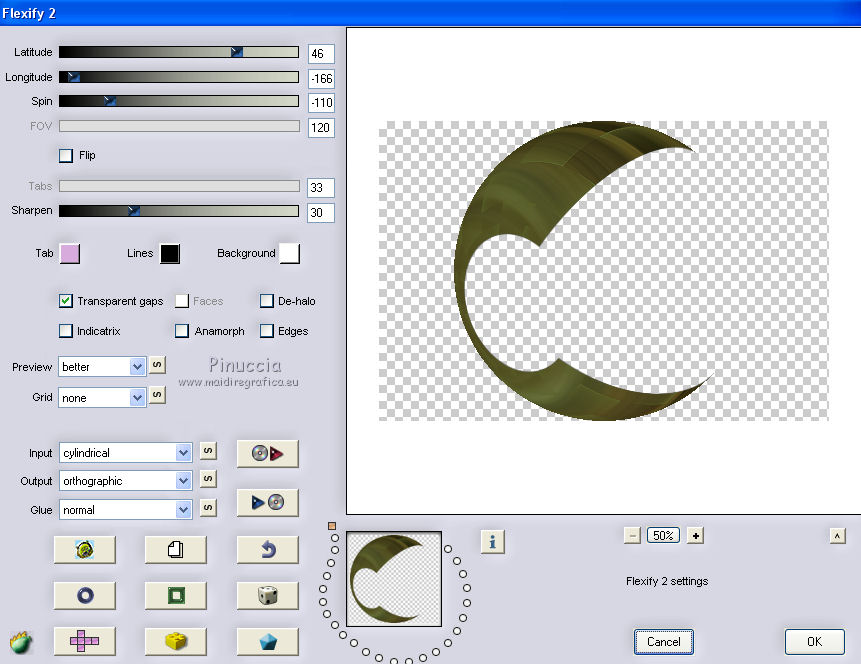
11. Effects>Plugins>Flaming Pear - Flexify 2.
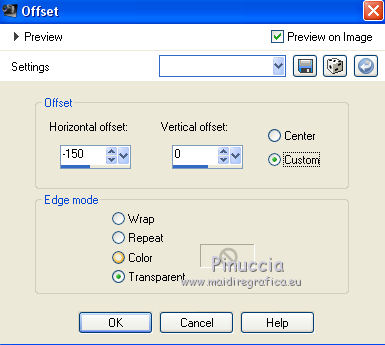
12. Effects>Image Effects>Offset
13. Layers>Duplicate.
Image>Mirror.
14. Layers>Merge>Merge Down.
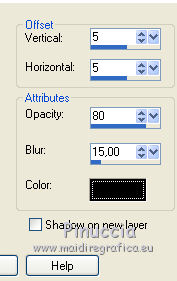
15. Effects>3D Effects>Drop Shadow, color black.
16. Edit>Paste as new layer (the image 6928539_orig is still in memory).
Image>Resize, 2 times to 80%, resize all layers not checked.
17. Layers>Load/Save Mask>Load Mask from Disk.
Look for and load the mask 20-20.
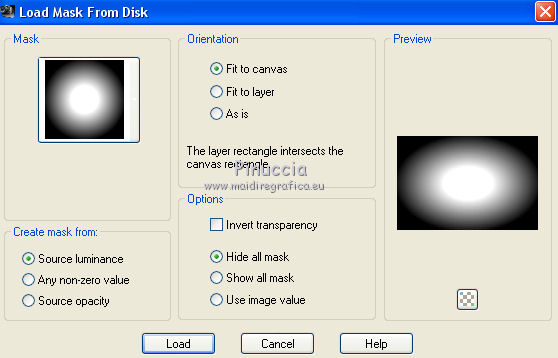
Layers>Duplicate - 2 times, to apply the mask 3 times.
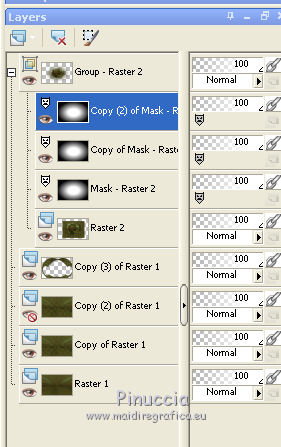
Layers>Merge>Merge Group.
18. Adjust>Sharpness>Sharpen More.
19. Layers>Arrange>Move down (under the Flexify layer).
20. Activate the top layer.
Open the tube KRYSHIVER2016-029, erase the watermark and go to Edit>Copy.
Go back to your work and go to Edit>Paste as new layer.
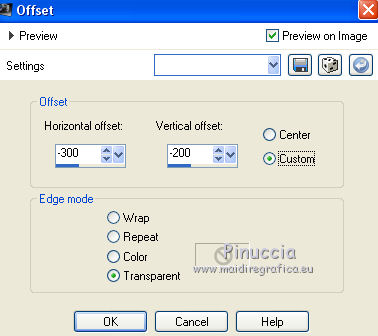
21. Effects>Image Effects>Offset
22. Effects>3D Effects>Drop Shadow, color black.
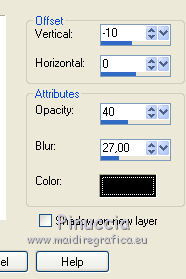
Reduce the opacity of this layer to 70%.
23. Open the tube tumblr_static_d2y0gukyac8 and go to Edit>Copy.
Go back to your work and go to Edit>Paste as new layer.
Image>Mirror.
24. Effects>Image Effects>Offset.
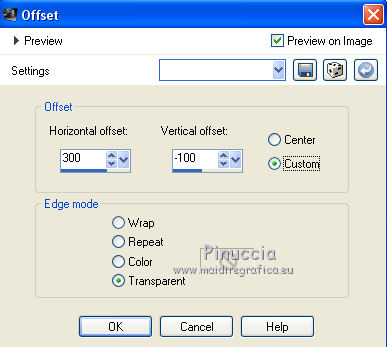
25. Effects>3D Effects>Drop Shadow, same settings.

Reduce the opacity of this layer to 70%.
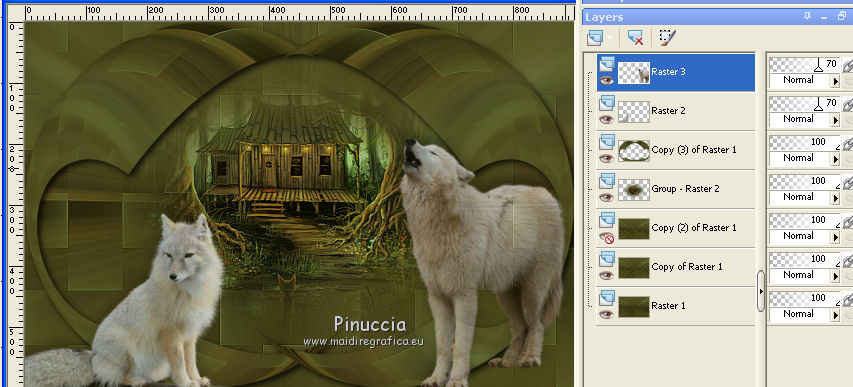
26. Layers>Merge>Merge Visible.
27. Open and activate the closed layer.
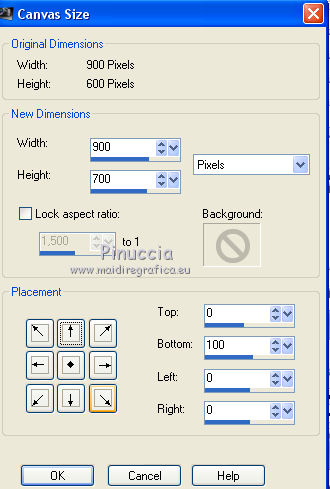
28. Image>Canvas Size - 900 x 700 pixels.
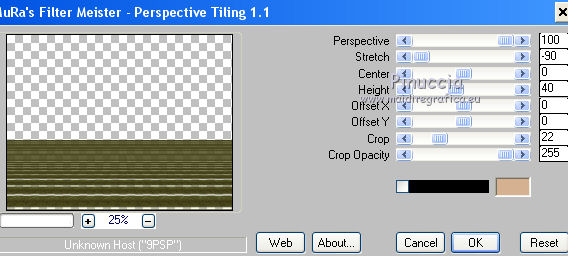
29. Effects>Plugins>Mura's Meister - Perspective Tiling.
30. Layers>New Raster Layer.
Layers>Arrange>Send to Bottom.
Set your foreground color to #cbb936,
Flood Fill  the layer with your Foreground colo. the layer with your Foreground colo.
31. Activate the top layer.
Open the tube girl-033 by Lana, erase the watermark and go to Edit>Copy.
Go back to your work and go to Edit>Paste as new layer.
Image>Resize, to 70%, resize all layers not checked.
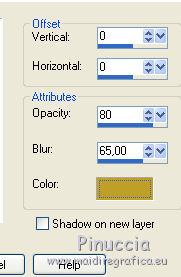
32. Effects>3D Effects>Drop Shadow, color #be9f29.
33. Layers>Merge>Merge All.
34. Image>Add borders, 2 pixels, symmmetric, color #cbb936.
Image>Add borders, 20 pixels, symmetric, color #596029.
Image>Add borders, 1 pixel, symmetric, color #cbb936.
35. Sign your work and save as jpg.
Your versions here

If you have problems or doubts, or you find a not worked link, or only for tell me that you enjoyed this tutorial, write to me.
19 January 2019
|
 ENGLISH VERSION

 ENGLISH VERSION
