|
TOP MARYLÈNE
 ENGLISH VERSION ENGLISH VERSION
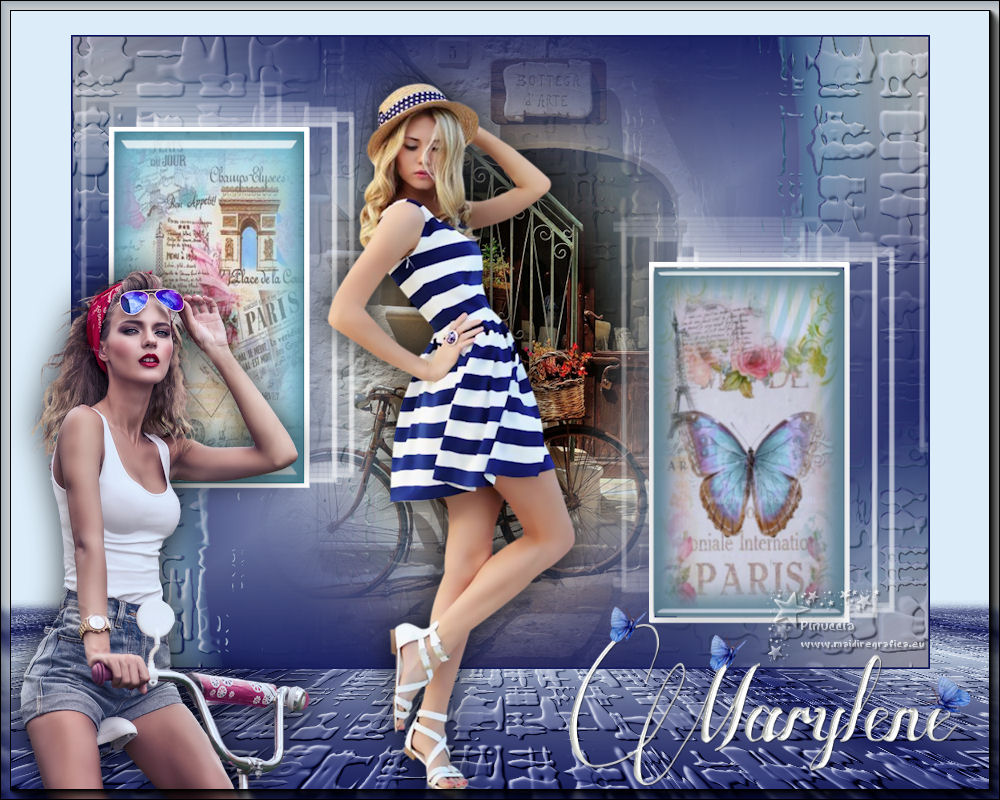
Here you find the original of this tutorial:

This tutorial was translated with PSPX7 but it can also be made using other versions of PSP.
Since version PSP X4, Image>Mirror was replaced with Image>Flip Horizontal,
and Image>Flip with Image>Flip Vertical, there are some variables.
In versions X5 and X6, the functions have been improved by making available the Objects menu.
In the latest version X7 command Image>Mirror and Image>Flip returned, but with new differences.
See my schedule here
French translation here
Your versions ici
For this tutorial, you will need:
Material here
Tube Criss 2783 by Linda Gatita
Tube Femme-1336-Azalee
Criss 2778 by Linda Gatita
Criss 2665 by Linda Gatita
82_divers_p2_animabelle
Texto_Marylene_nines
(you find here the links to the material authors' sites)
Plugins
consult, if necessary, my filter section here
Redfield - Craquelure here
Mura's Meister - Copies here
Mura's Meister - Perspective Tiling here
AAA Frames - Foto Frame here

You can change Blend Modes according to your colors.
In the newest versions of PSP, you don't find the foreground/background gradient (Corel_06_029).
You can use the gradients of the older versions.
The Gradient of CorelX here
1. Open a new transparent image 950 x 700 pixels.
2. Set your foreground color to #171d5d,
and your background color to #dcecf8.
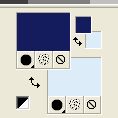
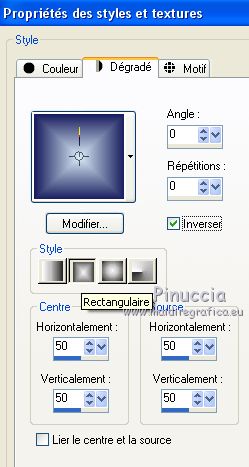
Set your foreground color to a Foreground/Background Gradient, style Rectangular.
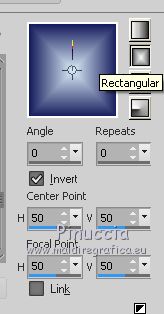
Flood Fill  the transparent image with your Gradient. the transparent image with your Gradient.
3. Open the tube Criss 2778 - Edit>Copy.
Go back to your work and go to Edit>Paste as new layer.
4. Effects>Image Effects>Seamless Tiling, default settings.

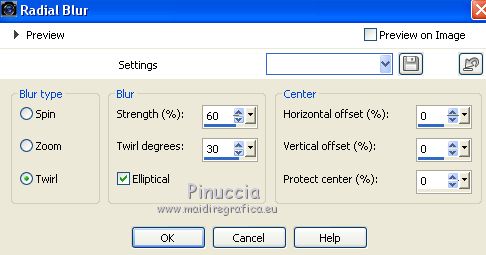
5. Adjust>Blur>Radial Blur.
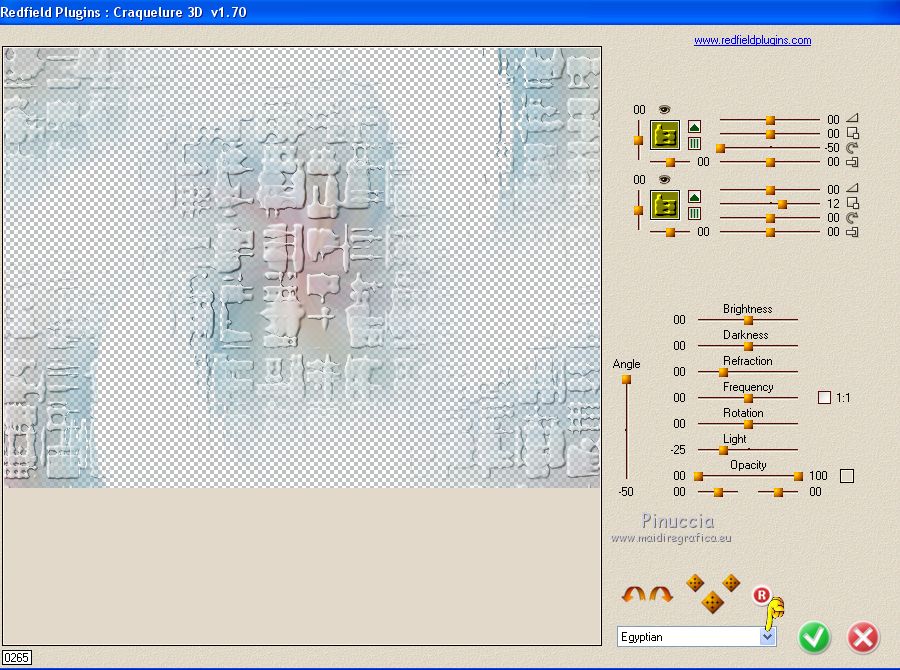
6. Effects>Plugins>Redfield - Craquelure 3D
Select the preset Egyptian and ok.
7. Open the tube 82_divers_p2_animabelle - Edit>Copy.
Go back to your work and go to Edit>Paste as new layer.
8. Layers>Merge>Merge Visible.
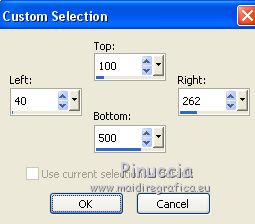
9. Selection Tool 
(no matter the type of selection, because with the custom selection your always get a rectangle)
clic on the Custom Selection 
and set the following settings.
10. Layers>New Raster Layer.
Set your foreground color to white #ffffff.
Flood Fill  the layer with color white #ffffff. the layer with color white #ffffff.
11. Selections>Modify>Contract - 5 pixels.
Press CANC on the keyboard 
Selections>Select All.
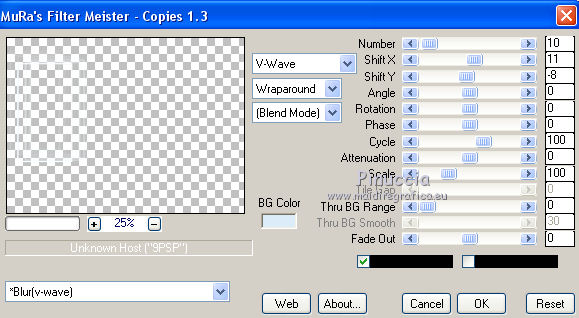
12. Effects>Plugins>Mura's Meister - Copies.
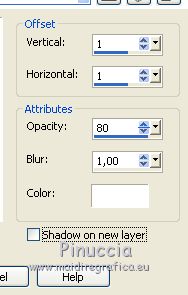
13. Effects>3D Effects>Drop Shadow - color #ffffff.
14. Layers>Duplicate.
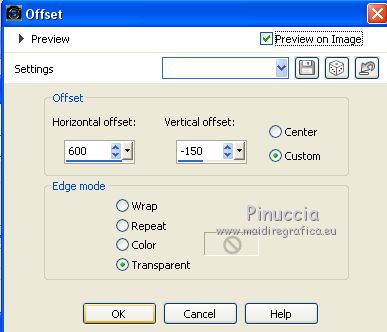
Effects>Image Effects>Offset.
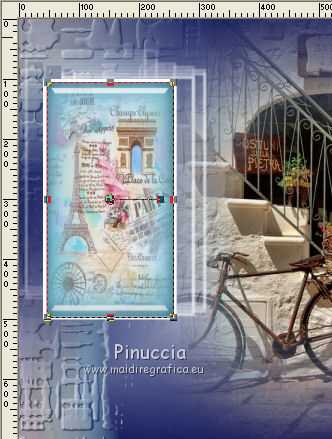
15. Activate again the tube Criss 2778 - Edit>Copy.
Go back to your work and go to Edit>Paste as new layer.
Place  the tube on the left white frame. the tube on the left white frame.
With your Pick Tool 
adapt the tube between the white borders.
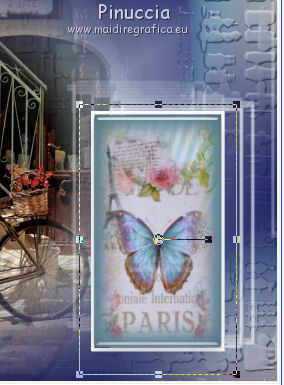
16. Open the tube Criss 2665 - Edit>Copy.
Go back to your work and go to Edit>Paste as new layer.
Place  the tube on the right white frame. the tube on the right white frame.
With your Pick Tool 
adapt the tube between the white borders.
17. Layers>Merge>Merge All.
18. Set again your foreground color to first color (#171d5d) and to your Gradient.
19. Image>Add borders, 2 pixels, symmetric, foreground color #171d5d.
20. Layers>Promote Background layer.
21. Image>Resize, to 90%, resize all layers not checked.
22. Image>Canvas size - 1000 x 800 pixels.
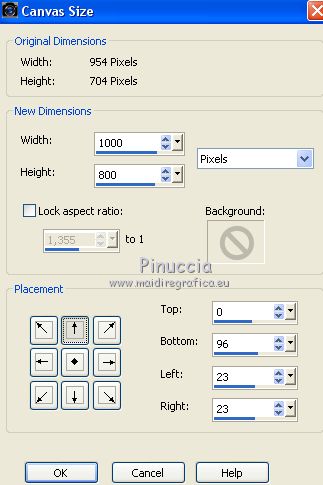
23. Layers>New Raster Layer.
Layers>Arrange>Send to Bottom.
Flood Fill  the layer with your Gradient. the layer with your Gradient.
24. Effects>Plugins>Redfield - Craquelure 3D
Select the preset Egyptian and ok.
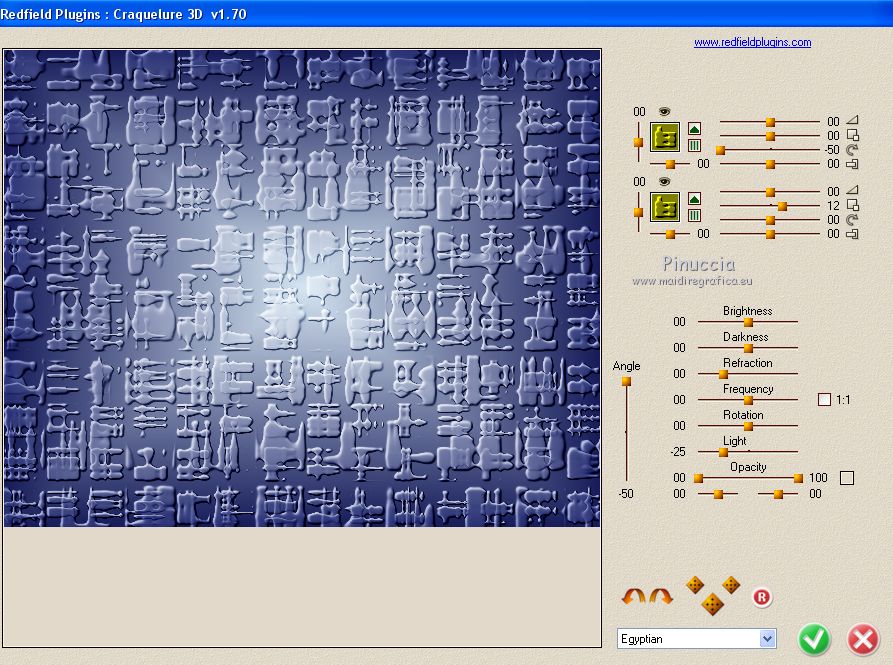
25. Effects>Plugins>Mura's Meister - Perspective Tiling.
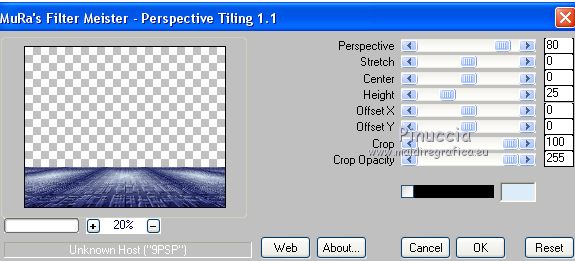
26. Activate the Magic Wand Tool 

and click on the transparent part to select it.
Press 5 fois CANC on the keyboard.
Selections>Select None.
27. Layers>New Raster Layer.
Layers>Arrange>Send to Bottom.
Flood Fill  the layer with your background color #dcecf8. the layer with your background color #dcecf8.
28. Activate the top layer.
Open the tube Femme-1336-Azalee - Edit>Copy.
Go back to your work and go to Edit>Paste as new layer.
Image>Resize, to 50%, resize all layers not checked.
Move  the tube at the bottom left. the tube at the bottom left.
29. Effects>3D Effects>Drop Shadow, color black.

30. Open the tube Criss 2783 - Edit>Copy.
Go back to your work and go to Edit>Paste as new layer.
Image>Resize, 1 time to 80% and 1 time to 90%, resize all layers not checked.
Place  the tube in the middle. the tube in the middle.
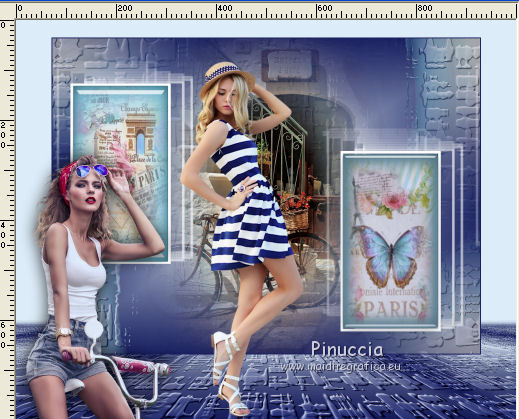
Effects>3D Effects>Drop Shadow, same settings.
31. Layers>Merge>Merge visible.
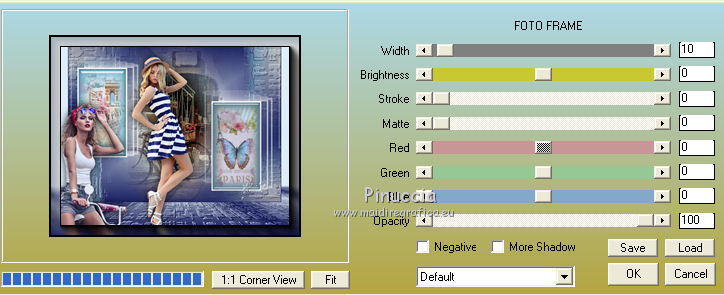
32. Effects>Plugins>AAA Frames - Foto Frame.
33. Open Texto_Marylene_nines - Edit>Copy.
Go back to your work and go to Edit>Paste as new layer.
Move  the tube at the bottom right. the tube at the bottom right.
34. Sign your work on a new layer.
Layers>Merge>Merge All and save as jpg.
Vos versions here

If you have problems or doubts, or you find a not worked link, or only for tell me that you enjoyed this tutorial, write to me.
14 Octobre 2018
|
 ENGLISH VERSION

 ENGLISH VERSION
